Posted on

20 game-changing hacks every teacher needs! 

Finally, the secret, genius hacks of clever classroom teachers are here! These are the lateral game-changers to classroom storage, student management and keeping resources ready and at your fingertips – and not dried up, lost, missing or mismatched! 

We recently ran a competition asking teachers to share hacks that can make a difference in their day-to-day teaching. Oh my, you had so many great hacks that get you through the day as a student-whisperer (actually, whispering to students was also a great hack!).  

It seems that the little ingenious ideas can have the BIGGEST impact. For busy, multitasking educators with a lot on their plate (in fact, let’s make that ‘plates’, plural, spinning in every direction!), getting a heads-up on a hack can only be a good thing.  

So, let’s head into this hack haven. We hope you can apply these to level up your classroom awesomeness! We’ve added in some MTA resources that might help too. (Our favourite teacher hack is to bookmark teaching.com.au and check regularly for shiny new arrivals and what’s on sale and clearance!). 


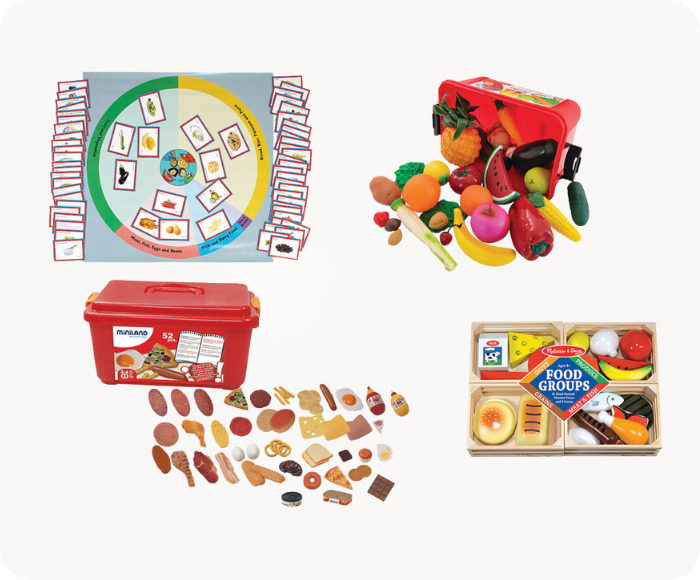
1. Hack: sort weekly resources into trolley drawers 

We love this organisational hack!  The idea is to use a 10- or 12-drawer trolley to prep and separate all your resources for the week (or term!) ahead. Each day’s resources go into a different drawer, so come Monday, everything is all sorted for the week and ready to go! This could be the trolley that gets your work week organised! 
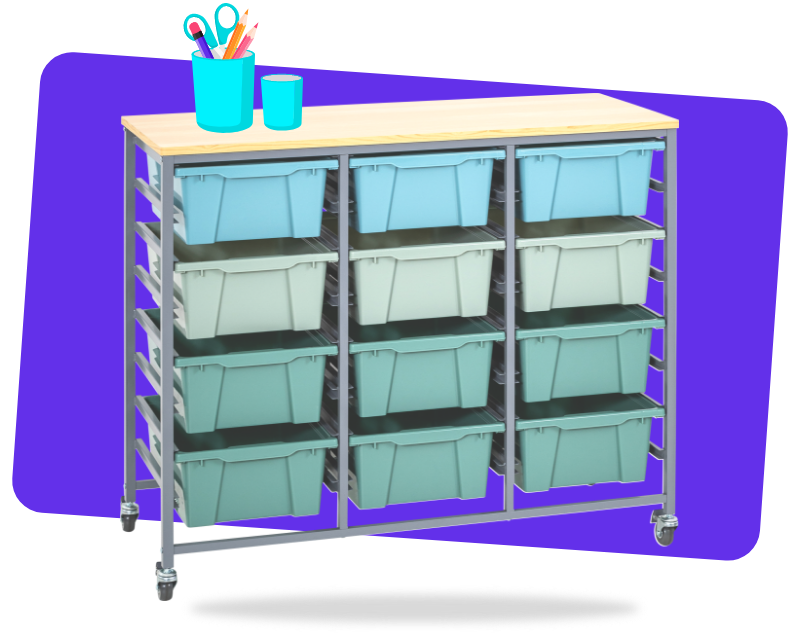


2. Hack: store paint in old soap dispensers 

Painting can be a messy activity. This hack takes away some of the mess and leaves room for the arty, creative fun. It’s all about storing paint in old soap dispensers. Students can then pump paint which does not make a mess. MTA has these easy pump foam paint bottles that could make this hack happen in style!   
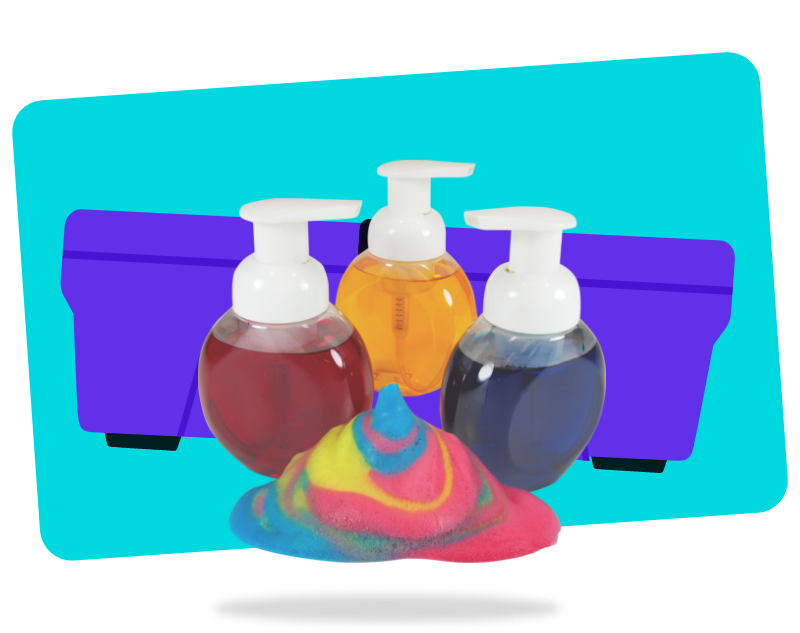
 

3. Hack: shoe holders as door storage 

A few of you offered up this clever hack to use shoe holders that hang from the back of a door to hold water bottles and other classroom equipment. Other uses for ‘shoe holder’ storage included glue, scissors, markers or extra stationery. The individual pockets can be labelled with names too. These awesome storage pockets make this dream a reality.  
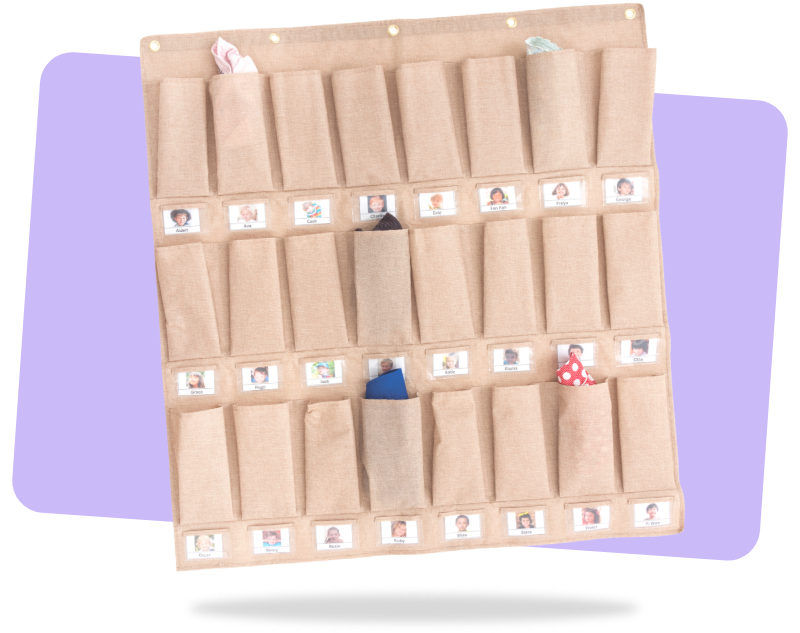
 

4. Hack: colour code everything! 

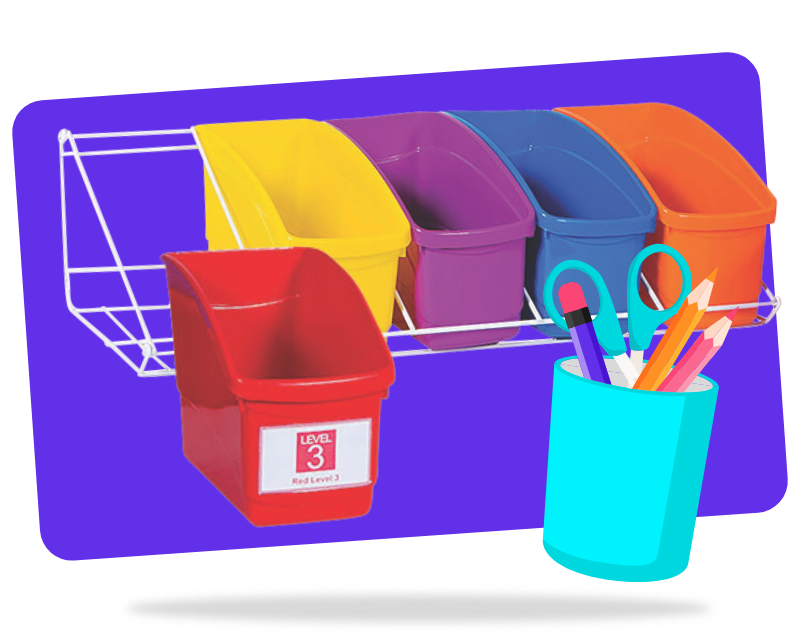
This wonderful hack is a great practice to apply at any stage of teaching! Assign different colours to different subjects, tasks or groups to make organisation visually appealing and easier to manage and find what you want at a glance. You could use colour coding for individual students, groups or themes… however you want to apply the ideas. Added bonus: your classroom will be colourful and bright! Get started with this awesome Book Tub Desk Caddy. 
5. Hack: photo labels for non-readers 

Photograph your resources and place photos as the labels on storage tubs or drawers where resources are stored. This not only helps young students put things away independently, it uses images and words so even your young non-readers can find things, replace things and build confidence! 


6. Hack: whiteboard sock storage/eraser  

This hack does double duty! Keep your same-colour whiteboard markers each in a series of little black socks in a basket. So then, you’ll waste no time looking for markers, or for a whiteboard eraser as your sock is on hand to do the erasing work! While you’re looking for a few old black socks to get started, why not grab some new hard working, long-lasting markers? 
 

7. Hack: use Velcro dots on whiteboard markers and whiteboard 

No more lost markers! This hack is brilliant. Attach Velcro dots or strips to your whiteboard markers and to your whiteboard frame. Keep them together and you know exactly where they are at all times! Boom! 


8. Hack: keep old lids  

Genius level hack activated: keep all the lids of used or finished glue sticks and markers. That way, when future lids and marker tops inevitably go missing, you always have a spare to use!  


9. Hack: give your resources a human name 

Where’s Bob? This hack is about creating a stronger caring bond between students and resources – and also is a playful, imaginative exercise that builds memory and creative skills. You and the students create ‘human’ names for your classroom resources. Perhaps their glue stick’s name is Sam, and their scissors are Bob. So if and when they go missing, students actually care and hunt them down! They may not care if a lid goes missing normally but they might care if Bob loses his ‘hat’ or ‘head’! Bye bye dried out glue sticks! 

Oh hi Bob! 
10. Hack: mini printed magnets of book covers on whiteboard  

This is such a cool hack for student management. Create mini printed magnets of your book covers to stick on your whiteboard, so students instantly know which book they need ready that day or week. 
11. Hack: glue down small items in laminating sheets  

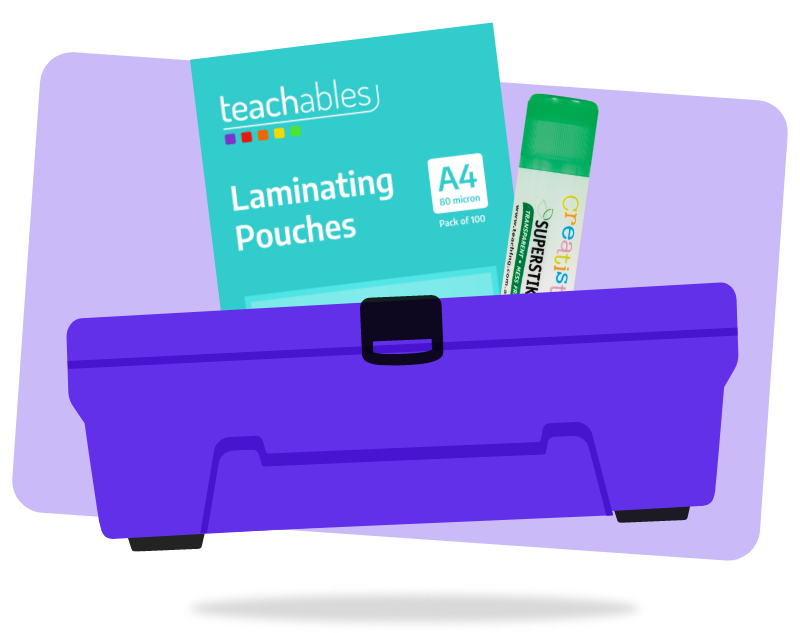
Glue down small items in laminating sheets so they don’t move. Yes, just a dot of glue to stop elements from slip-sliding before laminating. This is simple, but life-changing!  
 

12. Hack: a lint roller for speedy clean-up magic 

Glitter explosion? Spilled the sensory bin again?! Fear not! This hack is about giving you a secret weapon… a lint roller! Using a simple lint roller gives you sticky, speedy clean-up magic! 


13. Hack: add PVA glue to a sponge for sticky fun 

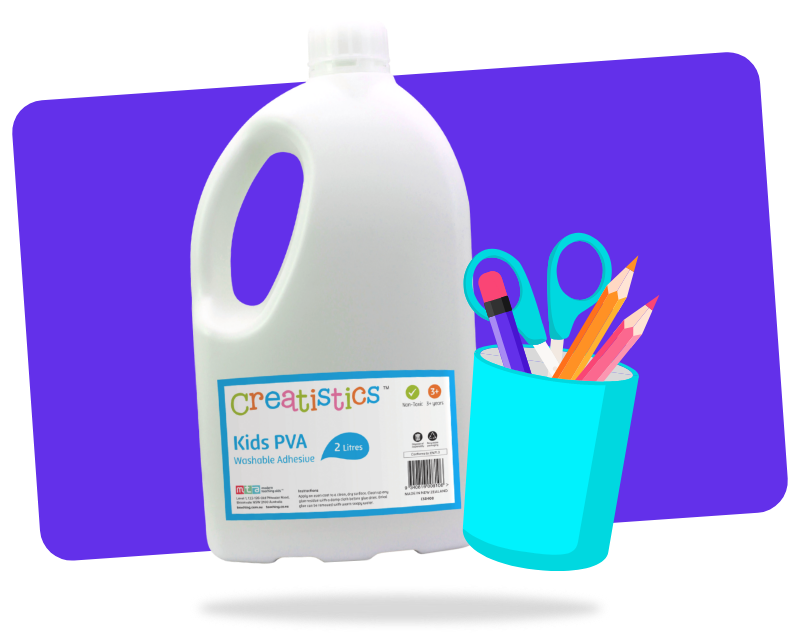
This is some sticky hack genius! Keep a sponge in a container with a seal tight lid. Add MTA PVA Glue and you have a quick, mess free way for students to glue. Smear the PVA glue (with a dash of water first) to the washing up sponge in your sealed container. It saves loads of prep time for sticky fun!  
 

14. Hack: dirtiest cloth competition to encourage cleaning 

We love this teacher hack! When your classroom is getting a bit grotty and in need of a clean or a dust, hold a ‘dirtiest’ cloth competition to see who can make their wet cloth the dirtiest when cleaning the room! Students love trying to find the most dust they can!  Grab a white Microfibre Cloth set to get started. 
 

15. Hack: ‘credit card’ system to ‘buy’ materials for STEM tasks 

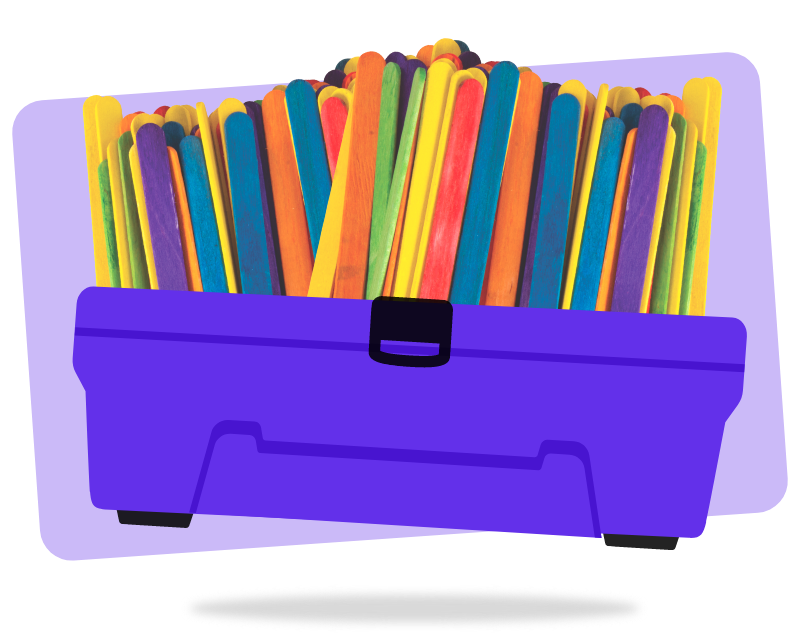
Give your students a ‘credit card’ to ‘buy’ materials’! When you do STEM activities, this is a great hack so students can focus on how many materials they are using. It creates a consumption mindfulness and awareness which is great to encourage! Create a ‘credit’ system, which may just be an A5 page with 20-25 boxes for each student. They need to use their credit sheet to ‘purchase’ equipment. For example, 10 pop sticks may be one box (which gets a tick or a stamp).  
 

16. Hack: throw a ball to ‘catch’ an answer 

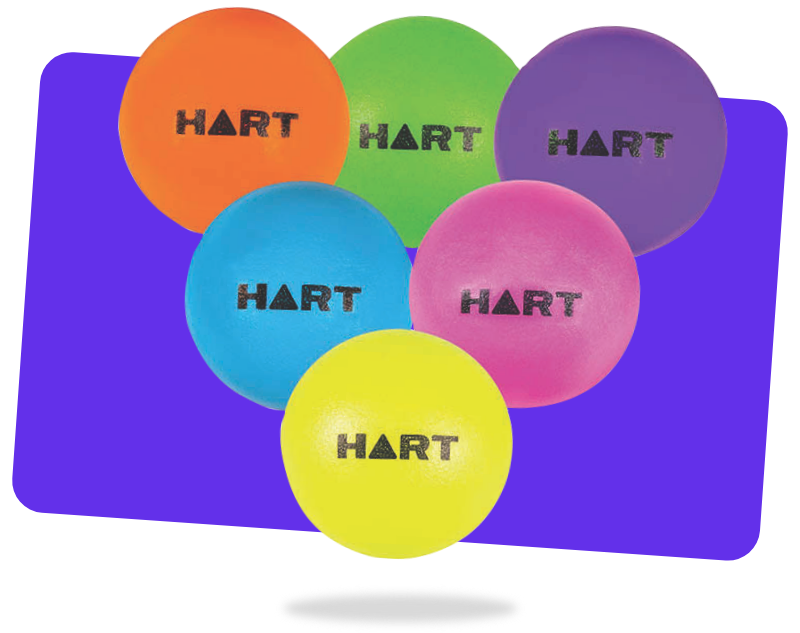
This is a great group discussion hack to encourage engagement! When asking students questions on the mat or discussing a topic, add in a cute lightweight ball and throw it to a student to prompt an answer. Watch participation go up massively! A bonus with this hack is you are working on their catching and throwing and gross motor skills too! 
 

17. Hack: hold something as ‘collateral’ when students borrow equipment  

Lenders often require collateral to reduce their risk, right? And so it is with teachers lending students precious equipment! Ask for collateral – something of value to the student – so you know that equipment or resources on loan will find their way back to you! (It’s also a great opportunity to teach students about borrowing, loan security and responsibility!). Some teachers mentioned holding a shoe as collateral! But you may want to consider other creative or precious objects to hold until your class equipment is safely returned! Students get their collateral item back only when the equipment is returned, ensuring they never forget! 


18. Hack: consolidate yesterday’s lesson with a drawing or story 

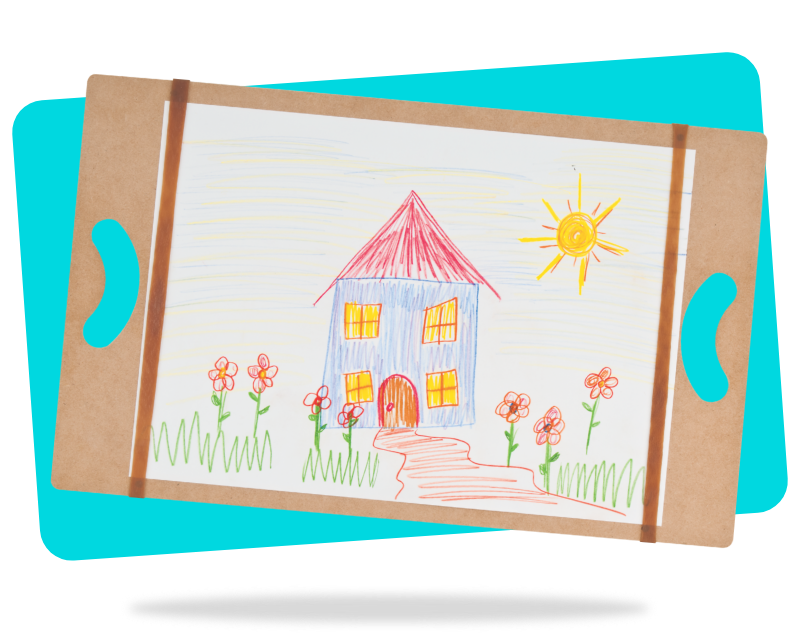
This is a wonderful teaching hack to help imprint lesson learning! It also helps build ‘revision’ skills and helps comprehension. The morning after a lesson, ask your students to draw or creatively write a representation of yesterday’s lesson. It helps them to connect to and consolidate the content. You might love these portable Creatistics wooden drawing boards for this exercise. 
 

19. Hack: use songs to share instructions & teach routines  

This is a great sonic hack! Use songs to teach routines and encourage positive behaviours. Singing instructions to young students is a great way to get them to follow them more than they do with simply talking. As one teacher said, ‘children end up singing these on their own, with a simple prompt and the rest of the class joins in’. So get your singing voice ready. 

20. Hack: eyes in the back of your head trick  

Ooh, you clever teachers! This hack could keep students guessing (and behaving) for years. Use your peripheral spotting to notice something amiss and then turn fully away before correcting the behaviour with a name and what they were doing! Eyes in the back of your head established.  


Inspired? Need these resources (and more hack-friendly faves) in your classroom now? We’ve got you! We’ve pulled together this amazing Wishlist of Teacher Hack Resources here. 

(Oh, our Wishlist function is ALSO a great hack. Have you tried it yet?). 

What’s your favourite teacher hack? Tag us @modernteaching showing us how you use your hack in action.  

BONUS POINTS if it features an MTA product! 


Posted on

Have a crafty Easter with these 6 egg-citing craft activities

Easter craft header image

Break out the bunny onesie, because Easter’s coming! It’s time for hat parades, egg hunts, chocolate bunnies and colourful craft egg-tivities!  

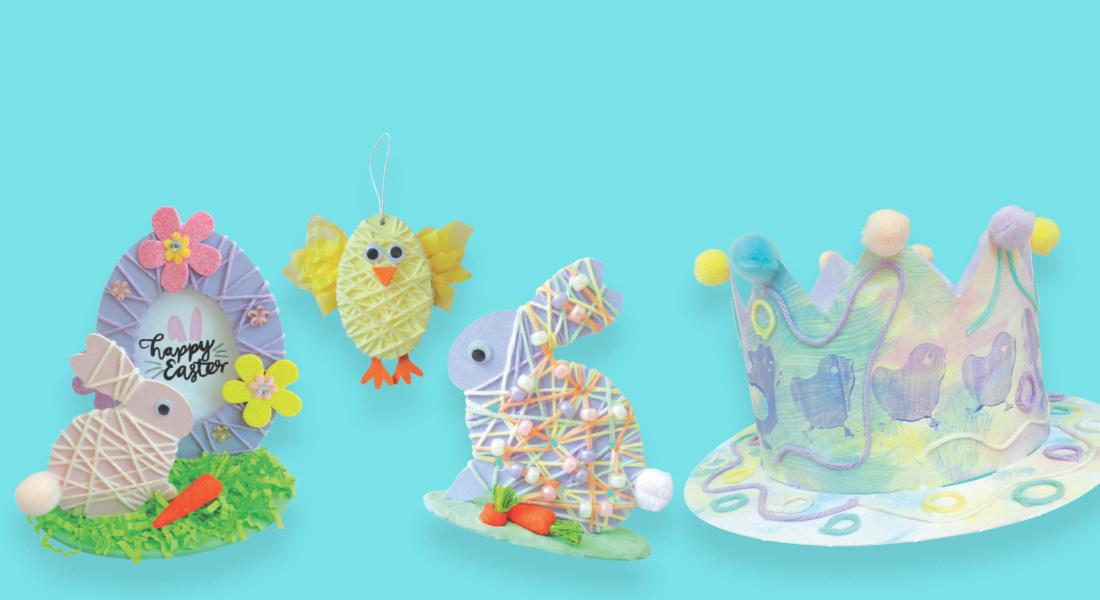
Here are 6 egg-cellent, egg-straordinary and egg-stra special craft activities to help little crafters create gifts, ornaments, cards and other seasonal cuteness. They’re easy, and they produce beautiful Easter treasures! Let’s hop right into it…  


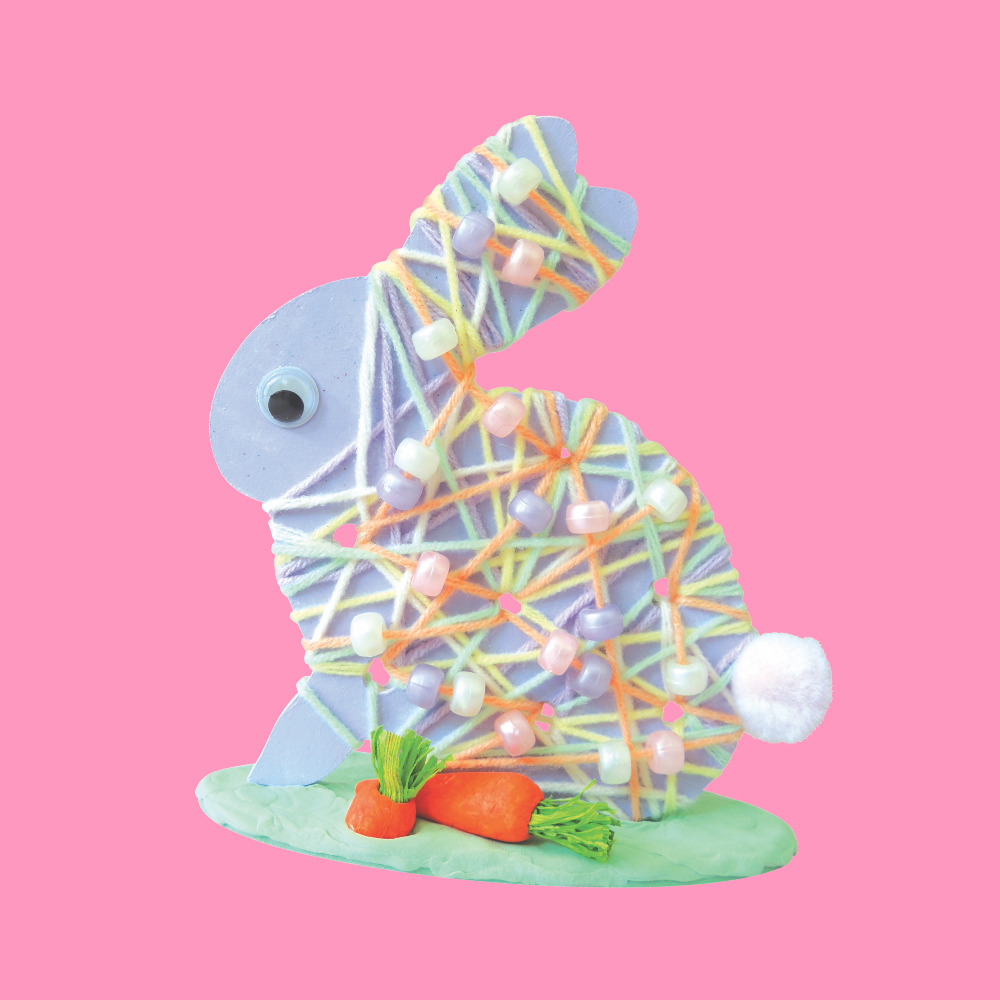
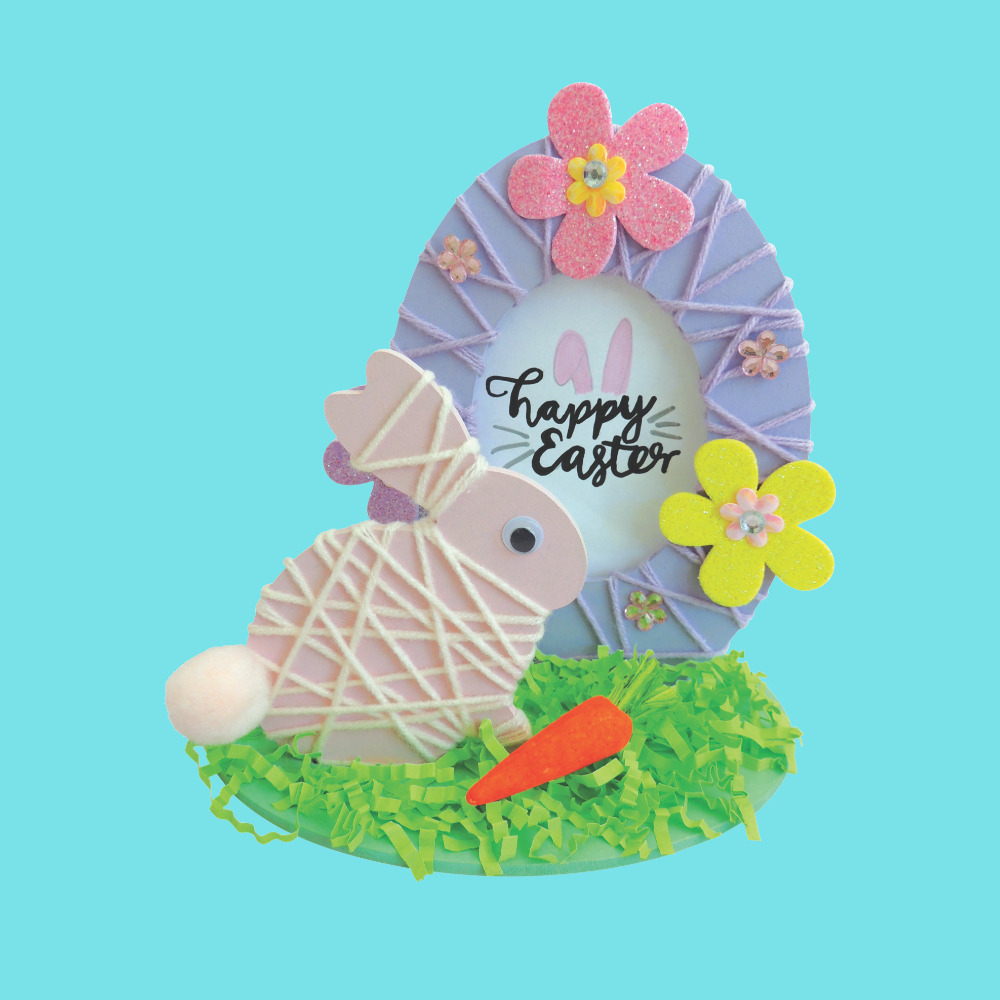
Wooden Weaving Bunny


Wooden Weaving Bunny


You will need:  

Wooden Weaving Bunny 

Pastel Paint 

Pastel Acrylic Yarn 

Plastic Lacing Needles  

Joggle Eyes 

Pastel Pony Beads 

 Clay Kit

Mini Carrots 


Step-by-step: 

Assemble the Wooden Weaving Bunny by slotting the bunny into the stand.  

Apply your desired shades of pastel paint to the bunny and stand, and set aside to dry. Repeat paint application if desired.  

Cut a workable length of yarn roughly 40cm long and thread one end onto a plastic lacing needle. Tie the other end around a section of the bunny with a firm knot at the back. 

Thread the lacing needle with its yarn through the pre-cut holes of the bunny, weaving in and out all over as desired.  

When there’s only a short length of yarn left, remove the plastic threading needle and tie onto the bunny with a firm knot at the back.  

Repeat steps 3 to 5 with as many colours of thread as desired.  

When you’ve reached the last length of thread, begin by tying the end to the bunny and then slot a pastel bead onto the yarn, setting it in place at the front of the bunny while weaving. Continue adding pastel beads as desired and tie off the end of the yarn firmly at the back.  

Mix green and white clay together to form a pastel green and press down onto the stand to cover the surface.  

Use craft glue to adhere joggle eyes, a pom pom tail and a few carrots.  

Done! The perfect Weaving Bunny is ready.  


TOP TIP: Younger age groups can swap the beads for ready-to-use foam or felt shapes with a dab of glue. 


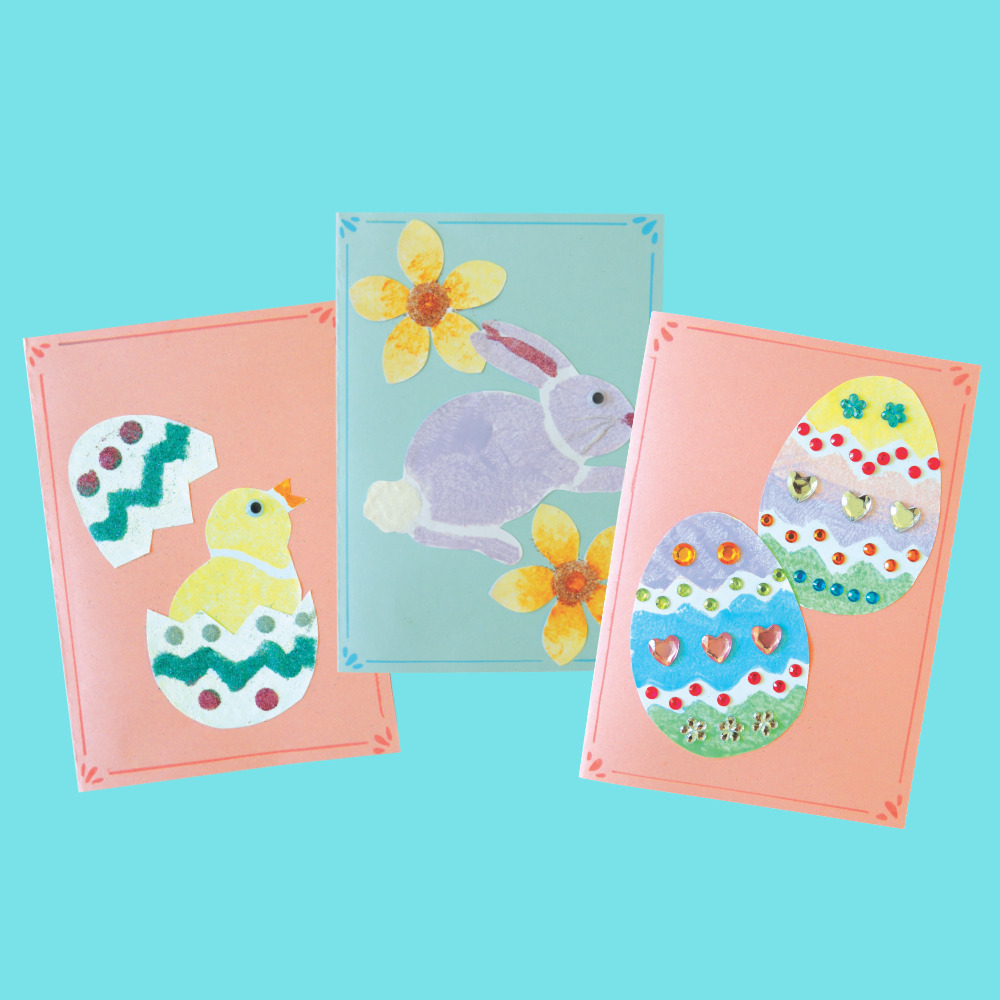
DIY Stencil Cards


You will need:  

Easter Stencils 

Pastel Coloured Cardboard 

Creatistics A4 White Cover Paper 

Pastel Paint 

Creatistics Glue Sticks 

Connector Colour Markers 

Stationery Scissors 

Bio-Glitter – Pack of 12 


Step-by-step: 

Pour a small amount of pastel paint onto a flat surface (painting trays, plates, etc). Use a brush or roller to even out the colour. 

Lay an Easter Stencil over a piece of white cover paper and secure in place with a bit of masking tape.  

Gently dab a sponge into the paint (avoiding large blobs).  

Gently dab the sponge over the stencil, making sure to sponge all the sections of paper through the stencil’s cut-out pattern.  

Carefully remove the masking tape and lift the stencil off the paper. Set the paper aside to dry.  

Fold a piece of pastel cardboard in half (two short lengths together) to make a card.  

When the paint has dried, cut out the stencilled shape and use a glue stick to attach to the card.  

Use coloured makers, Bio-Glitter and joggle eyes as desired to add detail to the cards and set aside to dry.  

Done! The perfect DIY Easter Stencil Card is ready.  


TOP TIP: For early childhood-aged children not yet confident with scissor skills, pop the stencil directly onto the pastel card to paint the pattern. 


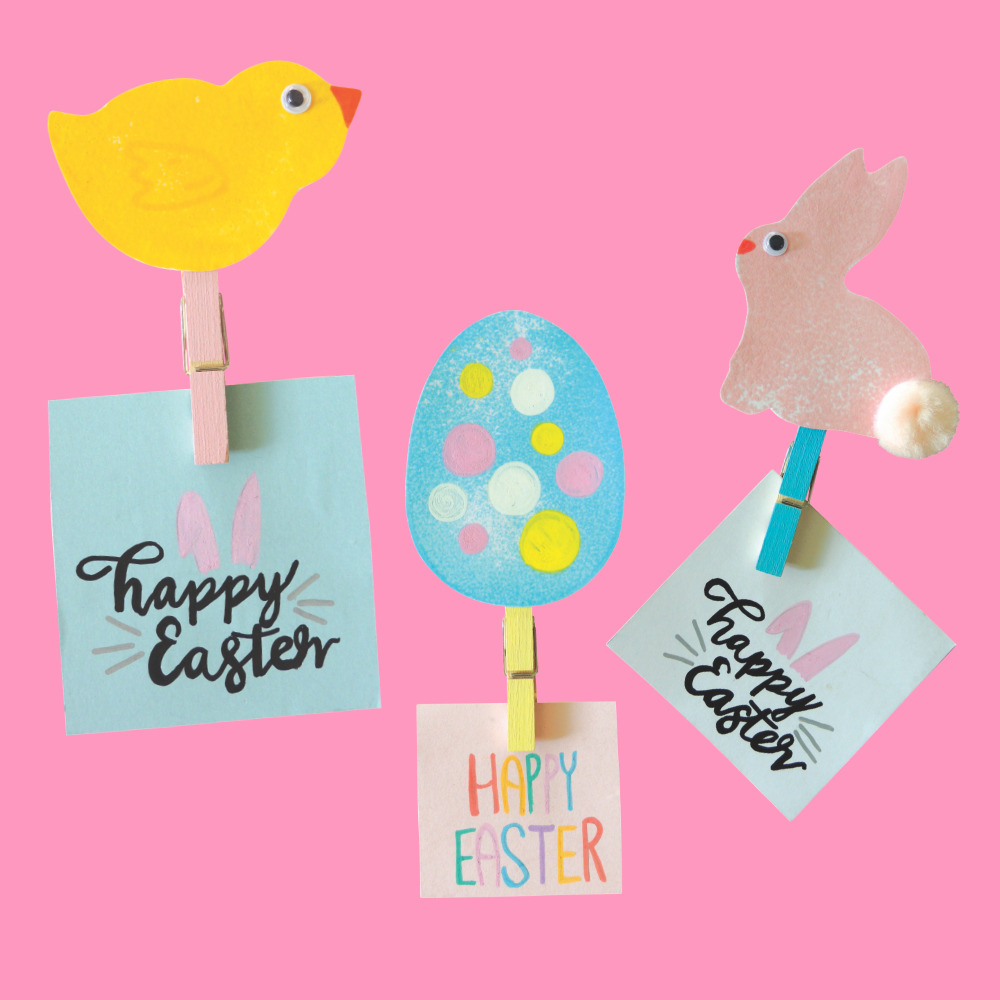
Sponge Print Fridge Magnets


Sponge Print Fridge Magnets


You will need:  

Easter Sponges 

Pastel Cardboard

Wooden Pegs 

Self-Adhesive Magnetic Sheets 

Creatistics Strong Craft Glue 

Joggle Eyes 


Step-by-step: 

Pour a small amount of pastel paint onto a flat surface (painting trays, plates, messy mats, etc) and use a brush or roller to spread the colour to an even layer. 

Gently press an Easter Sponge into the paint, then lift out of the paint and gently press down onto the cardboard. Lift off once more, leaving the painted print on the cardboard. Repeat as desired with each shape to fill the paper. Set aside to dry.  

Use the leftover paint or POSCA markers to add detail over the dried paint (an orange beak, patterns on the eggs, etc) and set aside to dry.  

Feed the dried painting through a laminator and set aside to cool down.  

Carefully cut around the shapes.  

Use strong craft glue to attach a wooden peg to the back of the laminated shape and joggle eyes onto the chick & bunny and set aside to dry.  

Peel and stick a self-adhesive magnet to the back of the peg.  

Done! The perfect Easter magnet is ready.  


TOP TIP: Easter sponges are wonderfully versatile! Sponge the shapes onto cards, wrapping paper and Easter Hats. Or snip the prints out and paste them onto pop sticks for adorable storytelling props! 


Wooden Diorama Frame 


Wooden Diorama Bunny


You will need:  

Wooden Easter Diorama Frame  

Pastel Paint 

Pastel Acrylic Yarn 

Pastel Pom Poms 

Sequin Flowers 

Adhesive Rhinestones 

Green Crinkle Paper Shred 

Joggle Eyes 

Mini Carrots 

Creatistics Strong Craft Glue 


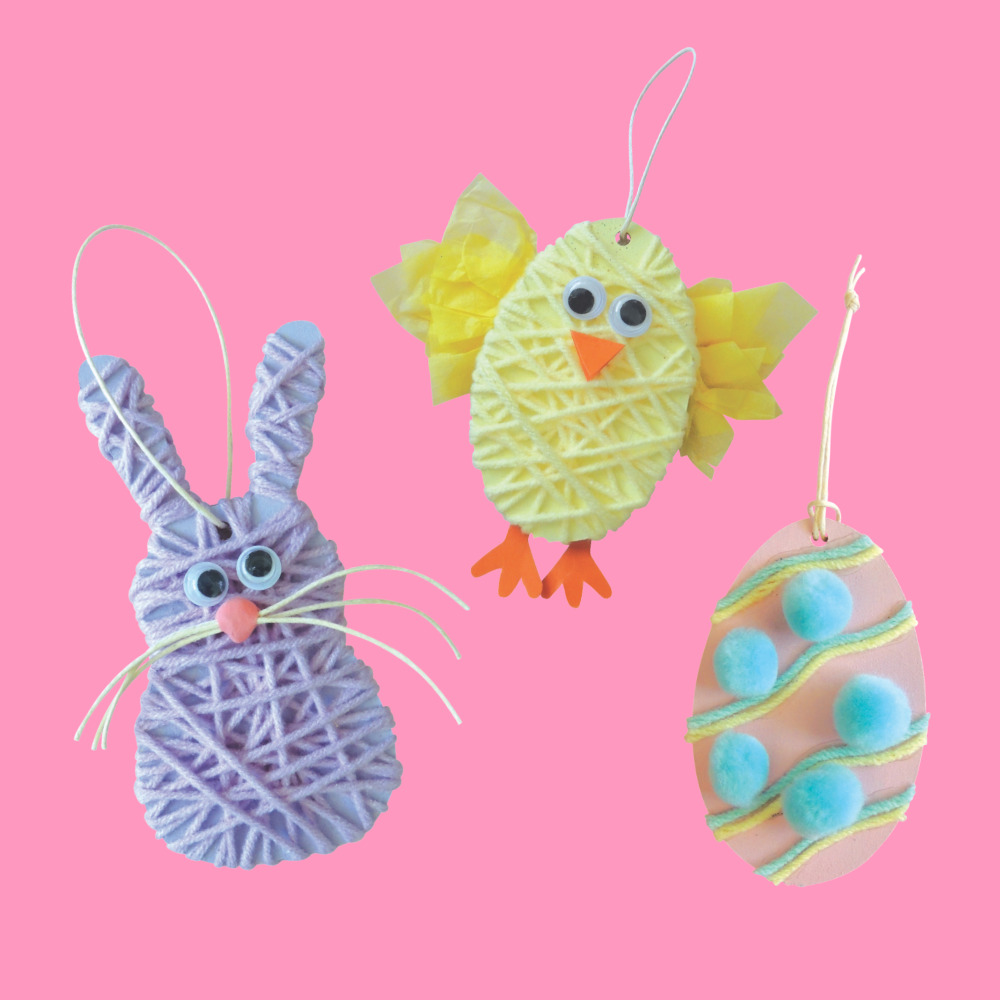
Yarn Chick, Bunny & Egg Ornaments 


Yarn Chick and Bunny

You will need:  

Creatistics Pastel Paint 

Pastel Acrylic Yarn 

Wooden Easter Ornaments 

Joggle Eyes 

Creatistics Strong Craft Glue 

Matt Paper Squares 

Coloured Tissue Squares 

Pastel Pom Poms 

Natural Beading Cord 

Paper Magiclay  


Step-by-step: 

Cover the wooden ornament in a layer of pastel paint and set aside to dry. Repeat paint application as desired. 

For the Bunny and Chick, cut a workable length of yarn, wrap it around the wooden ornament, and tie it with a strong knot.  

Wrap the yarn around the ornament until it looks full of colour (if needed, add another length of yarn). Tie the yarn off securely at the back.  

For the Bunny – snip three lengths of beading cord 10cm in length, tie a knot in the middle to make whiskers, and press a small amount of pink Magiclay around the middle to hide the knot and make a nose. Attach in place with craft glue, along with two joggle eyes. Set aside to dry.  

For the Chick – scrunch two tissue squares from the centre to make the wings. Fold an orange paper square in half and roughly draw a foot. Snip the foot out (you should now have two) and snip a small triangle shape along the remaining paper’s fold to make a little beak. Attach the feet, wings, beak and two joggle eyes in place with craft glue. Set aside to dry.  

For the Egg – use the craft glue nozzle to ‘draw’ lines and squiggles on the surface, carefully placing short lengths of yarn over the glue. Finish off with a few pom poms and set aside to dry.  

For each decoration, snip a short length of beading cord, thread it through the pre-cut hole and tie it into a loop to hang. 

Done! The perfect Easter Yarn Ornament is ready.  


TOP TIP: Taping the yarn at the back of the ornament with masking tape periodically will provide support for children with emerging fine motor skills. 


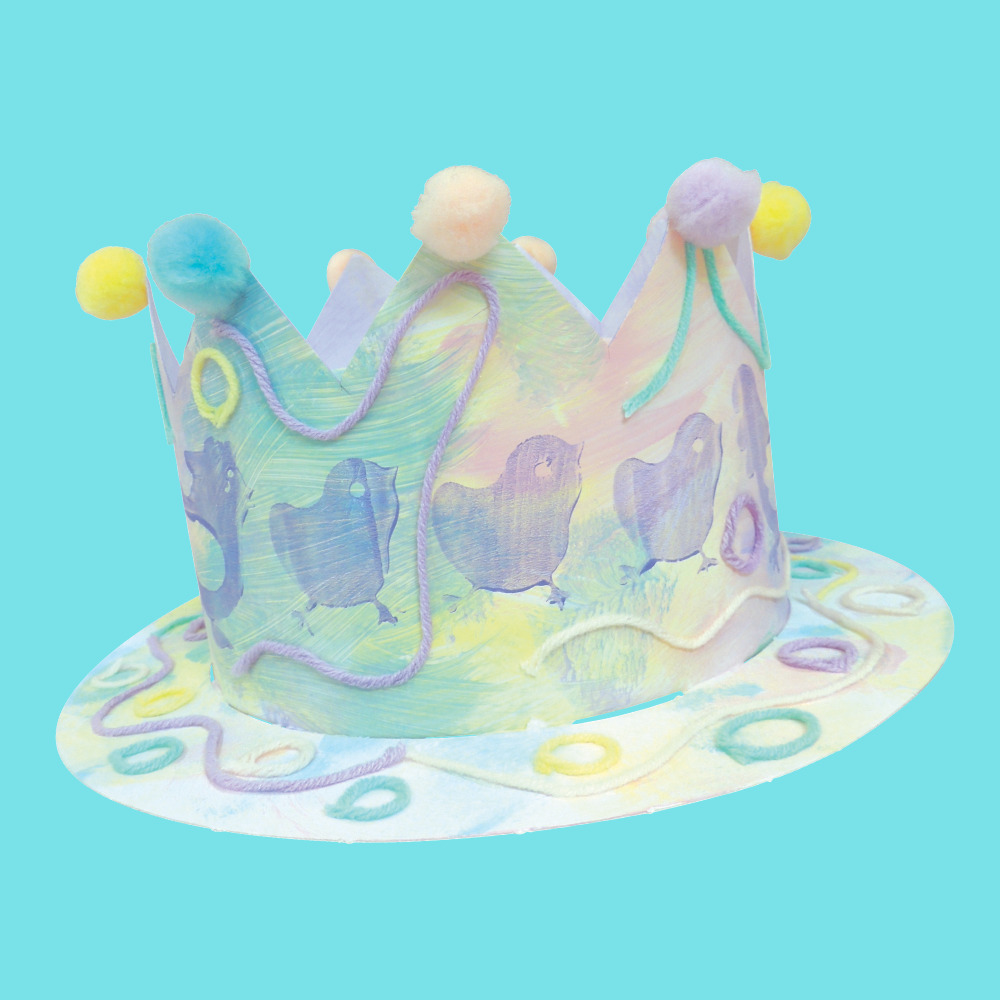
Roller Print & Yarn Bonnet


Easter Bonnet


You will need:  

Easter Rollers 

Cardboard Easter Hat 

Creatistics Pastel Paint 

Pastel Pom Poms 

Pastel Acrylic Yarn 

Bio-Glitter – Pack of 12 

Tacky Glue 

Creatistics Strong Craft Glue 

Painting Tray 


Step-by-step: 

Pop-out each piece from the large sheet of card. 

Use brushes or sponges to apply a thin layer of pastel paint to the pieces and set aside to dry.  

Pour a contrasting-coloured paint onto a messy mat or painting tray and use a brush or roller to smooth the paint to an even layer. Only a little paint is needed to make smooth prints.  

Gently roll the Easter Rollers in the paint, ensuring an even layer of paint over each raised shape.  

Roll the paint-loaded Easter Roller over the cardboard pieces, leaving behind its colourful print. Repeat as desired and set aside to dry. 

Use the strong craft glue nozzle to ‘draw’ wavy lines over the crown and brim pieces, snip lengths of pastel yarn and gently press into place using the glue lines as a guide. Use the craft glue to ‘draw’ lines and shapes to shake Bio-Glitter onto, and small blobs of tacky glue to adhere the pom poms. Set aside to dry. 

To assemble, sticky tape the scalloped crown piece together by the tabs, making sure it will fit the brim.  

Sticky tape the tabs on the bottom of the crown piece to the underside of the brim. 

If desired, sticky tape the tabs on the top circle to the crown piece (making a shelf to hold extra decorations). Set aside to dry. 

Done! The perfect Easter Hat is ready.  


TOP TIP: There’s no need for precise designs! The free-form style of this Easter Hat craft is wonderfully open-ended. 


We hope you love getting crafty this Easter and creating these 6 fun activities. If you’d like to download the step-by-step activity pack pdf, click here. Happy crafting, and please share your crafty Easter creations with us @modernteaching. 


Blog Home>

Shop MTA>


Posted on

Splash into summer with our favourite outdoor resources and activities 

Sun’s out, fun’s out! Summer is here and we’ve rounded up our favourite outdoor resources to inspire your summer setup. From water play to sand creations and muddy masterpieces, these activities spark curiosity, keep little hands busy and nurture a sense of belonging, being, and becoming. Ensuring you’re covering a whole range of Early Year Learning Framework outcomes. 

Ready to make a splash? Let’s dive in! 


Just add water 

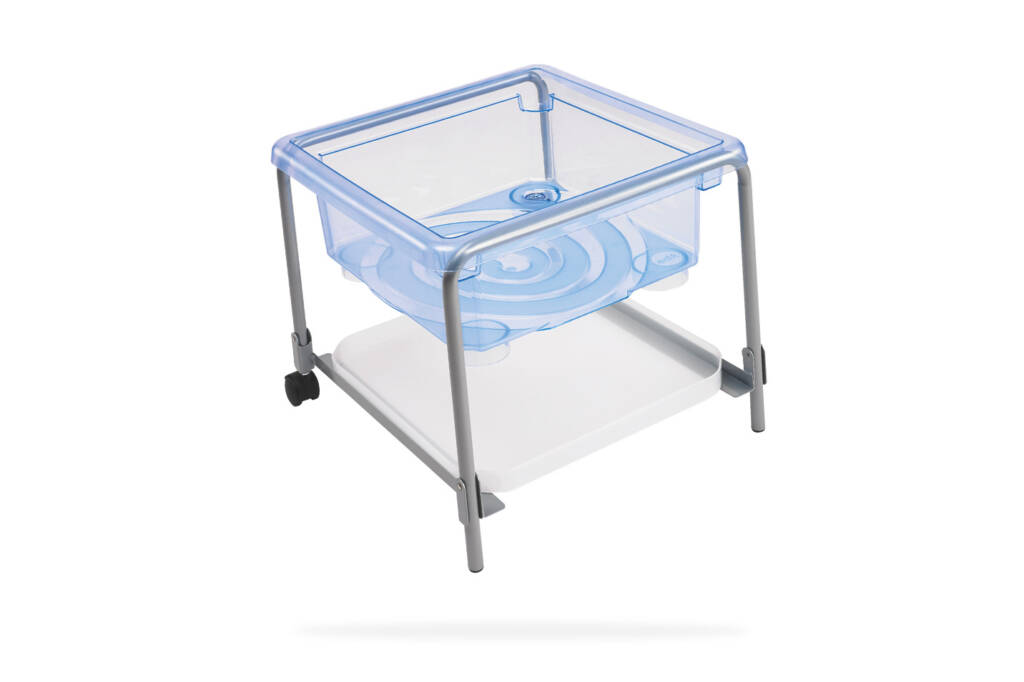
Nothing beats the cool fun of water play on a warm day. Whether it’s splashing, pouring or making potions, sensory water experiences are always a summer hit. Here’s 3 ways to take a water table, like our Fun2 Play Activity Tray & Stand, and go wild! 


Aquatic adventures 

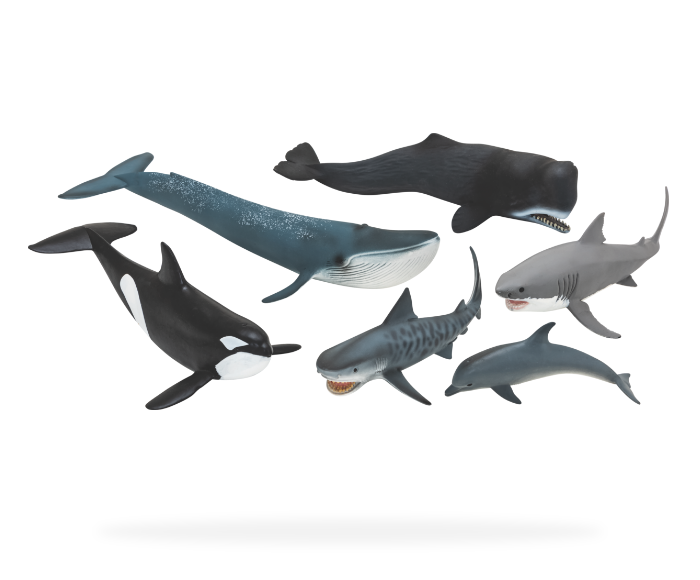
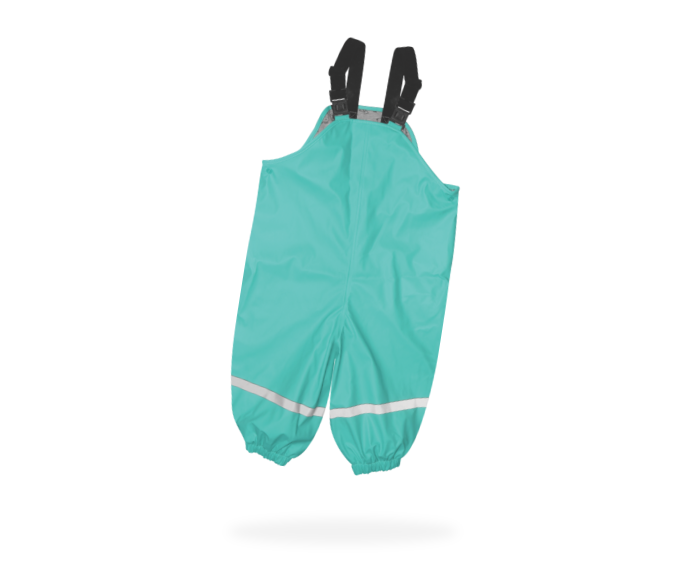
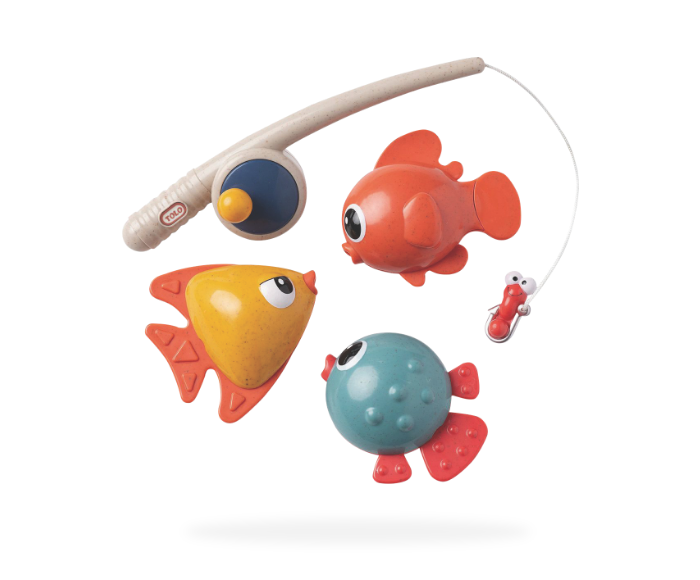
For little animal lovers, build a fish tank, go fishing, or give sea creatures a bubbly bath! This sensory-rich pretend play sparks curiosity and helps kids explore the world around them. Don’t forget the adorable waterproof overalls – practical and oh-so-cute! 

Ocean Animals

Shop now 

Aqua Overalls

Shop now 

Funtime Fishing Set

Shop now 


Waterway play 

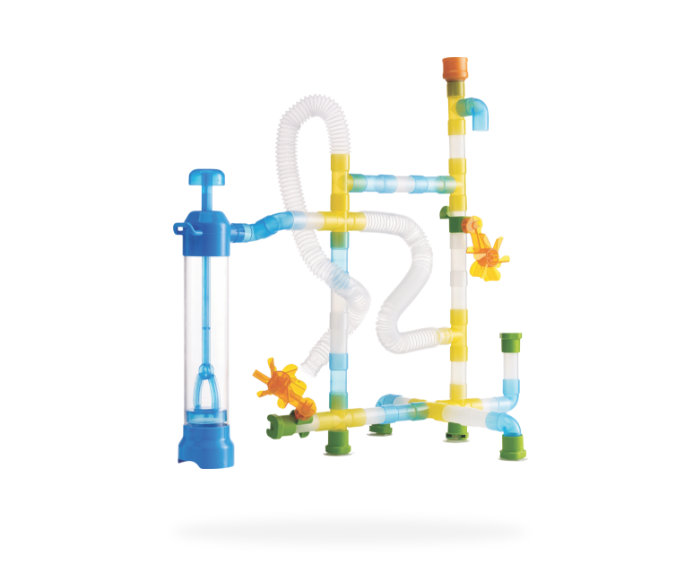
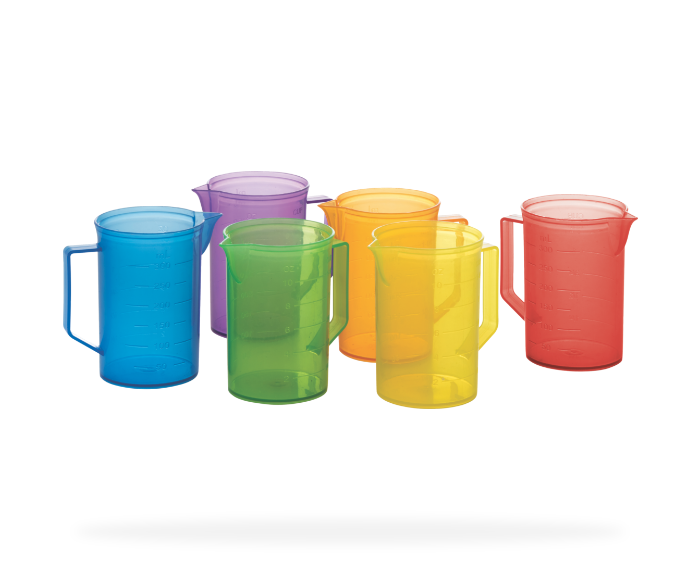
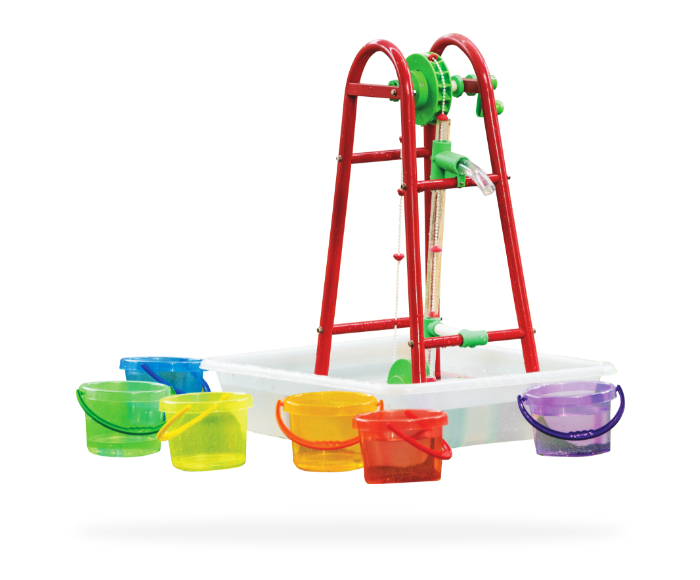
Turn water into STEAM learning! Budding engineers can experiment with colourful pipes, mini pumps and pouring tools to explore water flow, pressure, and movement. As they piece together their creations, they’ll discover cause and effect in action while building problem-solving skills. It’s hands-on fun that’s full of early STEAM magic! 


Crazy Tube Set

Shop now 

Rainbow  Jug Set

Shop now 


Water Pump Kit

Shop now 


Potion commotion 

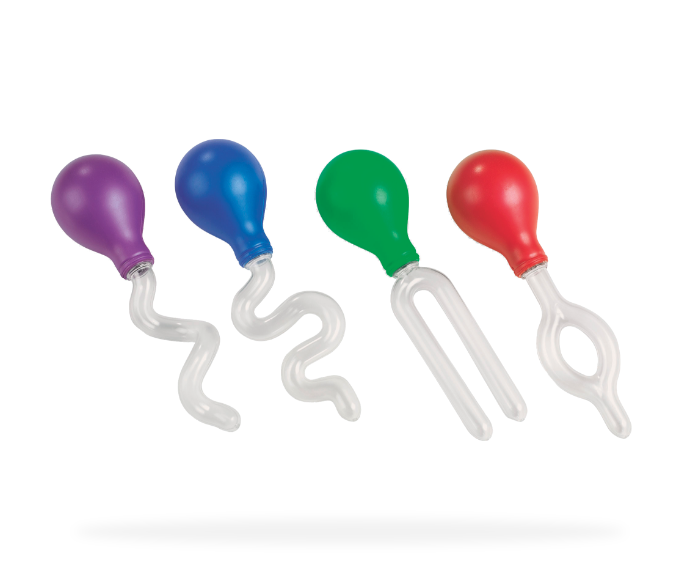
Ready for MORE magic? Pour, whisk and sprinkle your way to magical potions or a bubbling wombat stew! Add a dash of glitter or natural treasures like leaves and flowers for the perfect finishing touch. Potion-making isn’t just a witchy hobby, it’s a calming sensory activity and gateway to imaginative play and creative exploration! Mischief managed! 

Water Whisks 

Shop now 


Wacky Droppers

Shop now

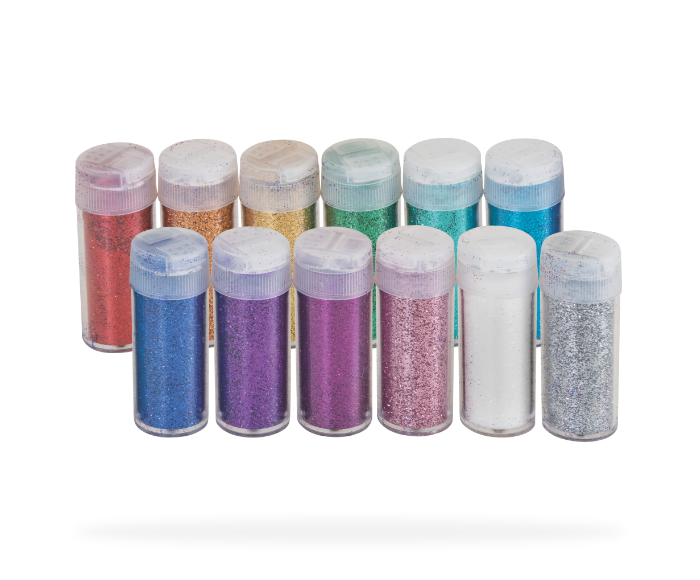
Bio-Glitter 

Shop now 


Super sandpits 

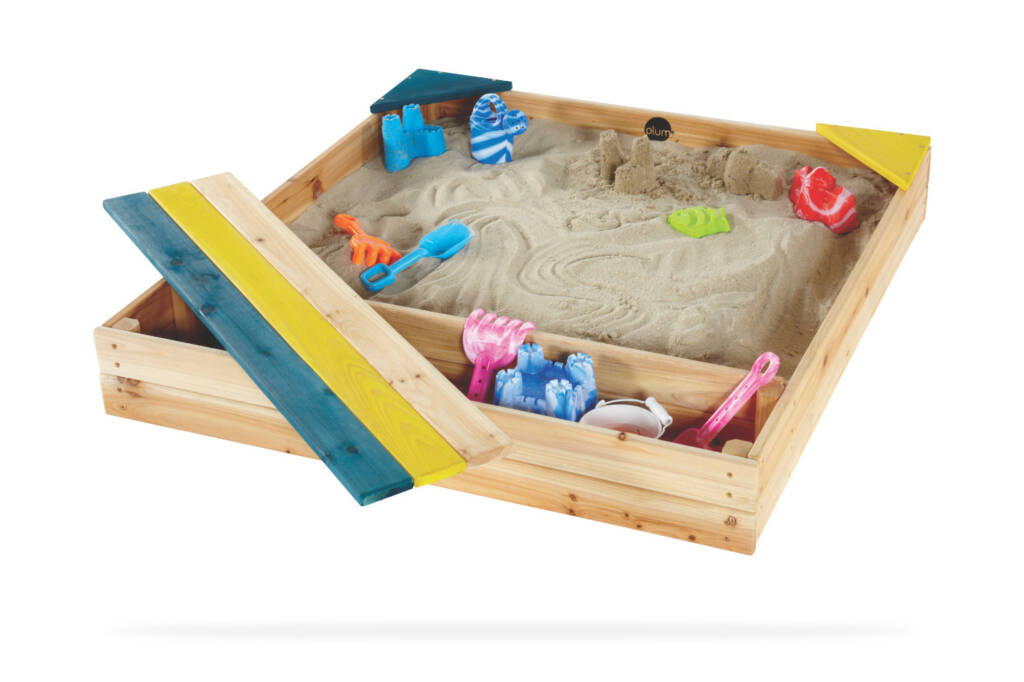
The sandpit is an endless source of adventure and creativity (not to mention an endless source of sand in little shoes, ears and nappies!). Whether they’re building castles, unearthing treasures or constructing their own sandy world, children love diving into sand play. Here are three exciting ways to turn a sandpit – like our Store It Wooden Sandpit – into a hub of exploration and imagination! 


Construction zone ahead 

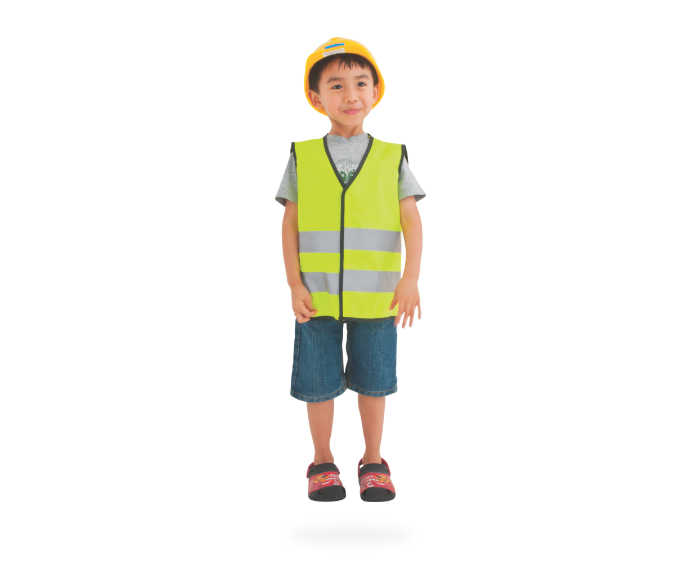
Car obsessed? Loader lover? Digger devotee? Set up a mini construction zone where children can dig, transport sand, build structures and carve out their very own sandy roads. Don’t forget those hard hats! WARNING: This activity will build fine motor skills while fostering teamwork and social connections! 

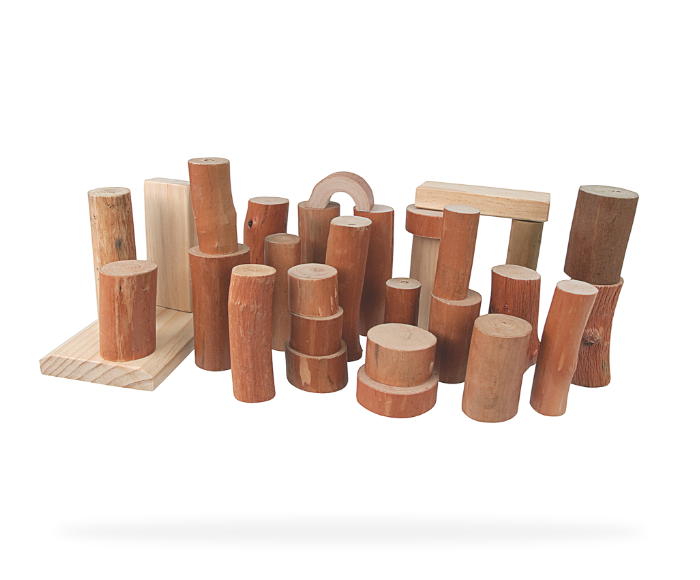
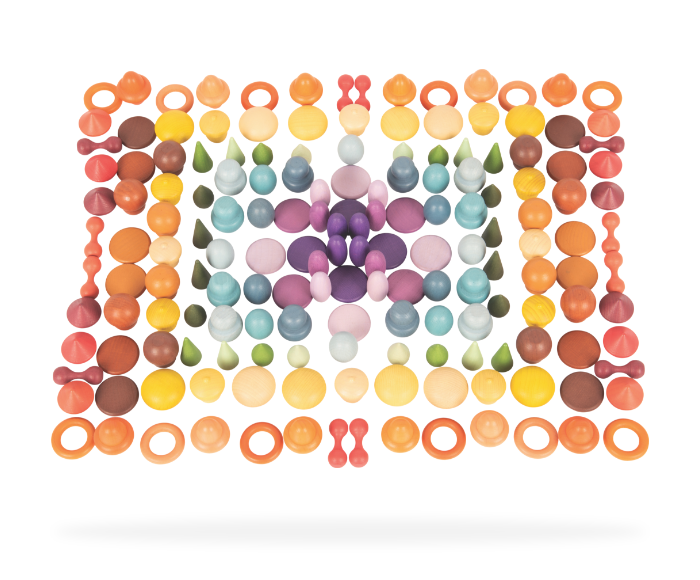
Barkless Wooden Log Blocks 

Shop now 

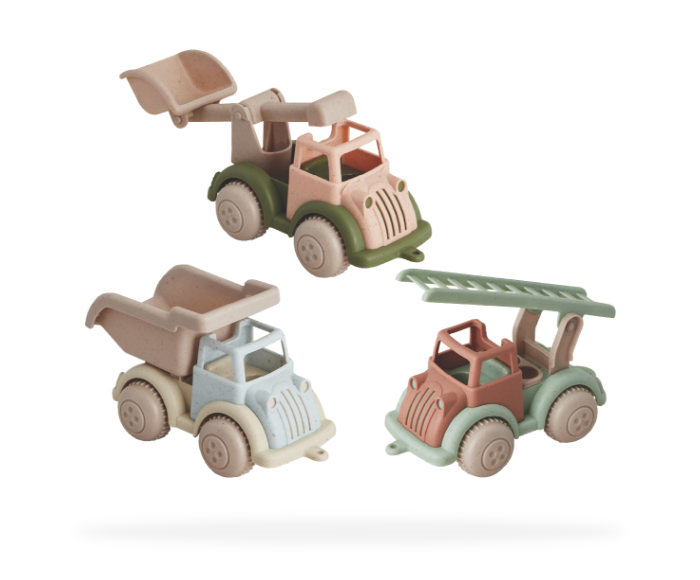
Viking Toys Eco Hearts XL

Shop now 

Construction Worker Dress Up 

Shop now 


Hunting for treasure

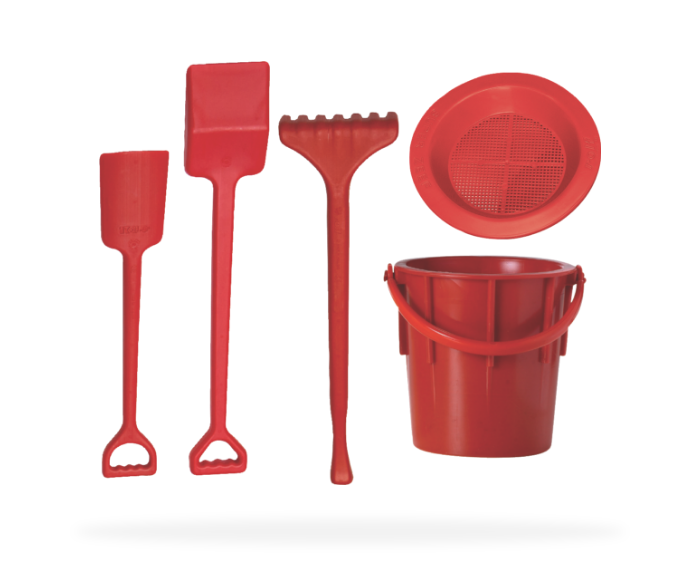
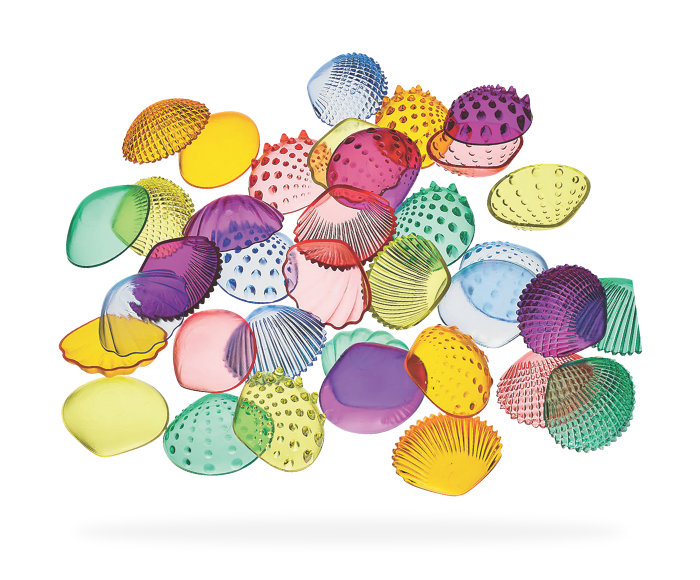
Hide colourful treasures in the sandpit and let the digging adventure begin! Little hands can sift, scoop and rake to uncover hidden gems and see who can fill their bucket the fastest. Treasure hunts are a playful way to boost fine motor skills while practicing turn-taking and building social connections. Discover our favourite hidden gems for treasure play below! 

Wooden Treasures Set

Shop now 

Red Sand & Water Kit Shop now 

Tactile Shells

Shop now 


 Sand sculptures  

Spark creativity as kids shape animals, castles, or their own imaginative designs in the sandpit. Add natural elements like twigs or stones for extra flair. Watch their faces light up with pride as they bring their unique creations to life! 


Eco Sand Set 

Shop now 


Sand Scrapers 

Shop now 


Create a Castle Kit 

Shop now 


 Mud kitchen: Now open! 

Let’s talk about something that brings all the fun, mess, and learning together in one glorious outdoor package: mud kitchens! Yep, there’s no better time of year to dive into the world of dirt and let little ones unleash their creativity and exercise social skills, while sharing plenty of laughs along the way.  

These muddy masterpieces are a game-changer in early childhood education. So, grab a mud kitchen, like our Living Classrooms Mud Mixing Table and watch them enjoy muddy play, all day! 


 Nature Café 

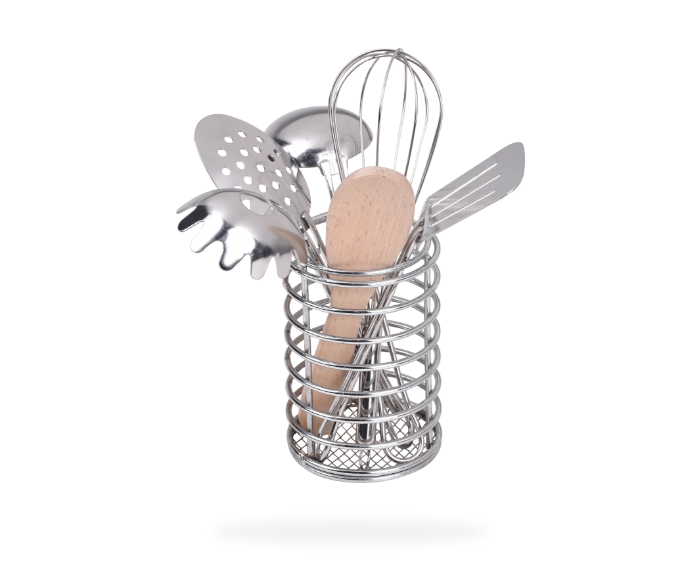
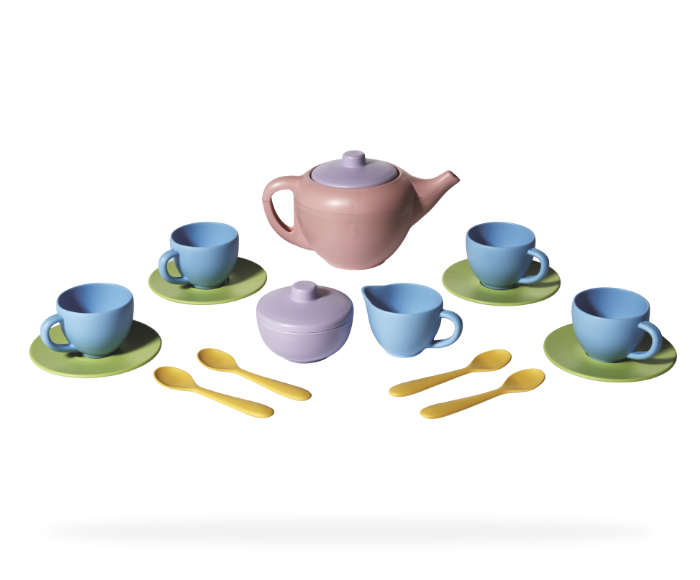
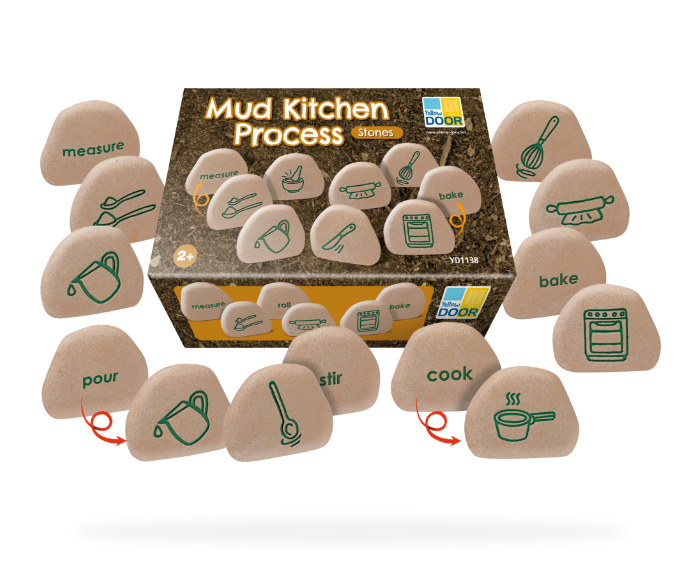
Order’s up! Watch as the little chefs bake ‘mudpies’, serve ‘coffee’ and sit down to enjoy their creations with friends in their very own mud cafe. Pretend & play activities are amazing for exercising collaboration, social skills and encourage (a lot of) imagination! 


Mini Cooking Utensils 

Shop now 

Green Toys Tea Set 

Shop now 


Mud Kitchen Stones 

Shop now 


Fossil Finders 

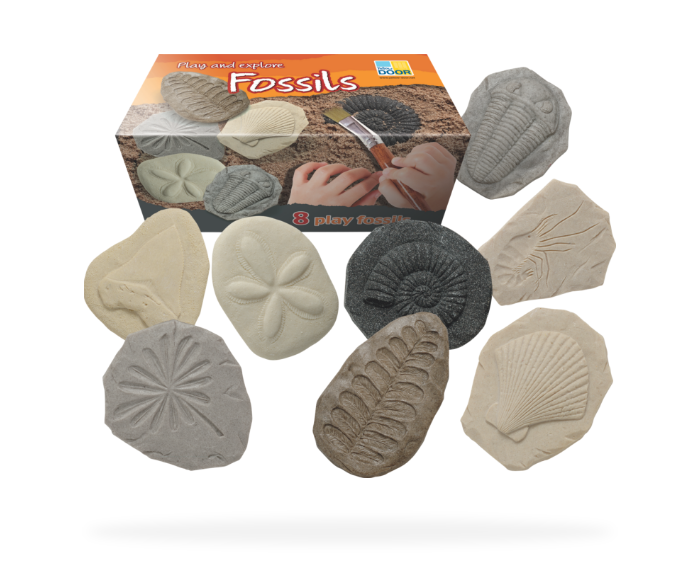
Archaeologists assemble! Hide fossils and bones under the mud and encourage their little hands to gently brush away to reveal their findings. Children will learn about connecting with their world and understanding of the natural elements, while enjoying some good old-fashioned sensory fun. 

Play & Explore Fossils Set 

Shop now 

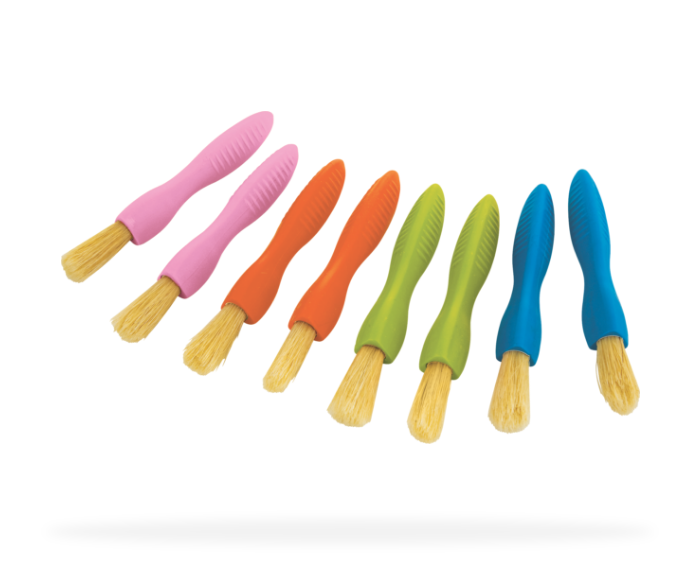
Easi Grip Brushes

Shop now 

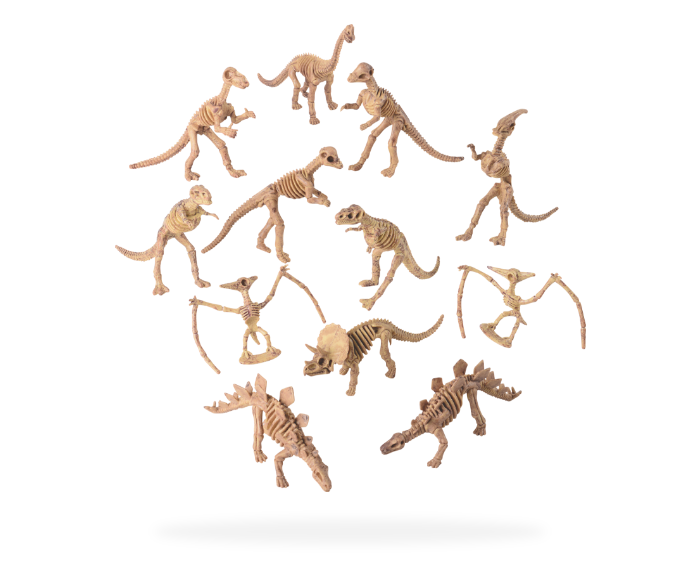
Dinosaur Skeletons

Shop now 


Muddy masterpieces 

Museum of modern mud anyone? Watch as your little artists mix mud and water to create textured masterpieces. Whether they’re finger-painting, brushing, or stamping, it is all about getting hands-on and letting their creativity flow. Plus, they’ll be boosting their sensory skills, fine motor control, and hand-eye coordination—all while connecting with nature! 


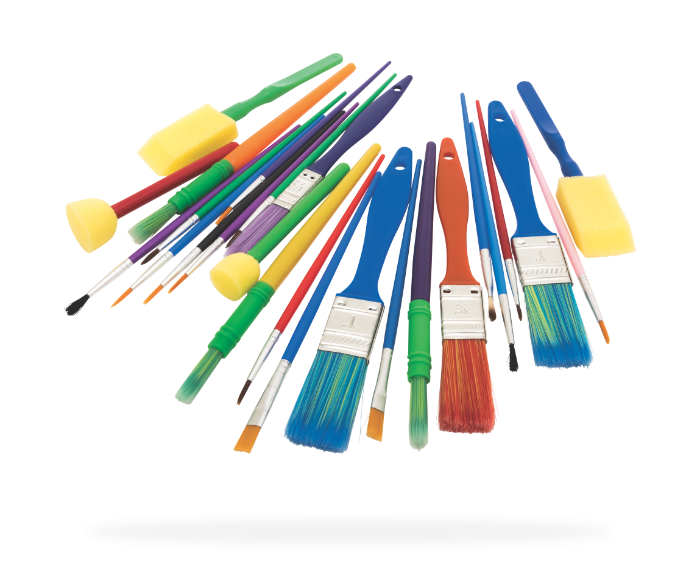
 Nylon Paint Brush Set 

Shop now 


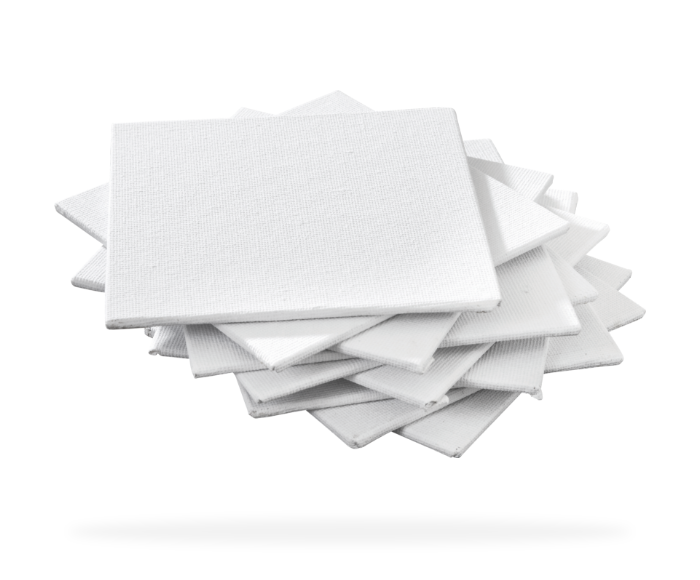
Mini Canvas Boards

Shop now 


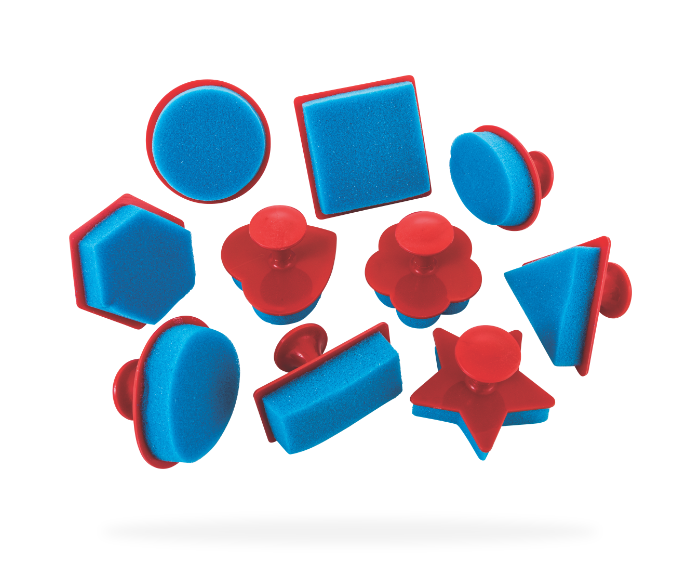
Shape Stampers Set 

Shop now 


The outdoors is more than just a change of scenery – it’s a world of possibilities. It’s about movement, discovery, and the joy of learning through play. So, grab your buckets, spades and sunscreen – Outdoor adventures await!  


Posted on

The top 10 ways educators create a welcoming environment

Lookbook-leaderboard header

(as shared by YOU and hundreds of other early childhood  educators) 


Welcome to an MTA blog written by YOU. Yes, you, educators of Australia and New Zealand (AKA today’s glorious brains trust). Recently, we held a competition to win an amazing ‘look’ from our new furniture Lookbook. To enter, we invited educators to tell us how they create a warm, welcoming environment in their space. We were overwhelmed with the ideas and wanted to share some of this community expertise. We’ve assembled hundreds of your ideas into these top 10 themes which we LOVE. These were the big hitters that came up again and again in educator responses, as you’ll see when you read on! ❤️ We hope they inspire you too: 

  1. Meet the children where they are 
  2. Natural spaces, natural light 
  3. Inclusive all the way 
  4. Ownership of the space 
  5. Open-ended resources 
  6. Promote curiosity 
  7. Home away from home 
  8. Organisation, routines & rituals 
  9. Cosy spaces & quiet corners 
  10.  Soft tones & warm hearts 

Let’s dive deeper into how to create a welcoming centre environment – in your words! Kind and creative learning environments with a sprinkle of magic are everywhere… 

lookbook-Teepee

Meet the children where they are 

  • Children always come first, and their views and interests shape my program.  
  • Meeting children where they are and embedding their interests within the environment while also considering their needs.  
  • Looking at the world from a child’s perspective.  
  • Remembering what I loved and found magical as a child. Trying to see it through the eyes of a child, not an adult. 
  • Thinking like a child: what does it look like from their perspective? How and what will they learn from? 
  • Integrating children’s interests and fostering open-ended play, allowing exploration and inquiry to evolve based on their choices and curiosity. 
  • Creating spaces and experiences based on children’s interests and areas of development using flexible and diverse resources. 
  • It must be at a child’s level, a splash of colour, challenging enough to stimulate their brain, but easy enough that they can actually engage with it. 

lookbook-table and chairs

Natural spaces, natural light 

  • Natural, light and calming spaces make for connection, imagination and happy faces.  
  • Natural elements: incorporate nature through plants, natural wood and displays of stones, shells or leaves to create a calming atmosphere.  
  • We choose natural colours complemented by beautiful wooden pieces.  
  • Natural light, clean and tidy, mix of colours, mix of visual stimuli (not too much all at once!), books/learning and play times at arm’s reach!  
  • Natural colours, different textures, cosy spaces and creating a homey feel to promote a sense of belonging. 
  • I love using natural materials that spark curiosity and exploration. 
  • We build a welcoming environment through natural resources and calming colours. 

lookbook- grey sofa

Inclusive all the way 

  • Create a warm, inclusive space with diverse activities and responsive teaching to foster curiosity, creativity and a sense of belonging.  
  • By greeting with a smile, encouraging open communication and providing a safe, inclusive space where all children feel valued and respected.  
  • Build relationships first & make sure children see their cultures/identities/contexts reflected in the space.  
  • Multicultural & inclusive materials: offer toys, books and activities that reflect different cultures and abilities.  
  • By being inclusive to all families, ensuring everyone is acknowledged and treated with kindness.  
  • We design our environments to be all inclusive, with areas set up for children where they can use their own ability and imagination.  
  • We make sure we have materials and learning tools to encourage all children.  
  • Inclusive play: ensure all children are included in activities, encouraging them to play and interact with one another. 
  • Ensure every family feels a sense of belonging. Our families are like our own, supporting each other whenever possible. We collaborate to create inclusive, empathetic environments. We are family ❤️ 

lookbook- blackboard

Ownership of the space 

  • Helping children create ownership of the space. The room is a blank space until they create art and put their mark on the space. 
  • Personal touches such as children’s artwork: showcase their work on walls or bulletin boards to foster pride and ownership. 
  • Welcome signs: have welcome signs with each child’s name, showing that they belong in the room. 
  • We greet each child, display their artwork on our walls, observe their interests, set up areas that provide opportunity for independent exploration, group and individual play and a balance of active and quiet spaces. 
  • Children’s handprints and artworks adorning the walls, creating a sense of agency, ownership over the space and safety paramount to learning. 
  • Evidence of children’s learning on the walls. 
  • Children have input into a play and learning environment allowing them to create a special place, giving them a sense of agency and belonging.  

lookbook- kitchen

Open-ended resources  

  • Open-ended resources, input from the team, children’s ideas and inspirations, and a whole lot of passion and love ❤️  
  • Careful selection of high-quality resources designed to enhance children’s love of play and learning and evoke joy and laughter.  
  • Open-ended resources that support imaginative and sensory learning, a space designed just for the children. 
  • Using MTA resources (editor note: thank you – we appreciate you) enables us to provide a safe, inclusive and diverse environment using enquiry-based learning activities for exploration, creativity and discovery.  
  • Sprinkling MTA’s bold statement pieces (editor’s note: loving this!) into spaces, then watch the magic happen!  
  • Using loose parts, nature, sustainable items for play, presented in a beautiful way. 
  • Provide a range of activities that are open-ended. Home corner is a big favourite.  
  • Curate a flexible, resource-rich space that invites exploration and interaction. 
  • Home corner is the perfect way to inspire dramatic play. It can be a science lab, bear cave, farmer’s market or anything their big imaginations think up. 

Lookbook-looseparts

Promote curiosity 

  • An area that lets their imaginations grow, everything being at their level. 
  • Hands and hearts open wide, curiosity our guide. 
  • Things to see, hear, taste, smell and touch, as well as spaces to hide, play, imagine, rest and learn. 
  • Mixing curiosity with hands-on chaos, ensuring every child feels like a VIP in the world’s most entertaining learning circus!  
  • Immerse ourselves in the children’s imaginative worlds and bring them to life with carefully curated objects to spark wonder and joy.  
  • Dance, explore and let curiosity lead the way!  
  • Ensuring the children can freely explore in a variety of ways that include curiosity and creativity but also engage in messy play. 
  • Provide various play areas like art, building, sensory tables and pretend play zones.  
  • Creating separate spaces for self-initiated learning – reading, drawing, building, imaginative play and quiet spaces. Taking the time to set up and join in on various activities and always looking for new and engaging ways to learn and interact. 

lookbook-low table

Home away from home 

  • We focus on recreating spaces similar to home to create a sense of belonging.  
  • Homelike, child-centred, interest based, beautiful furnishings and light, individual spaces, group spaces. 
  • Use feedback from families so we can include their home life in our learning and environment. 
  • Family photos: display photos of the children and families to create a sense of familiarity and connection.  
  • The environment needs to feel as much like walking into your own home as possible. 
  • Create a home away from home environment: family photos, lamps, photos of children’s bedrooms. 
  • Enchanting, dazzling, homelike look, lots of adventure and tiny nooks, learning should be inviting and fun. 

lookbook - Shelf 

Organisation, routines and rituals 

  • Lots of storage that lets you rotate the toys and activities; space to create, space to move.  
  • Ensuring that the environment is well organised, with resources easily accessible for children. 
  • Organised and decluttered: tidy and well-organised space with child-friendly storage so children can easily access toys and materials. 
  • Consistent schedules: a predictable routine helps children feel secure and know what to expect each day.  
  • Morning welcoming ritual! Greet each child warmly at the door with a smile, eye contact and perhaps a special greeting they choose (like a high-five or handshake). 
  • Well-ordered, beautiful environments stir children’s interest, identity, culture, imagination and wonder, enriching their development. 
  • We love to change our areas around once in a while to help challenge those little brains! 
  • We create a welcoming and engaging learning environment through routines and rituals, cosy and warm spaces, special interest items, flexible seating, a friendly smile and quality interactions. 

Lookbook, Chair

Cosy spaces & quiet corners 

  • Creating comfortable and inviting spaces that promote collaboration and interaction.  
  • Comfy chairs, books to read, using their imagination is the key!  
  • Craft a cosy learning nook with whimsical toys, fun routines, playful activities and lots of giggles.  
  • Adding cosy corners, natural nooks, creative crannies and spaces that ignite the senses. 
  • Comfortable furnishings: provide cosy reading corners with soft cushions, bean bags or a rug.  
  • Sensory and play areas, quiet corners: spaces where children can retreat if they need a break or quiet time. 

lookbook- kitchen corner

Soft tones & warm hearts  

  • Soft tones that also feel warm and inviting; active listening. 
  • Show genuine interest in what children say and give them your full attention during conversations.  
  • Soft tones that also feel warm and inviting, lots of resources, surfaces for them to create as well as floor space for them to connect to one another. 
  • Use warm, soft lighting and calming colours on the walls and furnishings. 
  • Open spaces, smiling faces, invitations to play and plenty of love and laughter ❤️ 
  • Warm tone and gentle language: a kind, gentle voice and positive language to encourage children.  
  • Soft music, an area to relax and a non-rushed atmosphere for children to explore. 
  • A focus on using textures/colours to bring warmth and a sense of belonging. 
  • Warmth and laughter… we believe a safe, warm and happy environment creates a place of exploration and creativity. 


We love these ten ways to create a warm, welcoming environment in your early childhood setting. Thank you! 🙏

Feeling inspired to dial up a zone or re-do your home corner? Shop for your early childhood learning space and resources right here. 

Love the looks throughout? ❤️ Download the new Lookbook here. 

Want help deciding what might suit your space? Doing a bigger refurb or even opening a new centre? Unlock inspiration with our talented new projects team in your FREE discovery session. It’s a fun, free way to create magic in your learning space. Lock it in. 


Posted on

Bringing mini beasts to life in your centre

Mini beast leaderboard

Everything you need to explore bugs, beetles, butterflies and more…


Educators love mini beasts. Moreover, they love our mini beast resources to support them in their exploration. They’re some of our most popular science resources and it’s easy to understand why!

Mini beasts are the small animals and insects that share our planet. They include crabs, butterflies, jellyfish, spiders, snails and caterpillars. Mini beasts can be found all over the world in all types of habitats, micro-habitats and ecosystems from forests and rivers to deserts or beaches.

To make exploration come to life with these cute and sometimes creepy critters, it’s great to start with the MTA interactive flat panel and add on some of our extensive collection of mini beast resources!

In our video, discover how the fingertip-friendly interactive flat panel becomes a wonderful tool to explore mini beasts, embracing creativity, mathematics, storytelling, literacy, movement, art and collaboration. The panel itself provides the backdrop to learning with smooth writing, ultra-high definition with 4K resolution, responsive touch and easy access to the Cloud.

Fact finding

Through the web browser on the panel, educators can uncover amazing fun facts about their chosen mini beast (or number of mini beasts). Here, the exploration covers what a mini beast likes to do and eat.

Data collecting

Heading outside with children and exploring the outdoor environment with a magnifying glass offers an opportunity to be amongst nature. Capturing photos and uploading those to the interactive panel allows the mini beast exploration to continue once inside again.

Interactive exploration

Using an amazing butterfly picture, the video demonstrates how to import the image, select it and manipulate it for learning (such as making it larger or smaller or highlighting and labelling parts).

Infinite canvas

The infinite canvas allows educators to move an image and add more to the panel easily, or to utilise the canvas for creating shapes and drawings, allowing sensory exploration and movement.

Reading stories

The e-Reader on MTA’s panel allows for large groups to get involved in literacy and storytime. Children can interact with the panel and turn the pages, circle the mini beasts or sight words.

Messy craft fun

The video then shows how the images captured allows educators to continue the project into more creative learning, using the mini beasts as a reference point for creating art.

Evidence collecting

Once the mini beast lessons are complete, educators can export their project and share it with families as evidence of learning.


Exploring mini beasts further…

mini beast kits

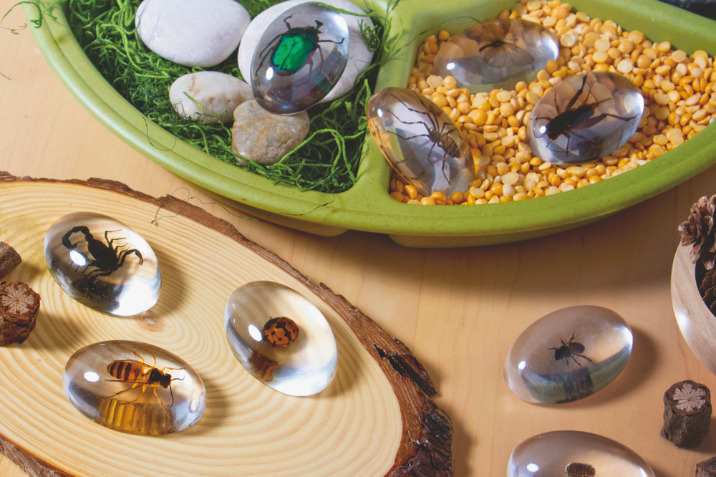
The Mini Beasts Complete Set includes each large set of our best-selling Mini Beasts, with a total of 62 specimens! The real-life specimens are safely encased in a crystal-clear resin, perfect for exploring under a magnifier or microscope. The durable blocks are safe for children of all ages, and each has the mini beast’s name printed on it for easy identification. These specimens are suitable for open-ended investigation or play, and each set includes a Teacher’s Guide with more information about the mini beasts in the set.

mini beast collection

Our new Camouflage Mini Beasts Set of 9 can be used to explore how different animals and insects have evolved to camouflage themselves for protection in their habitat. Educators can discuss adaptive features including colouring, physical shapes, defensive features, behavioural habits and more!

mini beast resin

Our Mini Beast Critters Kit includes three sets of four mini beasts critters: Marine Critters, Creepy Critters and Garden Critters. Each set shows the critters encased in resin so children can view the samples safely from all angles. They’re an excellent resource to extend children’s curiosity about commonly found critters in their environment.

Early years bug exploration

MTA’s Insect Exploration Kit includes all the essentials for mini beast learning. Items can be used individually or in small groups, with 12 trays, 12 hand magnifiers, 12 giant bug-viewing jars, 12 tweezers, a total of 14 jumbo toy insects, and a set of 6 real-life mini beast specimens.

Mini beast book

You’ll also find wonderful books and puzzles to continue mini beast exploration too. In Minibeasts Make the World Go Round, children can learn how minibeasts are essential to life on our planet! This book helps to teach about the interconnectedness of all creatures on our Earth, as an introduction to sustainability and an understanding of the balance of our biosphere.

Mini beast book

In Discover: Mini Beasts, children can discover how vast the world of mini beasts is, from the worms on the ground, to the insects in the air and the jellyfish in the sea.

Mini beast puzzles

For tactile exploration and hands-on learning, children can explore the diversity of the insect world with these durable close-up Minibeasts Puzzles (Set of 8). These wooden puzzles feature real-life images of a caterpillar, spider, dragonfly, worm, ladybird, bumblebee, ant and fly. The puzzles allow children to work on these at one time together, promoting teamwork and encouraging them to help one another.

Ready to get interactive with insects and bug out on glorious bugs? We’re all a-flutter too just thinking about the possibilities.

Shop all things mini beast right here


FREE Download: 5 exciting and educational mini beast activity ideas to keep your room buzzing! Download here>

Shop MTA>

Blog Home>

Posted on

Your most wished for resources

Most wished for leader board

What you love & want & need in your life right now 

We recently ran a competition to win your MTA Wishlist and were overwhelmed with wonderful Wishlists curated by enthusiastic educators everywhere. What were the favourite wished for resources?  Let’s pull back the Wishlist curtain and take a peek! 


Here are the headlines! 

Well colour me glittery pink! The most wished for brand was Creatistics. There were 9,334 Creatistics products in Wishlists. Creatistics is MTA’s brand that offers incredible value art & craft resource essentials that are high quality, safe and developed for classroom use. They go the distance, so it makes sense that they are Wishlist favourites. 

Our most extravagant Wishlist item that appeared three times was the awesome Quad Play Pod. It’s part of a revolutionary playground system that bridges the gap between permanent playgrounds and moveable play equipment… we love that you’re wishing big. 

Lots of you were absolutely loving the Reading Tree & Seat. We don’t blame you. It’s such a showstopper. It’s a centrepiece that provides an amazing space for reading, quiet time and reflection. 

Wooden resources and natural tones were popular additions to Wishlists – which is absolutely on trend for what’s happening, particularly in early years.  

On the other hand, colour is never out of style and we saw bold colours make a splash. 

Screenfree STEM kits were also popular, particularly in early years. We love screenfree coding as an entry into the world of robotics.  

Books and more books were the order of the day too. 


Why do you love Creatistics Cover Paper so much? (Um, no need to answer, we know!!) 

Art & craft resources

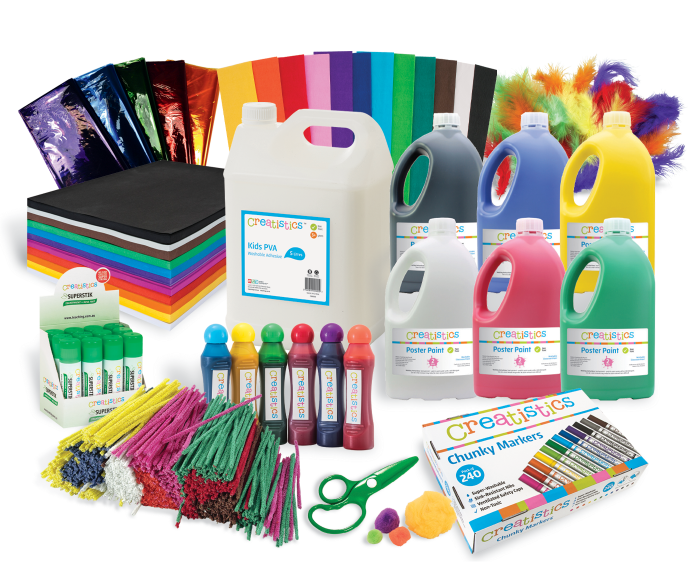
The top 15 products in Wishlists were Art & Craft resources. These were the favourites you loved.

  1. Creatistics Cover Paper Assorted A4 – Pack of 500
  2. Assorted Cellophane 75 cm x 1 m – Pack of 25
  3. Creatistics PVA Washable School Glue – 5 L
  4. Creatistics Poster Paint 2 L – Set of 10
  5. Creatistics Assorted Pipe Cleaners Class Pack 30 cm- Pack of 1000
  6. Creatistics Cover Paper Assorted A3 – Pack of 500
  7. Creatistics Chunky Colouring Markers – Pack of 240
  8. Creatistics Long Feathers – Pack of 140
  9. Creatistics Crepe Paper Assorted – Pack of 12
  10. Creatistics Short Feathers – Pack of 50  
  11. Dough Scissors – Pack of 10
  12. Pom Poms Assorted Colours & Sizes – Pack of 300
  13. Office Copy Paper A4 Pastels – Pack of 500
  14. Creatistics Superstik Glue Stick 35G – Pack of 36
  15. Creatistics Dot Art Markers – Pack of 6


Wishing big time for Cultural resources 

Cultural Resources

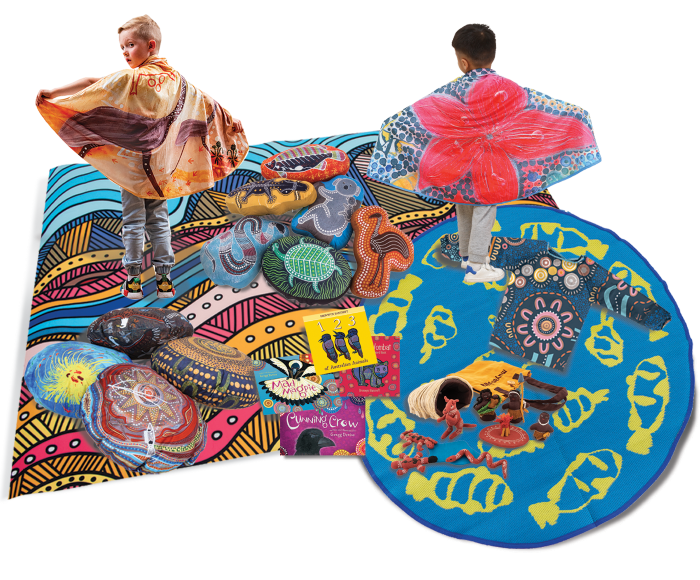
Cultural resources were also extremely popular Wishlist items. With a strong focus on embedding Aboriginal and Torres Strait Islander perspectives into both the Early Years Learning Framework and the Australian Curriculum, resources to build a cultural corner or integrate through daily lessons are more popular than ever. These were your favourites! 

  1. Aboriginal Animals Dress Up Capes
  2. Aboriginal Round Cushions –Set of 4
  3. Aboriginal Board Books for Early Years Pack
  4. Aboriginal Storytelling Book Pack
  5. Dreamtime Country Sacred Lands Indoor Floor Mat
  6. Aboriginal Dress Up Capes – Set of 4
  7. Australian Indigenous Outdoor Mats – Set of 3
  8. Bayadherra Junior Long Sleeved Smock – Pack of 10
  9. FairTrade – Muyan-Bara Aboriginal Family -10 Pieces
  10.  Indigenous Animals Pillows – Set of 6 


Everyone’s wishing for Sensory resources… 

sensory hex tray

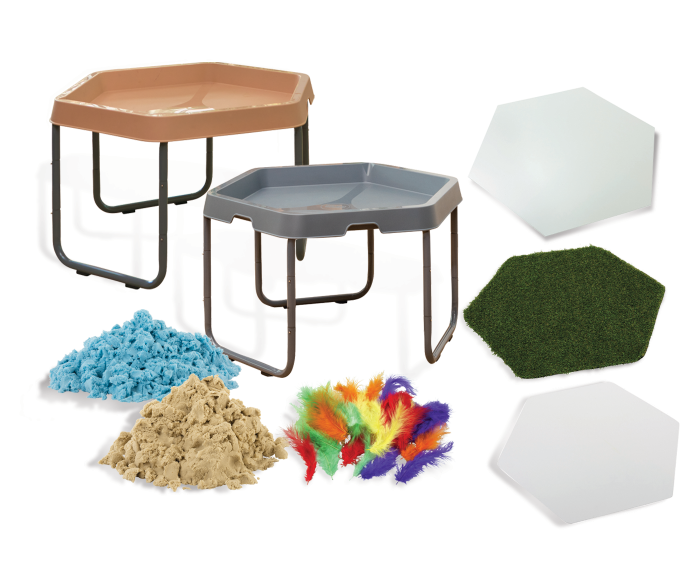
Okay, not literally everyone. But many educators are loving the depth of sensory resources on offer at MTA. And educators are thinking creatively about how to use these resources which we love! You wishlisted MTA hex trays and wishlisted fantastic resources that you could create sensory tray play activities with! 

  1. MTA Spaces – Hex Tray & Stand – Charcoal
  2. MTA Spaces – Hex Tray & Stand – Sand
  3. MTA Spaces – Hex Tray, Stand & Play Mats – Sand
  4. MTA Spaces – Hex Tray Stand & Mats – Charcoal
  5. Creatistics Magic Sand Blue – 2 kg
  6. Creatistics Magic Sand Natural – 2 kg
  7. Creatistics Pom Poms 2 cm – Pack of 100
  8. Creatistics Long Feathers – Pack of 140
  9. Creatistics Short Feathers – Pack of 50


Sensory exploration keeps on trending! 

sensory resources

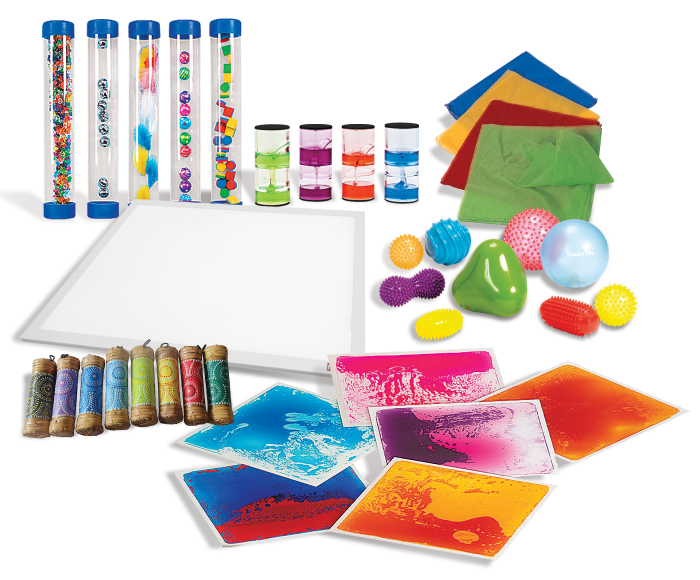
Outside of sensory tray play, other sensory resources for learning environments were also on Wishlists, including our popular large sensory liquid floor tiles. 

  1. Sensory Liquid Floor Tiles – Set of 6
  2. Lakeshore Giant Sight and Sound Tubes – 40 cm
  3. Magic Scarves – Pack of 12
  4. Explore & Discover Light Panel – A2
  5. Ooze Tubes – Set of 4
  6. Lakeshore Giant Sight and Sound Tubes – 40 cm
  7. Painted Bamboo Rainstick Kit
  8. Sensory Balls Mega Pack – Set of 9


Educators are wishing for outdoor & active resources too 

outdoor & active

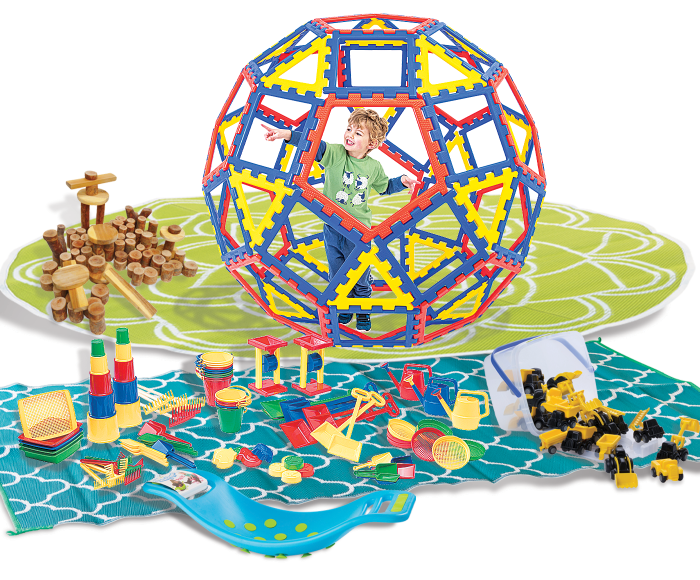
We think you might have been dreaming of outdoor play, construction and block play with your little learners as there was a big emphasis on play resources that took you outside. Fresh air, sunshine, an outdoor play area… and you’re sorted with these Wishlist favourites. 

  1. Heavy Duty Sand Play Set 47 Pieces
  2. Natural Tree Blocks – 106 Pieces
  3. MTA Spaces – Outdoor Mat Kit – Set of 4
  4. Teeter Popper – Blue
  5. Viking Toys Mini Chubbies Bucket Construction 20 Pieces
  6. XL Polydron Geo Dome Set of 62
  7. Outdoor Hollow Block Set 27 Pieces
  8. NYBY Big Sand Set 100 Pieces
  9. Heavy Duty Buckets Scoops & Sieves Set of 30


Were these popular resources on your Wishlists?  

Keen to make a Wishlist? This handy tool lets you create resource Wishlists for now, for the future or to keep your buy-again favourites in one place.  

Head to our Wishlist Hub to see curated Wishlists we’ve already created that you can shop easily too.  

Happy wishing! 


 Blog home>

Shop MTA>

Posted on

9 Memorable Father’s Day Art & Craft Activities

Father's Day Craft Leaderboard

Fathers, Grandfathers, Great Grandfathers, Stepfathers, Uncles, Brothers and all other loving father figures in the community will love to open a personalised handmade present- representing the love and gratitude we feel for them and to celebrate all they do for us each day.

The beauty of MTA’s open-ended range of Father’s Day materials is the ability for children to adapt them to their own needs & suitability – making a personalised treasure that’s just right for their role models.

Whether in the school classroom, early education setting, home-based learning or weekend crafting – there’s something for everyone in MTA’s NEW and best-selling Father’s Day art & craft resource collection.

Read on for some creative Father’s Day-themed activities to make Dad feel special.


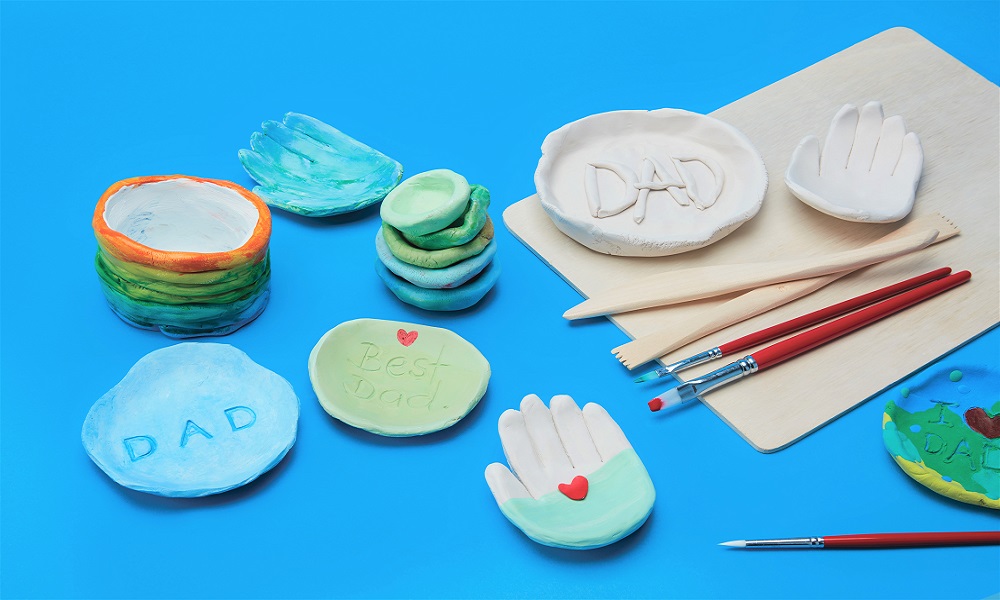
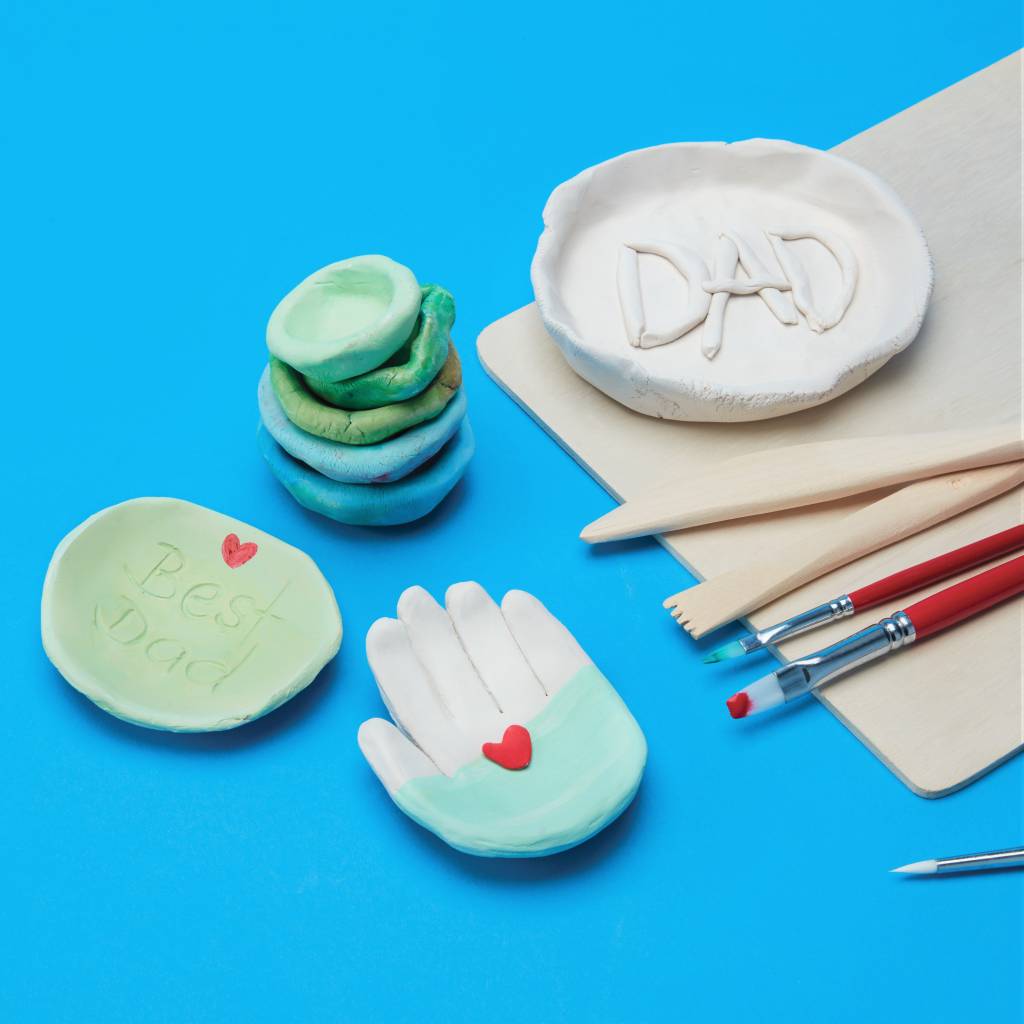
1. AIR DRY CLAY BOWLS

Father's Day Air Dry Clay Bowl Project

Air Dry Clay is wonderfully versatile, allowing young hands to easily mould into all sorts of treasures – including small plates and bowls to act as desktop paperweights or handy holders for keys, coins, wedding rings, and cufflinks etc. These beautiful keepsakes will be held in Dad’s heart as they hold his keys!


HAND BOWL STEP BY STEP

  1. Divide Air Dry Clay into roughly 8 portions
  2. Using a rolling pin, roll out each portion to roughly 1cm thick
  3. Place the child’s hand onto the clay and gently trace around using clay tools
  4. Gently cut away excess clay with a clay knife
  5. Lift hand print off the messy mat and smooth down any rough edges by gently pressing with fingers
  6. Set aside to dry for a few days
  7. Decorate with paint as desired and leave to dry
  8. When completely dry, coat with PVA Washable School Glue  or Crystal Clear  to provide a barrier to dirt, tarnish, wear stains and moisture.

*TOP TIP – placing the handprint in a small bowl lined with a paper towel while it dries will ensure it hardens into a shallow bowl shape.

Featured Products;

White Creatistics Air Dry Clay Ceramic Clay –  (one packet does about 8 little hands)

Glass & Ceramic Paint

Crystal Clear  OR Creatistics PVA Washable School Glue


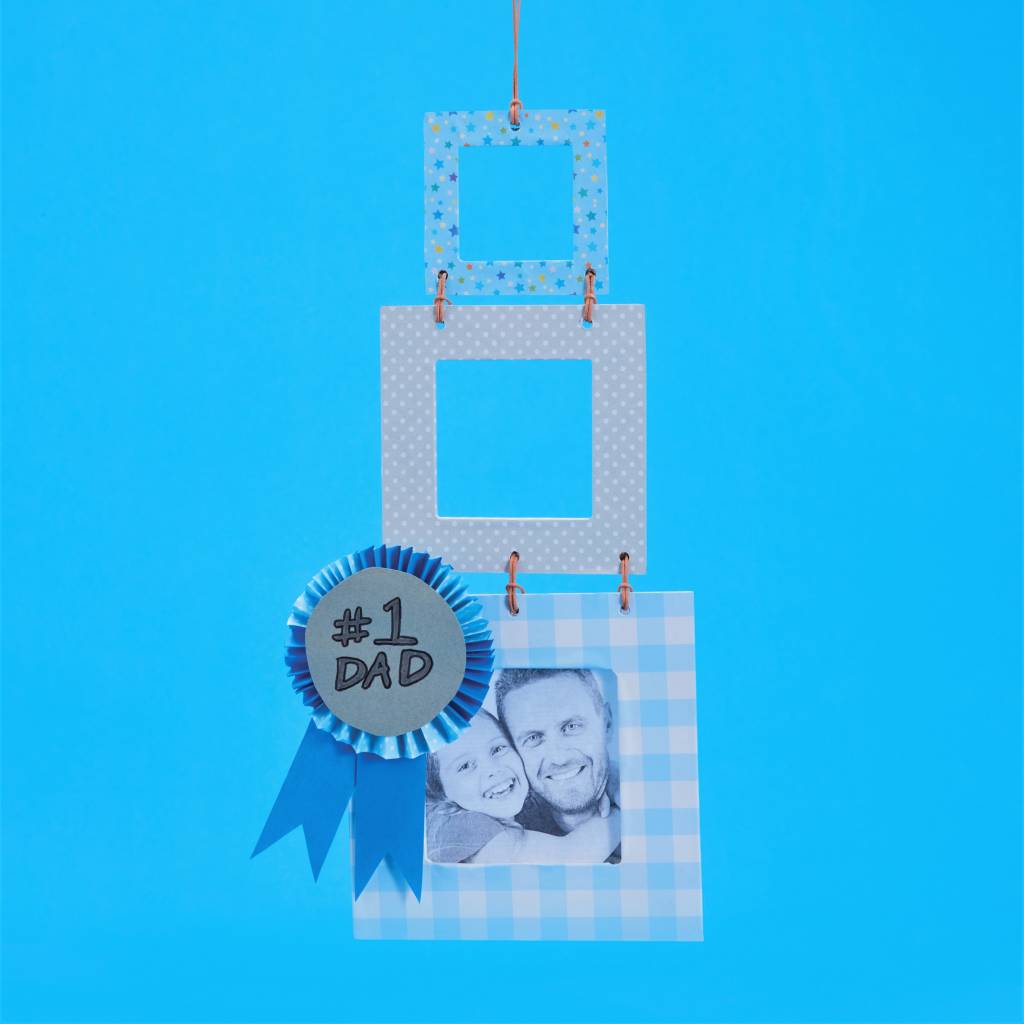
2. WOODEN HANGING FRAME

No 1 dad wooden hanging photo frame

Perfect for home, Dad’s office, the tool shed, or garden shed, Wooden Hanging Frames are perfect for children to decorate and add their own style. Use paint,  patterned, papermarkers or embellishments  to personalise and then add a photo or drawing to each of the different-sized frames. When your paint and glue has dried, each square frame is ready to be strung together using the handy pre-cut holes.


TO MAKE DAD ROSETTE

  1. Fold paper square into 4 lengths and cut along each fold – you will have 4 x long rectangle lengths
  2. Fold each rectangle length into a paper concertina (fold the strip back and forth along the length of the paper).
  3. Repeat for all 4 lengths of paper
  4. Glue the ends of the concertina sections to each other, alternating paper pattern. You will now have 1 long concertina.
  5. Bring 2 edges of the concertina together and glue in place to make a circle
  6. Cut two lengths of patterned paper into ribbons and apply glue to the top, attach to the back of the rosette.
  7. Cut a circle out of carboard, smaller in diameter to your rosette.
  8. Using a metallic marker, write #1 Dad, BEST DAD AWARD, or desired quote
  9. Use a thin permanent marker to trace around the metallic letters for crisp & clear lettering
  10. Apply an even layer of PVA glue to the back of the cardboard circle and lay it over the front of the concertina circle, apply pressure to the layers while drying (laying a book over the rosette will help it to dry flat).
  11. When dry, attach to the frame with a good dab of PVA glue

*TOP TIP – Low melt Hot Glue Guns will glue the rosette components together quickly for older age groups, or educators.


Featured products;

Blue Gingham Paper Roll

A4 Coastal Cardboard 220gsm

Hanging Frame

Pattern Paper Squares

Leather Cord

Creatistics Strong Craft Glue

Creatistics Superstick Glue Stick

Metallic Markers


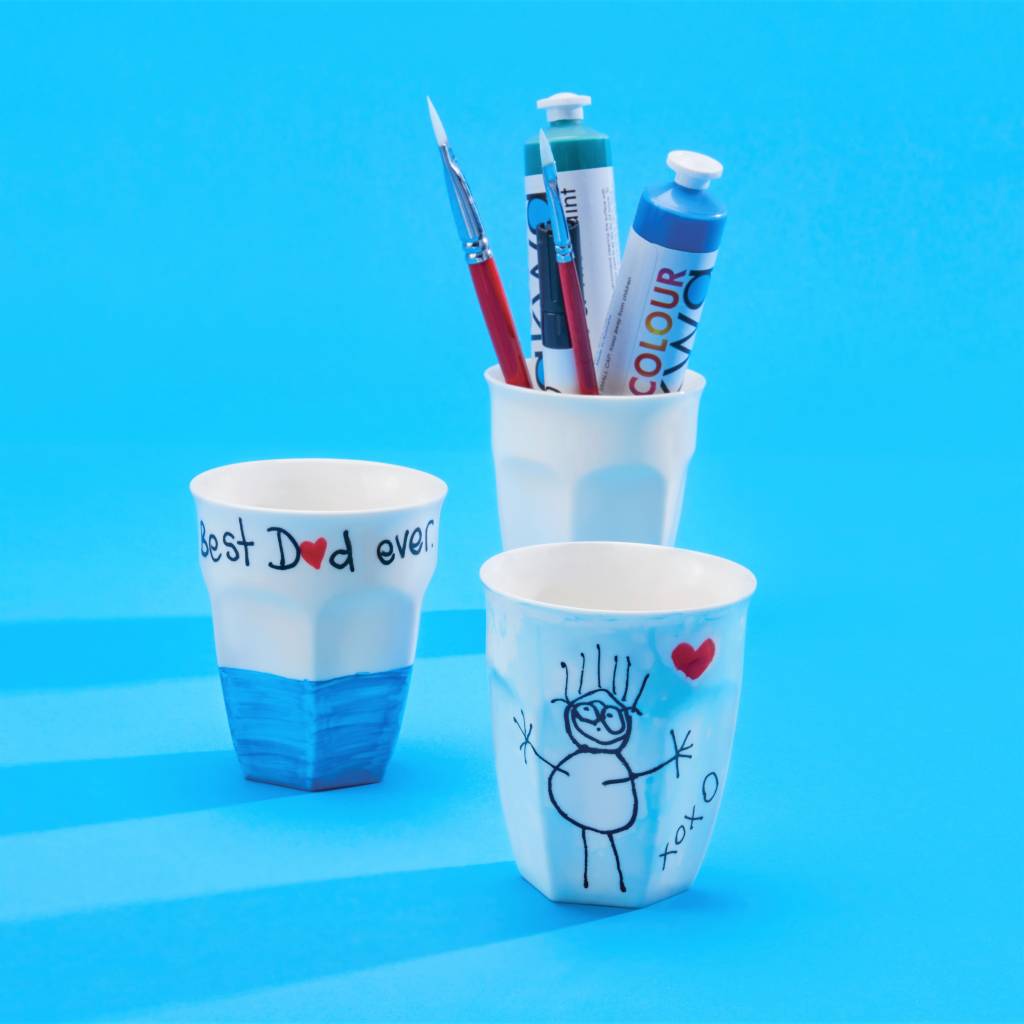
3. LATTE MUG

Best dad ever latte mug craft project

Whether Dad is gearing up for a big day ahead, or ready to relax after a long day, a personalised Latte Mug will be Dad’s go-to favourite cup! These beautiful mugs are supplied as plain white, providing the perfect canvas for children to decorate and personalise with drawings and messages to remind Dad how loved he is.

To set the markers and paint for wear & tear and dishwasher use, the mug will need to be baked in an oven. Set oven to 150 degrees C, once oven temperature has been reached, bake mug for 30 minutes, turn the oven off and allow to cool before removing. Dad’s mug is now ready for his favourite hot beverage.

*TOP TIP – Paint provides great overall coverage of colour, while porcelain markers provide precise detail.


Featured products;

Latte Mugs

Glass & Porcelain Markers

Glass & Ceramic Paint


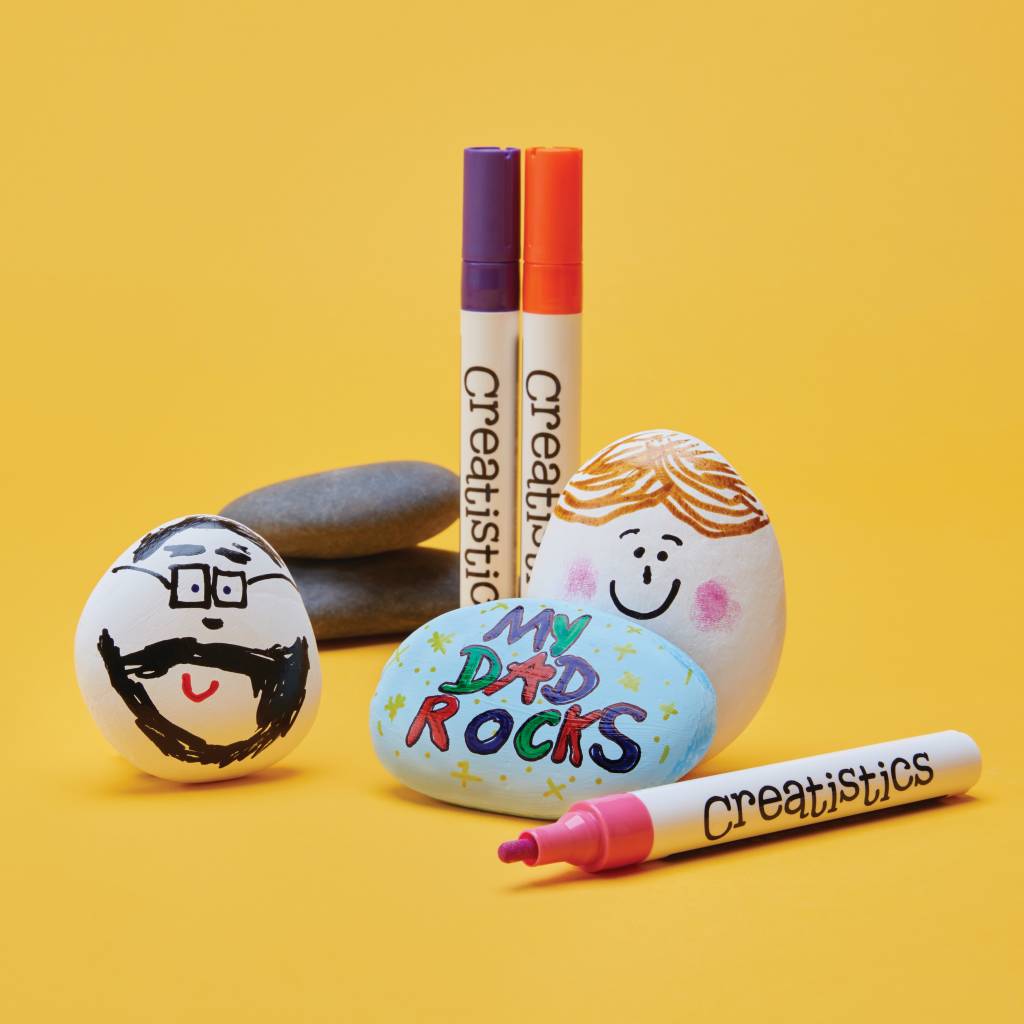
4. DAD ROCKS

Dad Rocks craft project

Painting rocks is a simple and fun craft idea that’s recently become popular the world over – with this adorable Father’s Day version sure to delight! You’ll want a smooth and clean stone, thick acrylic paint and heavy-duty markers to decorate your Dad Rocks. A few base coats of paint will provide the ideal surface on which to draw a likeness of Dad, a positive message on the back or a funny rock-themed quote – be as creative as you like! A coat of PVA glue or Crystal Clear will provide a protective surface for general wear and tear. Dad’s rock is now ready to find in a treasure hunt, to brighten the garden path or to keep loose papers secure as a desk paperweight. Dad will always know he rocks!

*TOP TIP – A quick wash with warm soapy water before decorating will give a clean surface for paint and markers to adhere to your rocks.


Featured products;

Story Stones

Glass & Porcelain Markers

Thinline Permanent Markers

Acrylic Paint Introductory Set

Crystal Clear  OR Creatistics PVA Washable School Glue


5. FATHER’S DAY CARDS

Fathers Day Card Craft Project

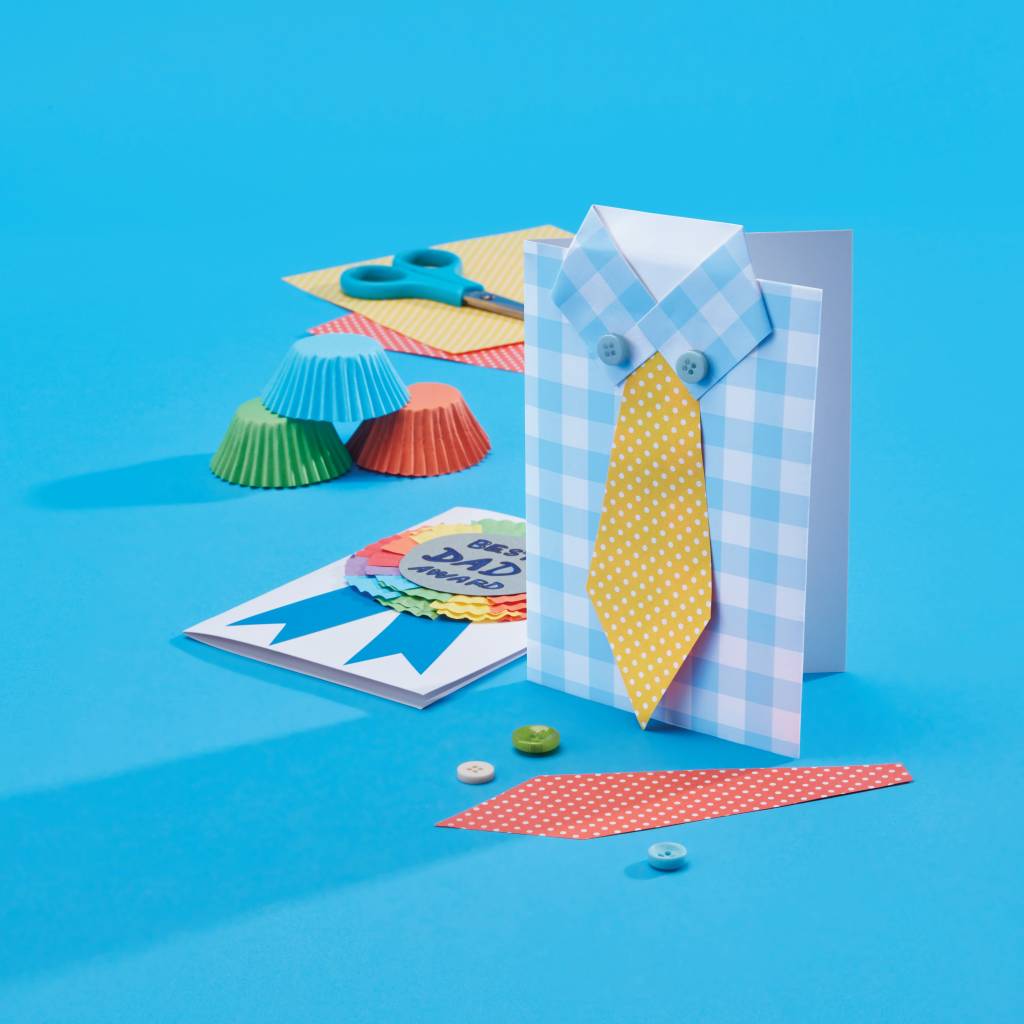
DIY Father’s Day cards make light work out of present making – perfect for children to use a wide range of open-ended materials in imaginative ways to make something just right for their Dad. A thoughtful and loving message inside the card will be something Dad will hold in his heart forever. If you’re feeling like some creative card inspo, have a read on to follow the step-by-step guides to making a Dad Shirt card or a Patty Pan Award card.

DAD SHIRT CARD – Step by Step

  1. To make the shirt front, apply glue to the front of the card and lay it onto the back of the gingham paper (the white side)
  2. Cut away excess paper
  3. To make the tie, select your desired colour of patterned paper and cut into a tie shape (narrow at the top, wide at the bottom with a V shape)
  4. Glue tie in the centre of the shirt front card
  5. To make the collar, apply glue to a length of cover paper and lay it onto the back of the gingham paper (the white side) and cut away excess to make your desired collar size
  6. Fold the 2 sides of the collar length around to make the front corners of your collar (this is where the buttons will go)
  7. Glue buttons in place onto the shirt front
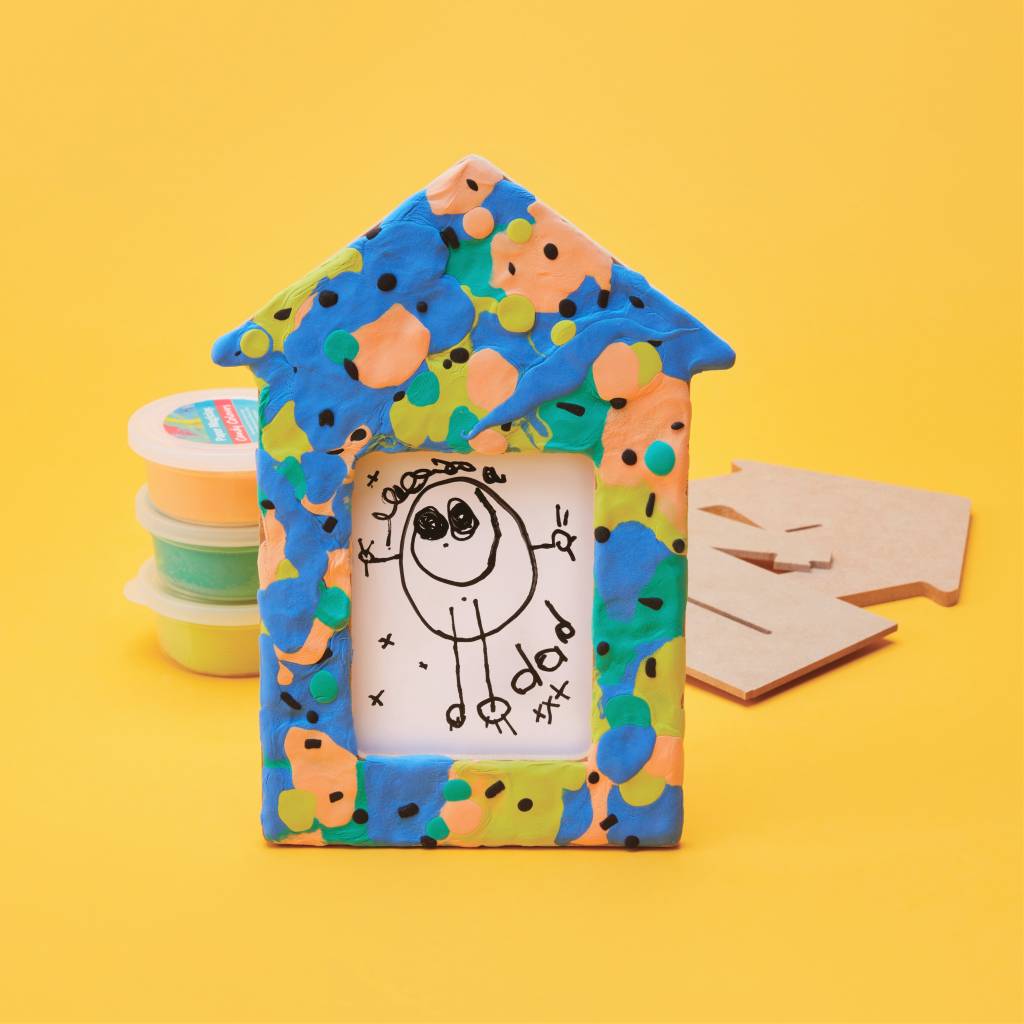
  8. Decorate the inside of the card with drawings and messages
  9. Your card is ready for Dad!

*TOP TIP – To make the collar lengths apply glue stick to an entire piece of cover paper and lay onto the gingham paper, you will then be able to cut multiple strips of collars at the one time.


PATTY PAN AWARD CARD – Step by Step

  1. Cut a circle out of coloured cardboard
  2. Draw or write your message for Dad using markers
  3. Cut patty pans into quarters
  4. Glue sections of patty pans onto the back of the cardboard circle to form the Rosette (experiment with colour patterns, or multiple layers)
  5. Cut 2 lengths of coloured paper or cardboard & cut an inverted V shape into the lower lengths to form the Rosette ribbons
  6. Attach you ribbons onto the back of the rosette with glue
  7. Apply a layer of glue to the back of the finished rosette and press down firmly onto the card
  8. The inside of the card can be decorated with drawings and messages too!
  9. Slot your card into the supplied envelope and it’s ready for Dad!

*TOP TIP – The front of the card where the patty pan award sits can also be decorated with paint, drawings or coloured paper for an extra splash of colour!


Featured products;

White Cards and Envelopes

Pastel Assorted Buttons

Blue Gingham Paper Roll

Pattern Paper Squares

Creatistics A4 White Cover Paper 

Large Coloured Patty Pans

A4 Coastal Cardboard

Metallic Markers

Thinline Permanent Markers


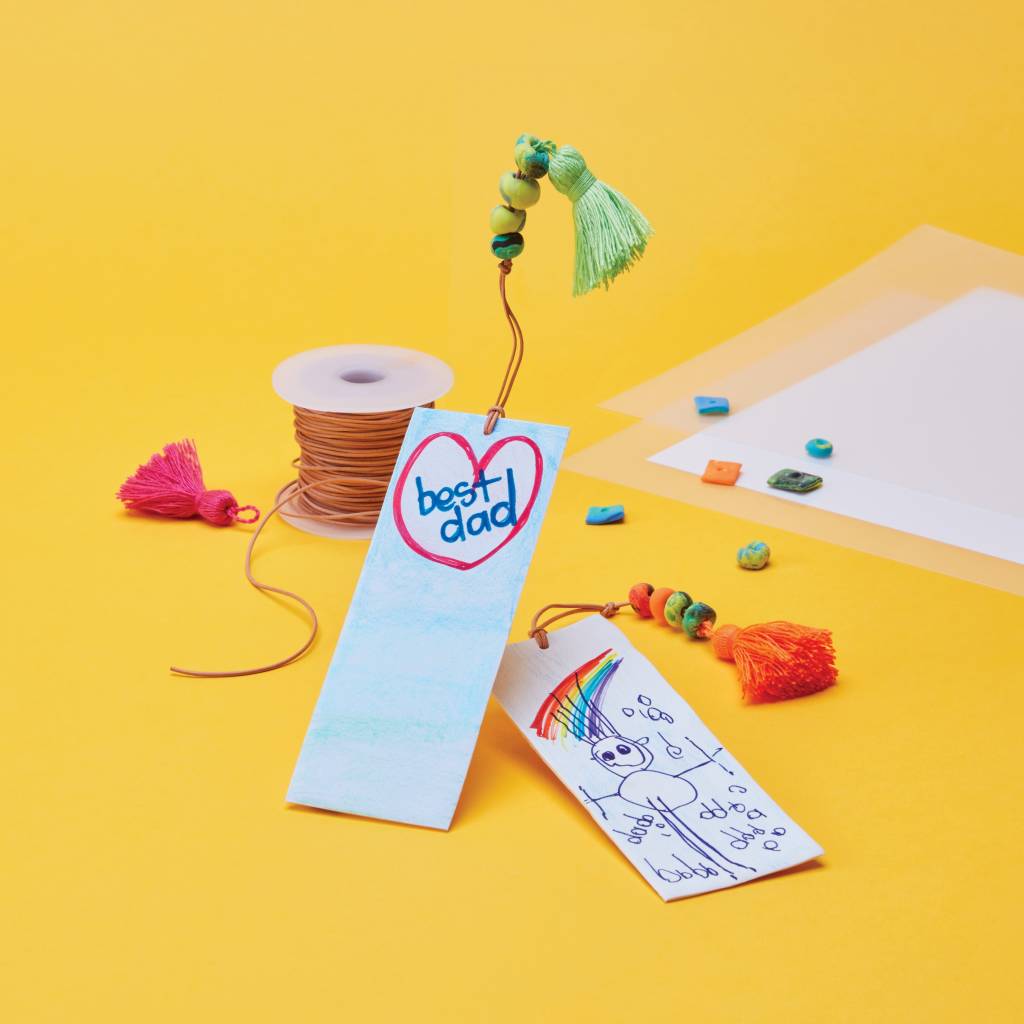
6. SHRINK FILM BOOKMARKS

Best Dad Shrink Film Bookmarks craft project

With just a few supplies and a lot of imagination, these handy bookmarks are super simple to make, and will remind Dad how special he is with each turn of a page.

To make, simply cut a length of clear shrink film  or printable shrink film ) (one sheet of shrink film makes 4 bookmarks). Draw or write your design onto the matt side using coloured pencils  or markers , use a hole punch to make a hole for threading the string later on – and then you’re ready to bake! Pre-heat the oven to 150 degrees C. Place design on a lined tray (matt side up) and bake. The plastic will begin to shrink after 10 seconds. Remove from the oven once the plastic has flattened and set tray aside to cool completely before handling.

To make the beads, roll small chunks of silk clay  or paper magiclay ( in the palm of your hand) to form small beads. Poke each bead with a skewer all the way through, making sure the hole is wide enough to thread cord or string through and then set aside to dry for 24 hours. Use a length of strong string (or leather cord ) to tie through the punched hole, add some of your colourful beads and tie off with a coloured tassel . Your personalised bookmark will mark reading places proudly!

*TOP TIP – Coloured pencil markings go a long way once shrunk in the oven; a very light shading is all that’s needed for bright vibrant colour!


Featured products;

Clear Shrink Film  (Each sheet of clear film paper makes roughly 2 car hangers).

White Printable Shrink Film

Jumbo Coloured Pencils

Lyra Giant Skintone Pencils

Thinline Permanent Markers

Candy Colours Paper Magiclay

Paper Punch One Hole

Leather Cord

Assorted Colour Tassels


7. CERAMIC PLANT POT with PLANT LABEL/STAKE

Dad themed CERAMIC PLANT POT with PLANT LABEL craft project

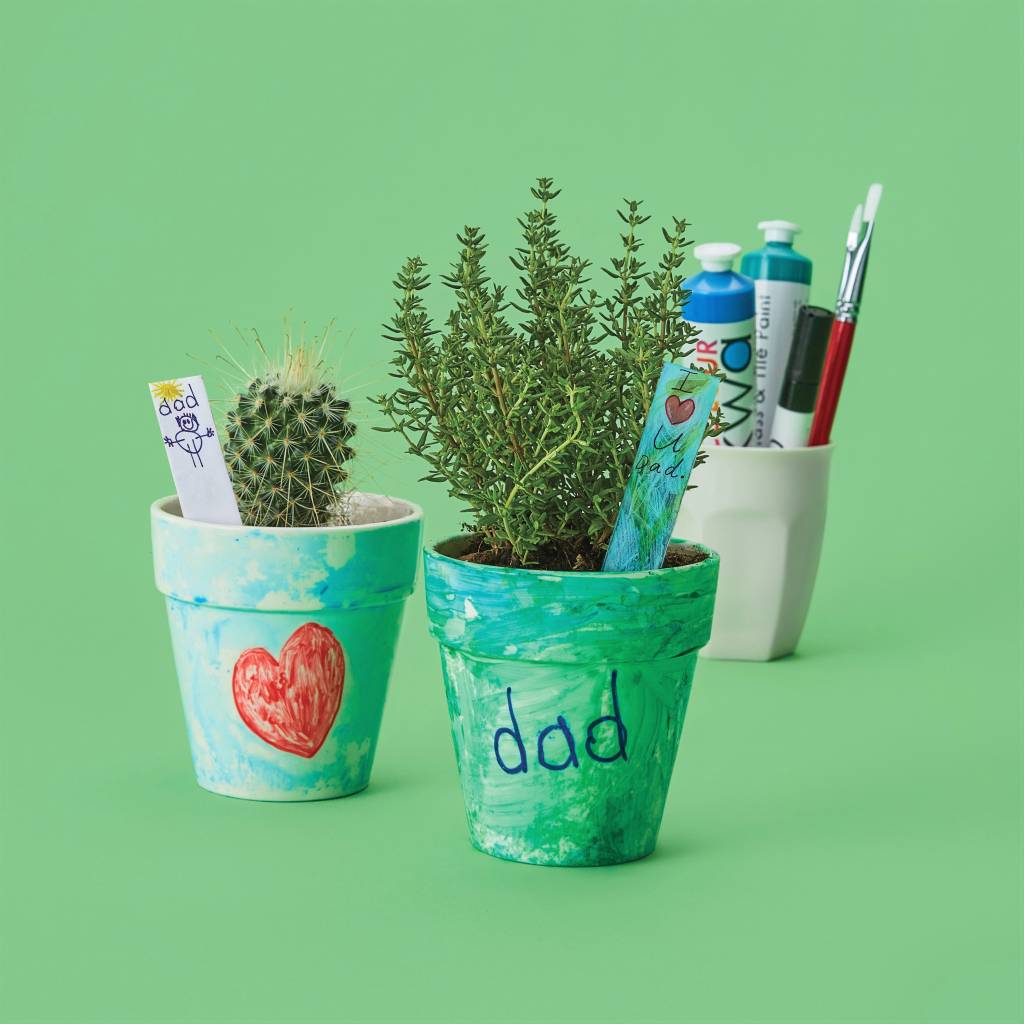
Plants truly are the gift that keeps on giving! Whether your Dad would like a spiky cactus to decorate his office or a tasty bunch of herbs to spice up his cooking, he’ll no doubt love a personalised plant to keep him thriving.

These adorable ceramic plant pots make the perfect vessel to decorate with glass & ceramic paint  and porcelain markers. We’ve added a little shrink film plant label for further personalisation, which makes the ideal tag to jot down the care instructions for Dad’s plant.


*TOP TIP – Paint provides great overall coverage of colour, while markers provide precise detail.


Featured products;

Porcelain Flower Pot OR  Terracotta Plant Pot

Glass & Porcelain Markers

Glass & Ceramic Paint

Jumbo Coloured Pencils

Clear Shrink Film

White Printable Shrink Film

Thinline Permanent Markers Assorted Pack


8. WOODEN HOME FRAME

WOODEN HOME FRAME craft project

Home is where the heart is, and what a beautiful home these wooden frames make! The sturdy surfaces of the wooden frames are ideal for all sorts of personalised decorations including open-ended Father’s Day essentials or silk clay . When your frame has been decorated and thoroughly dry it’s ready for a photo, drawing or special message to be added into the frame. You’re then ready to slot the wooden stand into the back of the frame so it can sit proudly on Dad’s desk where we’re sure it will stay forever!

*TOP TIP – Remember to add the date to the back of your Home Frame so Dad can remember what year it was when he looks back at his treasured memories.


Featured products;

Wooden Home Frame

Silk Clay Kit

Candy Colours Paper Magiclay 

 Father’s Day Craft Essentials


9. AIR DRY CLAY DECORATIONS

These sweet decorations will bring a smile to Dad’s face every time he sees them. For younger children, the design can be kept straightforward and simple lettering, with older age groups adding complexity to their designs with messages, carving decorations or clay beads.

To make, simply roll out a slab of air-dry clay and use cookie cutters  or free-form tools to cut out your desired shape. Set aside to dry for 24 to 48 hours on a flat surface. Meanwhile, to make the beads, roll small chunks of clay , silk clay  or paper magiclay  in the palm of your hand to form small beads. Poke each bead with a skewer all the way through, making sure the hole is wide enough to thread cord or string through and then set aside to dry with the decoration. When the clay is firm to the touch it’s ready for painting. When your decorations are dry once again, they’re ready for stringing together – remember to tie them off well to keep those beads from rolling away!

*TOP TIP – The thicker your decorations are, the sturdier they will be able to withstand general wear and tear. A few coats of PVA glue will also provide strength to your decorations for added longevity.


Featured products;

Creatistics Air Dry Clay Ceramic Clay – (one packet does about 8 little hands)

Glass & Ceramic Paint

Creatistics PVA Washable School Glue

Silk Clay Kit

Candy Colours Paper Magiclay 

Leather Cord


Whether it’s a Dad, Grandpa, Stepdad, Brother or a cherished father figure you’d like to spoil, MTA has you covered with all sorts of treasures waiting to be personalised with your love.


*All these activities can be modified and adapted to suit different age groups, taking away small parts for children under 3 years of age and replacing them with larger safe parts. Where scissors are used, educators may use adequate supervision to suit the needs of the children or offer pre-cut shapes. Where glue guns are used, educators may substitute with a safer alternative such as washable PVA glue.


Which one is your favourite?


Blog Home> 

Shop MTA>


Posted on

7 STEAM-tacular activities to celebrate sports

STEM Sports blog_header

If you’re looking for ways to make STEAM education as thrilling as a sprint to the finish line, you’ve come to the right place. We’ve crafted seven hands-on activities that will have your students thinking like engineers, creating like designers and competing like champions – inspired by the spirit and excitement of sport!

Each activity is a blend of creativity, teamwork and scientific exploration. You’ll have your students calculating trajectories, experimenting with physics and learning about the principles of design – all while having a blast. Ready to ignite the torch of curiosity?

Get your game face on. It’s time to teach, learn and play like champions!


1. High jump STEAM activity


 High jump stem activity


Using nothing but paper cups and rubber bands, participants will engineer their own innovative solutions to launch cups to impressive heights, combining creativity and physics in this engaging hands-on experience.


You’ll need:

Eco Paper Cups

https://www.teaching.com.au/product/white-eco-paper-cups-8oz-8211-pack-of-50

Geoboard Rubber Bands

https://www.teaching.com.au/product/rubber-bands-for-geoboards-240-pcs

Glue-on Eyes

https://www.teaching.com.au/product/large-glue-on-eyes-3-sizes-8211-pack-of-300

Gloss Coloured Paper

https://www.teaching.com.au/product/gloss-paper-circles-18cm-8211-pack-of-360

Strong Craft Glue

https://www.teaching.com.au/product/creatistics-strong-craft-glue-118ml

Scissors


Let’s make it!

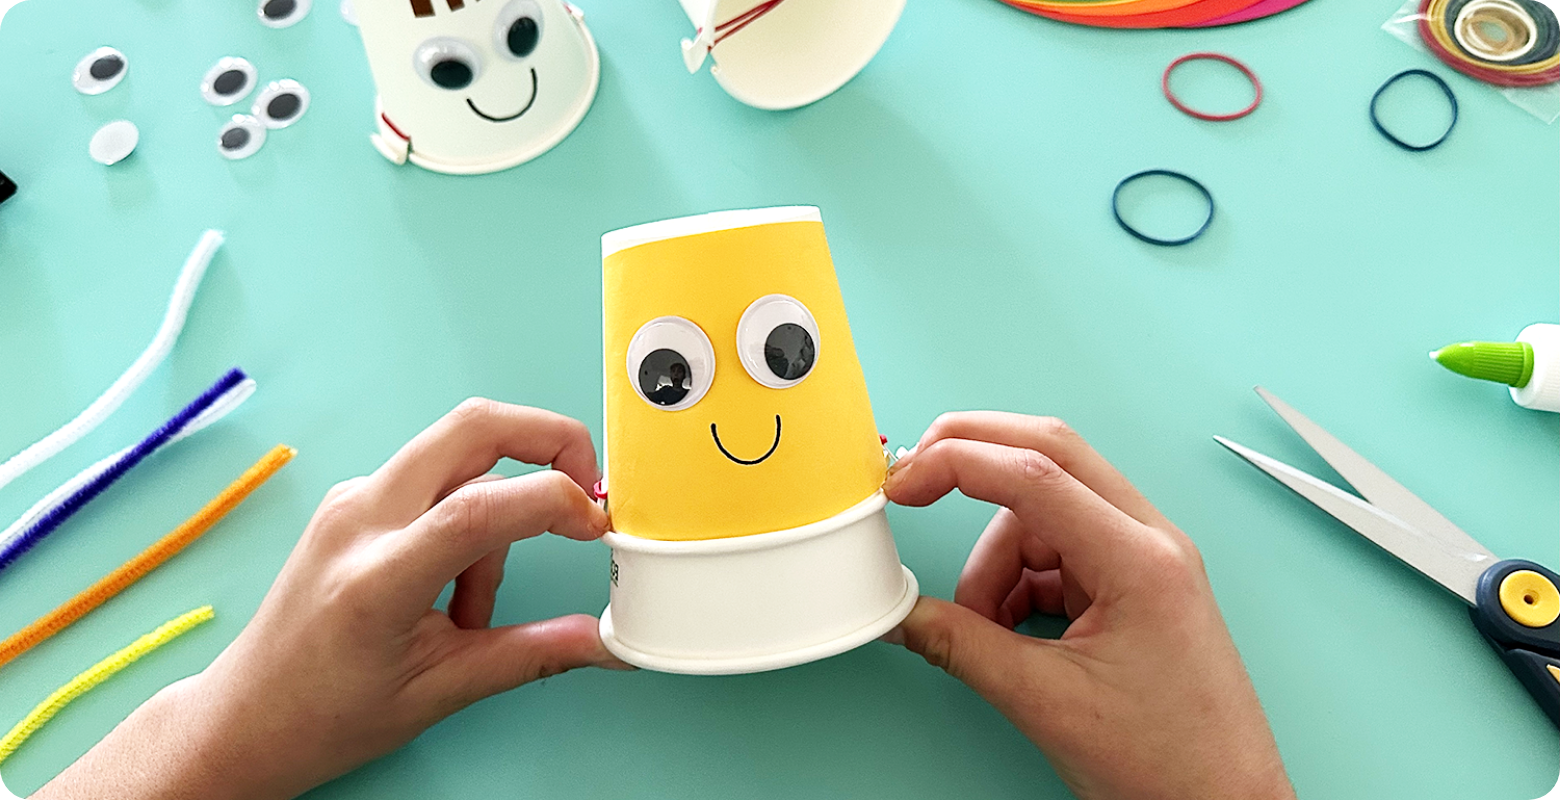
1. Use scissors to cut two slits into the paper cup rim, roughly 1 cm in length and 1.5 cm apart. Repeat this step directly across from the other two slits. You’ll now have two ‘notches’ to hold the rubber band. This is your high jump contestant.

2. Decorate your high jump contestant with coloured paper, markers etc. Finish off with two glue-on eyes and set aside to dry.

3. Place your contestant on the table in front of you with the opening facing you. Take a rubber band and loop it around one of the notches, twist once and loop around the other notch.

4. Take another cup, turn it upside down on the table in front of you.

5. Gently slide your high jump contestant over the other cup. Hold on tight! You’ll feel the resistance of the rubber band wanting to let go.

6. Let go of the top cup and watch it jump up high!


Done! Your high jumper is ready to compete.


*TOP TIP – Experiment with the different sized rubber bands (diameter and thickness) to experiment with different tension levels, finding the perfect balance between elasticity and power to propel your athlete to greater heights with precision and control.


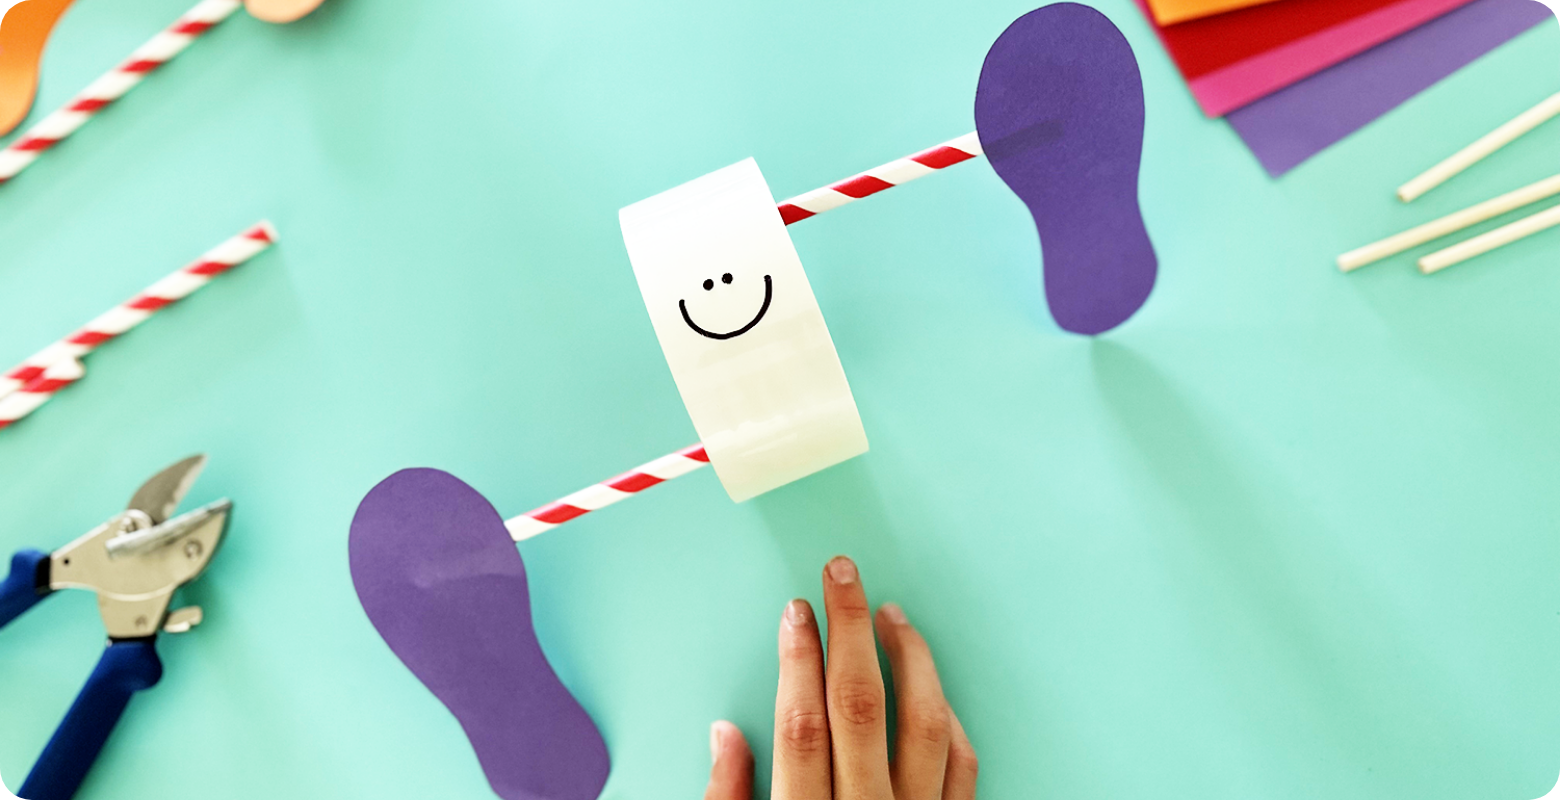
2. 100 m dash STEAM activity


100m stem activity


Step up to the starting line with the 100 m dash challenge! Using simple materials like packing tape rolls, wooden dowels and paper straws, create feet that’ll sprint their way to the finish line! Decorate your runner in team colours, mark out a course… take your mark, get set and go!


You’ll need:

Wooden Dowels

https://www.teaching.com.au/product/teachergeek-accessories-8211-dowels-8211-300x5mm-8211-set-of-50

Multi Cutter

https://www.teaching.com.au/product/teachergeek-8211-multi-cutter-only

Clear Packing Tape (or thick cardboard to make a tube)

https://www.teaching.com.au/product/sellotape-packaging-tape-757-48mm-x-75m

Paper Straws

https://www.teaching.com.au/product/assorted-paper-straws-8211-pack-of-500

Coloured Paper (QL90190)

https://www.teaching.com.au/product/hot-amp-cold-coloured-paper-a4-80gsm-8211-pack-of-500

Sticky Tape

https://www.teaching.com.au/product/sellotape-pack-tape-dispenser-2-rolls-tape

Scissors


Let’s make it!

1. On coloured paper, draw the outline of shoe prints (or trace your own shoes or feet). Use scissors to carefully cut out the shapes.

2. Place the two shoe prints in front of you like you would to put on a pair of shoes. Cut a paper straw in half and tape one straw half to each foot, roughly 1/3 of the way down the foot just below the big toe. The other two straw ends will stick out in the middle of the feet.

3. Cut a wooden dowel in half to make two short wooden dowels. Tape one end of each dowel to a roll of packing tape’s inner tube. Make sure the dowels are at opposite ends of the inner tube (you can also make your own cylinder tube from strong cardboard, PVC pipe off cuts etc).

4. Slide the two paper straws over the dowels (sticky tape side facing down). Give the roll of tape a gentle push and watch those feet run!


Done! Your athlete is ready for the 100 m dash.


*TOP TIP – For optimum performance, ensure the feet are securely taped to the straws, and the wooden dowels securely attached to the packing tape roll to avoid wobbling during the dash, guaranteeing a smoother race experience.


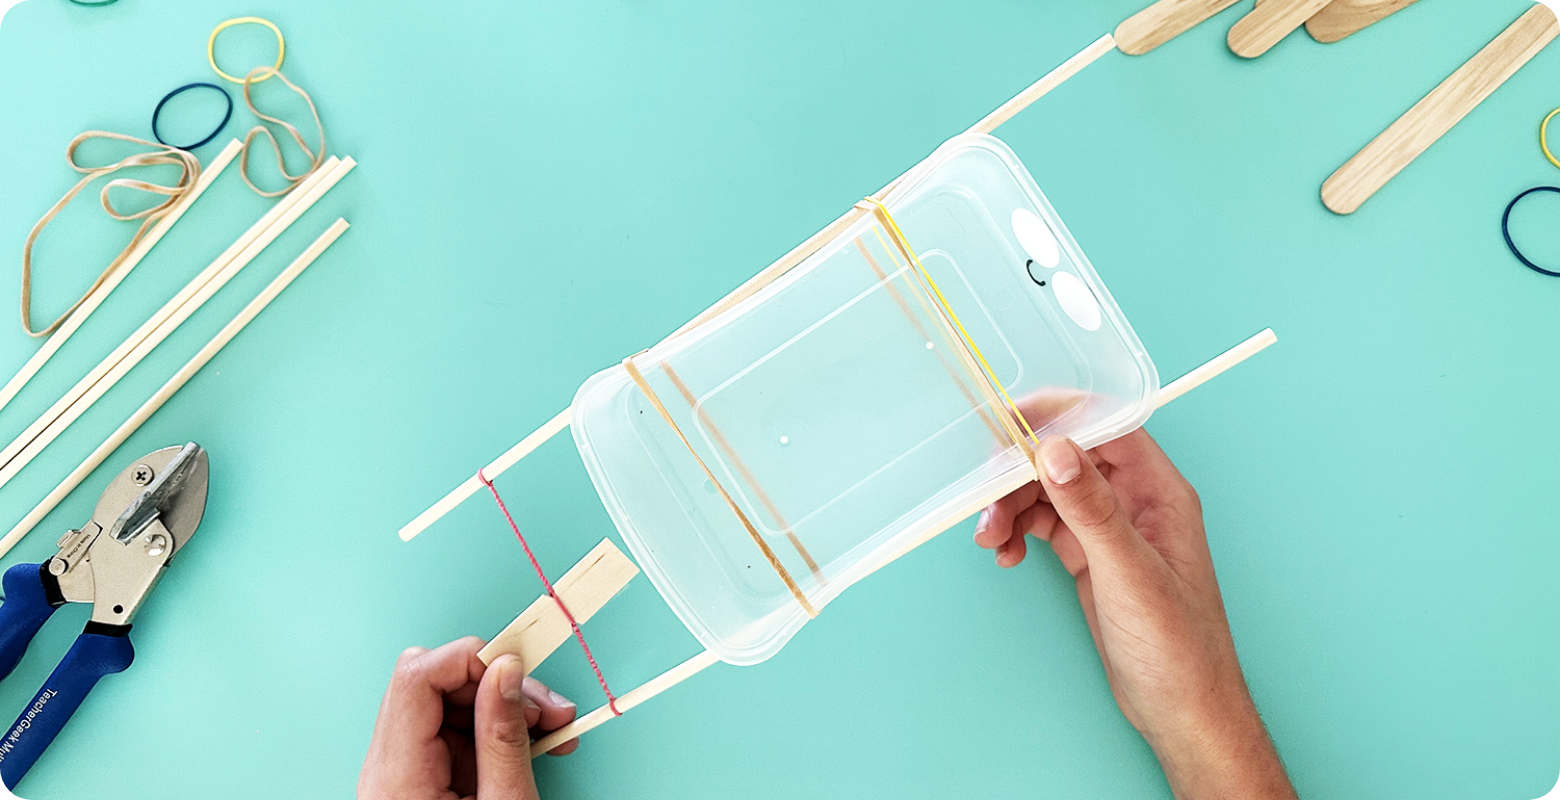
3. Swimming race STEAM activity


Swimming stem activity


Students craft their own aquatic athlete using a plastic take away container, wooden dowels, rubber hands and pop stick paddle, immersing themselves in the principles of engineering and fluid dynamics as they compete in epic swimming challenges.


You’ll need:

Plastic takeaway container (rectangle)

Wooden Dowels

https://www.teaching.com.au/product/teachergeek-accessories-8211-dowels-8211-300x5mm-8211-set-of-50

Thick Rubber Bands – size 35

https://www.teaching.com.au/product/teachergeek-accessories-8211-dowels-8211-300x5mm-8211-set-of-50

Thin Rubber Bands – size 14

https://www.teaching.com.au/product/rubber-bands-size-14-100gm

Jumbo Pop Sticks

https://www.teaching.com.au/product/jumbo-pop-sticks-8211-pack-of-100

Multi-cutter

https://www.teaching.com.au/product/teachergeek-8211-multi-cutter-only

Joggle Eyes

https://www.teaching.com.au/product/large-glue-on-eyes-3-sizes-8211-pack-of-300

Permanent Markers

https://www.teaching.com.au/product/permanent-markers-bullet-tip-assorted-colours-8211-pack-of-12

Tacky Glue

https://www.teaching.com.au/product/tacky-craft-glue-8211-125ml


Let’s make it!


1. Using a thick rubber band, wrap two wooden dowels onto the takeaway container, one on each side. Wriggle the rubber band in place towards one end. Place another rubber band on the other end of the container binding the dowels in place for balance.

2. Wrap a thin rubber band around two ends of dowel to hold the paddle.

3. To make a paddle, use the multi-cutter to shorten a jumbo pop stick to roughly 6 cm in length (a few notches cut into the middle on both sides will help guide winding too). Place the paddle in the middle of the thin rubber band and wind around and around, tightening the rubber band. Hold on tight! You’ll feel the tension of the swimmer ready to go!

4. Gently place the swimmer into the water, let go and off it goes!

Done! Your swimmer is ready to compete.


*TOP TIP – For improved stability and streamlined motion, balance the weight distribution of your swimmer by adjusting the positioning of the wooden dowels and pop stick paddle, optimising performance and reducing drag for a faster swim.


4. Yacht regatta STEAM activity


Yacht Stem activity


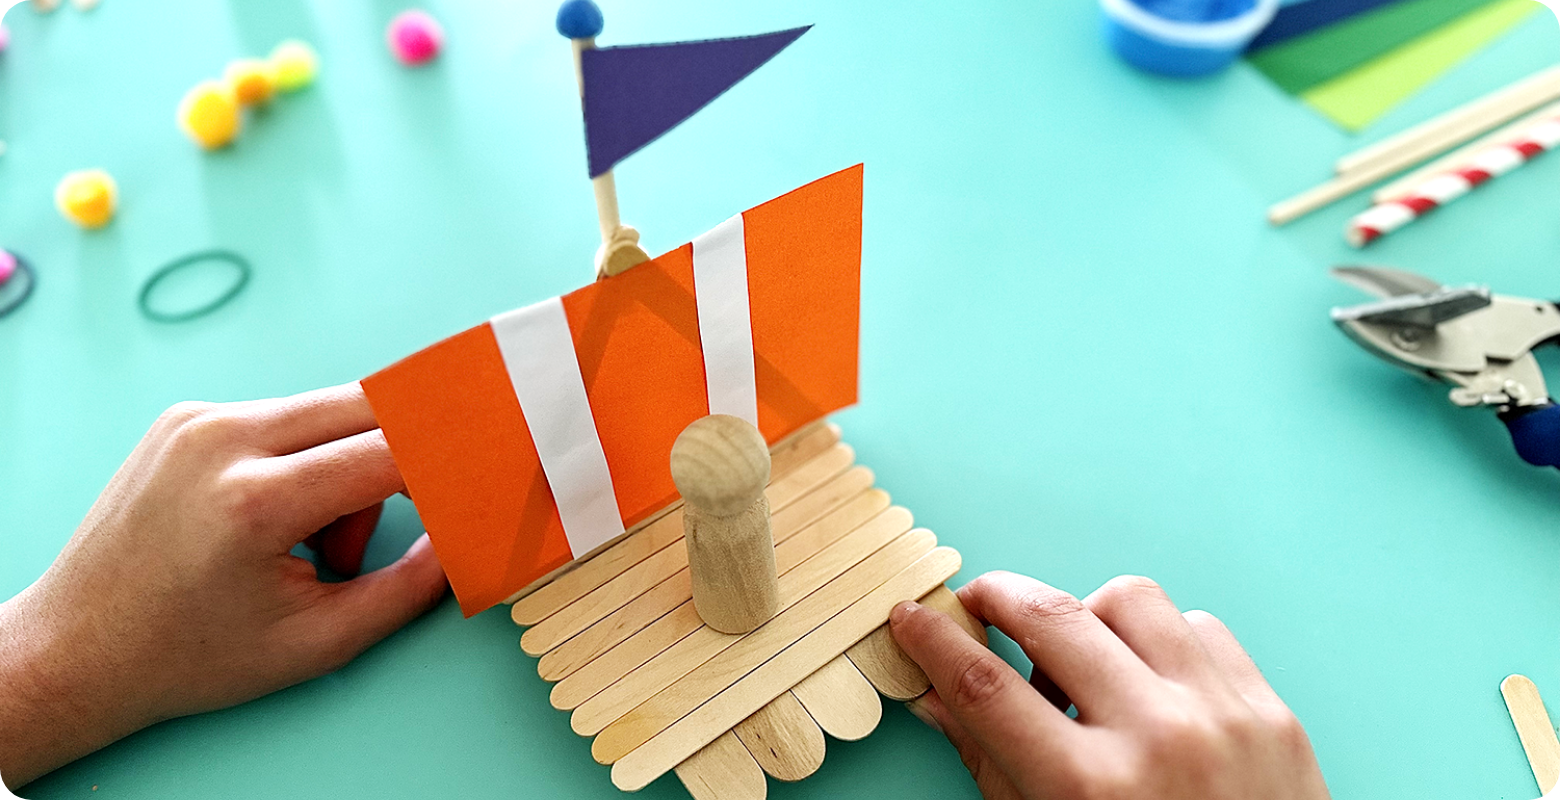
Using an array of simple construction materials, participants will engineer their own miniature floating boats, competing in an exciting regatta that blends imagination with hands-on craftsmanship. Let’s set sail!


You’ll need a variety of loose parts for children to assemble. Choose from:

Aluminium Foil

https://www.teaching.com.au/product/foil-roll-with-dispenser-44cmx150m

Coloured Cover Paper

https://www.teaching.com.au/product/coloured-cover-paper-a4-120gsm-8211-pack-of-500

Cork Sheet

https://www.teaching.com.au/product/cork-sheet-8211-30x25x0-2cm-8211-each

Glue Gun

https://www.teaching.com.au/product/mini-glue-gun-8211-low-temperature

Strong Craft Glue

https://www.teaching.com.au/product/creatistics-strong-craft-glue-118ml

Masking Tape

https://www.teaching.com.au/product/sellotape-masking-tape-18mm-x-50m

Paddle Pop Sticks

https://www.teaching.com.au/product/paddle-pop-sticks-coloured-8211-pack-of-1000

Paper Cups

https://www.teaching.com.au/product/white-eco-paper-cups-8oz-8211-pack-of-50

Rubber Bands

https://www.teaching.com.au/product/rubber-bands-size-14-100gm

Sponges

https://www.teaching.com.au/product/durafresh-scour-8216-n-8217-sponge-8211-pack-of-5

Sticky Tape

https://www.teaching.com.au/product/sellotape-pack-tape-dispenser-2-rolls-tape

Washi Tape

https://www.teaching.com.au/product/washi-tape-arty-8211-set-of-8

Wooden Dowels

https://www.teaching.com.au/product/teachergeek-accessories-8211-dowels-8211-300x5mm-8211-set-of-50

Magiclay

https://www.teaching.com.au/product/paper-magiclay-candy-colours-8211-240g-pack

Take away containers (rectangular and circular tubs)

Plastic bottles

Scissors


Let’s make it!

1. Gather your materials – you’ll need an array of construction items to create the three main components of your boat – a base (hull), a mast and a sail.

2. Use a glue gun or strong glue to adhere the components together. Set aside to dry.

3. Test your boat by placing in water and watching it float. Adjust the sail and weight distribution as needed to improve stability and speed.


Done! Your boat is ready to complete in the yacht regatta.


*TOP TIP – For optimal performance, ensure that the weight distribution of your yacht is balanced by adjusting the placement of materials, to allow for smooth sailing and maximum speed during the regatta.


5. Shot put launcher STEAM activity


Shot put stem activity


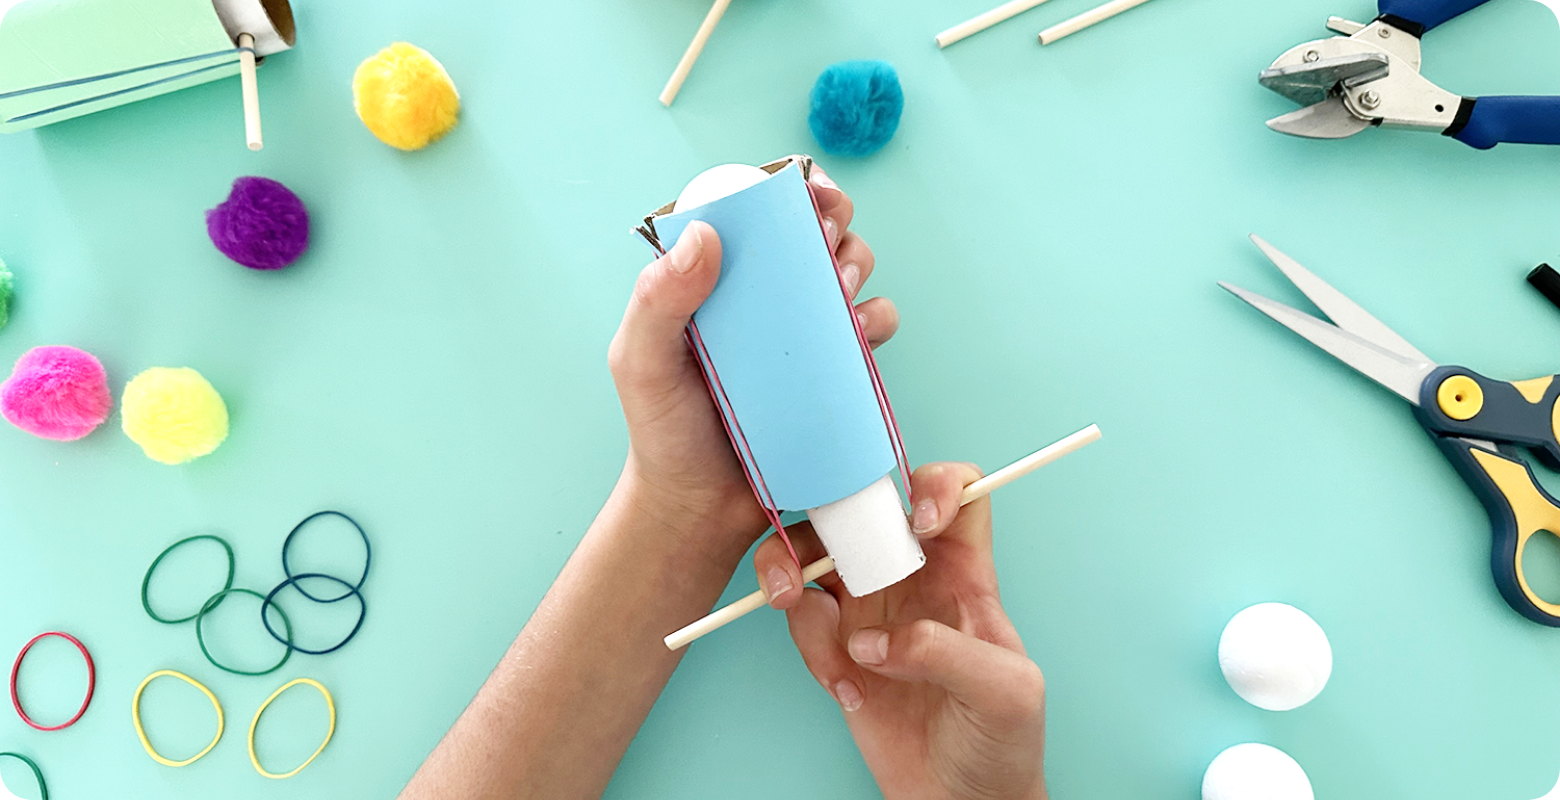
Crafted from a few simple supplies, the cardboard roll shot put launcher is sure to be a hit. It combines the thrill of physics and engineering principles. Students will dive into concepts like force, trajectory, and energy transfer as they experiment with different-sized inner tubes and launch all sorts of projectiles—table tennis balls, pom-poms, polystyrene balls, and more.


You’ll need:

Wooden Dowel

https://www.teaching.com.au/product/teachergeek-accessories-8211-dowels-8211-300x5mm-8211-set-of-50

Multi-cutter

https://www.teaching.com.au/product/teachergeek-8211-multi-cutter-only

Rubber Bands – size 14

https://www.teaching.com.au/product/rubber-bands-size-14-100gm

Assorted Cardboard Tubes

https://www.teaching.com.au/product/cardboard-tubes-assorted-8211-pack-of-60

OR

Cardboard Rolls

https://www.teaching.com.au/product/cardboard-roll-8211-pack-of-36

Masking Tape

https://www.teaching.com.au/product/sellotape-masking-tape-18mm-x-50m

Large Cotton Balls

https://www.teaching.com.au/product/cotton-wool-balls-100g

Neom Pom Poms, assorted sizes to experiment

https://www.teaching.com.au/product/neon-pom-poms-assorted-sizes-8211-pack-of-150

Large Pom Poms

https://www.teaching.com.au/product/pom-poms-assorted-colours-38mm-8211-pack-of-50

Table Tennis Balls

https://www.teaching.com.au/product/school-table-tennis-balls-pack-of-6

Polystyrene Balls

https://www.teaching.com.au/product/polystyrene-ball-8211-white-8211-38mm-8211-pack-of-10

Single Hole Punch

https://www.teaching.com.au/product/paper-punch-one-hole

Teacher Scissors

https://www.teaching.com.au/product/westcott-20cm-titanium-point-non-stick-scissors


Let’s make it!

1. From the assorted cardboard tubes, take the second largest size OR use scissors to cut a regular cardboard tube lengthways (CL9821), squeeze the two loose edges over each other, overlapping to make a thinner tube. Tape to hold in place.

2. Use the single hole punch to punch two holes into the thinner tube opposite one another, roughly half an inch from one end.

3. Cut a wooden dowl in half and push through one hole, through the middle of the thinner tube until the dowel’s ends sit evenly out both holes.

4. On the largest sized assorted cardboard tube (or regular cardboard roll) cut two slits into one end of the tube roughly 1 cm long and 1.5 cm apart. Repeat this step on the same end, directly across from the other two slits. You’ll now have two ‘notches’ to hold the rubber bands.

5. Insert the narrow tube into the larger tube – the notches at the top of the large tube and the smaller tube with the dowel poking out the bottom.

6. Loop a rubber band into one of the ‘notches’, pulling the rubber band down the outer side of the tube and loop over one of the ends of the dowel. Repeat this step with another rubber band on the other side of the cardboard tube.

7. Hold your launcher with the dowel at the bottom and place a cotton wool ball in the top of the launcher so that it rests just on top of the narrow tube.

8. You’re ready to launch! Gently pull back on the dowel so that the inner tube extends out the back of the launcher and aim…

9. Release the dowel and watch the cotton ball fly!


Done! Your shot put launcher is ready to compete.


*TOP TIP – Foster creativity by decorating your launcher with paint, markers or embellishments – compete individually or together with team colours!


6. Basketball shootout STEAM activity


Basketball stem activity


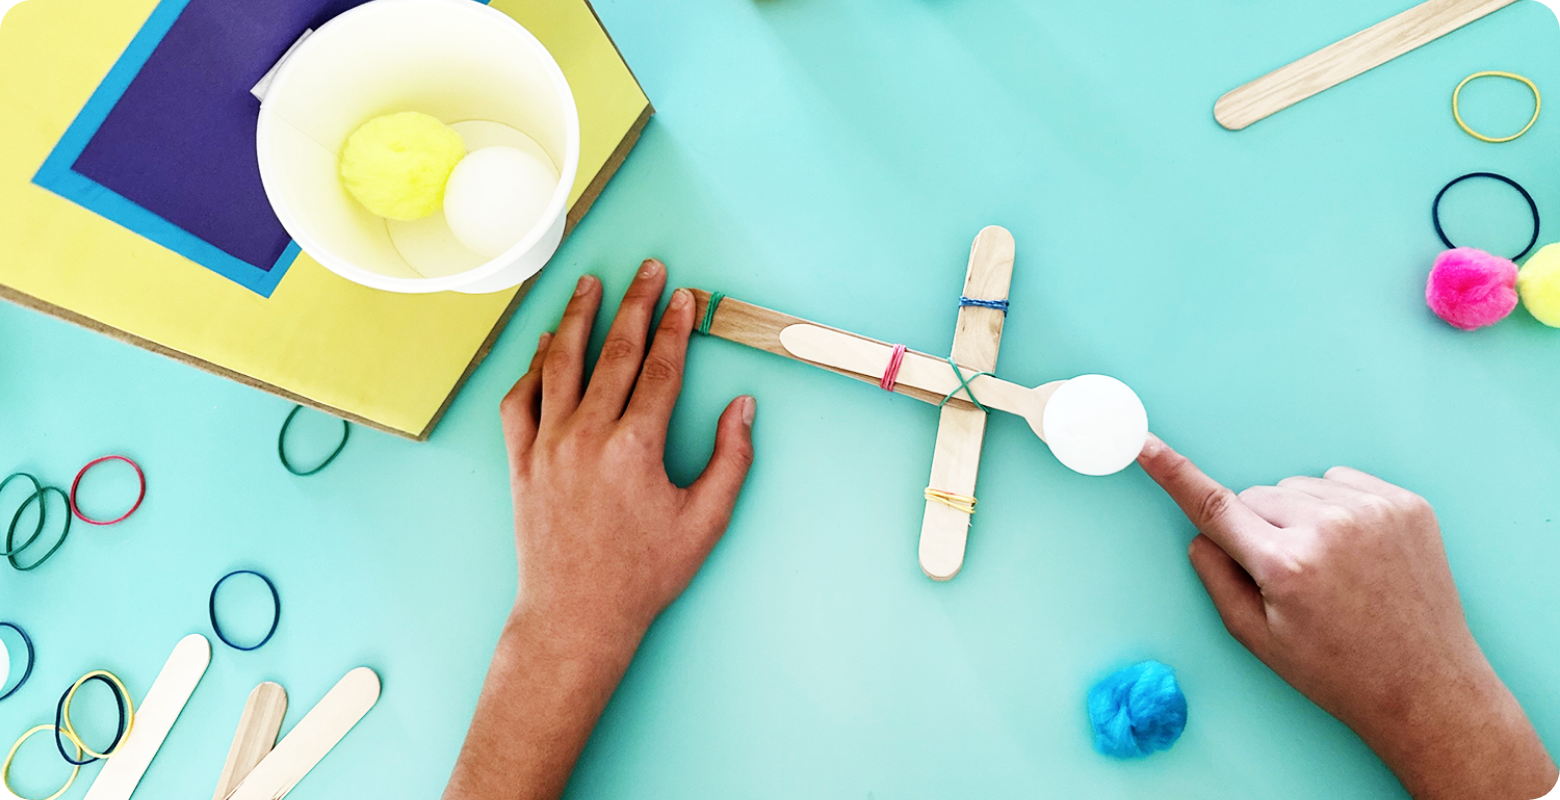
Create a thrilling basketball shootout game with pop sticks, a wooden spoon and rubber bands. Challenge your friends to hit the paper cup basket while exploring the concepts of force, angles and trajectory. Let the friendly competition begin – may the best engineer win!


You’ll need:

Jumbo Pop Sticks

https://www.teaching.com.au/product/jumbo-pop-sticks-8211-pack-of-100

Rubber Bands – size 14

https://www.teaching.com.au/product/rubber-bands-size-14-100gm

Eco Wooden Spoons

https://www.teaching.com.au/product/eco-wooden-spoon-160mm-8211-pk-100

Eco Paper Cups

https://www.teaching.com.au/product/white-eco-paper-cups-8oz-8211-pack-of-50

Table Tennis Balls

https://www.teaching.com.au/product/school-table-tennis-balls-pack-of-6

Polystyrene Balls

https://www.teaching.com.au/product/polystyrene-ball-8211-white-8211-38mm-8211-pack-of-10

Masking Tape

https://www.teaching.com.au/product/sellotape-masking-tape-18mm-x-50m

Small cardboard box


Let’s make it!

1. Place two jumbo pop sticks together, one on top of the other, and secure together with a rubber band roughly 2 cm from each end.

2. Slide an eco-spoon over the top of the two joined pop sticks, roughly halfway down, and under one of the rubber bands to hold it in place. Make sure the spoon is facing up to hold the ball.

3. Take seven more jumbo pop sticks and stack them on top of each other. Secure both ends with rubber bands, roughly 2 cm from each end.

4. Hold the two pop sticks with the wooden spoon in one hand and use the other hand to slide the seven-pop stick stack under the spoon and jamming it between the two pop sticks. Secure in place with another band if needed.

5. Use masking tape to adhere a paper cup to a small cardboard box and place in front of you nearby. You’re ready to shoot your basketball! You can also add multiple cups to a larger box with score points for an even more challenging shootout.

6. Place a table tennis ball on the spoon and gently pull the spoon back, aim and shoot!


Done! You’re ready to compete.


*TOP TIP – Experiment with different balls to launch including large pom poms or 3.8 cm polystyrene balls to see which go higher and longer. You can also add multiple paper cups to a larger box, adding points to score depending on which ‘basket’ your ball lands in.


7. Balancing gymnast STEAM activity


gymnast stem activity


Discover the fun of physics as students craft a balancing gymnast using only pop sticks, wooden pegs and pipe cleaners. Watch as the gymnast balances on a wooden spoon, demonstrating principles of centre of gravity and equilibrium. Children will marvel at the science behind the perfect balance and have a blast with every wobble and tilt!


You’ll need:

Jumbo Pop Sticks

https://www.teaching.com.au/product/jumbo-pop-sticks-8211-pack-of-100

Eco Wooden Spoons

https://www.teaching.com.au/product/eco-wooden-spoon-160mm-8211-pk-100

Pipe Cleaners

https://www.teaching.com.au/product/multicoloured-pipe-cleaners-6mmx300mm-pack-of-100

Wooden Pegs

https://www.teaching.com.au/product/wooden-pegs-8211-pack-of-48

Washi Tape, to decorate

https://www.teaching.com.au/product/washi-tape-arty-8211-set-of-8


Let’s make it!

1. Twist two pipe cleaners around each other to create one thick pipe cleaner.

2. Wrap the pipe cleaner around one end of a pop stick and twist the pipe cleaner tightly in place.

3. Place a wooden peg at the two ends of the pipe cleaner (and add some colourful washi tape to give your gymnast some flare).

4. Hold an eco-wooden spoon in front of you and place the gymnast onto the spoon with the pipe cleaner and pegs dangling close to the spoon.

5. Test out the balance, shifting the pipe cleaner and wooden pegs a little at a time until the balance is spot on.


Done! Your gymnast is ready to compete!


*TOP TIP – Ensure the pipe cleaner arms/legs are evenly spaced and symmetrical to achieve the best balance on the wooden spoon. Be patient! It will take time adjusting here and there until you get it spot on.


Congratulations on transforming your classroom into a STEAM hub of sporting fun. As you continue to ignite the torch of knowledge, may your classroom radiate brilliance like a true champion. We look forward to seeing your students shine at the next event! Tag @modernteaching so we can join in!


Blog Home>

Shop MTA>

Posted on

6 hands-on sensory tray activities you’ll LOVE

Hex Tray Blog Header

Bring on the tray play! Versatile, engaging hex trays give children endless learning possibilities. Also known as a tuff tray or sensory table, the humble hex tray is an open-ended, moulded plastic tray typically in a natural sand colour with a hexagonal shape inspired by the shape of honeycomb (you can also get a charcoal hex tray). 


Why tuff trays are a crowd favourite 


These trays are great for both indoor and outdoor use. (Our ‘hex tray’ features UV-stable plastic which is fade resistant). Use it on a tabletop, on the floor or with a metal stand. Add playmats (textures, roadway, rainbow, chalkboard) or bring your own imagination to the table!!! Self-contained hex trays make the perfect platform for messy play, small world play, sensory exploration and nature play. We’re looking at sensory exploration in this blog as it’s such an important part of early childhood development, allowing children to explore using their senses of touch, sight, smell, hearing and sometimes taste! Hex trays are ideal for creating sensory experiences due to their shallow compartments and ability to contain various materials including water (keep a towel or two handy)! Let’s dive into our sensory activities. 


Explore the deep blue sea 


Transform your tray into a mini underwater world. Some important days in the calendar give you a great reason to make a splash! World Reef Awareness Day on 1st of June is focused on protecting the world’s coral reefs. Then World Oceans Day will be celebrated on 7th of June this year to raise awareness about the critical role our oceans play in sustaining life on Earth. These days give you a wonderful opportunity to teach about our world’s shared oceans and our personal connections to the sea. Fill compartments with blue-tinted water, add sea creatures, shells and stones. Encourage children to explore marine life, discuss ocean habitats and learn about sea creatures’ characteristics. Introduce concepts of buoyancy, sink and float, and understanding of the marine ecosystem. 


Activity 1: Sensory ocean tray 

In this messy play experience, we combine small world wonder with elements of STEM magic. 


Ocean Hex tray


You’ll need:   

Hex Tray & Stand (SUN201K)  

Blue Craft Dye (EC102)    

Ocean Counters (LER0799)   

Watercolour Sponges (NAR089)   

Plastic Slip Syringe (SER1016003)   

Grassy Stones (TH9130)   

Transparent Shells (GUW8081)   

Zip lock bags (sandwich size)   

Muffin pan or freezer-safe bowls   

Shaving Foam  

Bicarbonate of soda  

Vinegar  


Let’s make it!   

  •  Add a few ocean counters to a zip lock bag and fill with water. Secure tightly and lay flat in the freezer until frozen solid. Repeat for desired quantity.
  • Add ocean counters to a muffin pan (or bowl) and fill each section with water. Carefully place in a freezer until frozen.
  • Shake 2 x 1kg boxes of bicarbonate of soda into the hex tray.
  • Time to set the scene! Arrange the transparent shells, remaining ocean counters and grassy stones in the hex tray.
  • Remove the muffin pan from the freezer and let sit for several minutes; the ice shapes should slip out easily now, and to the hex tray scene.
  • Remove the frozen sandwich bags from the freezer, carefully remove the bag from the ice, discard the bag safely and add the ice bricks to the hex tray scene.
  • Add a splash of blue craft dye to a jug of water and gently pour into the hex tray over the bicarbonate of soda.
  • Add desired amount of shaving foam into the hex tray.
  • Add a few cups of vinegar (we used double strength) into a bowl accessible for children to fill syringes with and squirt into the water. Done! You’re ready to explore.


TOP TIP – If you’re enjoying this messy play experience indoors, keep a towel nearby for quick clean ups as the morning/afternoon progresses.  


Celebrate World Environment Day 


This event on the 5th of June has become the largest global platform for environmental outreach. Join the movement! Use your hex tray to explore climate, weather patterns, global warming, animal habitats, marine pollution, overpopulation, sustainable development, wildlife and plant life. Create a miniature landscape representing different climates, from deserts to rainforests. Use natural materials like sand, moss and small plants to illustrate ecosystems. Discuss the importance of preserving the environment and the role each child can play in conservation efforts. 


Activity 2: Wonderful world sensory tray 

Create a small world sensory tray with creatures great and small roaming the earth! 


  World Environment day Hex tray


You’ll need:   

 Hex Tray & stand (SUN201K)  

 All Weather Magnifying Glasses (GC4600)  

 Blue Magic Sand (CS1501)  

 Green Magic Sand (CS1502)  

 Natural Magic Sand (CS1500)  

 Cocoa  

 Straw/hay  

 Animal & insect figurines   

 Pebbles (PNP055)  

 Pine leaves (SH9512)  

 Wooden farm fence (LB0021)  


Let’s make it!  

  •  To make the ‘soil’, add ½ cup of cocoa to the natural-coloured magic sand and give it a good mix through.  
  • Add all the different coloured sand and straw to the hex tray (we’ve sectioned the tray into wild animals, domesticated animals, ocean animals and insects, with each different coloured surface representing the land, sea, grass, and farm.  
  • Create a happy habitat by adding rocks and plants etc. to form a small world scene. Get creative! You might have some shells or flowers etc. on hand to add different colours, textures, and aromas.  
  • Carefully place the animals into their habitats along with magnifying glasses and you’re ready to play!  


Extension:  

Sensory Stories: Use your tray table as a storytelling prop for sensory narratives. Fill compartments with materials representing elements of a story about our world, such as cotton balls for clouds, blue water beads for the sea and small figurines for characters or animals. Encourage children to engage in imaginative play as they manipulate the sensory elements to retell the story or create their own narratives. 


Sensory nature play  


Using found objects in nature for sensory exploration is awesome, particularly in autumn and winter! Fill compartments with vibrant leaves of various shapes and colours. Encourage children to touch, feel and sort leaves based on texture, size and colour. Stimulate senses and promote descriptive language as children engage in tactile experiences with nature’s seasonal beauty. Explore the textures, scents and colours of each of nature’s treasures. 


Activity 3: Nature sensory tray 

Bold colours in autumn and winter offer an enticing invitation for children to explore. 


Nature Hex Tray


You’ll need:  

Hex Tray & stand (SUN201K) 

5kg bag of white rice 

Red vegetable dye (AFS126) 

Yellow vegetable dye (AFS140) 

Baking trays  

Baking paper 

Large zip lock bags 

Branch cut circles (TH0030) 

Pine Cones (TH0020) 

Natural leaves (TH0040) 

Insect counters (TEB6013) 

Masking Tape (DP0504) 

All-Weather Jumbo Tweezers (GC4604) 

All-Weather Magnifying Glasses (GC4600) 

Eco paper cups (JM850) 


Let’s make it!  

  • Add coloured rice to the bottom of the hex tray and decorate with the natural resources, leaves and insect counters.  
  • Adhere lengths of masking tape over the top of the tray, creating a maze for children to work through.  
  • Place a pair of tweezers, magnifying glass and paper cup at each station for children to search and collect objects. Done! You’re ready to explore.  


How to colour rice:  

  • Add 4 cups of uncooked white rice to a large zip lock bag.  
  • Mix desired amount of vegetable dye powder with 1 tablespoon of vinegar and dump into the bag.  
  • Seal the bag well, then shake it around until the rice is coated in colour.  
  • Pour the coloured rice onto a baking tray lined with baking paper and spread out evenly. 
  • Leave to dry thoroughly for a day or so depending on the weather. To speed up drying time stir the rice around on the tray a few times to ensure air can access each grain as it dries, or place in the sun etc.  


TOP TIP – If children are helping to shake the bag of coloured rice, it can be a good idea to double bag (place the sealed zip lock bag of rice into another zip lock bag and seal again). 


Bring early literacy to life 


Transform your hex tray into a literacy wonderland to support phonics and early reading skills. Fill compartments with letter tiles, phonics cards or literacy manipulatives. Engage children in hands-on activities to match letters, form simple words and explore letter-sound relationships. Encourage storytelling and imaginative play to enhance language development and literacy comprehension. 


Activity 4: Alphabet fishing sensory tray 

With this tactile activity, children will be reeling in their alphabet catch in no time. 


Alphabet Hex tray


You’ll need:  

Hex Tray & Stand (SUN201K)  

Cotton Sensory Sand 6kg (EC234-6) 

Magnetic Letters (QT5452) 

Fishing Rods (ZZ001S) 


Let’s make it!  

  • Tip the cotton sensory sand into the hex tray and spread evenly. 
  • Evenly spread desired number of magnetic letters over the sand.  
  • Place the fishing rods around the outside of the hex tray, inviting children to fish a letter. Done! You’re ready to explore.  


TOP TIP – Younger children developing their hand eye coordination might enjoy working with magnetic wands to fish out the magnetic objects.  


Colour sorting & sensory exploration  

Use your tuff tray to introduce the concept of colour recognition and sorting. Fill compartments with an array of colourful objects such as buttons, beads or pom-poms. Prompt children to sort objects by colour, count each group and discuss colour shades and variations. Foster cognitive development and early mathematical concepts through hands-on colour exploration activities. 


Activity 5: Colour sorting sensory tray  

This tray activity combines tactile exploration with classification skills and fine motor dexterity. 


Colour sorting Hex tray


You’ll need: 

Hex Tray & Stand (SUN201K) 

Sorting Bowls & Tweezers Set (TEB6332) 

Sea Life Counters (TEB6012) 

 Vegetable Dye 

Assorted Pom Poms (SH1374)  

Popping corn 

Jar/jug 

Baking tray 

Baking paper  

Water 

Vinegar  

Measuring cups  

Measuring spoons 


Let’s make it!  

  • Add the coloured corn, pom poms and sea life counters to the hex tray.  
  • Place the matching Sorting Bowls & Tweezers around the 6 sides of the hex tray as ‘stations’ to invite children to collect the corresponding-coloured items. Done! You’re ready to explore. 


TOP TIP – The vinegar coats the colouring onto the corn evenly and acts as a preservative to stop the corn from spoiling. It’ll last for ages! When you do finally finish, why not try sprouting the kernels in the veggie garden!  


How to colour corn:  

  • Pour a 400g bag of popping corn into a large jar/jug (old coffee jars work well).
  • Add 1 cup of water and 1 cup of vinegar (or 1/2 cup of double strength vinegar). Add a little more water if needed to completely cover the corn in liquid. 
  • Add 1 tablespoon of vegetable dye/food colouring to the jar and give it a good stir.  
  • Leave to soak for 24 hours, pour into a strainer, and give a good rinse under the tap (the coloured water can be used for painting if desired).  
  • Pour the corn onto a baking tray lined with baking paper and leave in a warm sunny spot to dry thoroughly (stir the corn around to ensure all surfaces are dry) and then store in an airtight container/zip lock bag until ready to use.  


Extensions: 

Texture Play: Fill compartments with a variety of textured materials such as colourful sand, rice, pasta, cotton balls or kinetic sand. Encourage children to explore the textures using their hands or even their feet for a more immersive experience. Discuss the differences between smooth, rough, soft and hard textures, fostering descriptive language and tactile awareness. 

Calming activities: Create calming sensory experiences using soothing materials like lavender-scented rice, soft fabric scraps or water with a few drops of essential oil. Encourage children to engage in calming activities such as running their fingers through the rice or feeling the texture of the fabric, promoting relaxation and emotional regulation. 


Exploring pre-writing & First Nations symbols  


Activities that explore cultural perspectives are fantastic to incorporate into your tray time. Fill compartments with symbolic items like animal figurines, traditional artwork or Indigenous symbols. Encourage children to explore the significance of each symbol, engage in storytelling inspired by Indigenous culture and practise pre-writing skills by tracing symbolic patterns. Develop fine motor skills and cultural appreciation in an inclusive learning environment. 


Activity 6: First Nations symbols sensory tray 

This activity combines fine motor skills development with the exploration of literacy using Aboriginal symbols cards. 


First Nations Hex tray


You’ll need:  

Hex Tray & Stand (SUN201K) 

Red, Yellow and Black sand (EC706, EC708, EC701) 

Easi Grip Brushes (CS2566) 

Aboriginal Symbols Cards (RICA1302)


Let’s make it!  

  • Empty the 3 containers of coloured sand into your sensory tray and gently smooth out.  
  • Place an Aboriginal Symbols Card and Easi Grip Brush at each ‘station’ for children to recreate.  
  • Use the Easi Grip brushes (or fingers for tactile memory) to recreate the symbols.  
  • Enrich the experience using language. Talk about the symbols; what they look like (is the symbol created with wavy lines, circles, dots, curves etc.), what does each symbol represent (meeting place, water, animals etc.) Can you tell a story using the symbols? What symbols can you find in the learning environment? Done! You’re ready to explore. 


TOP TIP – Younger children will benefit from the chunky barrel of the Easi Grip Brushes while older students will find a thinner brush more comfortable to handle. 


And so over to you for tuff tray time! We’re so excited to know what activities you use your tray for to encourage sensory exploration, messy play and small world play in your centre. What’s your favourite activity? Which will you be trying first? 

We’ve pulled together all your MTA hex tray sensory and small world play essentials in this Wishlist. 


Blog Home>

Shop MTA>

Posted on

How to build the ultimate indoor play space in your kitchen corner

Pretend play blog header

Kids in the kitchen! 🌽🍳 Bringing play-based learning to life 


Children learn best through play. It’s a vital part of early childhood that encourages children to learn, develop and grow whilst having fun. In The Early Years Learning Framework, play-based learning is a central focus, and emphasises the intentional role of educators in enriching learning. (EYLF practice: Play-based learning and intentionality) 


Bringing a kitchen corner to life in your centre creates a stage for pretend play, role play and open-ended play that encourages imagination, language development, social interactions, sharing, as well as a sense of belonging and identity. A wonderful pretend play space allows educators to achieve EYLF outcomes such as: ‘Children are confident and involved learners; Children are connected with and contribute to their world’. So what are we waiting for? Time to whip up the ultimate indoor kitchen play space. 🍳 


Hot trends to look for in kitchen sets 


Trend: the real deal! 

They might be ‘pretend’, but the trend is for real-look play kitchens. This comes through in details such as soft close hinges, real tapware and contemporary materials. Love!! 


Trend: open furnishings 

Another trend is for open furnishings, allowing easy access to shelves and cooking play essentials! We love this, as it creates a visual feast that inspires play easily. 


Trend: modular 

Versatility is king with these new play spaces. Modular elements you can build and shape how you like to accommodate your space and move around to keep things fresh! 


Our top dream (play) kitchens… 


Coastal & cool  

This new Norwegia Spaces Coastal Kitchen Island & Bench Set has breezy fresh vibes for days. It leans into the trends with real taps and versatile kit elements (that also complement the Natural Spaces and other Norwegia Spaces ranges). Shop the set or the Bench and Island separately. 


8953_MulticulturalFood Set


Urban & awesome  

Urban chic, early childhood-style! This new Norwegia Spaces Urban Kitchen Island & Bench Set embraces the industrial look with its modern materials, black & white look and clean lines. Shop the set or the Bench and Island separately. 


Flexible & fun 


The Natural Spaces Open Play Kitchen Set of 4 is so versatile. We adore the open furnishings and modular aspect of this set that has a beautiful natural aesthetic! The set includes a kitchen bench, stove, sink and cupboard. Move them around however you like to inspire play! 


8953_NS Open PlayKitchen


Take a peek at the whole range: Kitchen & Home Corner Furniture 


Let’s get cooking! 

Now it’s time to stock up the cupboards and cook up some fun learning! We’ve handpicked 10 colourful food, health and nutrition sets to invite role play, conversation, open-ended play and group activities.  


1: Multicultural on the menu 


8953_MulticulturalFood Set 


Teach little ones respect for diversity and cultural responsiveness through role play & discussion with the Multicultural Food Set. It includes a Chinese Food Set, Japanese Food Set and Italian Food Set. Each set features food, plates, condiments and a menu. Each play food set is also available separately. 


2: Tuck into bush tucker 


Bush Tucker Resources


Play snap, read, prepare a pretend meal and chat about Aboriginal & Torres Strait Islander perspectives with this new Bush Food Kit. It’s focused on learning about traditional Aboriginal bush food in a tangible and fun way, encouraging role play while opening conversations about First Nations People and their culture. 


3: Teach about food allergies 


Food allergies resource


Help the little ones in your care learn about Food Allergies & Intolerances with this engaging card game. There are eight cards with food intolerances, 45 food cards, ambulance cards and more.  


4: Food bingo! 


Food bingo resource


For early literacy skills, association skills and critical thinking, you’ll love having a pack of Bingo (with 72 food items) in your kitchen corner. Each tile has an image on one side and a name on the other, so that children can practise learning associations with visual and verbal cues. There are flexible play options to suit children of various ages and abilities – match picture to picture; or word to picture. 


5: Match or sort the fruit & veggies 


Matching veggie resource


This new Fruit & Vegetable Match set lets little ones play and learn at the same time. There are 28 colour-printed wooden tiles, perfectly sized for small hands. Match the pairs, play a memory game or use the tiles to practise sorting food items: fruit vs veg; various colours; sweet vs sour vs savoury; seeds vs no seeds… it’s up to you! 


6: Learn about the food groups 


8953_The Food Group Book Pack


Potatoes, eggs or sour grapes?! Learn about food groups in a fun way with The Food Group Book Pack. This bestselling picture book series serves up a plate full of laughs, adventures and lessons with empowering and charming stories. There are seven books… from The Couch Potato to The Smart Cookie to The Big Cheese! 


7: What’s for breakfast? 


Get puzzling and prepare a yummy meal with My Breakfast Tray. This new tray from Andreu Toys will be so popular in your kitchen corner for pretend play. (Andreu Toys are committed to inclusive education, with a clear intention of promoting diversity). The wooden tray is served up with all its accessories, including toast, fried egg and more. Did someone say yum? 


8: Chop! Chop! Let’s hone those fine motor skills! 


Food cutting resource


With the Joseph Joseph Chopping Board Set, chop away with this licensed replica of Joseph Joseph’s colourful Chop2Pot folding chopping board. This fun set includes a safe-to-use Elevate knife and four pieces of ‘choppable’ food. It uses ChopPop™️ play food technology for safe play with no hook & loop fastenings or magnets in sight! 


9: Cake & coffee… let’s brew this!


Tea & coffee resource


With a cake mixer, tea set and coffee set in Melissa & Doug’s Wooden Appliances Sets, you can mix it up or cook up some mud pies! Melissa & Doug’s hand-crafted designs use durable wood and other specialist materials that are popular with educators and children alike. 


10: Wrap your food & nutrition learning up in a bow  


Nutrition Curriculum Kit


Get the cupboards ready! Our Nutrition Curriculum Kit will help you stock up on all the pretend play food you could need! You can also teach students about healthy eating in a hands-on way. There’s a huge set of play food that includes meat, breads, poultry, dairy, sweets and condiments. There’s a 36-piece container of fruits and vegetables, plus a wooden play food crate featuring the five food groups. The kit also includes a floor mat showing the healthy eating plate, with food cards and teacher notes. It’s such a valuable resource to teach about nutrition! 


Head here to see even more Play Foods & Home Corner ideas, 


Key food, nutrition & health dates for your calendar 

We know your little learners will use their play kitchen every day, but these annual days are a perfect time to delve deeper into the world of kitchens, health, nutrition and food! 

🥕 National Eat Your Veggies Day – 17 June  

🍓 National Nutrition Week – 16-23 October 

🥑 International Chef’s Day – 20 October 

🍇 More fun food days this year 


We can’t wait to hear how you create your play kitchen corner. Hungry to get started? We’ve pulled together everything here in this Wishlist.  


For a consultation or more inspo, check out the Brilliant Learning Spaces we support in early childhood. Oh, and download the inspirational Booklet for more ideas! 


Blog Home>

Shop MTA>