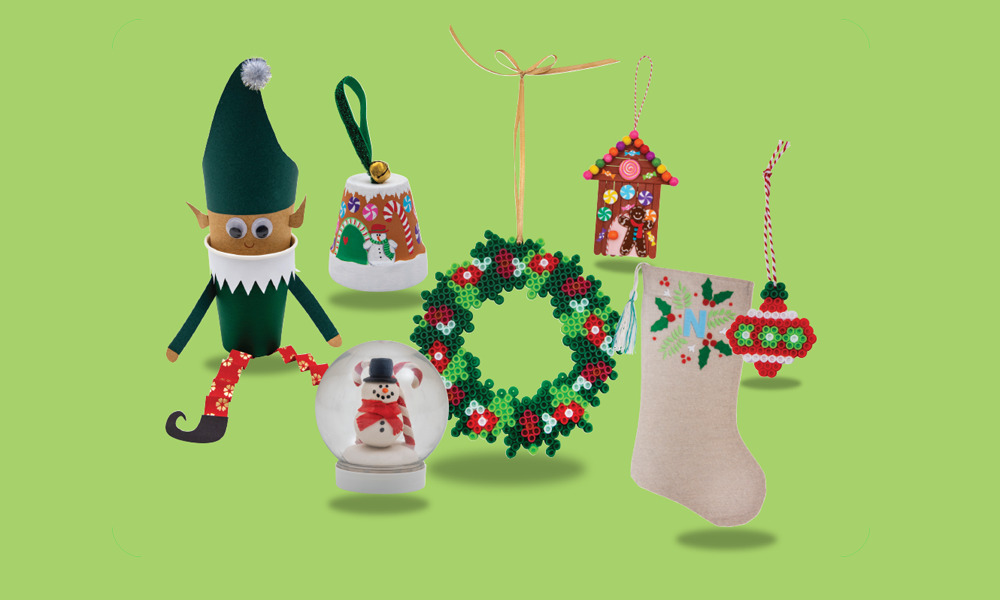
From wreaths to snow globes, it’s time to get Christmas crafty with these 7 elf-approved activities! While Santa is busy in the North Pole preparing for his big appearance, that’s the cue for all of us down here to plan our festive season arts and crafts. We’ve put our Santa thinking caps on and come up with 7 fun craft activities to bring the joy and merry! They’re as easy to make as kicking back on a sleigh ride with jingle bells on! Little creative minds and hands ready? Let’s gooo!
Elf cup
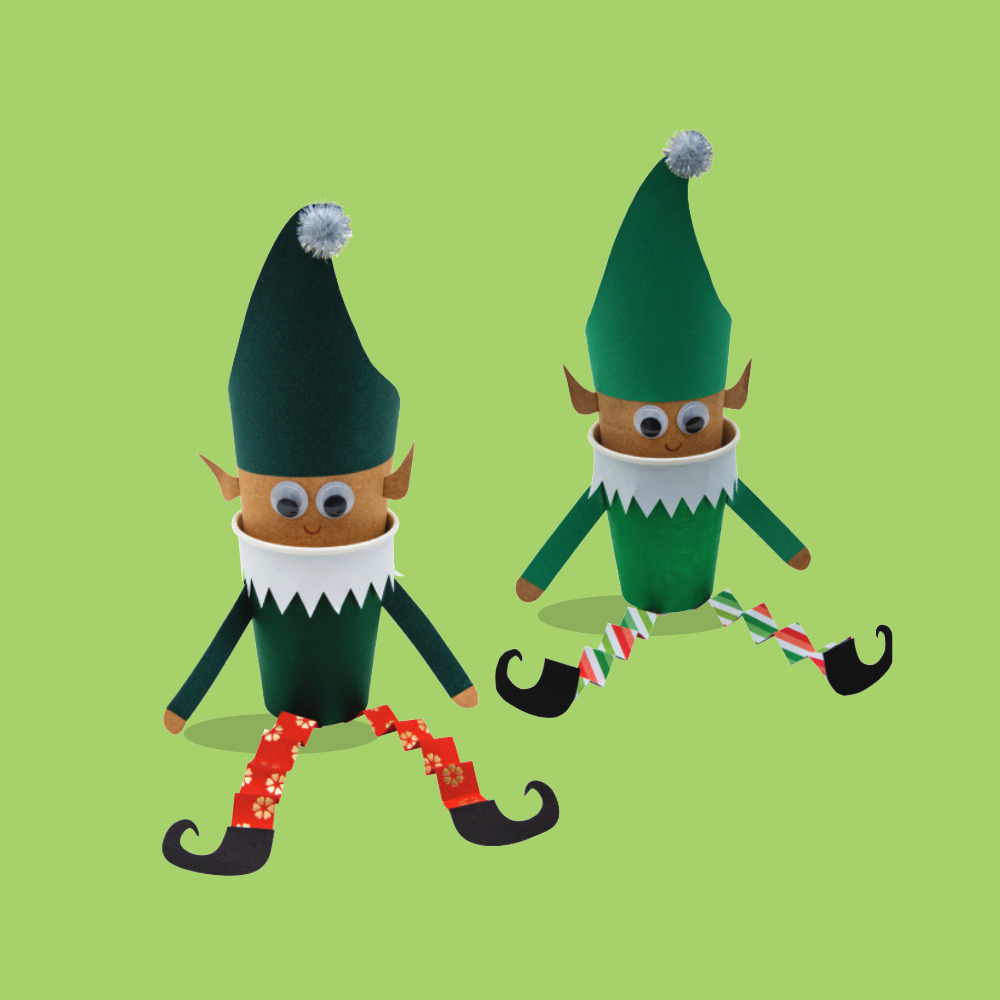
We took a poll and 100% of Santa’s elves LOVE it when you create little craft versions of them! These finished elf cups look wonderful sitting on a shelf (naturally), on the Christmas table or near the tree. White eco-paper cups are the basis of these cute decorations, painted in green. Then you build your elf’s legs, feet, and cheeky head and hat.
You will need:
White Eco Paper Cups https://www.teaching.com.au/product/jm850
Christmas Paper Chains https://www.teaching.com.au/product/cs5548
A4 Coloured Cover Paper https://www.teaching.com.au/product/teb0001
18mm Joggle Eyes https://www.teaching.com.au/product/sh1038
Strong Craft Glue https://www.teaching.com.au/product/cs0004
A4 Kraft Paper https://www.teaching.com.au/product/teb0087
Assorted Christmas Pom Poms https://www.teaching.com.au/product/th180
Let’s make it!
Cover your cup in green using a marker or paint and set aside to dry.
To make the elf’s collar, cut a strip of white cover paper 28(L) x 3.5(W)cm, and then trim zig-zags into one edge (triangles measuring approx. 1.5cm, with each point roughly 1.5cm apart).
Wrap your zig-zag collar around the top of the cup, attaching with glue at the back.
To make the elf’s legs, take 2 strips of Christmas paper chain and fold them back and forth to make a zig-zag fold.
Use a dab of glue to attach the legs to the base of the cup.
To make the feet, fold a piece of black cover paper in half and draw one point elf shoe with a pencil, cut the pencil markings out, giving you two shoes.
Use a dab of glue to attach the shoes to the very end of the zig-zag paper legs.
To make the elf’s head, cut a piece of brown Kraft paper approx. 15(L) x 26(W)cm, wrap it into a cylinder with an overlap of approx. 2cm, and either tape or glue in place. Pop it into the cup.
To make the hat, free draw a wonky triangle shape (measuring approx. 26cm at the base, going up to a point. Our elf’s hat measures 14cm from the base line to the point).
Cut out your elf hat and glue it onto the top of the elf hat, overlapping the hat onto the Kraft paper.
To make the arms, use the excess paper from the hat and Kraft paper. Cut two strips of brown craft paper measuring 9(L) x 1.5(W), and 4 x coloured paper lengths 8(L) x 1.5cm.
Layer the Kraft paper and coloured paper together – 1 coloured on the bottom, Kraft in the middle with the ends poking out and another coloured on the top, gluing together. Repeat to make the second arm. Use a pair of scissors to round off the brown Kraft paper to form the hands.
Make a small 45-degree fold on the tops of the arms and glue to the elf cup body.
Free draw two ears on the brown Kraft paper – with 0.5cm excess to fold back and glue to the elf’s head.
Finish off by adding a smile and gluing on 2 joggle eyes, a pom pom on the hat and set aside to dry thoroughly.
Done! The perfect Elf Cup is ready!
TIP: Modify for younger age groups with pre-cut shapes or templates to snip out.
Gingerbread house terracotta pot ornament
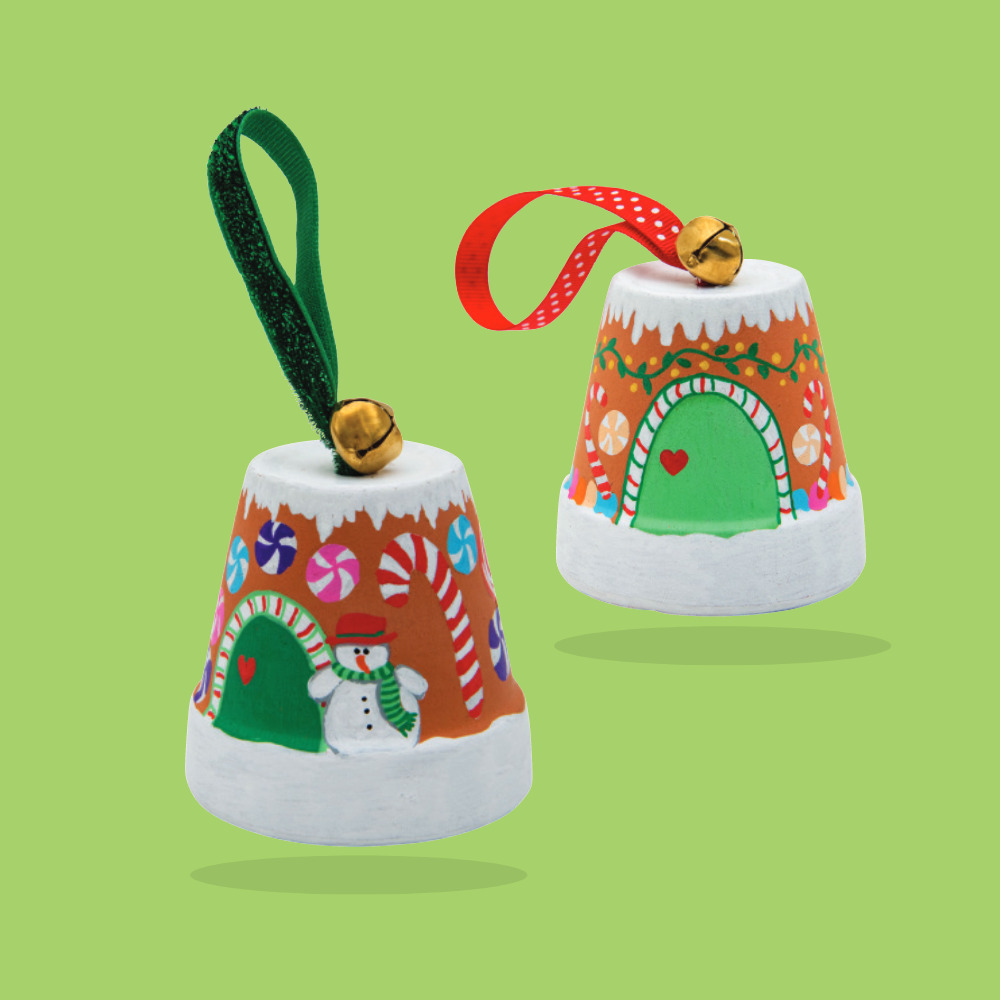
This gingerbread house ornament is so cute, it’s bound to be a big favourite for little hands to create and give them a tremendous sense of pride in their work! It would look great sitting on a desk, a shelf, coffee table or a windowsill! These little terracotta pot ornaments also make perfect seasonal gifts for loved ones!
You will need:
Terracotta Plant Pots https://www.teaching.com.au/product/sh9802
Fine POSCA Markers https://www.teaching.com.au/product/um300
Christmas Jingle Bells https://www.teaching.com.au/product/sh9475
Assorted Christmas Ribbons https://www.teaching.com.au/product/sh1588
Crystal Clear https://www.teaching.com.au/product/md025
Let’s make it!
Lightly draw your design onto the terracotta pot with a lead pencil – white snow around the rim and fallen snow coming down around the top edges, a little door, candy canes, gum drops, lollies etc. as desired.
Use the white POSCA paint marker to fill in the large white snow areas.
Use the colourful POSCA paint markers to fill in the brightly coloured details, letting your pencil markings guide your art and set aside to dry.
Apply a layer of Crystal Clear to the entire surface of the pot to provide a permanent barrier to moisture and wear & tear and set aside to dry.
Cut a 20cm length of Christmas Ribbon, form a loop and push the two loose ends through the Jingle Bell.
Feed both loose ends through the hole at the top of the pot, trapping the Jingle Bell on top.
Use strong tape or glue to adhere the loose ribbon ends to the inside of the pot.
Done! The perfect Gingerbread House Terracotta Pot Ornament is ready.
TIP: Further personalise your decoration with embellishments, glitter or writing as desired.
Gingerbread pop stick houses
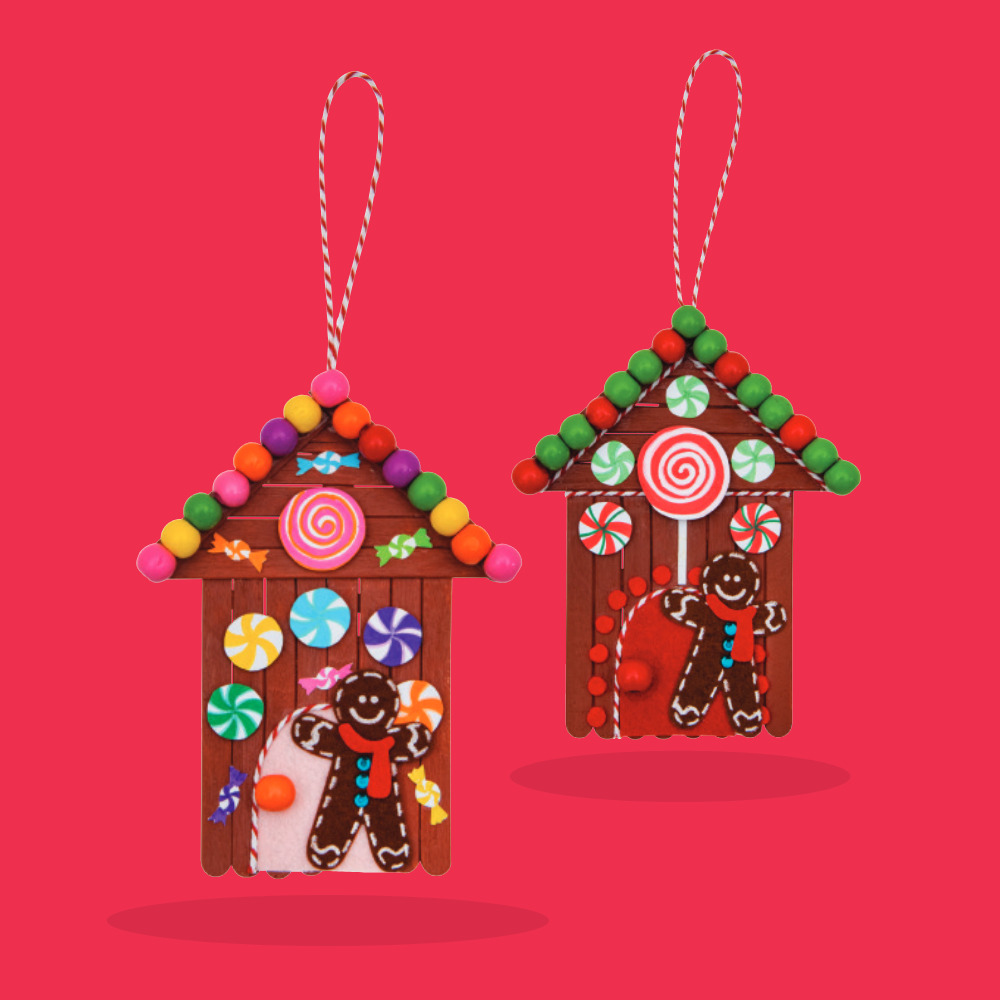 No holiday season is complete without a gingerbread house – the sort you can eat and the sort you can treasure, like these! Whimsical and looking oh-so-delicious, these quaint pop stick houses make beautiful seasonal displays. They’re so pretty to hang around the classroom, on the Christmas tree at home or to gift as thoughtful presents!
You will need:
Paddle Pop Sticks Plain https://www.teaching.com.au/product/jm67
Choc Fudge Brown Classroom Splash Acrylic Paint https://www.teaching.com.au/product/ec1114
Strong Craft Glue https://www.teaching.com.au/product/cs0004
Wooden Coloured Beads https://www.teaching.com.au/product/am1770
Assorted Felt Sheets https://www.teaching.com.au/product/flt016
A4 White Cardboard https://www.teaching.com.au/product/AUS208
Christmas Candy Colour Chenille Sticks https://www.teaching.com.au/product/sh1321
Fine POSCA Markers https://www.teaching.com.au/product/UM300
Assorted Felt Christmas Stickers https://www.teaching.com.au/product/SH1613
Red and White Bakers Twine https://www.teaching.com.au/product/sh733
Let’s make it!
To assemble the pop stick house – trim 9 pop sticks to 2/3 of their original size.
Lay 8 of the trimmed pop sticks in a row and use strong glue to adhere the 9th trimmed pop stick across the bottom (to hold your 8 pop sticks together). Allow to dry.
When your glue is dry, flip over and glue 1 whole-length pop stick to the top of the trimmed pop sticks, covering the trimmings.
Trim 2 more pop sticks to 2/3 of their size and glue these to form a triangle-shaped roof (one end each on the sides, and the other end together to form the roof’s point).
When the glue is dry, trim 4 more pop sticks to fit the roof’s triangular frame, and glue in place. Allow to dry.
When the glue is dry, flip your Gingerbread House over – it’s now ready to paint the front in your desired shade of fudge brown. Set aside to dry.
Now it’s time to make all your decorations. We’ve used coloured wooden beads to decorate the roof and doorknob, felt sheets to make the door, bakers’ twine to trim, Christmas felt stickers and candy colour chenille sticks. The sweet treats have been made using POSCA markers on white cardboard which have been cut out and glued into scraps of white felt to raise them up.
Use strong glue to attach all your decorations to the front of your Gingerbread House and set aside to dry thoroughly (the wooden doorknob might need a 2nd blob of strong glue to hold in place).
Lastly, flip your Gingerbread House over, cut a length of baker’s twine and attach to the back of the house to form a hanging loop) and set aside to dry.
Done! The perfect Gingerbread House Decoration is ready.
TIP: Older age groups might enjoy using glue guns to assemble their houses and decorations.
Iron-on beads tree baubles and Christmas wreath
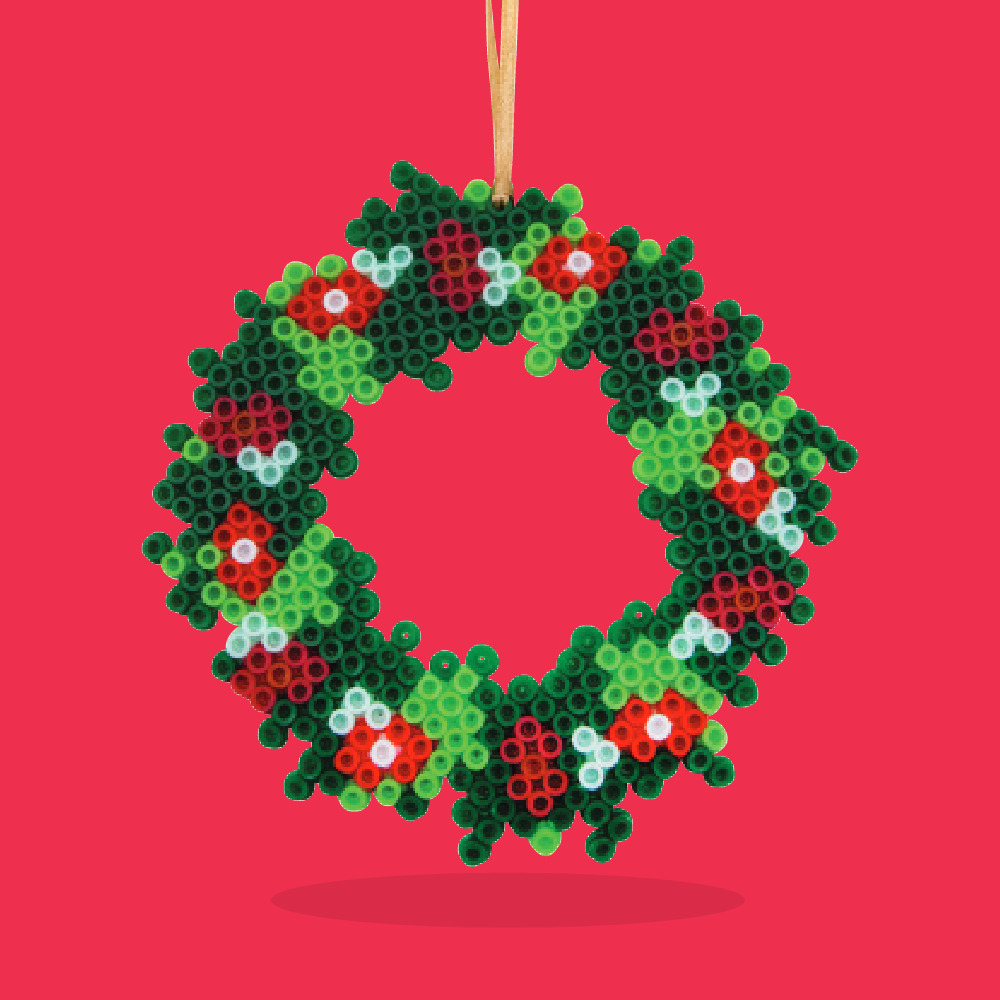
Have you tried making iron-on bead ornaments? It’s a really simple and fun creative activity, allowing for all sorts of patterns and shapes. You arrange the Christmas-coloured beads on the peg boards to make your desired pattern. You’re then ready to fuse the beads together using a hot iron (adult time!) to make a long-lasting ornament to adorn classrooms, homes or the beloved family Christmas tree.
Baubles – you will need:
Christmas Iron-on Beads Kit https://www.teaching.com.au/product/pb2456k
Red and White Bakers Twine https://www.teaching.com.au/product/sh733 OR
Christmas Ribbon Rolls https://www.teaching.com.au/product/cs9207
Wreath – you will need:
Christmas Iron-on Beads https://www.teaching.com.au/product/pb2456
Square Bead Boards for 5mm Beads https://www.teaching.com.au/product/amb600
Ironing Paper for Iron-on Beads https://www.teaching.com.au/product/amb800
Christmas Ribbon Rolls https://www.teaching.com.au/product/cs9207
Let’s make them!
Arrange the iron-on beads into a design on the bead board.
Warm a household iron to high, making sure the steam is off.
Cover the design with a sheet of ironing paper and iron over until the beads start to melt and fuse together into a colourful and flexible shape.
Allow your design to cool before removing from the bead board.
Peel the protective layer off an acetate sheet and cut two pieces to the size of your frame.
When cool, thread a length of yarn through one of the beads, creating a loop to hand, and tie off (a skewer will help to remake a hole if the beads have completely melted.
Done! The perfect Iron-on Beads Christmas decoration is ready.
TIP: Make sure you have an adult to help or complete the ironing steps.
Snow globe
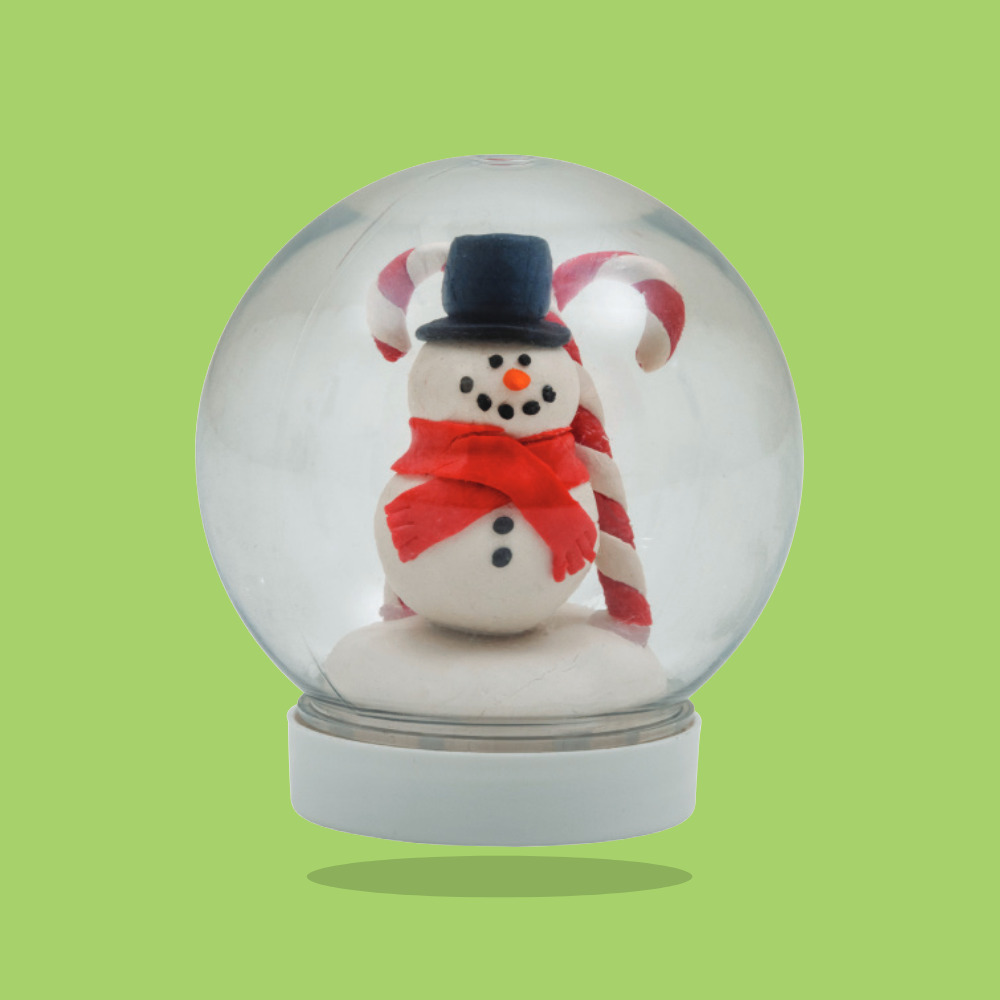
Do you collect snow globes? Do you have one special one? Have you made one before? A snow globe makes a perfect lasting seasonal treasure for little ones – or a perfect gift for friends or family members. You can make whatever scene you like for the inside of your snow globe, although we went with a snowman! However, you can let your creativity run wild with your perfectly preserved snow globe creation!
You will need:
Snow Globe https://www.teaching.com.au/product/CS6575
Glitter; https://www.teaching.com.au/product/bio-glitter-8211-set-of-8
Oven Bake Polymer Clay https://www.teaching.com.au/product/KC1025
High Temp Glue Gun https://www.teaching.com.au/product/CS1660
High Temp Glue Sticks https://www.teaching.com.au/product/CS1661
Christmas Rhinestones https://www.teaching.com.au/product/SH9727
Christmas Ribbon Rolls https://www.teaching.com.au/product/CS9207
Let’s make it!
Wash your hands with soap and water, and dry thoroughly before using the clay.
Soften the Polymer clay using the warmth of your hands, kneading until it is warm and workable.
Shape the clay into a Christmas scene (a snowman, candy canes, reindeer, Santa, presents, a tree etc). Make sure it’s able to fit inside the snow globe (we’ve made a snowman, 2 candy canes and a platform).
Carefully lay your designs onto a flat baking tray with baking paper.
Put your finished design into the oven and bake at around 130 degrees Celsius for 15 to 30 minutes (baking times may vary depending on the size of your chosen designs).
Let your creation completely cool before handling (any rough areas can be sanded or touched up with paint as desired).
Using a hot glue gun (or strong glue that will be waterproof when dry), adhere your Christmas creations to the inside of the snow globe lid, and set aside to dry.
Fill the snow globe with water and glitter as desired and tightly screw the lid to the globe (securing the lid to the globe with a hot glue gun will add complete security).
Decorate the base of the snow globe with sequins or ribbon as desired.
Done! The perfect Christmas Snow Globe is ready.
TIP: Make sure to have an adult help or complete the steps requiring an oven.
Pop stick nutcracker ornament
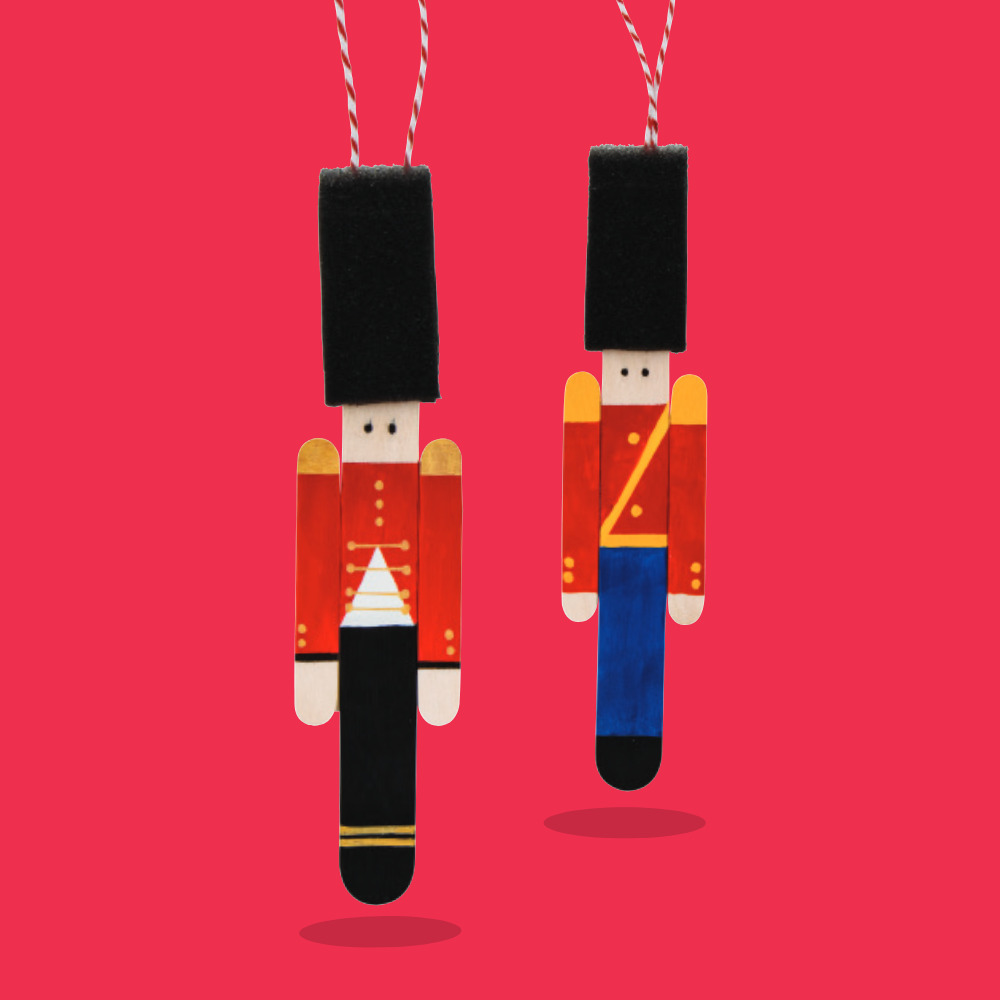
This is such a simple but adorable ornament to hang on the Christmas tree! Do you know the story of the Nutcracker? It tells the story of a little girl called Marie (Clara in some versions) and her toys. In the original story, Marie’s toys come to life on Christmas Eve and a Nutcracker figure helps lead the fight against an army of mice! One of the main themes is about the power of imagination. Marie leads people through a magical dream, who see the wonder of Christmas through her eyes.
You will need:
Foam Paint Brush Set https://www.teaching.com.au/product/nar102
Jumbo Pop Sticks https://www.teaching.com.au/product/jm100
Mini Paddle Pop Sticks https://www.teaching.com.au/product/sh956
Student Acrylic, https://www.teaching.com.au/product/student-acrylic-8211-set-of-5
Fine POSCA Markers https://www.teaching.com.au/product/UM300
Gold Bullet POSCA Marker https://www.teaching.com.au/product/UM509
Strong Craft Glue https://www.teaching.com.au/product/cs0004
Red and White Bakers Twine https://www.teaching.com.au/product/sh733
Washi Tape: https://www.teaching.com.au/product/th1625
Let’s make it!
Use a lead pencil to lightly mark out the Nutcracker’s details on 1 x jumbo pop stick (the face, jacket, pants and shoes) and 2 x mini pop sticks (the arms and hands).
Use acyclic paint to block out the colours (washi tape can help create crisp lines) and set aside to dry.
Use fine POSCA paint pens to decorate the details – yellow for the uniform’s buttons, black to make the eyes etc. and set aside to dry.
Lay the pop sticks face down, arrange them into place and use strong tape or glue to hold them in place, and set aside to dry.
Remove the handle from the foam paint brush, add a small squeeze of strong glue inside, and slide it onto the Nutcracker’s head.
Attach a loop of baker’s twine to the back of the ornament with strong glue (we’ve poked the ends into the back of the sponge hat) and set aside to dry.
Done! The perfect Pop Stick Nutcracker Ornament is ready.
TIP: A small pop stick cut in half and running along the back of the Nutcracker will help the body and arm pop stick pieces stay in place.
Paper Jingle Ornaments
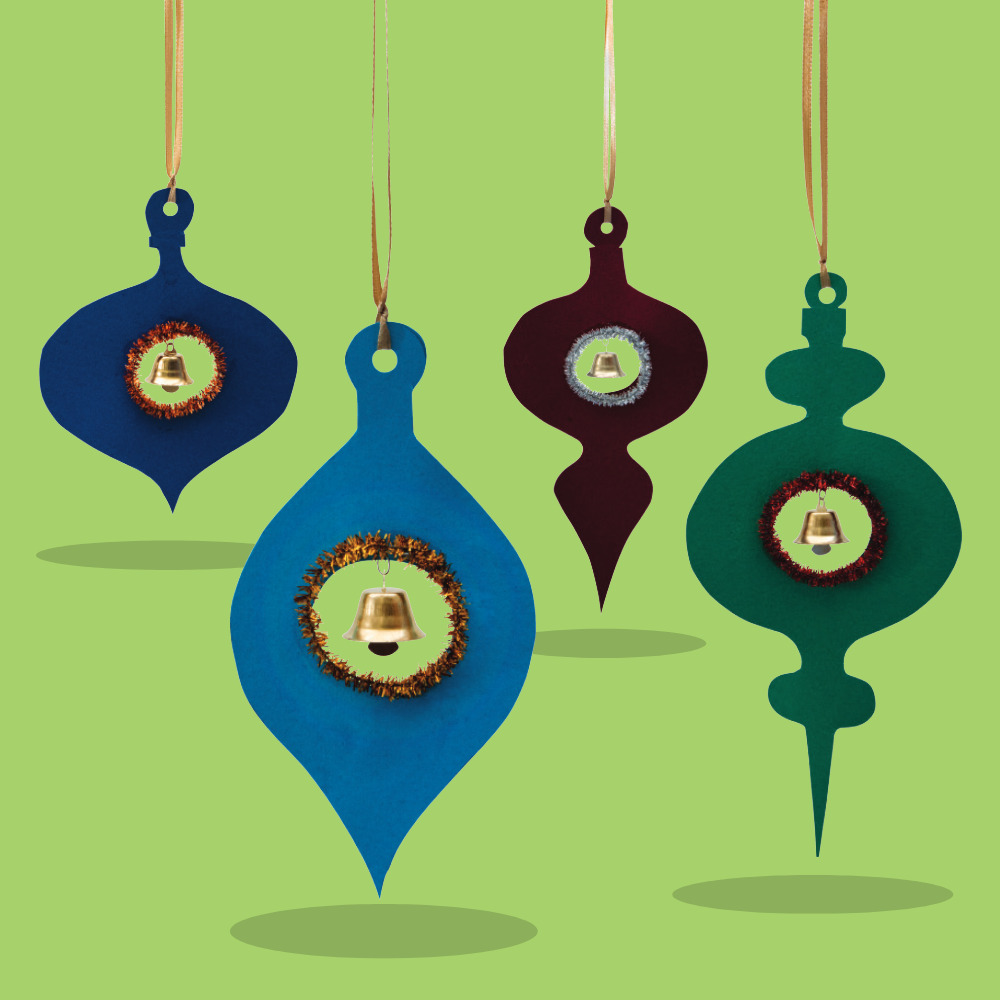
These paper crafting favourites will look beautiful hanging around the classroom or on the Christmas tree at home. They can be made in so many different shapes and colours too! Christmas is all about jingle bells and these are a perfect way to bring your own personalised jingle bells to life!
You will need:
A4 Coastal Cardboard https://www.teaching.com.au/product/aus502#
Tinsel Pipe Cleaners https://www.teaching.com.au/product/cl2205
Christmas Ribbon Rolls https://www.teaching.com.au/product/cs9207
Christmas Bells https://www.teaching.com.au/product/gold-038-silver-bells-8211-pack-of-50
Paper Punch One Hole https://www.teaching.com.au/product/acc003
Silver Craft Wire https://www.teaching.com.au/product/THE218
Supertac Glue https://www.teaching.com.au/product/th005
Let’s make it!
Draw your Christmas decoration shapes onto cardboard and cut out (make sure to leave room for the tinsel and bell in the middle, and a hanging hole at the very top).
Use a compass or small round object to draw a circle in the middle of the decoration (roughly 3.5cm diameter).
Cut out the centre hole (fold the cardboard slightly, make a snip and then use the snip to insert your scissors to cut around the circle line). Discard the trimmings.
Cut a short length of beading wire roughly 4cm long, thread a Christmas bell onto the wire, fold the wire in half and push one end through the cardboard decoration, roughly 1cm above the cut-out circle. Twist the two ends around each other to hold the bell securely (trim if needed).
Cut a sparkly pipe cleaner to approx. 15cm in length and bend around to form a circle to fit around the cardboard decoration centre cut out. Twist the ends around the circle neatly. Use strong glue to attach the sparkly pipe cleaner to the cardboard decoration and set aside to dry thoroughly.
When dry, use a hole punch to make a hole at the top of the decoration and tie a length of Christmas ribbon, forming a loop to hang.
Done! The perfect Paper Jingle Ornament is ready.
TIP: It doesn’t need to stop there! Add as much decoration and sparkle as you like with drawings, embellishments and glitter.
So, there you have 7 beautiful Christmas craft activities to give you decorative goodies that young and old alike will love. Hang them, place them, gift them, share them, enjoy them!
If you’d like to download the step-by-step activity pack pdf, click here.
Happy crafting and seasonal wishes and please share your crafty seasonal awesomeness with us @modernteaching

