Posted on

6 easy heartfelt, handmade Mother’s Day gifts Mums love and little ones love to make 

8924_MTA_Mothers Day Craft_Header Blog

Every mum is a gift. But on Mother’s Day, it’s their turn to receive some love in the shape of a special gift.  

Help your little learners say “I love you, Mum” with these super simple craft activities. Key tags in candy colours. Wooden flowers that always bloom. Sweet note holders that cradle special messages. These handmade gifts are an easy way for children of all ages to showcase their love and creativity and have been designed to make educators smile too! They’re colourful, fun ideas we take you through step-by-step. 


Get ready to dive into a world of glitter, glue and gratitude as we turn this Mother’s Day into a magical moment for educators, children and mums alike! 


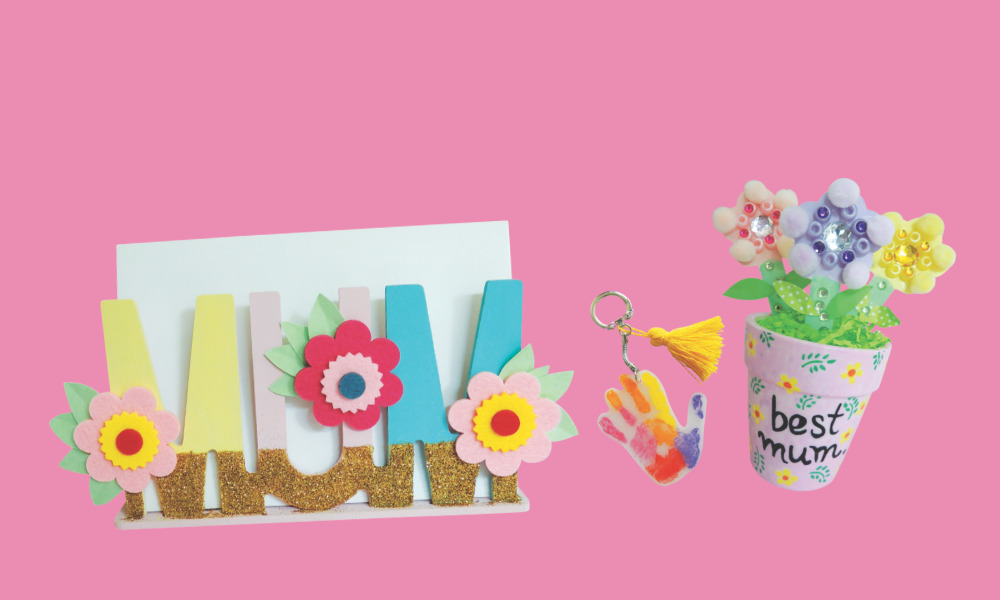
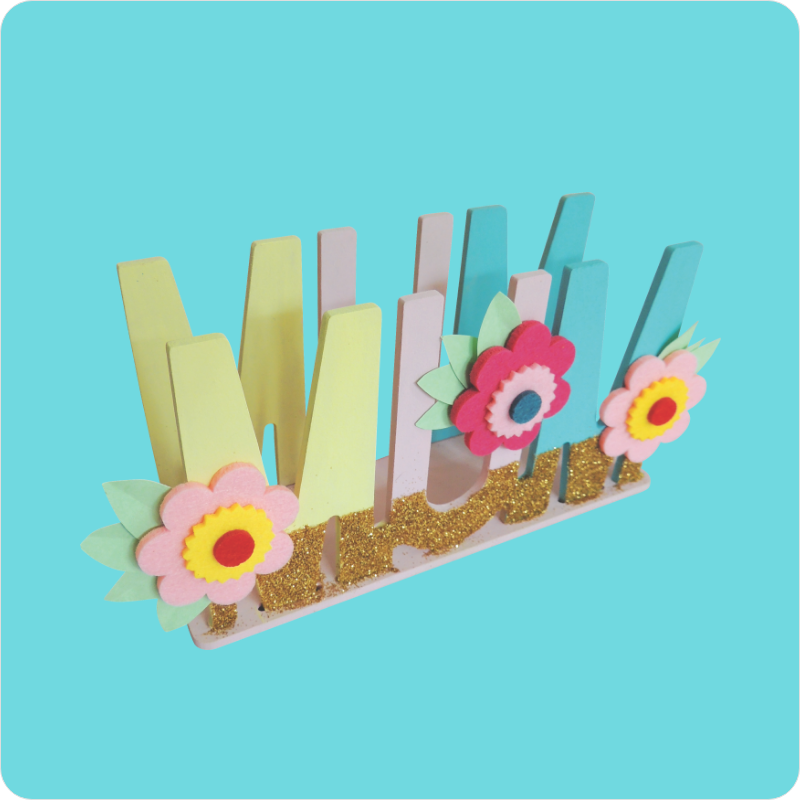
Mother’s Day Note Holder 
 

8924_Mother’s Day Note Holder


We all know that mums are busy bees. So, what better gift to give than a note holder that keeps notes and special messages organised and doubles as a colourful and floral appreciation of all the hard work they put in? 


You will need:  

Mum Note Holder 

Pastel Paint 

Pastel Paper 

Felt Flowers 

Bio-Glitter – Set of 8 

Creatistics Strong Craft Glue  

Masking Tape 


Step-by-step 

Assemble the note holder by slotting the two MUM sides into the stand. 

Apply your desired shades of pastel paint to the sides and stand and set aside to dry. Repeat paint application as desired.  

Lay a length of thin masking tape across the front of the MUM lettering roughly 2/3rds of the way down. Press down gently.  

Spread a layer of glue to the MUM letters below the masking tape line and sprinkle Bio-glitter to cover the glue. Shake off excess and set aside to dry. 

Use a pencil to roughly draw a small leaf shape onto the pastel paper, fold the paper several times (to a workable thickness to complement scissor skills) and cut out the drawn leaf. You will now have multiple leaves. Repeat as desired. 

Use strong craft glue to adhere the leaves and the desired number of felt flowers to the note holder and set aside to dry. 

Done! The perfect Mother’s Day Note Holder is ready.  


*TOP TIP – When shaking the Bio-glitter over the MUM Note Holder, lay a piece of paper under it to catch the excess glitter. You’ll be able to put the glitter back in the bottle to reuse.  


Add this activity to your Wishlist: https://www.teaching.com.au/sharedwishlist/65f36ef8283170dfe3f5d7e0 


Wooden Flower Bouquet 


8924_Wooden Flower Bouquet


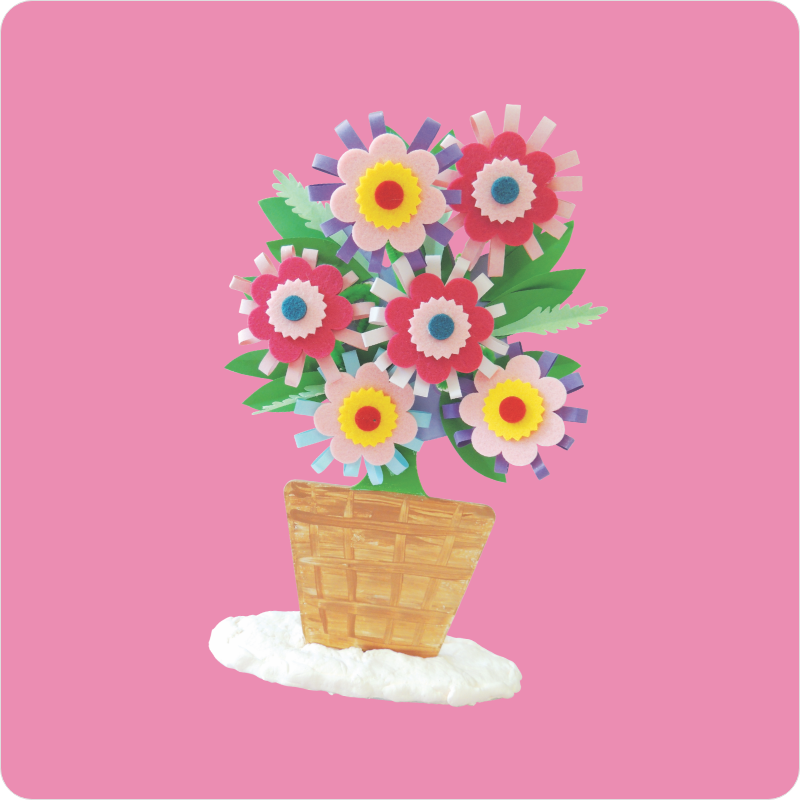
To show everlasting love for mums on their special day, gift something that lasts just as long with an everlasting flower bouquet! Plus, the original wooden flower bouquet can double as a jewellery display for another crafty day. 


You will need:  

 Wooden Flower Bouquet

Creatistics Acrylic Paint Set 

Felt Flowers 

Pastel Pipe Cleaners 

Matt Paper Squares 

White Silk Clay 

Paper Magiclay Candy Colours 

Tacky Glue 


Step-by-step  

Assemble the Flower Bouquet by slotting the flowerpot into the stand. 

Apply your desired shades of pastel paint to the assembled flower bouquet and set aside to dry.  

Snip 2 x green pipe cleaners into 3rds to make 6 x short flower ‘stems’.  

Turn 6 x felt flowers upside down on a flat surface and squeeze a big blob of tacky glue to the back of each flower. Gently press the ends of the pipe cleaner stems into the tacky glue blobs and leave to dry overnight.  

Weave and twist the flower stems through the pre-cut holes and twist around themselves to keep them in place.  

Use small dabs of tacky glue to secure the paper leaves in place, making a bountiful-looking bouquet of flowers. Set aside to dry.  

Use a small handful of white silk clay with a small amount of candy-coloured Magiclay to knead and press down onto the stand to add texture as desired (handy to press additional embellishments into as desired). 

Done! The perfect Wooden Flower Bouquet is ready. 


*TOP TIP – Extend the activity for older students by enlarging the flowers using matte paper squares. Simply draw larger flower shapes or thin strips to loop for petals and glue to the back of the felt flowers before adding the pipe cleaner stem.   


Add this activity to your Wishlist: https://www.teaching.com.au/sharedwishlist/65f3777f7ab85899632d2751 


Rose Gold Key Tags 


8924_Rose Gold Key Tags


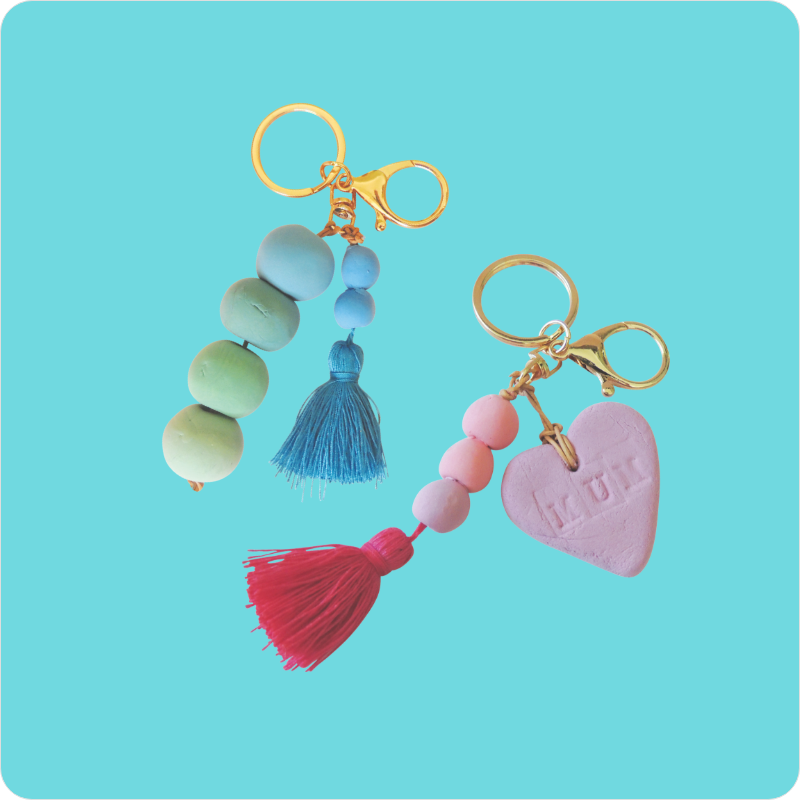
These personalised Mother’s Day keyrings turn an ordinary key chain into an extraordinary keepsake. What’s more, they’re super colourful and eye-catching, so mums can say goodbye to the days of misplaced keys! 


 You will need:  

Rose Gold Lobster Key Tags 

White Silk Clay 

Paper Magiclay Candy Colours 

Leather Cord 

Alphabet & Number Stamps 

Assorted Coloured Tassels 

Dough Scissors 

Plastic Lacing Needles 


Step-by-step 

 Knead a portion of white silk clay with small amounts of candy coloured Magiclay to make pastel tones.  

Use a small handful of your pastel silk clay to gently press flat, keeping the thickness roughly 1 – 2cm.  

Use dough scissors to cut out a heart shape (Use a pencil or skewer to roughly mark out the heart shape to guide cutting lines if required). Gently press the edges to smooth them.  

Press the Alphabet & Number stamps into the heart to imprint ‘MUM’ or ‘I LOVE MUM’ etc. as desired. 

Poke a skewer through the top of the heart and wiggle around, making a hole large enough to thread the leather cord. Set aside to dry out.  

With the offcuts from the heart and your remaining pastel coloured silk clay, roll into large round ‘beads’.  

Poke a skewer through the centre of each hole and wiggle around to form a hole large enough for the leather cord to thread through. Set aside along with the heart to dry out for 24 to 48 hours.  

Time to assemble! Cut a length of leather cord roughly 30cm and thread through the heart and secure with a knot. Thread on several beads (plastic lacing needles will assist the cord through the beads if needed) and then tie to the Rose Gold Lobster Key Tag. Tie off with several tight knots. Cut off excess cord.  

Cut another length of cord to attach several beads and one coloured tassel to the lobster keychain, again tying off with several tight knots. Cut off excess cord.  

Done! The perfect Rose Gold Key Tag is ready.  


*TOP TIP – For younger age groups feel welcome to omit the beads and use a cookie cutter to help form the silk clay shape.  


Add this activity to your wishlist: https://www.teaching.com.au/sharedwishlist/65f378f8283170dfe3f5d822 


Wooden Flower Pop Mum Pot 


8924_Wooden Flower Pop Mum Pots


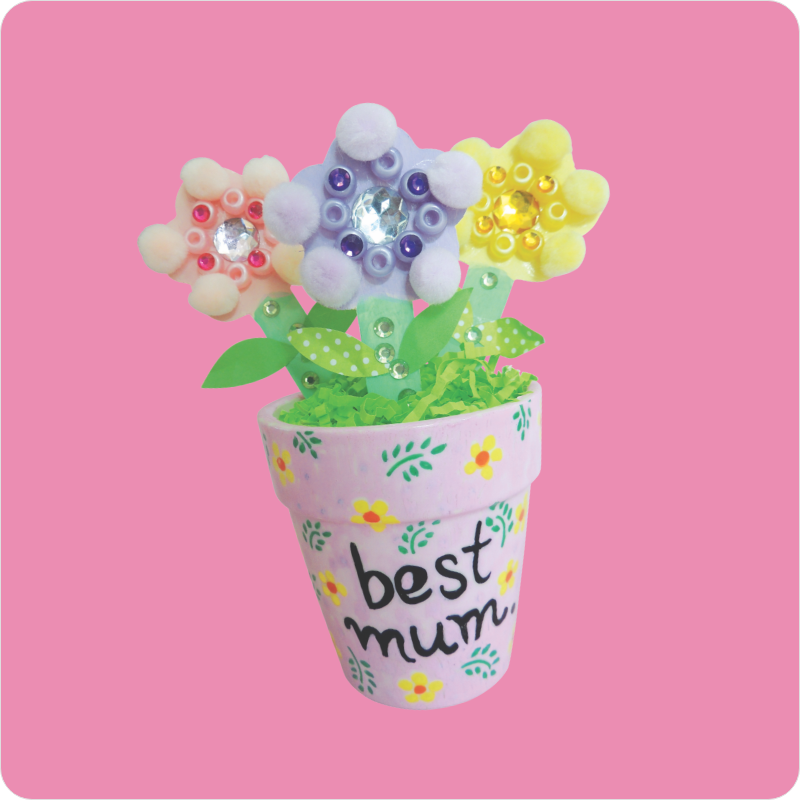
The creative possibilities are endless with the blank canvas of a flower-shaped paddle-pop stick and a flower pot. Children can write their sweetest Mother’s Day messages on the pots and then customise the beautiful flowers! 


You will need:  

Wooden Flower Paddle Pop Sticks 

Porcelain Flower Pot

Glass & Porcelain Markers 

Creatistics Pastel Paint 

Pastel Pom Poms  

Pastel Buttons 

Creatistics Pattern Paper Squares 

Green Crinkle Paper Shred 

Adhesive Rhinestones 

Green Silk Clay 


Step-by-step 

Draw or write messages onto the porcelain pot using Glass & Porcelain markers and set aside a few hours for drawings to air dry.  

Bake the pots in the oven at 150 degrees C for 30 minutes, turn oven off and allow to cool before removing (this ‘sets’ the markers to reduce wear and tear).  

Apply pastel paint to the Wooden Flower Paddle Pop Sticks and set aside to dry. Repeat application as desired.  

Use craft glue to decorate flowers with pastel buttons, beads, pom poms, rhinestones and pattern paper. Set aside to dry.  

Fill the pot with Silk Clay and gently press the flower pop sticks into the clay just enough to stand up. 

Add a few squeezes of craft glue on top of the silk clay and gently press Green Crinkle Paper to cover the clay. Set aside to dry.  

Done! The perfect Flower Pop Mum Pot is ready.  

*TOP TIP – Personalise further by adding a photo to the centre of the Flower Paddle Pop Sticks. Simply print out in a small size and snip around the children’s faces to fit the centre of the flower stick.  


Add this activity to your wishlist: https://www.teaching.com.au/sharedwishlist/65f37a77c9a9b8250467e47c 


Mother’s Day Yarn Card  


8924_Mother’s Day Yarn Card


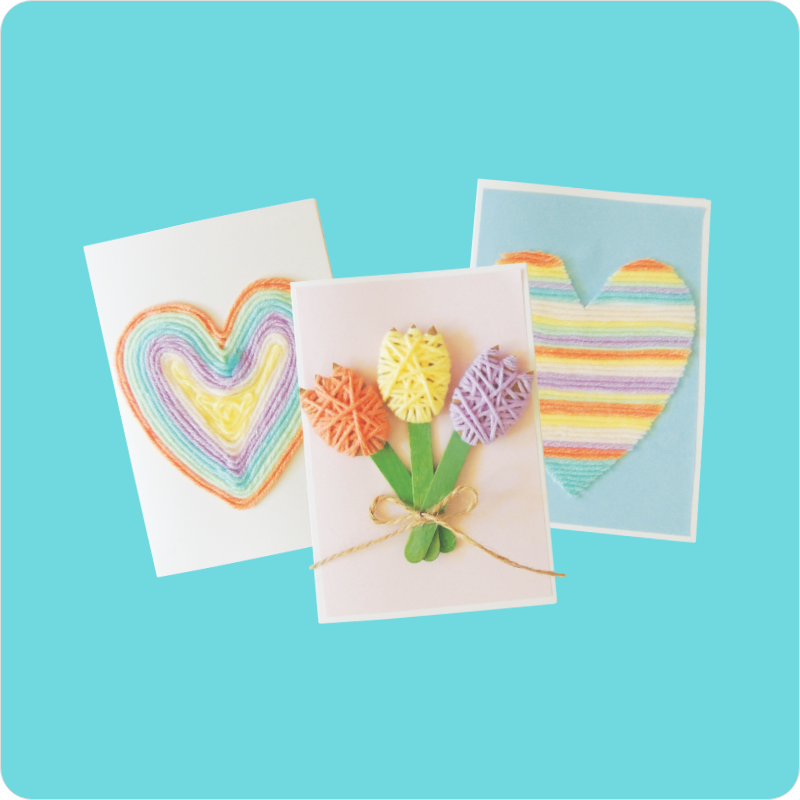
This activity is a two-for-one special! Children can pick between two beautiful options, but no matter which they choose, mums will love this heartfelt card. 


You will need:  

Pastel Acrylic Yarn 

White Cards and Envelopes 

Creatistics Strong Craft Glue 

Mini Pop Sticks 

Pastel Coloured Cardboard 

Creatistics Glue Sticks 

Jute Hemp Twine 


  • TULIP CARD  


Step-by-step 

On an old cardboard box, draw 3 x tulip shapes and cut out carefully (alternatively, use coloured cardboard if you haven’t got any boxes handy).  

Cut a workable length of pastel yarn and either tie around the centre of the tulip or use masking tape to attach yarn in place at the back.  

Wind the yarn around the tulip until it looks full and colourful. Either tie off at the back or use masking place to hold down.  

Repeat steps 2 and 3 for each of the tulips.  

Cut a piece of coloured cardboard to fit the front of the card, roughly 14(L) x 9(W)cm, and glue to the front of the card. 

Use strong craft glue to adhere 3 x mini green pop sticks and the 3 yarn tulips to the front of the card, along with a jute hemp twine bow around the pop sticks. Set aside to dry.  

Draw/write MUM a Mother’s Day message inside the card.  

Done! The perfect Mother’s Day Yarn Card is ready.  


*TOP TIP – Cardboard boxes are thick enough to hold their shape for young children to wrap the yarn around. Young children might also enjoy working with a larger sized tulip shape to match their fine motor skills. 


  • HEART CARD  


Step-by-step 

Using a pencil, draw a heart onto the card.  

Cover the entire heart shape with craft glue.  

Snip workable lengths of pastel yarn and lay over the glue, working from the outside of the heart to the inside until all the glue is covered.  

Set aside to dry.  

Alternatively, draw a heart shape onto the coloured cardboard, cover in glue and lay shorter lengths of yarn horizontally across the heart working from the top to the bottom until all the glue it covered. When dry, carefully cut out the heart shape, snipping off the excess yarn at the same time. Your heart is now ready to glue onto the white card.  

Done! The perfect Mother’s Day Yarn Card is ready.  


*TOP TIP – This activity is for all ages! Younger children will enjoy working with short pre-cut lengths of yarn, sticking them into glue applied in a heart shape.


Add these activities to your wishlist: https://www.teaching.com.au/sharedwishlist/65f38089ea44c27e8ee81208 


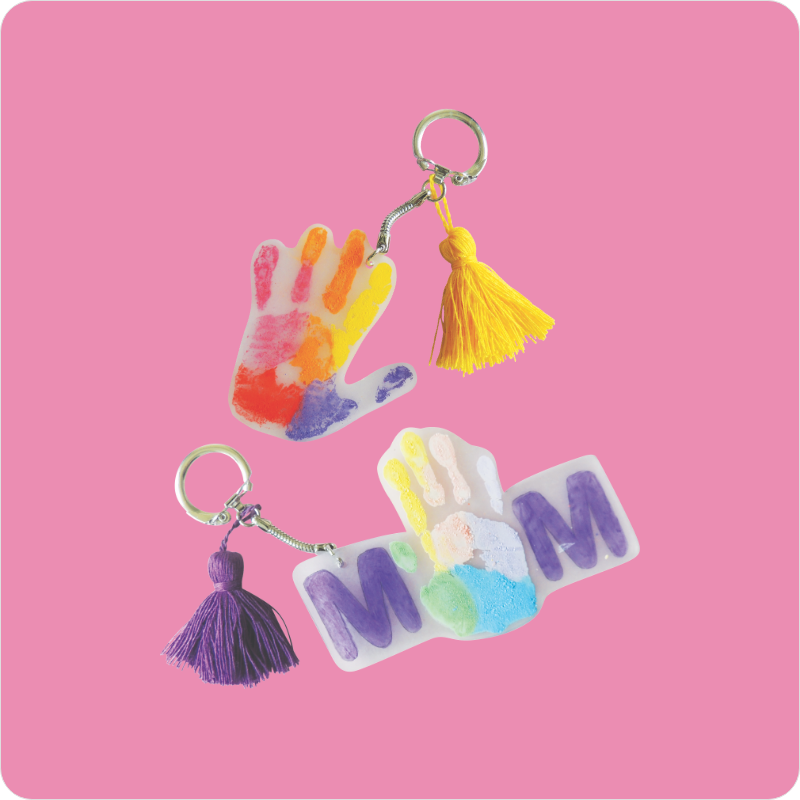
Handprint Shrink Film Key Chain  


8924_Handprint Shrink Film Key Chain


Kids grow up so fast! This Mother’s Day, give a personalised lasting memory with this handprint keychain. It’s a meaningful way to celebrate the connection between children and their wonderful mums. 


You will need:  

Clear Shrink Film 

Creatistics Acrylic Paint 

Creatistics Paint Brushes 

Key Chain 

Assorted Colour Tassels 

Natural Beading Cord 

One Hole Paper Punch 


Step-by-step 

Use a brush to apply paint to children’s hands (a brush will ensure an even coat of paint for a crisp handprint).  

Press painted hand down onto the shrink film and lift hand off to reveal the print. Set aside to dry. 

Older students might like to write the letter M on either side of the handprint, spelling out MUM with the handprint in place of the letter U. 

Carefully cut around each design and punch a hole at the top.  

Preheat oven to 150°C. 

Place the design on a lined tray (matte side up) and bake.  

Plastic will begin to shrink after 10 seconds, watch carefully! They will shrink to approx. 60% of the original size. 

Remove from oven once plastic has flattened and set tray aside to cool completely before handling. 

Thread the beading cord through the shrink film decoration, add a tassel and tie firmly to a key chain. 

Done! The perfect Handprint Key Chain is ready.  

*TOP TIP – Coloured pencil markings will darken in the oven; a very light shading is all that’s needed for bright vibrant colour.  


Add this activity to your wishlist: https://www.teaching.com.au/sharedwishlist/65f37fdfc4ec54ebb11c0f19 


We hope you love getting crafty this Mother’s Day and creating these 6 fun activities. If you’d like to download the step-by-step activity pack pdf, click here. Happy crafting, and please share your crafty Easter creations with us @modernteaching. 


Blog Home>

Shop MTA>


Posted on

Celebrate summer with 7 handmade craft activities full of sunshine and fun!

Summer craft Header

From sand art to a paper plate sun… try some quick, cool fun over the long, hot summer. Celebrate the colours, textures and feathery, fluttery creatures of summer with these 7 super-easy craft activities. Designed for little hands to deliver a big result, share your summer craft handmade creativity and tag us @modernteaching! We love seeing your style! So roll up your sleeves and dive in! We’ll guide you through each summer-loving step.


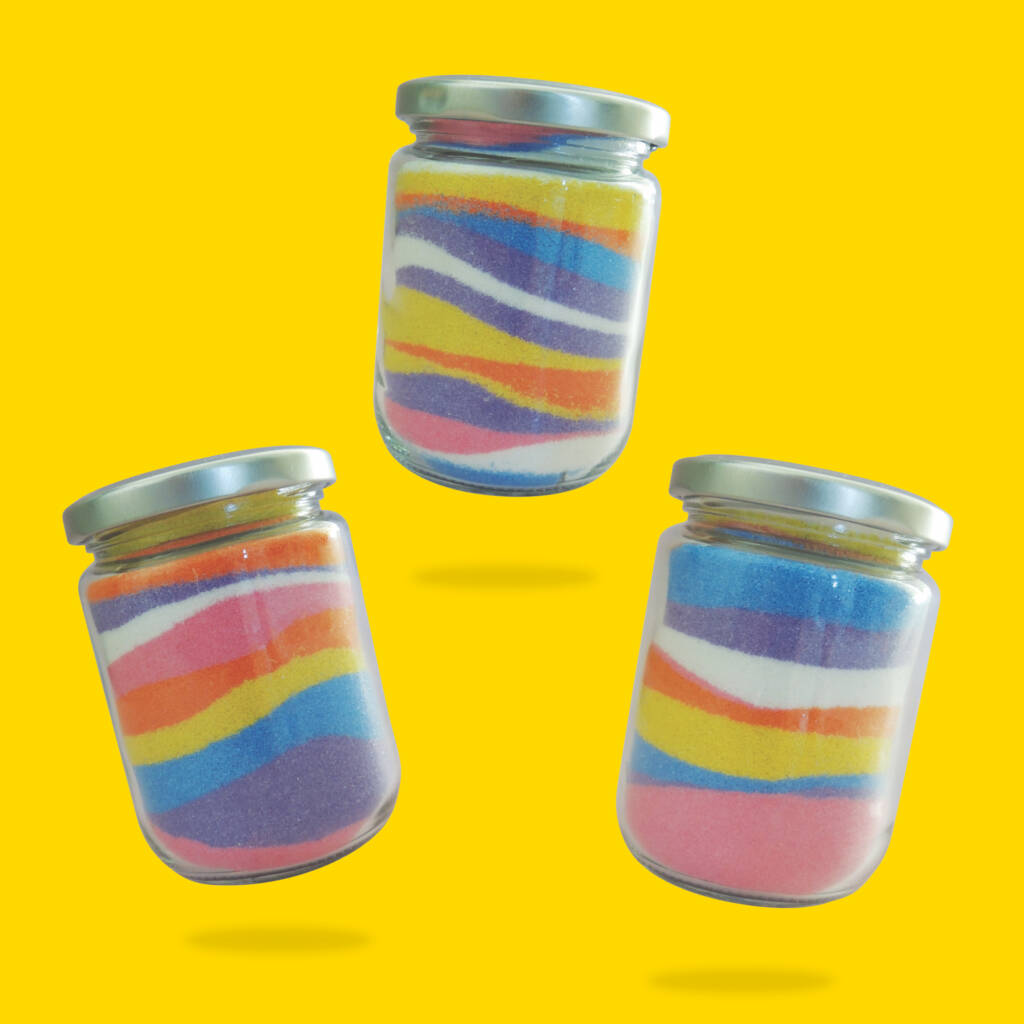
Sand Art Jar


Sand Art Jar

Summer in a jar! This is so simple, dreamy and impactful. Making a humble jar take on summer sand beach vibes is so easy! It will look so cute on a shelf and teaches children about colours, patterns and textures. Follow along step-by-step here.


You will need:

Glass Storage Jar

Creatistics Coloured Sand

Dispenser Bottles with Cap

Creatistics Strong Craft Glue


Step-by-step:

Take the lid off the glass jar and set aside.

Use a spoon or dispenser bottle to pour layers of coloured sand into the jar one at a time.

Use as many colours and layers as desired until the jar is completely full.

Apply a thin layer of Strong Craft Glue to the rim of the lid and tightly screw onto the jar.

Wipe away any excess glue and set aside to dry.

Done! The perfect Sand Art Jar is ready.


TOP TIP – Make mesmerising layers by tilting the jar slightly in different directions when adding each colour of sand.


Cardboard Tube & Paper Plate Butterfly


Cardboard Tube & Paper Plate Butterfly – 1

Make a family of adorable butterflies and watch your heart flutter. These butterflies can be as colourful and imaginative as you like. Why not create a summer theme wall for your butterflies to fly free?


You will need:

Cardboard Tubes Assorted

Unwaxed Round Paper Plates

Assorted Joggle Eyes

Multicoloured Pipe Cleaners

Pom Poms

All Purpose Washable School Glue

Collage Paper Shapes

Tempera Poster Paint

Masking Tape


Step-by-step:

Using lots of bright colours, apply paint to a paper plate and a cardboard roll and set aside to dry.

When thoroughly dry, cut the paper plate into quarters to make the butterfly’s wings (children old enough to be handy with scissors might benefit from drawn-on cutting lines to follow).

To assemble the butterfly, use strong glue to adhere the four wings to the cardboard roll body and two joggle eyes.

To make the antennae, fold one pipe cleaner in half and adhere two pom poms to the two ends with strong glue.

Stick the antennae to the inside of the cardboard roll with masking tape.

If desired, use strong glue to decorate the wings with scraps of paper, snipping them into shapes as desired and set aside to dry.

When thoroughly dry, personalise further by drawing a mouth and any other features as desired.

Done! Your perfect Butterfly is ready.


TOP TIP – To hang in the learning environment, poke a skewer through the back of the butterfly’s cardboard tube body and thread a length of string through.


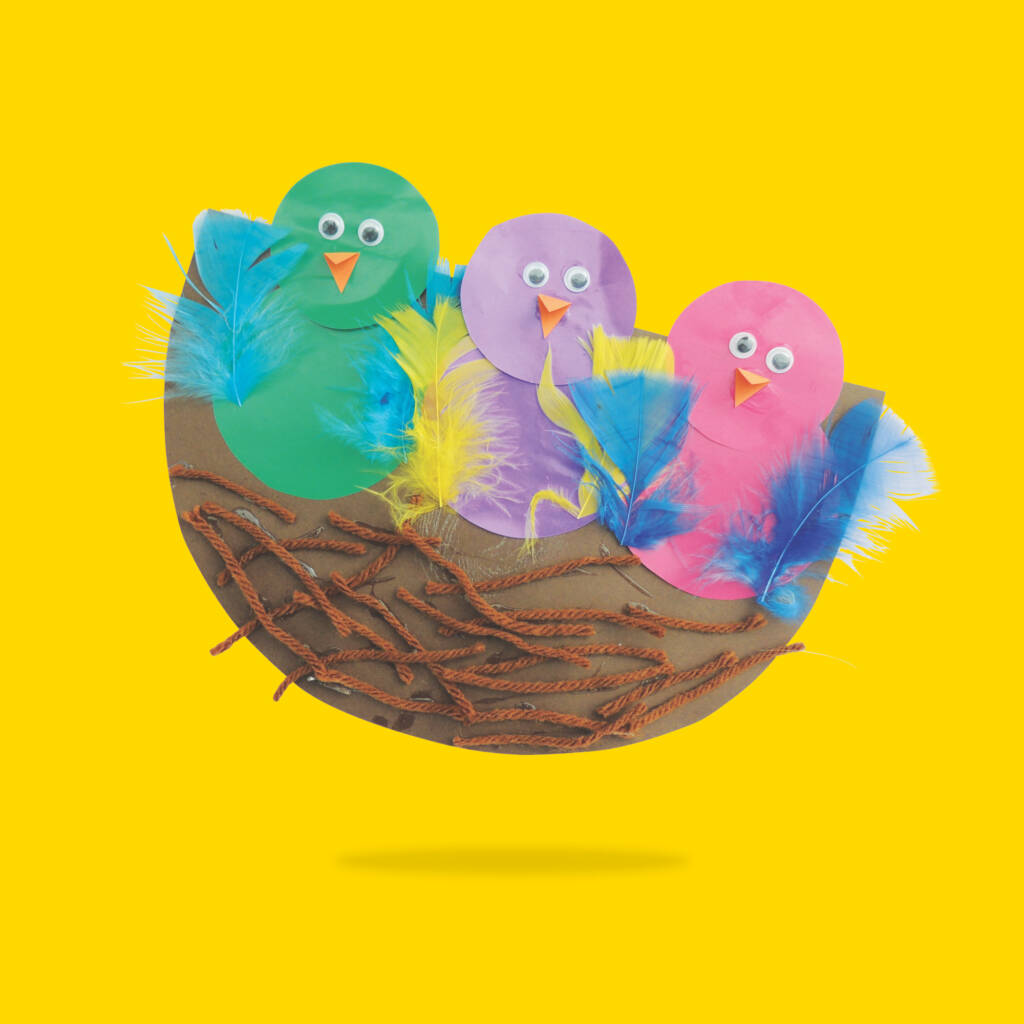
Birds Nest

Birds Nest


This sweet bird’s nest with a family of little birds is so much fun to make and looks great. Where will your summer birds nest live? Have fun with your colourful, feathered friends as children learn about textures, colours and different ‘homes’.

You will need:

A4 Creatistics Brown Cover Paper

Gloss Paper Squares

Short Feathers

Joggle Eyes

All Purpose Washable School Glue

Masking Tape

Creatistics A4 Orange Cover Paper

Acrylic Brown Yarn


Step-by-step:

With brown cover paper, cut one rough semicircle shape and set aside.

With your gloss squares, use a round object (measuring cups work well) to trace and cut out circles – one large and one smaller. Two circles will make one bird. Set desired quantity of circles aside.

Take an orange gloss square, fold it in half and cut small triangles along the folded line. These will open out to make the bird’s beak. Set aside.

Snip short lengths of brown yarn (each roughly 5(L)cm) and set aside.

Ready to assemble! Use all-purpose washable school glue to adhere the pieces together – 1 larger circle to make the bird’s body and one smaller to make the head with a beak. Add feathers for wings and yarn to create a cosy nest.

Add two joggle eyes to each bird and set aside to dry.

Done! Your perfect Birds Nest is ready.


TOP TIP – Young children with emerging scissor skills might enjoy working with a selection of pre-cut shapes to assemble, or paper eye stickers instead of joggle eyes.


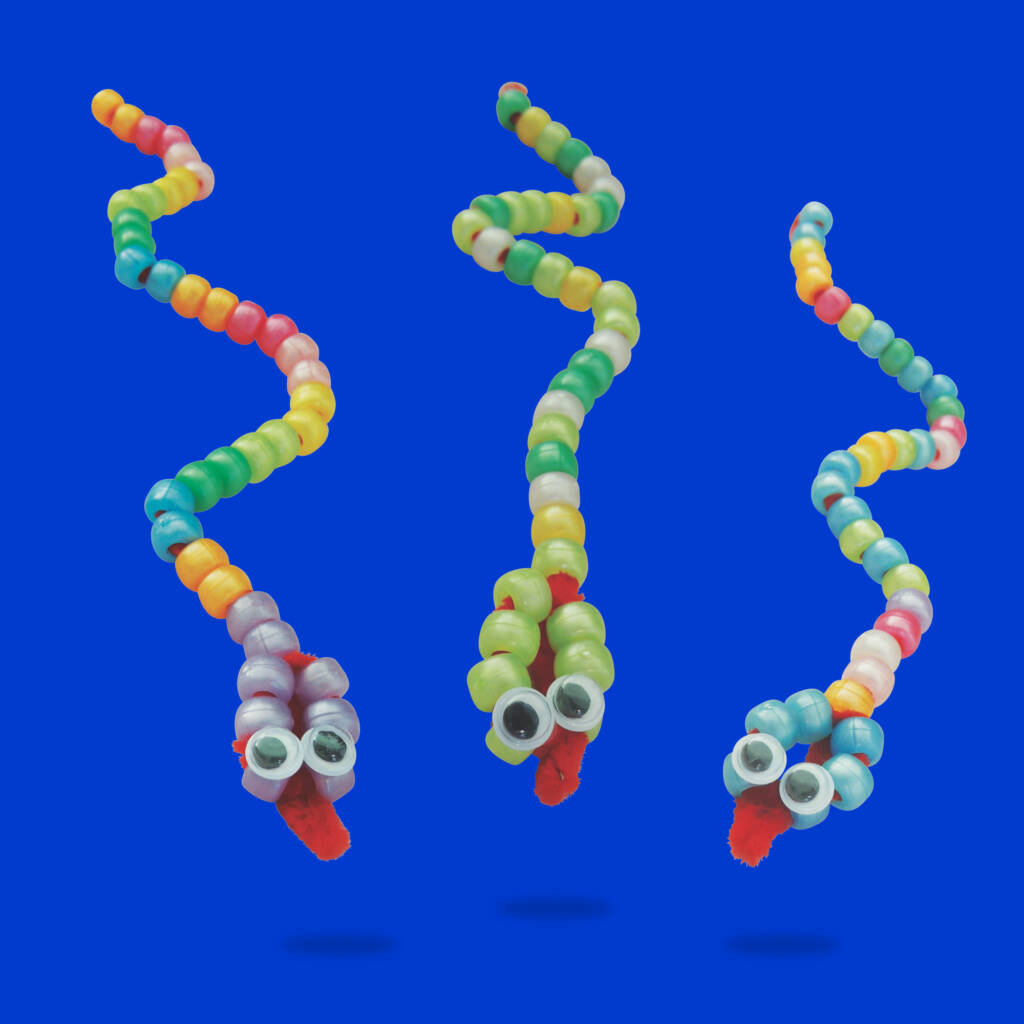
Pony Bead Snake

Snakes craft, Blue background

Snakes alive! Beads make a great basis for craft activities, developing fine motor skills in young children and encouraging creativity. Watch a slithering (but friendly) snake come to life in this summer craft activity children will love. Slither along step-by-step here…


You will need:

Multicoloured Pipe Cleaners

Pearl Pony Beads

Assorted Joggle Eyes

All Purpose Washable School Glue


Step-by-step:

Thread the 1st bead onto the pipe cleaner and bend the very end around the bead, securing it in place to prevent the rest of the beads from falling off.

Thread 28 more beads onto the pipe cleaner to form the snake’s ‘body’.

To make the head, thread six beads of the same colour and then curve back around to form a head shape (three beads on each side of the head) and firmly twist the pipe cleaner around itself between two beads at the snake’s ‘neck’.

Bend the remaining length of pipe cleaner back to poke out through the middle of the head to form a tongue.

Use Washable School Glue to adhere two joggle eyes onto the head, and an extra dab of glue as the tail and head to secure for play and set aside to dry.

Done! Your perfect Pony Bead Snake is ready.


TOP TIP – These adorable snakes aren’t just for craft! They make wonderful props for children’s dramatic play and recounting of favourite stories.


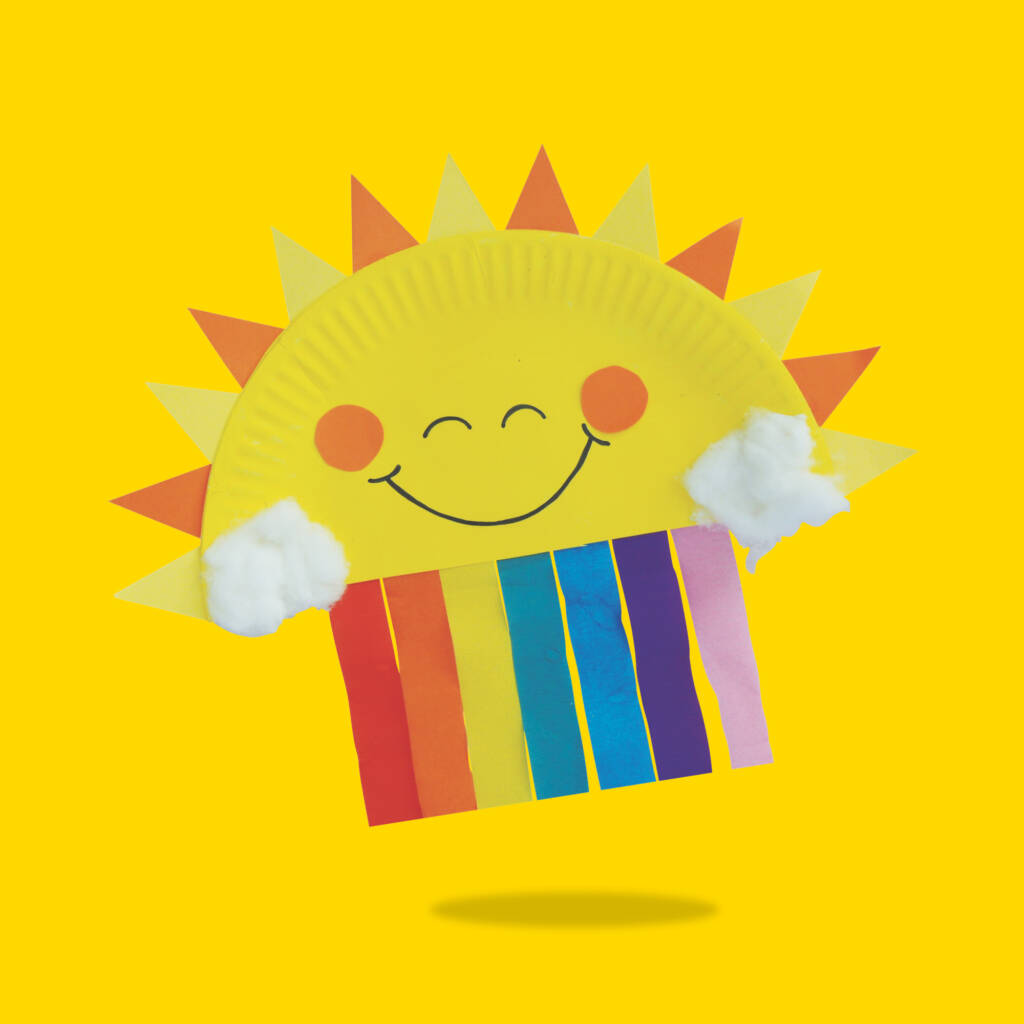
Paper Plate Rainbow Sun


Sunshine Craft, Yellow background

Here comes the sun! With some crepe streamers and paper plates, little ones can create a salute to the sun! Encourage environmental awareness and how Planet Earth and the sun work together. Children have the freedom to create the sun’s friendly face, too. Use this craft activity time to teach about weather, heat, clouds and rain (and rainbows!).


You will need:

Unwaxed Paper Plates

Tempera Poster Paint

Creatistics A4 Yellow Cover Paper

Assorted Crepe Streamers

Creatistics PVA Washable School Glue

Cotton Wool Balls

POSCA Black Bullet Marker


Step-by-step:

Cut one paper plate in half to make the sun and paint it a bright, sunny yellow.

To make the clouds, glue several cotton wool balls to either side of the paper plate’s flat surface and set aside to dry.

To make the sun’s rays snip yellow and orange paper into long tringles, and either glue or sticky tape them onto the back of the painted plate.

Cut strips of crepe paper roughly 30cm in length to make the rainbow, one each of red, orange, yellow, green, blue and purple.

Arrange the crepe paper into rainbow form and glue or tape the lengths to the back of the sun’s flat surface so they can hang down.

Finish off by personalising your sun further with a smiling face.

Done! Your perfect Paper Plate Rainbow Sun is ready.


TOP TIP – To turn your paper plate rainbow sun into a 3D hanging artwork, simply paint another half plate to glue to the back of the sun, punch a hole through the two sides and hang it in your learning environment with a length of twine.


Spinning Paper Cup Windmill


Spinning Paper Cup Windmill – 1

This craft activity lets children create an adorable windmill complete with moving paper blades. Not only is this handmade activity fun, but it also helps children understand basic motion and wind energy (and maybe they can see some famous windmills around the world!).


You will need:

Tempera Paint

Paper Fasteners Split Pins

Cardboard Colour Squares

All Purpose Washable School Glue

POSCA Bullet Marker Pack

Spring Assisted Scissors


Step-by-step:

Decorate a paper cup with brightly coloured paint and set aside to dry.

To make the windmill’s blades, cut two lengths of coloured cardboard (each length measures 9cm long, 2cm wide at the ends, and 1cm wide in the centre).

Use a skewer to poke a hole through the centre of each blade and push a split pin through the holes. Use a dab of school glue to secure the windmill blades to the pin and set aside to dry.

Use markers to decorate the dried windmill cup with windows, a door and any other desired features (remember your windmill will stand upside down).

Use a skewer to poke a hole through the front of the cup, roughly 1.5cm from the top (the bottom of the cup).

Push the split pin (with blades) through the cup’s hole and secure it in place, opening the fasteners inside the cup.

Done! Your perfect Spinning Paper Cup Windmill is ready.


TOP TIP – Make light work of making windmill blades by cutting out a template for preschoolers to trace around or have pre-cut blades ready for younger years.


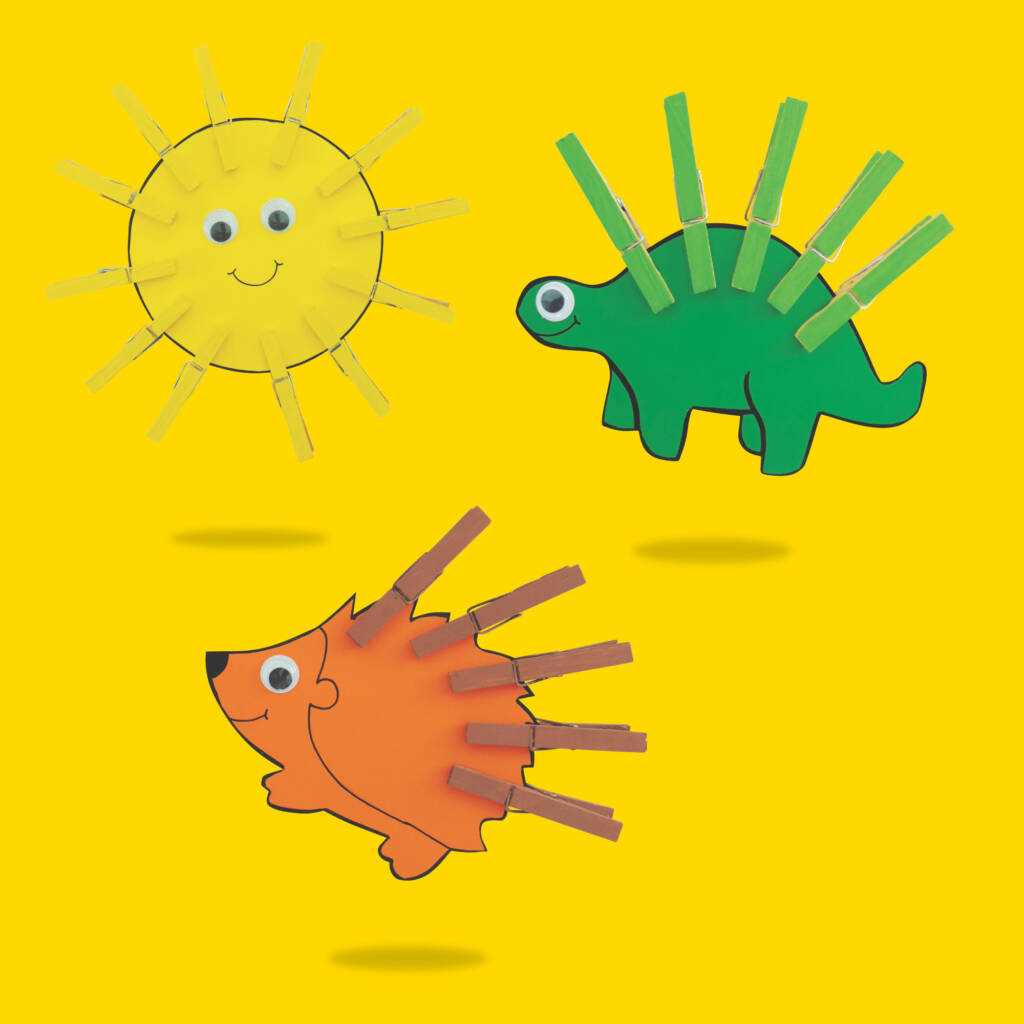
Wooden Peg Creatures

Wooden Peg Creatures

Peg-tastic animals and shapes! In this fun activity, creativity and imagination will run wild as children create their own little creature that has a spiky feature or rays. How about a “peg-asus” with pegs for wings (see what we did there!)?


You will need:

Wooden Pegs

Cardboard Colour Squares

Scissors

Large Glue-On Eyes

Creatistics Acrylic Paint Pack

Tacky Craft Glue


Step-by-step:

With a pencil or marker, draw your desired creature that features spikes, such as a dinosaur, echidna, hedgehog or a sun.

Carefully cut the shape out.

Use Tacky Craft Glue to attach joggle eyes to your creature and set aside to dry.

Using coloured paint, cover the wooden pegs in your desired shade (green for a dinosaur, yellow for a sun, etc.) and set aside to dry.

Use markers to add desired details, such as fur, feathers, scales, facial features, etc.

When the pegs are dry, peg them into position on your creature.

Done! Your perfect Wooden Peg Creature is ready.


TOP TIP – Young children with emerging scissor skills might enjoy working with pre-cut shapes or paper eye stickers instead of joggle eyes.


So, hands up who’s ready for hands-on summer craft? Enjoy these 7 handmade summer craft activities and if you’d like to download the step-by-step activity pack pdf, click here.

Happy crafting over summer and make sure to share your crafty summer awesomeness with us @modernteaching.
 

Blog Home>

Shop MTA>


Posted on

Easter Art And Craft Activities


Hop into Easter with a Crafty Eggs-Travaganza 

Easter is a time for family, friends, and of course adorable Easter craft! From super simple pre-cut ‘everything in the box’ activities to egg-citing multi-step projects for older students to have a crack at, we’ve rounded up 10 of the best!

Read on to adorn your classroom in Easter cheer, assemble the most adorable gifts for some-bunny special and organise an egg-stra special hat parade that’ll be the talk of the town.

So grab your best Easter bonnet and let’s hop to it.


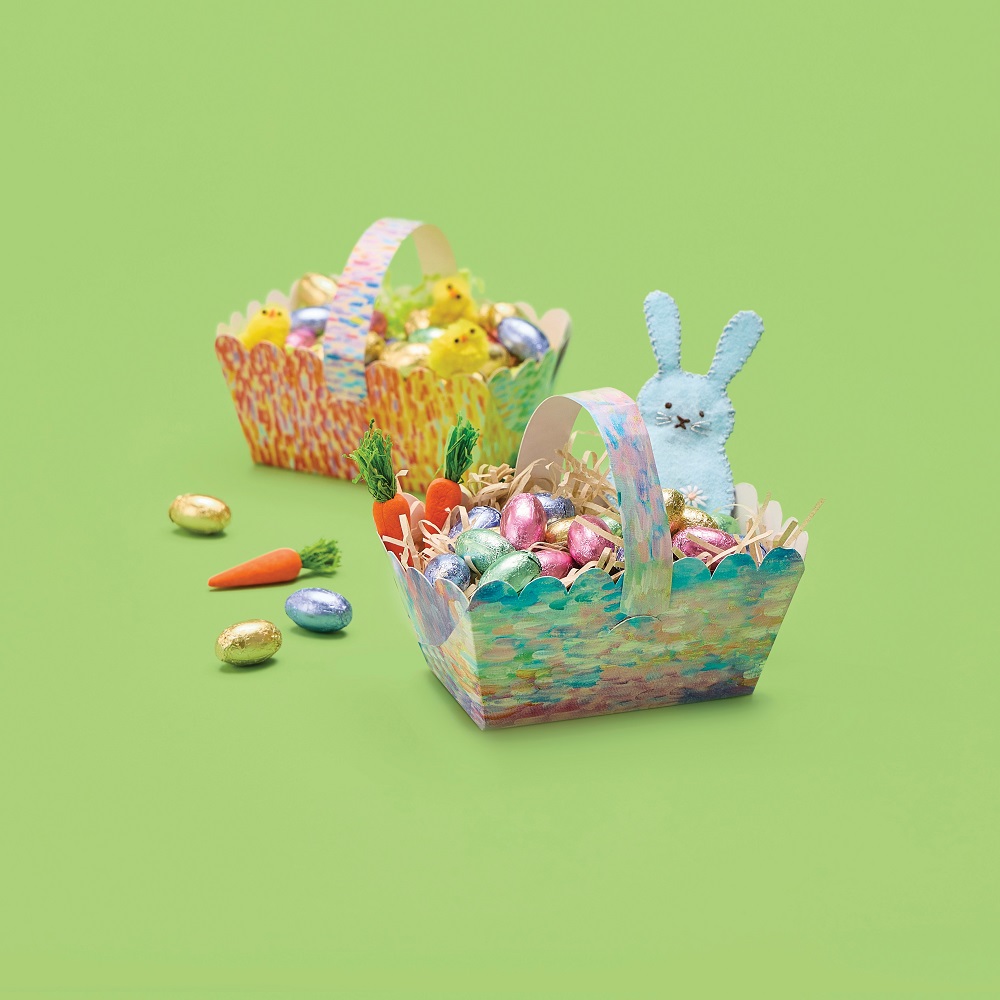
Easter Hunting Baskets

Easter Hunting Basket

The traditional Easter hunting basket has formed part of our Easter memories for generations, with happy little hunters excitedly gathering hidden choccy eggs around the garden or school grounds. The basket making in the days and weeks before hand would build the anticipation of the festivities to come – and finally the day would arrive!

But it doesn’t need to be chocolate! There’s plenty of treasures for children to hunt for, why not try Easter sticker sheets, felt bunny stickers, mini carrots and fuzzy chicks for imaginative Easter hunting that’s bound to delight.

Simple to make and fun to craft, these cardboard baskets are pre-cut with slots and perforated lines to guide your basket folding. All you need to do is decide how you’ll decorate yours!


STEP-BY-STEP

  1. Apply the glue stick to the backing of your Easter basket and handle.
  2. Press the glue side of the basket onto the backing side of the pattern paper and gently smooth down with your fingers to remove any air bubbles, set aside to dry.
  3. Carefully cut away the excess pattered paper and recut along the pre-cut Easter basket lines
  4. Use the pre-fold lines of the basket to fold the basket into its shape and glue into place.
  5. Decorate your basket with Easter stickers, paper shred and chicks.


Done! The perfect hunting basket is ready for chocolate egg hunting!


*TOP TIP – Younger children will enjoy decorating their baskets with scraps of paper or paint, rather than one sheet of patterned paper.


Products Used;

Impressionist Pattern Papers OR Gingham Paper 

Easter Hunting Baskets

 Kraft Paper Shred  OR Green Crinkle Paper Shred

Easter Stickers 

Easter Chicks 

Creatistics Superstik Glue Stick  


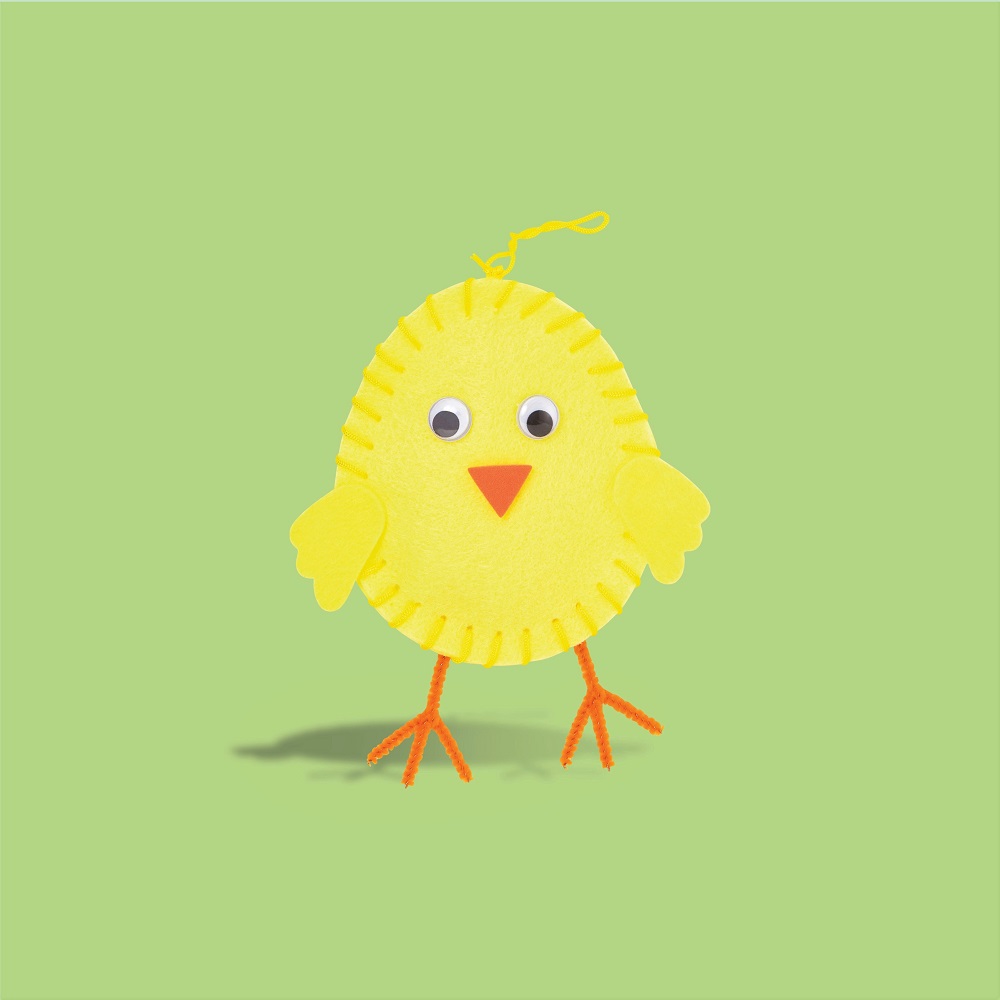
Felt Threading Easter Chicks

Felt Threading Easter Chicks

Mess free crafts like these soft & sweet Easter Chicks are super simple to navigate. With all the pre-cut pieces supplied in the kit, students can experiment with sewing techniques as they assemble the components using the accompanying visual instructions. You’ll just need a tiny dab of glue at the end to adhere the little chicks’ eyes, beak, and wings. And ta-da! Your adorable textile creation is finished.

There are so many incredible developmental benefits for young students engaging in basic sewing, including patience and confidence, fine motor dexterity, the ability to cognitively following instructions, the building of valuable life skills and many more.

These little chickees are just about bouncing out of the packet to be assembled! Read on to follow the steps to make one for your very own.


STEP-BY-STEP

  1. Assemble all your pieces – 2 x yellow felt body pieces, filling, plastic sewing needle & yellow weaving thread, 2 x wings, 2 x eyes, a beak and length of orange pipe cleaner to form the legs.
  2. Bend your orange pipe cleaner over to that it forms a long semi-circle.
  3. Using scissors, carefully snip two short lengths off the ends, and use these lengths to twist around the legs to form the chick’s feet, and then set aside.
  4. Thread your plastic needle with the yellow weaving thread and tie a knot in one end.
  5. Place your yellow body pieces together, and using a whip stitch, begin to sew the two pieces together at one side.
  6. Place leg piece inside the 2 body pieces and continue to whip stitch, locking the legs into the body as you continue around the edge.
  7. When you have stitched most of the way around, carefully place your filling evenly into the body and finish off stitching the two pieces closed, tying off with a firm knot (the remaining thread can form a hanging loop if desired).
  8. Using a small dab of tacky glue, attach the 2 eyes, the beak and wings to chick and set aside to dry thoroughly.


Done! Your felt Easter chick is ready.


*TOP TIP – Holding the pieces together with a few pegs will help keep everything stable while younger students sew it all together.


Products Used;

 Felt Threading Easter Chicks

Tacky Craft Glue 


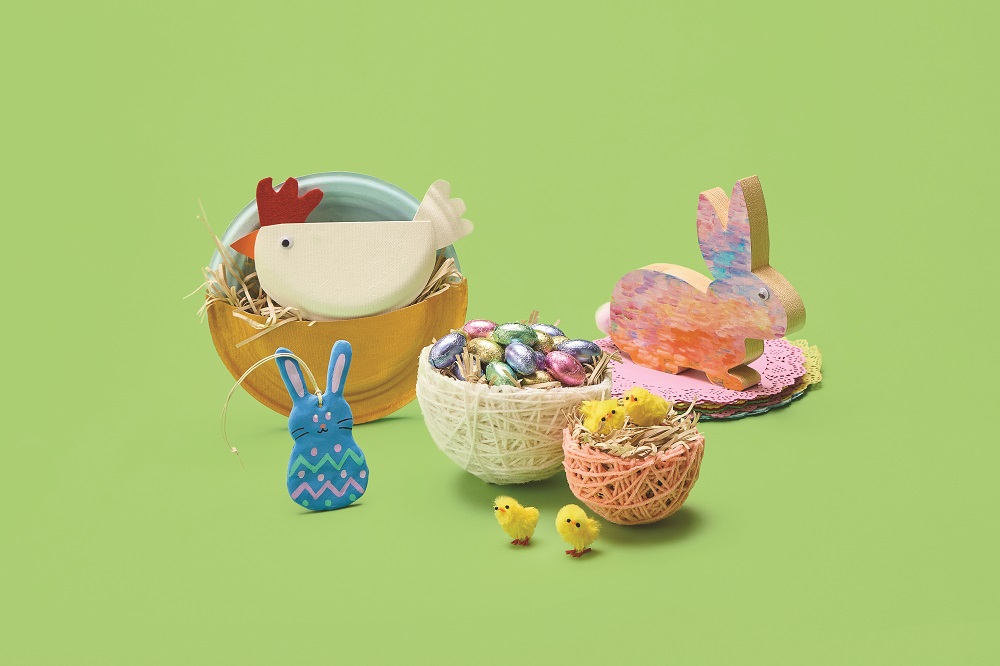
Eco Plate Roosting Nests

Eco Plate Roosting Nests

Paper plates – a classroom favourite! It’s amazing what you can transform them into. With just a snip of some scissors, a splash of colour, a dab of glue and a sprinkle of creativity, you’re able to make any creative creature.

For this activity we’ve transformed the trusty paper plate into an adorable roosting nest. We know little ones will love filling their nests with Mama Hen and her beloved eggs & chicks. We love the texture and stability the eco sugarcane ‘paper’ plates gave to this activity, providing value for children to engage in pretend play and storytelling with their creations.


STEP-BY-STEP

  1. For the background, apply your choice of pastel paint onto the front side of a plate and set aside to dry.
  2. To make the nest, cut one plate in half, apply gold paint to the back side, and set aside to dry.
  3. To make Mama Hen, cut the remaining half plate into a semi-circle or large egg shape.
  4. Using coloured felt or paper, cut out one white tail, one orange beak and one red comb.
  5. Glue the beak, comb and tail onto Mama Hen and glue on some joggle eyes so she can keep watch over her chicks.
  6. When the painted plates have dried, glue the nest onto the background plate and set aside to dry again (a few pegs will help everything stay in place while the glue dries).
  7. When Mama Hen and her nest is thoroughly dry, pack in Kraft Paper Shred and then rest Mama Hen and her chicks inside their cosy home.


Done! Your very own Easter Roosting Rest is ready.


*TOP TIP – Add some extra goodies to Mama Hen’s nest by gluing patterned paper onto sugar cane plates and cut into oval egg shapes.


Products Used;

18cm White Sugar Cane Eco Plates

23cm White Sugar Cane Eco Plates 

Pattern Paper Squares 

 Creatistics Pastel Paint

Assorted Felt Sheets 

Joggle Eyes 

Kraft Paper Shred 

Gold Fabric and Craft Paint 

Creatistics Strong Craft Glue 

Easter Chicks


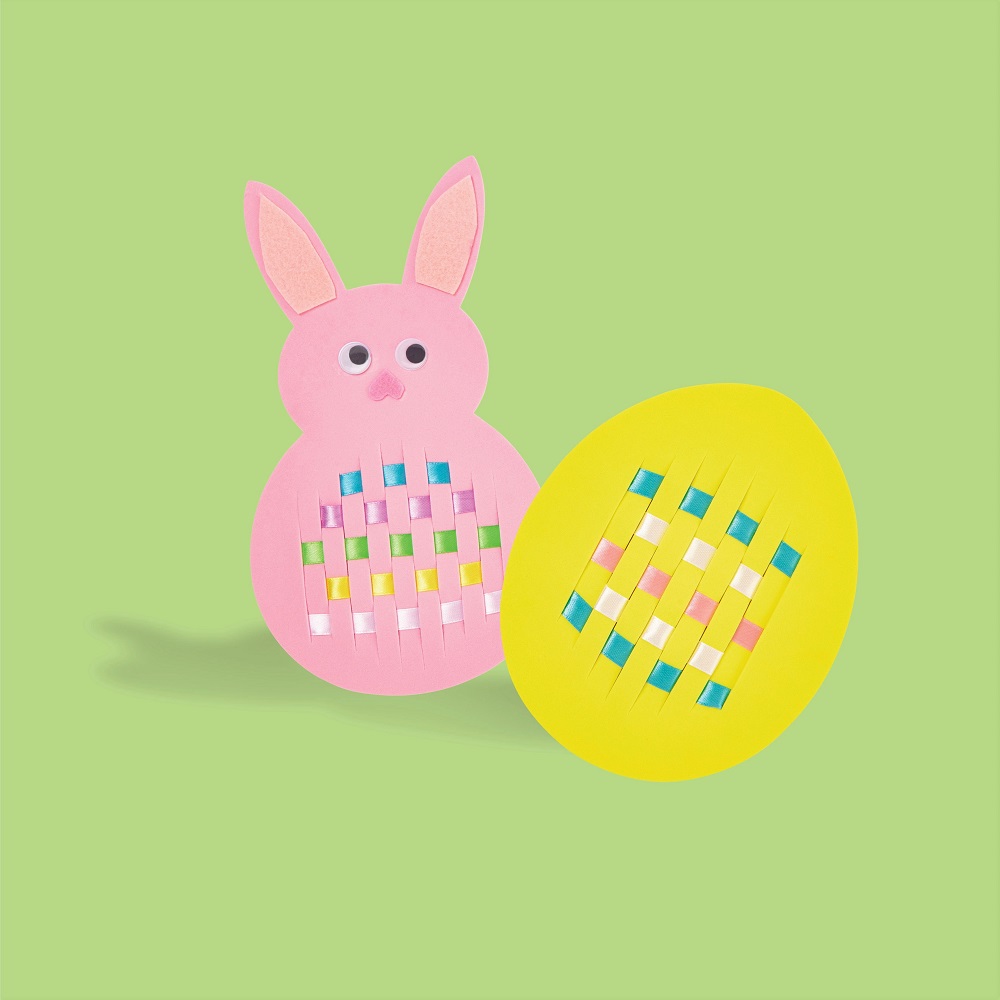
Weaving Eggs & Bunnies

Weaving Eggs & Bunnies

Create fantastic weaving patterns this Easter with the Weaving Eggs & Bunnies set. This is a brilliant introduction for children working with textiles as they gain an understanding of the fundamentals of weaving and pattern designs. They’re perfect to decorate the classroom, home or make the sweetest Easter gifts for loved ones. Extend children’s vocabulary as they discuss secondary colours and pastel shades and positional language to describe the action of ‘over and under’ as they work with the satin weaving ribbons.

Take the activity to the next level by adding eyes, nose and decorative details to the bunnies or create a nest for the eggs. Add them to Easter hats and bonnets, use them for storytelling or combine two together to make Easter themed hinting baskets. When children’s creativity is involved, there’s absolutely no limit!


STEP-BY-STEP

  1. Choose your design and pre-cut lengths of satin ribbon.
  2. Weave each length of ribbon over and under the pre-cut slots to form a pattern.
  3. Use a dab of tacky glue to hold the ribbon in place on the reverse side.
  4. Add your choice of detail such as bunny’s joggle eyes and pastel felt facial features or decorate both shapes with adhesive rhinestones or glitter flowers and daisies.
  5. If using glue, set aside to dry thoroughly.


Done! The perfect Easter weaving eggs & bunnies are ready.


*TOP TIP – Experimenting with pattern making and sequences in the classroom will help younger children get the hang of the over and under action to form weaving patterns.


Products Used;

Weaving Eggs & Bunnies 

Pastel Felt 

Assorted Joggle Eyes 

Tacky Craft Glue 


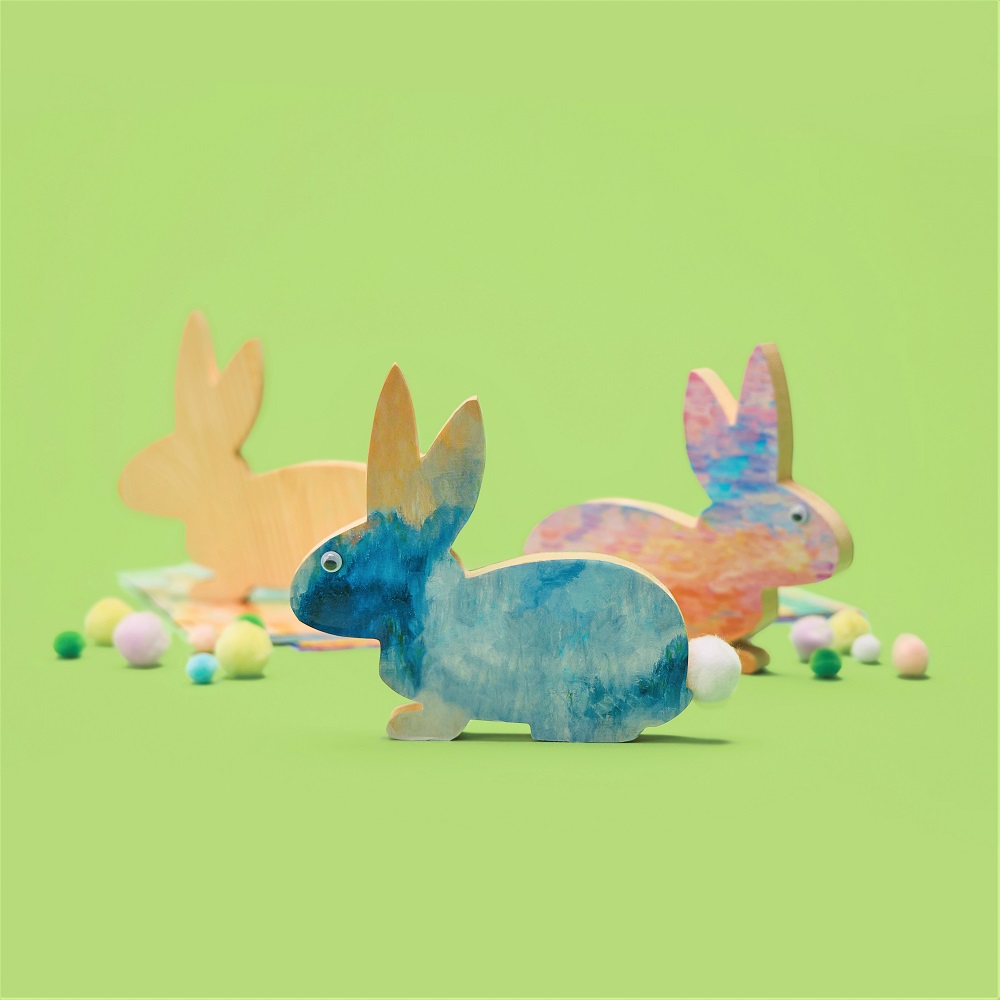
Colourful Wooden Bunnies

Colourful Wooden Bunnies

These solid pre-cut wooden bunnies are a terrific experience to incorporate woodwork to the younger year’s classroom. Made from a solid block of unfinished pinewood, they lend themselves to all sorts of decorations. Whether it’s patterned paper, paint, wood markers, POSCA pens, glitter glue or a combination of them all, there’s bound to be a colony of bunnies full of individual personality in no time!

Read on to follow the steps to make the illustrated impressionist artwork inspired bunnies.


STEP-BY-STEP

  1. Lay the wooden bunny onto the impressionist paper and trace around with a pencil.
  2. Lift the bunny off and carefully cut around the pencil markings.
  3. Cover one side of the wooden bunny with Creatistics Superstik glue stick and place the blank side of the paper onto the wooden bunny, matching the bunny paper shape to the corresponding wooden bunny side.
  4. Repeat for the second side.
  5. Apply Tacky glue to Joggle eyes and a Pom Pom tail and adhere in place and set aside to thoroughly dry.
  6. Draw whiskers and other details on your bunny as desired) or add on some Easter themed embellishments. Don’t forget Bunny’s crunchy carrot to nibble on too.


Done! Your adorable Easter Bunnies are ready.


*TOP TIP – Cutting the paper just on the inside of the pencil markings will ensure it fits the wooden bunny exactly.


Products Used;

Wooden Bunny

 Pastel Pom Poms 

 Impressionist Pattern Papers 

Creatistics Superstik Glue Stick  


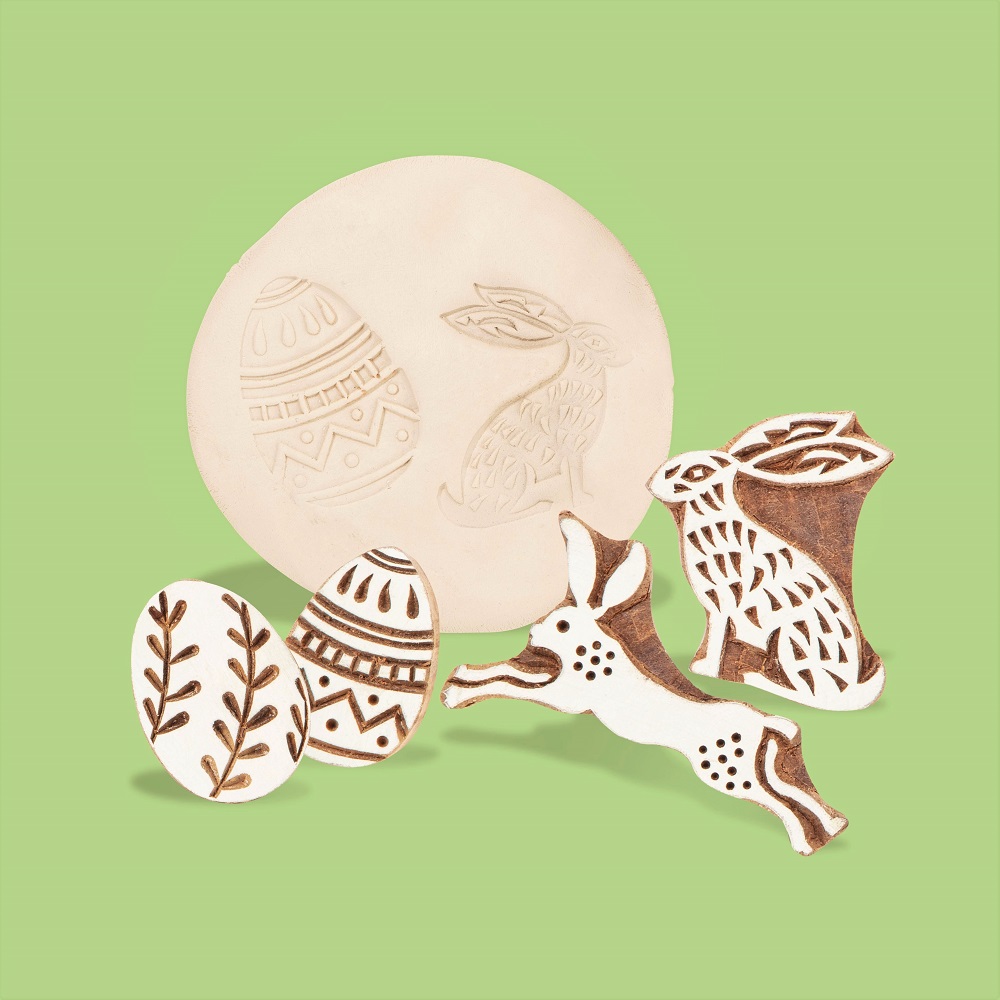
Easter Block Print Stamps

Easter Block Print Stamps

Clay is a medium that lends itself to all age groups and crafting abilities – from beginners right through to experienced potters. And the beauty of air-dry clay is the ability to form incredible works without needing the hassle and expense of firing ovens. Simply use your hands to form coil or pinch pots, shallow dishes, birds in nests, necklaces, wall art, hanging decorations, nature prints, paper weights and so much more!

These adorable Easter themed wooden Block Print Stamps add festive flare to your Easter clay works. Perfectly paired with natural beading cord or leather cord, to make all sorts of jewellery or decorative works. Form your own clay beads or grab yourself convenient packs of beads in natural wood, pearl pony, or painted pink & white wood.

Don’t forget to add a finishing-off sparkle with Creatistics Bio-glitter, and you’re all done!


*TOP TIP – If your clay dries out while you’re using it for extended periods, use a little water on your hands to form a smooth surface. This is particularly handy for smoothing the edges of your works.


Products Used;

Easter Block Print Stamps 

Creatistics Air Dry Ceramic Clay  

 Air Hardening Clay 

Flowers of Australia Block Stamps  

Wooden Block Print Stamps 


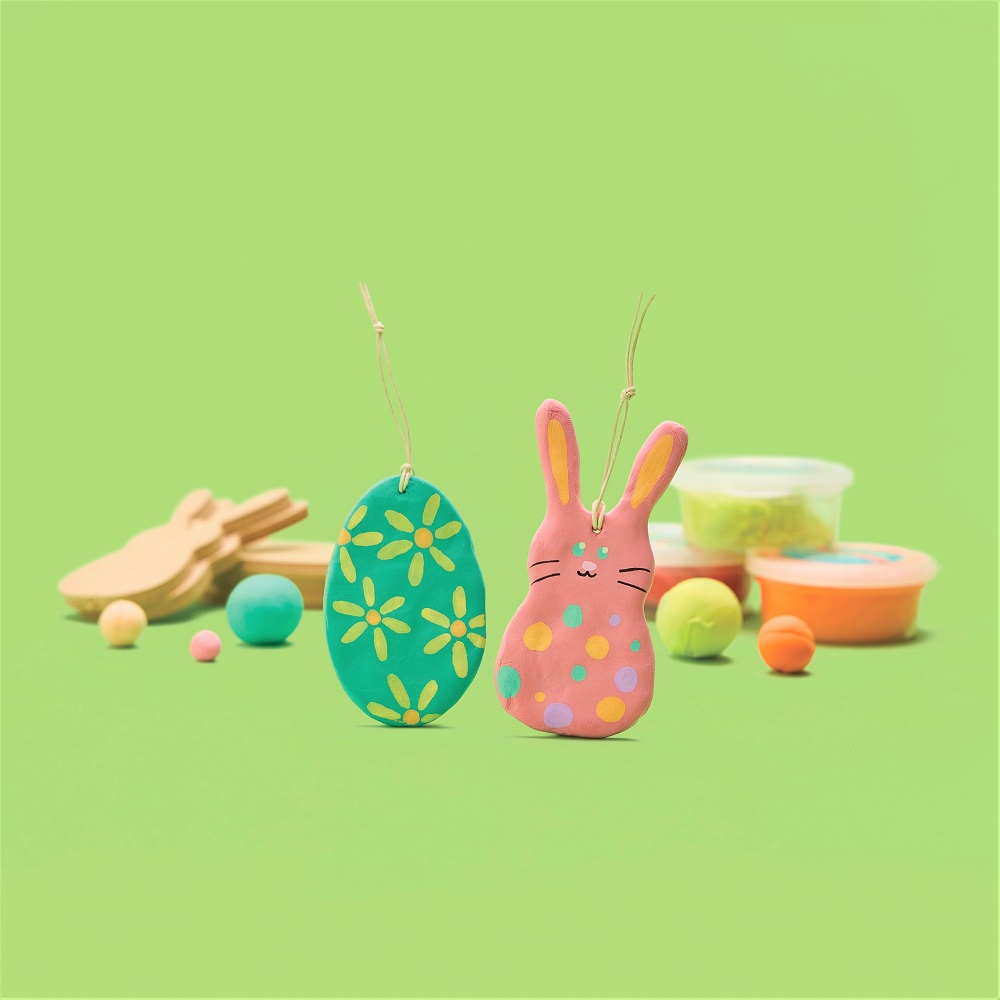
Wooden Easter Ornaments

Wooden Easter Ornaments

These wooden Easter ornaments are the cutest little blank canvases, allowing for plenty of personalisation as children decorate them to their liking. The finished product can make all sorts of goodies – traditional hanging decorations, key chains, school bag accessories, car rear view mirror accessories, gift tags, Easter hat additions, hunting basket treasures and so much more.

For colourful multi-step creations, the following activity combines modelling with drawing. Although, the beauty of a blank wooden shape ensures there’s no end to the types of mediums that can be used – paint, patterned paper, collage, embellishments, glitter and more.

How will you transform your Easter ornaments?


STEP-BY-STEP

  1. Divide each Magiclay colour pot into 3 portions (each 20g container will cover approx. 3 Wooden Easter Ornaments).
  2. Using your fingers, gently press your portion of Magiclay into a flat rough circle.
  3. Place it onto the wooden ornament and wrap it around, covering the ornaments entire front surface.
  4. Gently mould the clay onto the back of the ornament, using your fingers to manipulate the Magiclay into place. Your ornament should now be completely covered.
  5. Carefully poke a skewer through the ornaments hole to ensure it can still hang when dry.
  6. Set aside to dry for 24 to 48 hours.
  7. Use POSCA paint pens to decorate your shapes and set aside to dry again.
  8. Thread a length of twine/ribbon through the ornament’s hole and tie off securely into a loop.


Done! The perfect Easter decorations for the classroom and home are ready.


*TOP TIP – For large classes or combination of classes, the bulk pack Silk Clay Kit, also available separately in individual colours, will ensure there’s plenty to go round in each student’s preference of colour.


Products Used;

Paper Magiclay Candy Colours  

 Wooden Easter Ornaments 

Natural Beading Cord 

POSCA Marker Pastel


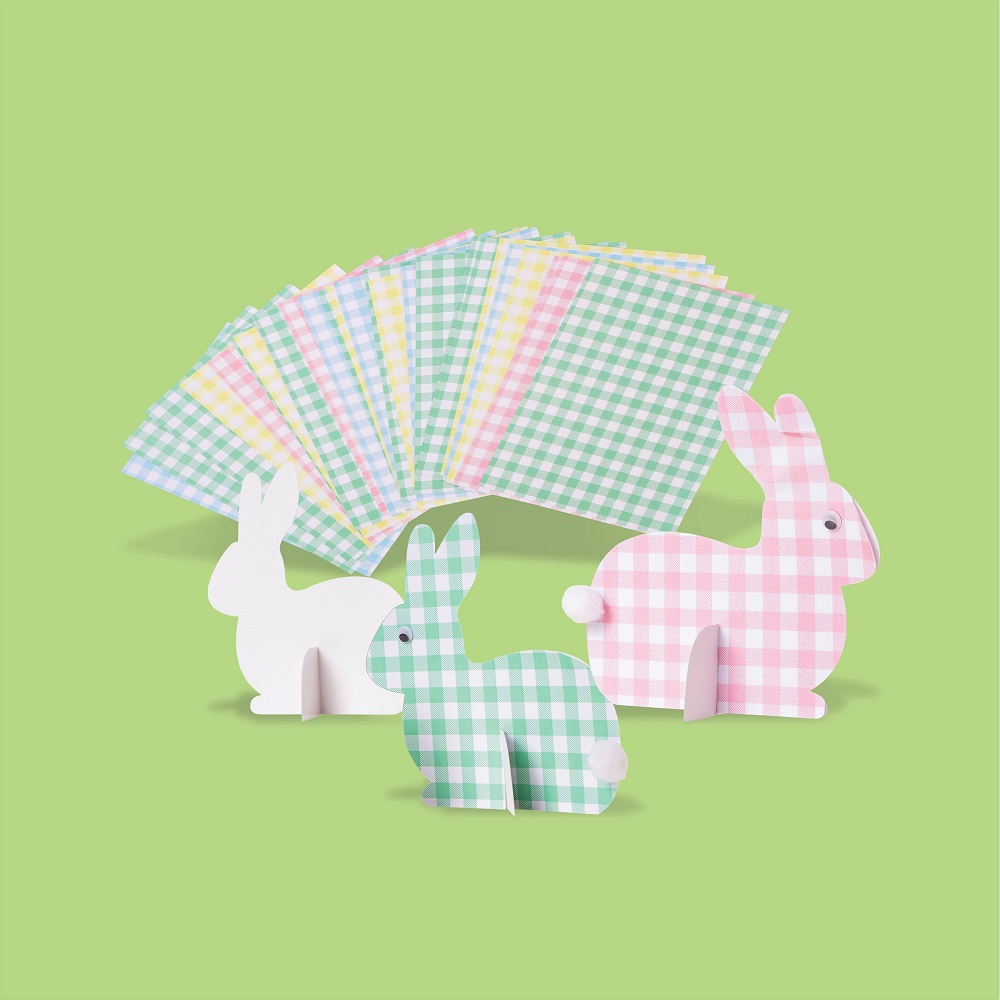
Standing Cardboard Easter Bunny

Standing Cardboard Easter Bunny

These cute Standing Cardboard Bunny shapes are sure to capture children’s attention. They’re supplied in plain white cardboard to provide opportunities for creativity to shine – collage, paint, draw or stick on any number of embellishments. Add joggle eyes, a nose, a pom pom tail or even tie a decorative bow around the collar. You’re Peter Cottontail is ready to hop down the bunny trail!

Read on to work through the steps for creating your very own pastel toned gingham patterned bunny.


STEP-BY-STEP

  1. Apply a layer of glue stick to one side of the bunny and set aside to dry.
  2. Carefully cut the excess paper from around the bunny, and along the pre-cut standing slot.
  3. Repeat steps 1 and 2 on the reverse side of the bunny if desired.
  4. Use tacky glue to adhere joggle eyes, a pom pom tail (and any other embellishments) and set aside to thoroughly dry.
  5. Slot the bunny-shaped cardboard piece neatly into the pre-cut holder.


Done! Your adorable standing bunny is ready to decorate your desk, mantel, or Easter lunch table.


*TOP TIP – When using glue, allow your decorated pieces to thoroughly dry before slotting the bunny into its standing base.


Products Used;

Standing Cardboard Bunny

Gingham Paper

Pastel Pom Poms

Creatistics Superstik Glue Stick

Tacky Craft Glue 

Assorted Joggle Eyes


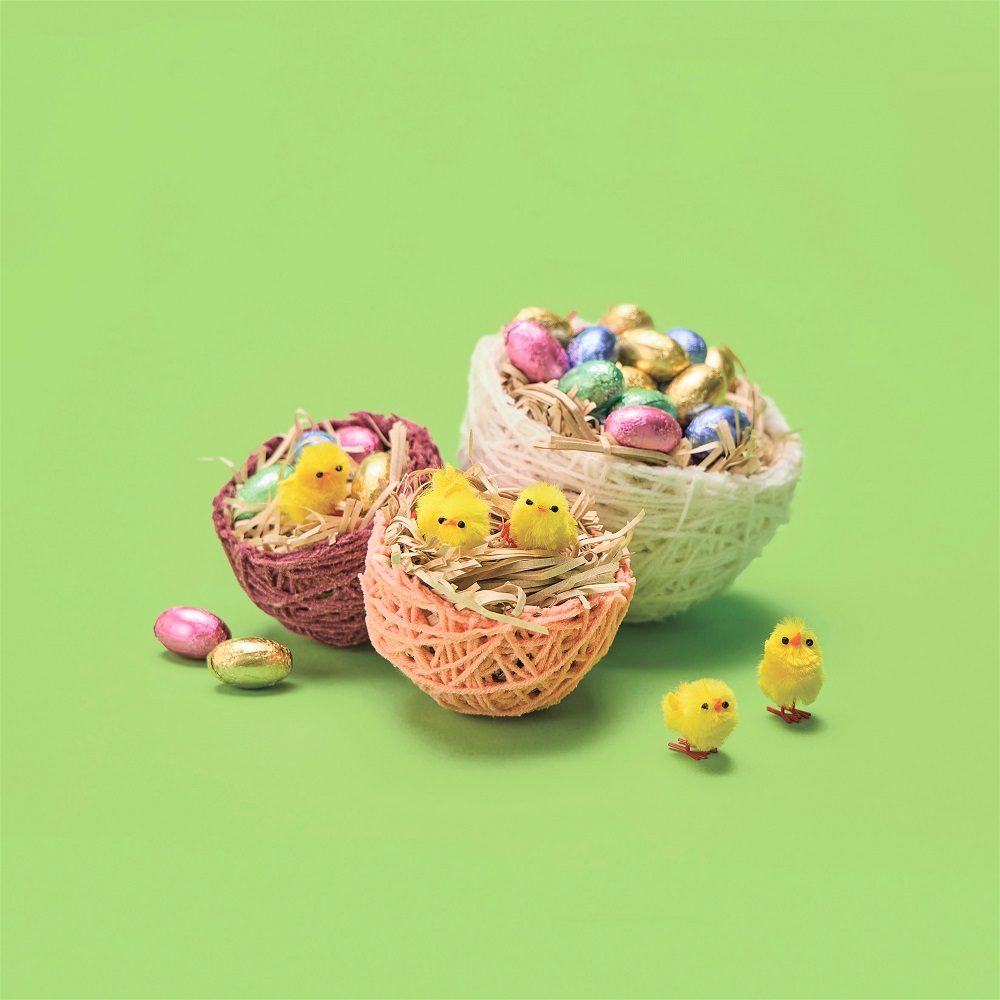
Easter Yarn Nests

Easter Yarn Nests

Are you looking for an oh-so-cute project for older students? This utterly adorable Easter activity uses a process similar to papier mache, in this case using yarn in place of paper, with PVA glue acting as the moist adhesive to bind the yarn onto a balloon and then hardening into a nest as it dries.

Buttery soft pastel toned yarn in light blue, pink, purple and white will make for a super sweet Easter theme while bright & bold coloured yarn will lend itself to artistic flare. When your nest is ready, it can be filled with paper shred in natural, pastel rainbow or green or even snuggly feathers in pastel, bright or natural. Add in some little chickees and hide your choccies away.

In any colour way you choose, your yarn nests will sit proudly on display!


STEP-BY-STEP

  1. Blow up the balloon with a small amount of air so that it resembled an egg shape, firmly tie a knot and set aside.
  2. Pour approx. 1 cup of PVA glue into a shallow bowl.
  3. Cut long lengths of coloured yarn and carefully place them into the glue to avoid tangling, making sure all parts of the yarn are covered in glue.
  4. Slowly wind the PVA covered yarn around the balloon, using fingers to gently move the yarn into place and remove excess glue when wrapping.
  5. Hang to dry (depending on the weather this may take up to a week).
  6. When the glue is thoroughly dry, pop the balloon and remove all pieces while carefully cutting the yarn egg in half to form 2 nests.
  7. Fill each nest with paper shred and decorate with chicks and chocolate eggs.


Done! The perfect cosy Easter nest is ready.


*TOP TIP – Letting the PVA yarn dry between layers will speed up the process (too many layers of yarn and PVA will make it tricky to dry). Be patient, it can take days for some layers to dry thoroughly.


Products Used;

Balloons

Assorted Acrylic Yarn 

Creatistics PVA Washable School Glue

Kraft Paper Shred

 Easter Chicks


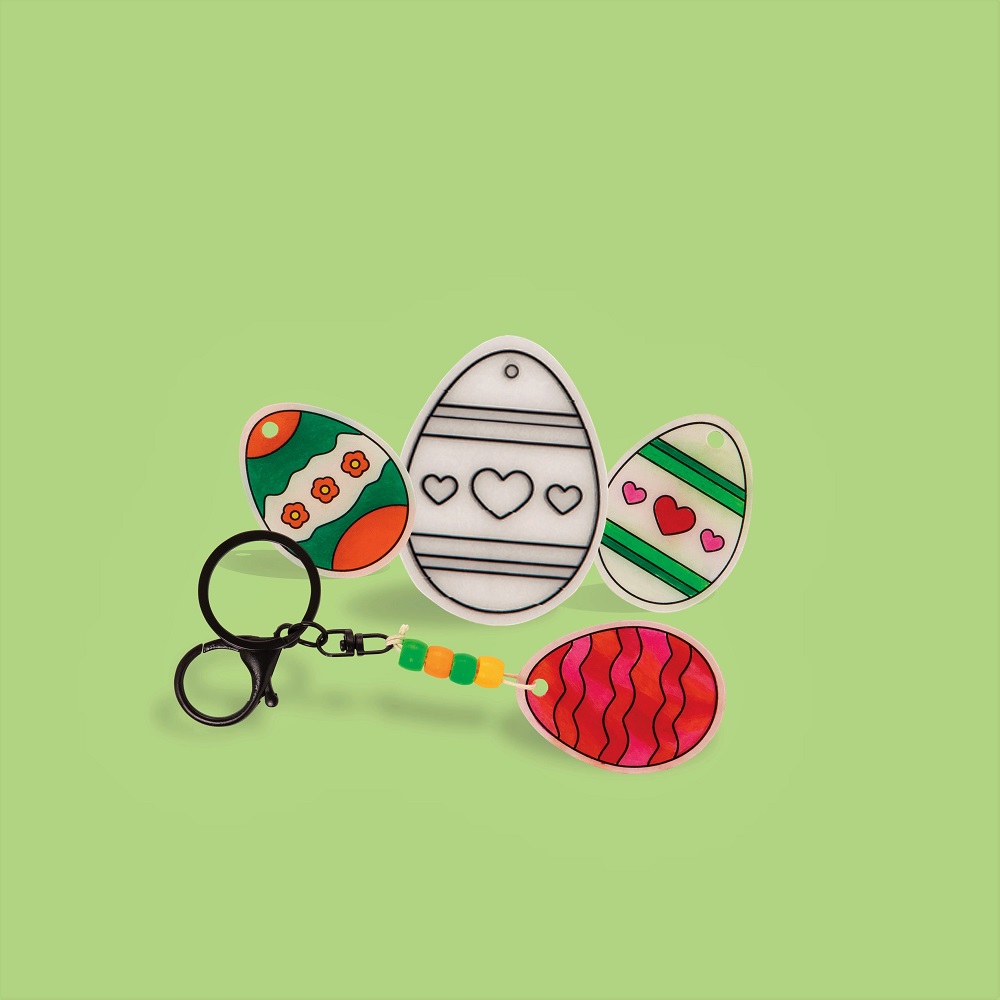
Shrink Film Easter Eggs

Shrink Film Easter Eggs

Have you tried shrink film before? Simply colour, bake, and watch it shrink!

Shrink film is a brilliantly mesmerising activity, and these new handy pre-cut Shrink Film Easter Eggs are sure to create a buzz in the classroom. Use the different patterns to make trinkets, jewellery, and decorations – and the happiest of Easter craft memories.


STEP-BY-STEP

  1. Colour in your design on the matt side of the shrink film using coloured pencils or permanent markers (remember to pop out the pre-cut hanging hole before baking).
  2. Pre-heat oven to 150°C.
  3. Place design on a lined tray (matt side up) and bake.
  4. Plastic will begin to shrink after 10 seconds (to approx. 60% of its original size).
  5. When the plastic has returned to its flat shape remove the tray from the oven.
  6. Wait for the shrink film to cool completely before handling.
  7. When thoroughly cool, thread a length of cord into the hole, and firmly tie off.
  8. Thread desired number of beads onto the cord and firmly attach to your keychain with several firm knots.


Done! The perfect Easter themed key ring is ready!


*TOP TIP – With shrink film, coloured pencils go a long way. A very light shading will result in bold and vibrant colours.


Products Used;

Shrink Film Easter Eggs

 Black Lobster Key Tags

Natural Beading Cord

Pearl Pony Beads

Jumbo Coloured Pencils


Easter Clay & Dough Cutters

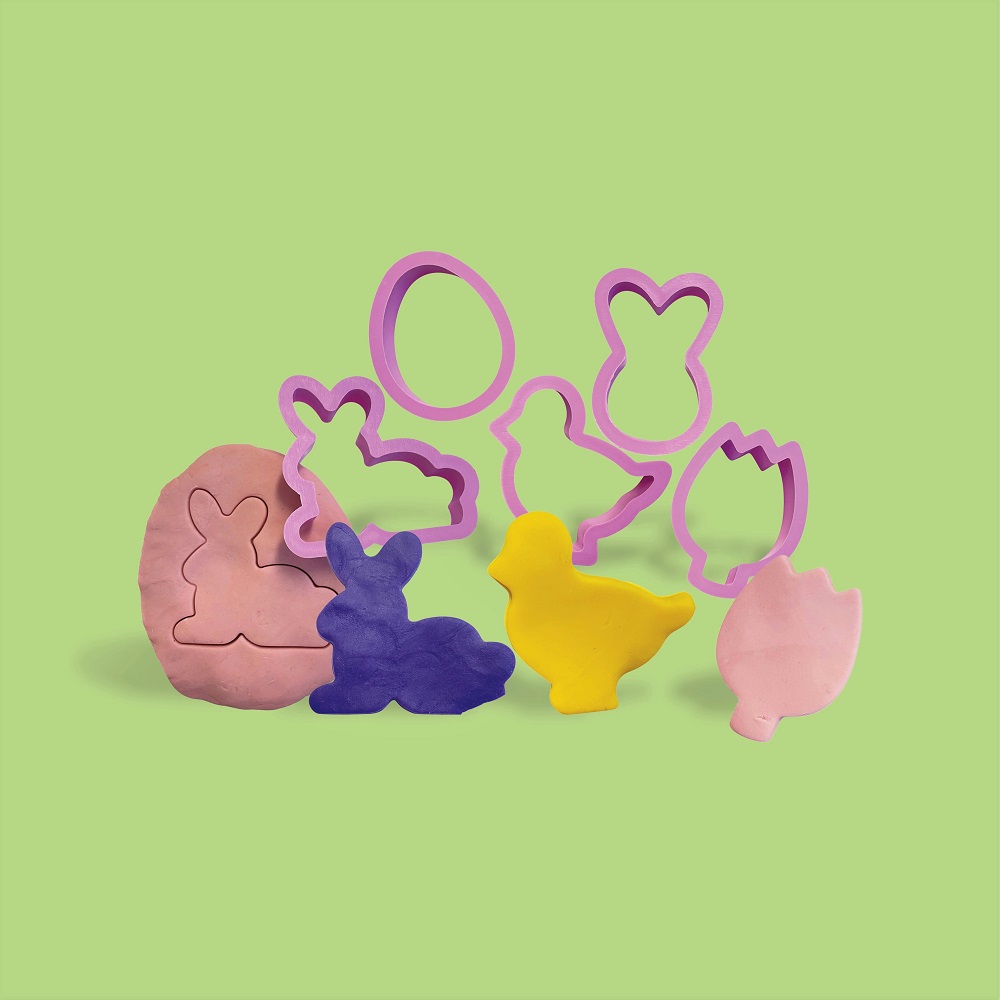
Easter Clay & Dough Cutters

Working with dough is a satisfying way to entertain children’s tactile stimulation and creativity. It’s also an activity rich with physical benefits – from fine motor strength and dexterity to coordinating dough tools to form creations out of the chosen medium.

This set of Easter Clay and Dough Cutters offers incredible possibilities for children to make and create Easter goodies. In each set there’s an egg, baby chick, rabbit, tulip, and bunny face shape for children to stamp in any number of dough options (play dough, cookie dough, modelling clay, or plasticine).

For children to make permanent works, air dry clay is a handy option, simply roll the clay out as you would for dough, press the Easter shaped cutter into the clay, remove the excess and set your clay ornament aside to dry. Before it’s dry, use a pencil or skewer to carefully poke a hole into the top of the shape will ensure there’s somewhere to tie cording and beads for simply stunning Easter decorations.


*TOP TIP – A light sprinkling of Bio-Glitter will add an extra-special sparkly touch to the experience.


Products Used;

Easter Clay and Dough Cutters

Creatistics Pastel Dough

Plastic Rolling Pin 


We hope you’ve enjoyed the latest eggs-travaganza of Easter crafts and are bursting with inspiration for an egg-stra special Easter!


Download: Easter activities PDF Bundle


Blog Home>

Shop MTA>

Posted on

Ten Frightfully Good Activities For The Spooky Season

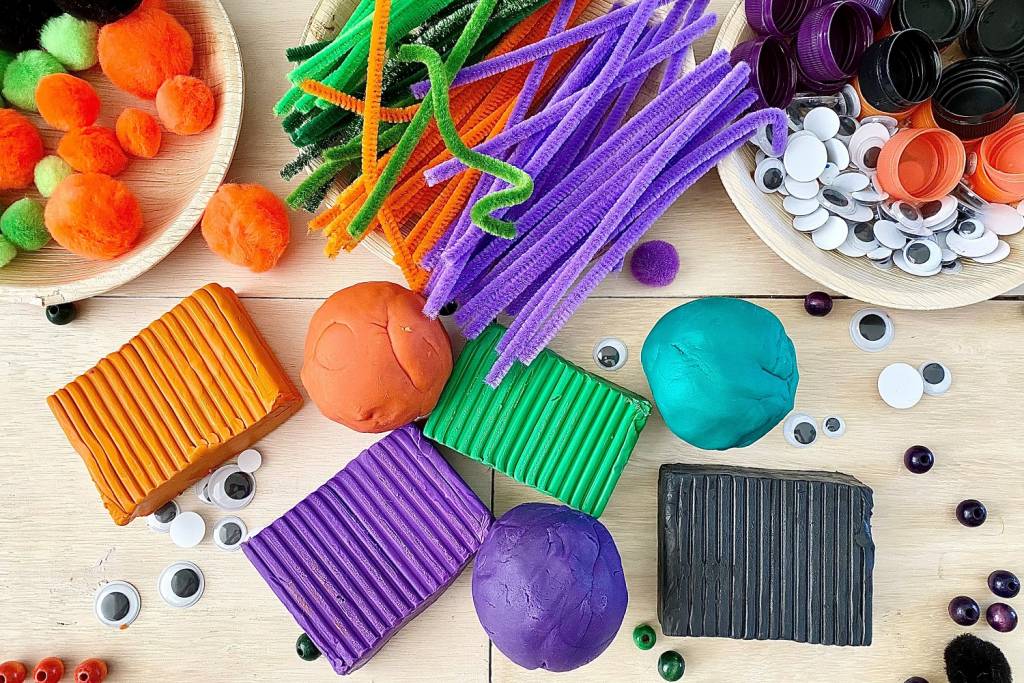
Various Halloween themed craft supplies

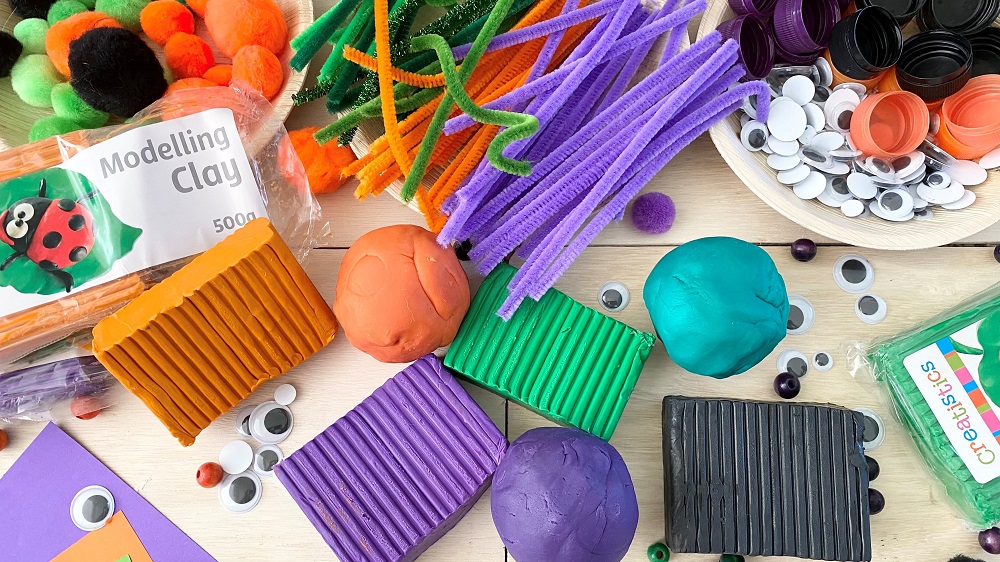
Halloween is such a fun time of year for spooky crafts and activities, with plenty of opportunities to bring out children’s creativity and imagination. From dressing up in costumes and decorating the classroom or home to scavenger hunts, and arts and crafts, there’s something for everyone to have a wickedly good time! Read on for some quick, easy and festive Halloween projects that will have you howling!


Paper Bag Monsters

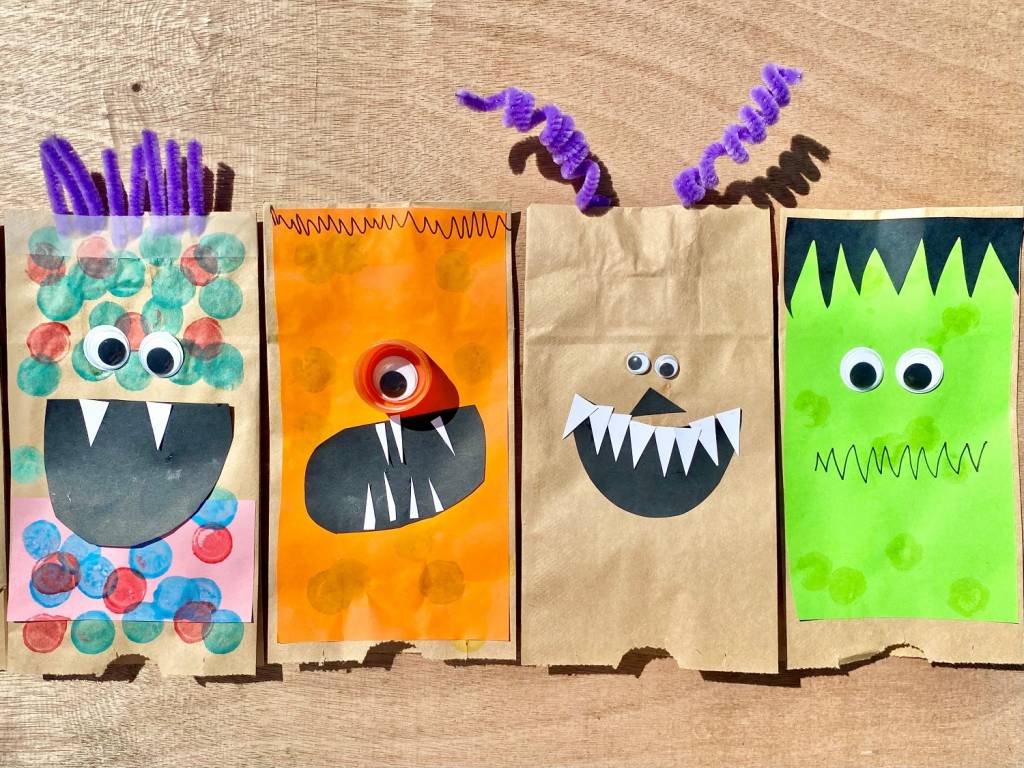
Spooky bag monster craft project
Paper bag monsters are a versatile craft experience for children to let their imaginations run wild! These plain bags can be decorated in whatever wacky characters come to mind, with children freely exploring the open-ended materials offered and choosing to use them in their own wonderful ways. Add language and storytelling to the experience by creating storylines with their characters or find a cosy spot for children to engage in spooky monster puppet play when their paper bag creations are dry.


Featured products:
Paper Bags 
Dot Markers 
Jumbo Creations Box 
Paper Shapes 


Ghost Pencil Toppers
frightful ghosts pencil toppers craft project
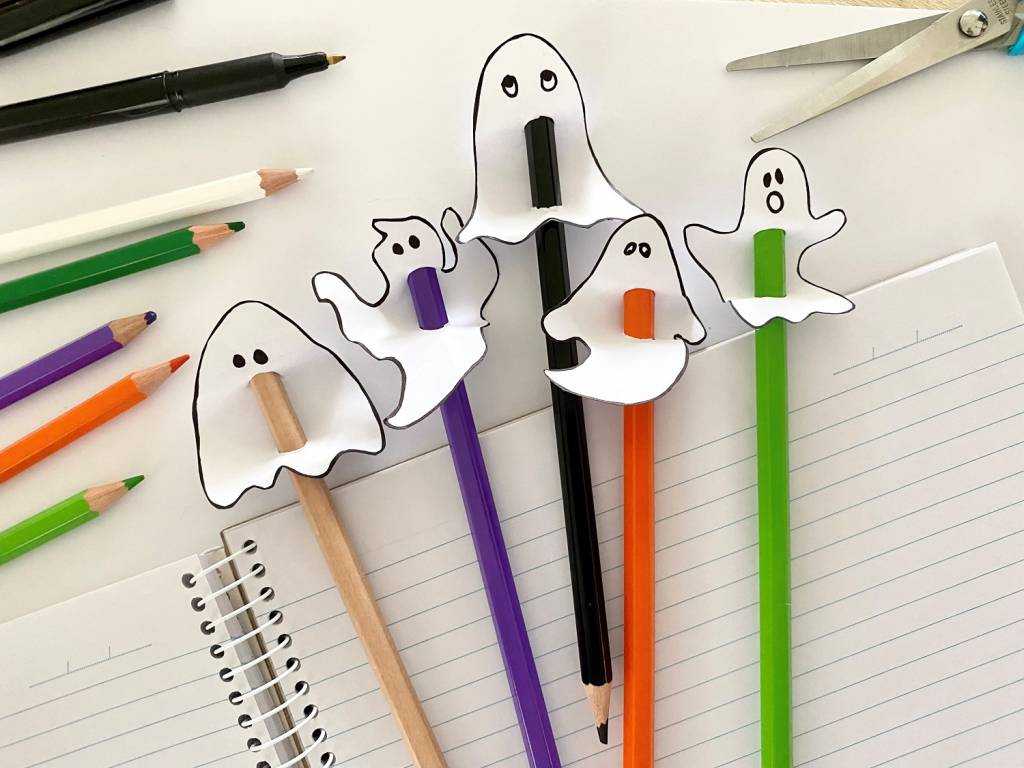
Add some spooky excitement to drawing and writing with these quick and easy paper pencil toppers. Simply draw a ghost character onto thick paper or cardboard and cut the shape out, punch two holes in the ghost and gently thread the pencil or pen through the holes and abracadabra, your adorably spooky pencil toppers are ready for action.


Featured products:
White Cover Paper 
Coloured Pencils 


Spooky Book Placeholder
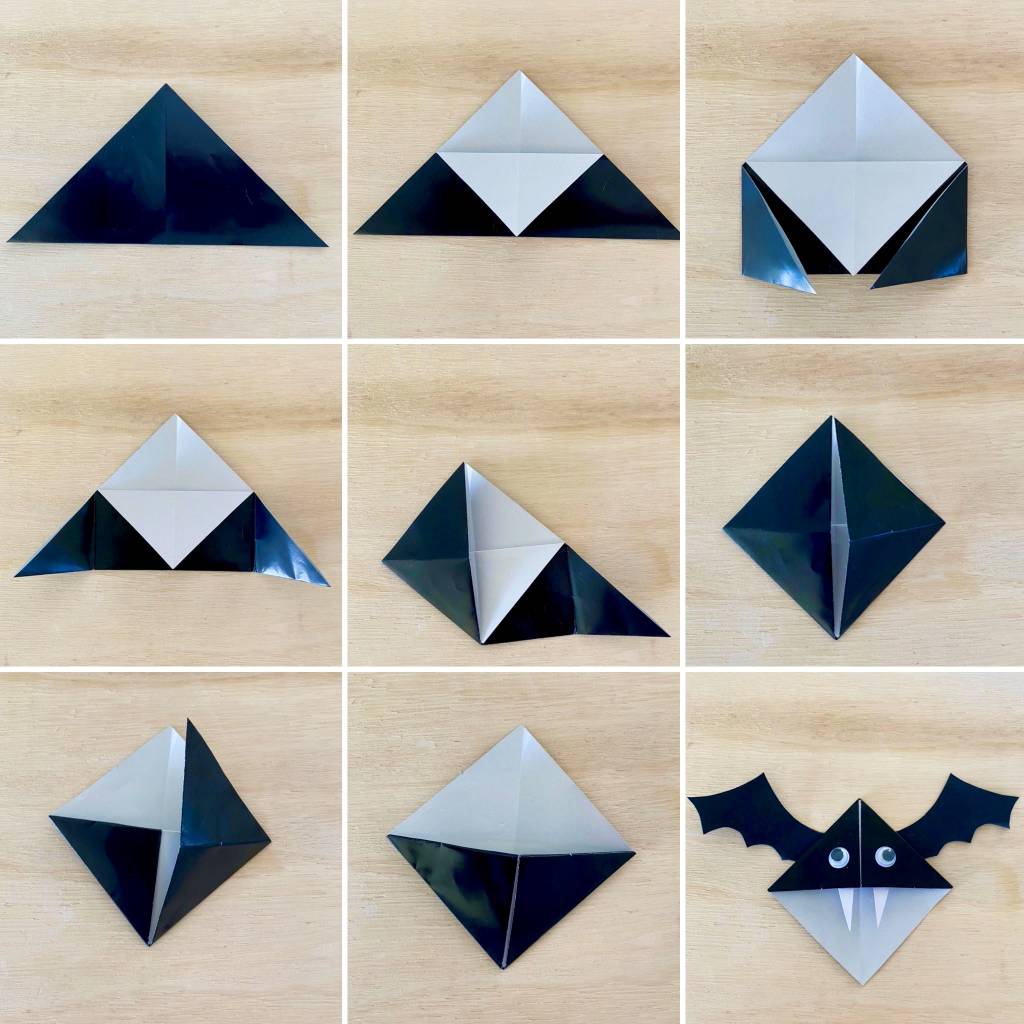
Made from only a few simple paper folds and embellishments, this is one cute creature that’s batty about storytime! Grab yourself a square piece of black paper and follow the folding sequence pictured below.

Bat Bookmark Folding Instructions

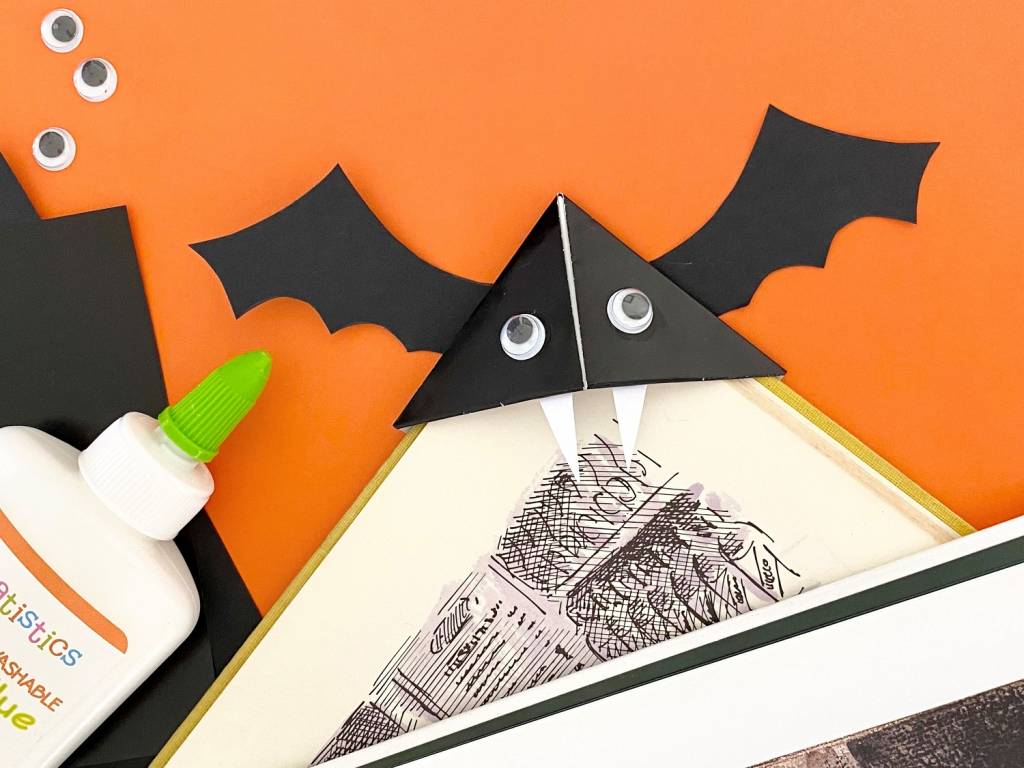
Add some little wings, fangs and joggle eyes, and this adorable spooky book placeholder is ready to join in the reading. Let your imaginations run wild and fold all sorts of fun creatures with a spooky twist – bats, pumpkins, cats, frogs, owls, ghosts and more!


Featured products:
Matt Paper Squares 
Gloss Paper Squares 


Storytelling Pop Sticks
Storytelling Popsticks
Storytelling is an activity rich in language and communication! It’s a time for children to hone their concentration and listening skills, explore feelings and emotions, share their own experiences and learn from others in an interchange of knowledge. Stories can explore aspects of STEM, problem solving, memory recall and provide a place where children can freely express their thoughts and imaginings. We love storytelling!

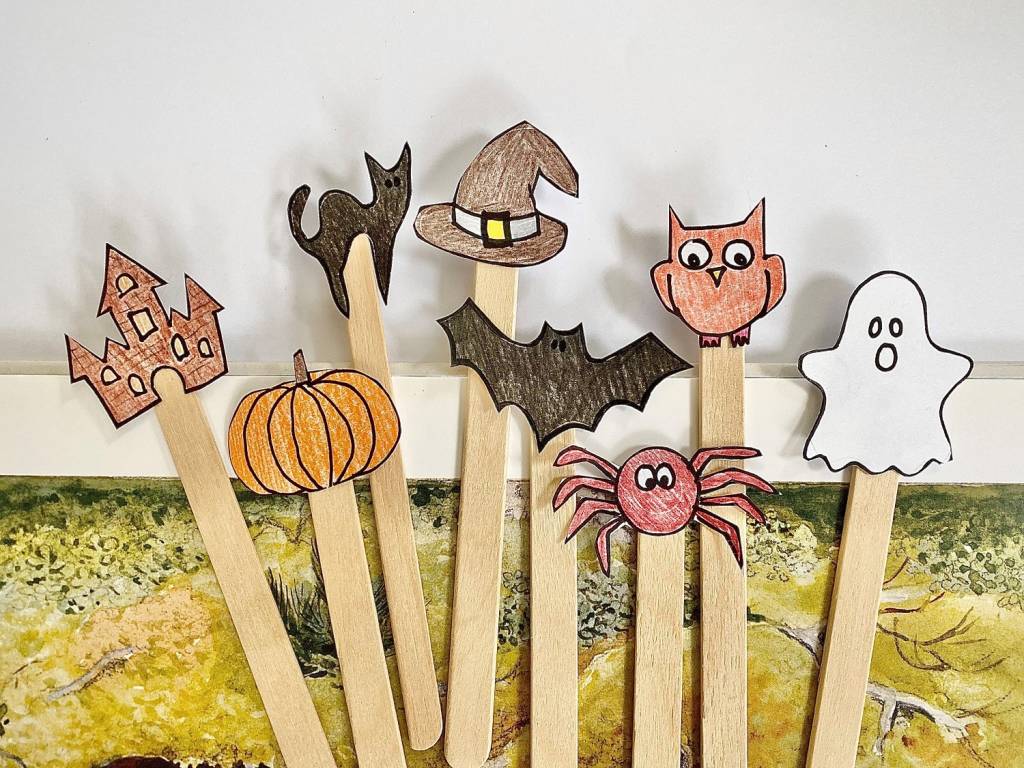
These adorable props provide visual prompts for children and educators to tell a story. Draw some story characters on thick paper or cardboard, colour them in, cut them out and stick them onto pop sticks (for extra durability, the drawings can be laminated before they’re added to the pop sticks). Follow the characters from a favourite storybook or create your own for all sorts of imaginative tales. Once upon a time….


Featured products;
Pop Sticks 
Coloured Pop Sticks 
Coloured Pencils  
Coloured Jumbo Pencils 


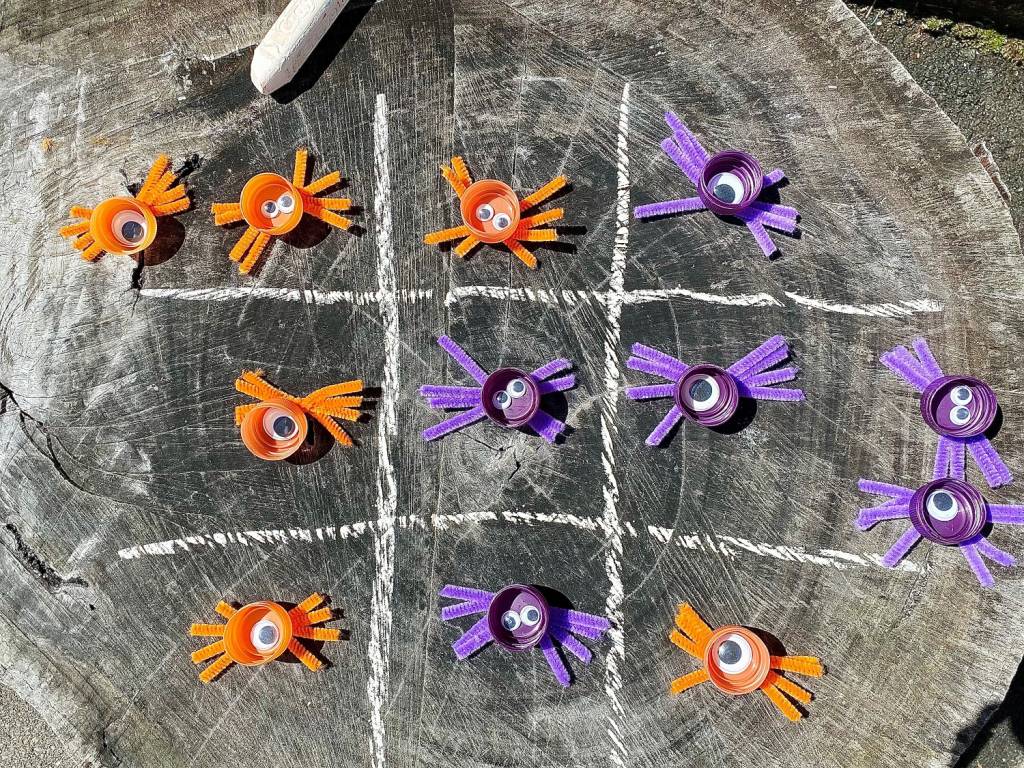
Spider Tic Tac Toe
Spider Tic Tac Toe drawn in chalk on slate
Also called Noughts & Crosses, Tic Tac Toe is a fun and simple game for young children to build maths skills, including counting, predictability, problem solving and special awareness. Taking turns to lay their pieces on the board, whoever gets three in a row, either horizontally, vertically or diagonally, is the winner! This is a traditional game that can be made up with all sorts of odds and ends – to make the game board, use paper and markers or a hard, flat surface and chalk or sticks. To make the playing pieces, simply find four of something that’s different from the other player’s pieces. We’ve made spooky bottle top spiders in two different colours, but you could use stones, shells, wood slices, counters etc.


Featured products:
Bottle Tops 
Pipe Cleaners 


Loose Parts Dough Creatures
Loose Parts Spooky Dough Creatures
With loose parts play, anything can happen! Children can move loose parts freely,  adapting and turning them into anything their imagination desires. A selection of open-ended loose parts makes a wonderfully inspiring invitation for children to explore, experiment, inquire and invent, and with the addition of dough or modelling clay, children are sure to make some fantastical creations!
To make a treasured keepsake that will last, switch the dough or modelling clay for air-dry clay, which will harden beautifully in a day or so, ready to adorn the classroom or live on at home.


Featured products:
Modelling Clay Kit 
Creatistics Dough Kit 
Creatistics Dough Set 
Craft Essentials Kit 


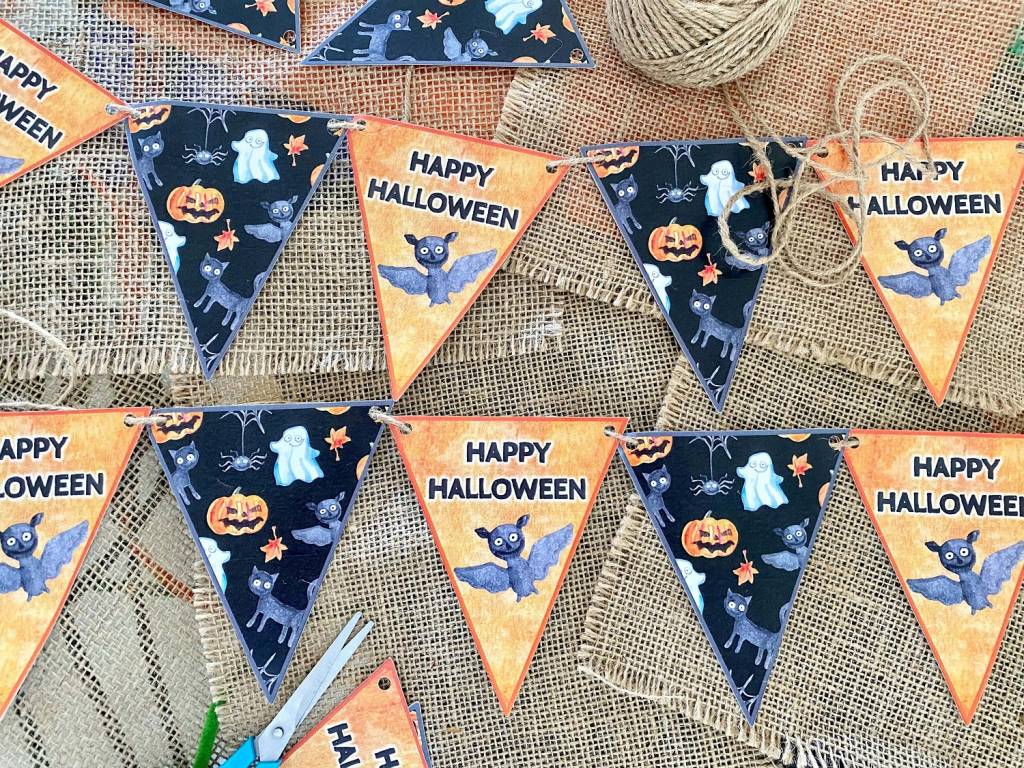
Happy Halloween Bunting
Happy Halloween bunting
Adorable FREE printable Happy Halloween bunting!

These sweet and spooky characters are sure to bring festive cheer to the learning environment – whether it’s the classroom, after school setting, home learning or weekend fun – the finishing touch to any Halloween party is here. Simply print out as many copies of the bunting as you desire, snip out the shapes, follow the hole punch guide and string up your spooky triangle bunting.
No need to worry about waste either. Paper bunting can be saved and reused next year, snipped up for spooky collage art, popped into the recycling or even shredded and added to the compost to make nutritious soil to grow yourself a real pumpkin!


Featured products:
Jute Hemp Twine 
White Cardboard 
Happy Halloween Bunting  FREE PDF Download 


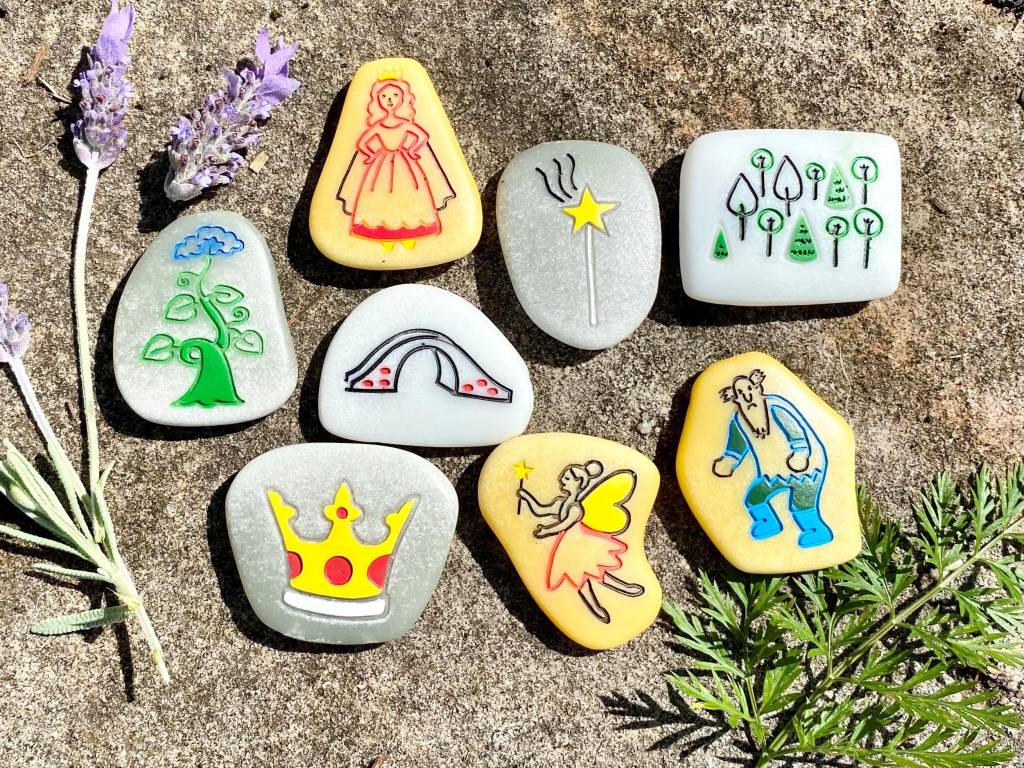
Outdoor Story Stones

Outdoor Story Stones
Combine storytelling with the wonder of nature with these adorable story stones. Made from a mix of natural stone and resin, they’re built to last the rigours of play outside, allowing outdoor nature play to guide imaginative storytelling. The sights, sounds and textures of the great outdoors all make wonderful prompts for scenes where anything can take place. Story stones can also be made by adding simple illustrations to stones or small wooden branch cuts.


Featured products:
Story Stones – Fairy Tales 
Story Stones – Outer Space 
Story Stones – Under the Sea 


Batty Paper Crafts

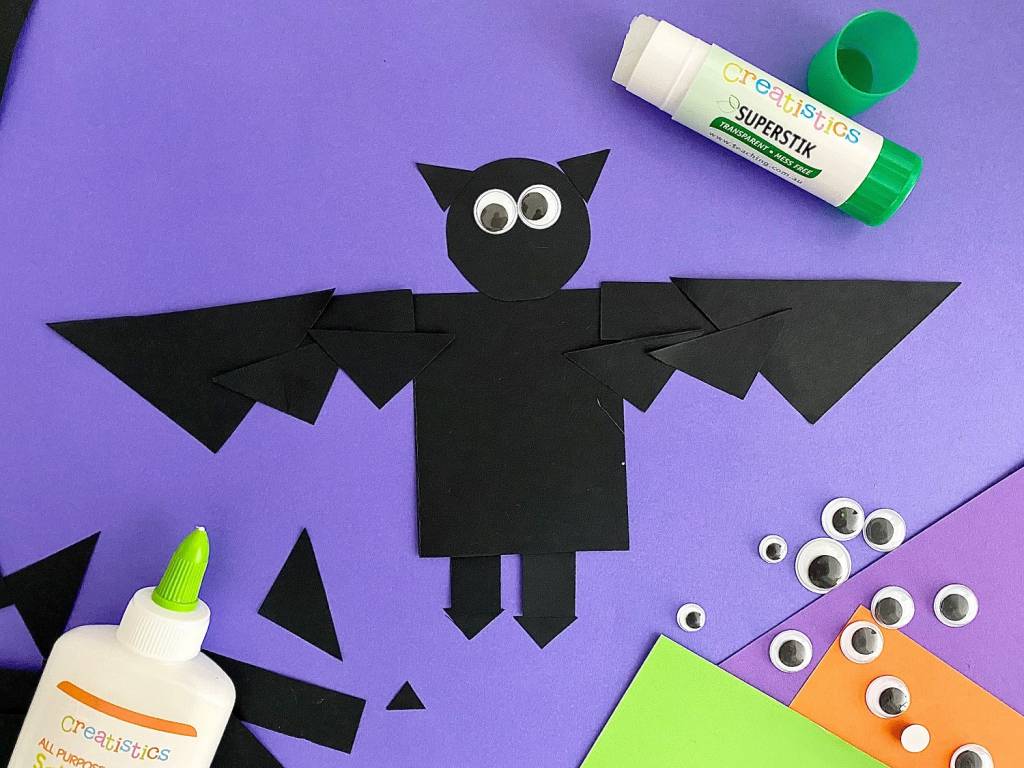
frightful bat paper craft project with google eyes and gluesticksPaper arts and crafts are fantastic for children learning about colours and shapes. Snipping paper is also a fun way to work on scissor skills. Joggle eyes will help bring children’s creations to life and may even inspire some spooky storytelling! The paper shape pictures can decorate the classroom or be taken home as gifts to share the excitement of the spooky season.
This activity can also be adapted for different age groups to make sure everyone’s safe. Children confident with scissors may like to snip their own shapes out, where younger ones might benefit from a selection of pre-cut shapes to choose from.


Featured products;
Coloured Paper 
Joggle Eyes 


Spooky Fairground Bowling

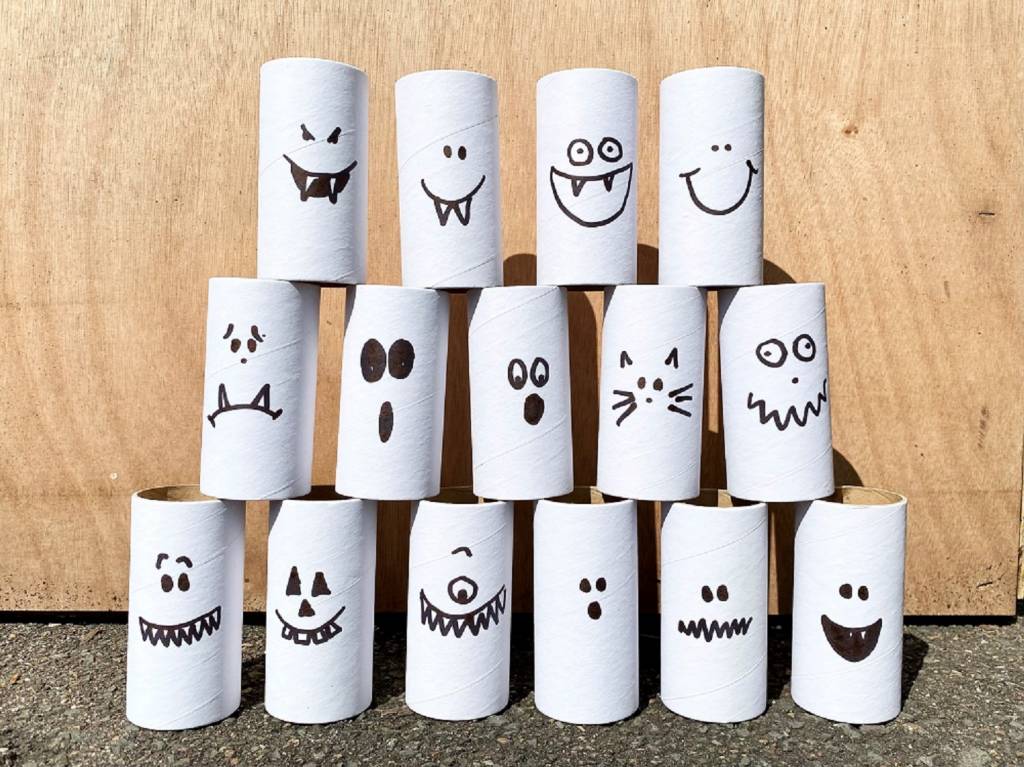
Spooky Fairground Bowling craft project using cardboard rolls Fairground bowling games are a timeless tradition for all good parties, and this sweet, spooky version is a hoot. Add some wacky faces to sturdy cardboard rolls and take turns knocking them down with any ball you have handy. These ghosty characters look great with plain white rolls or decorated with paint, markers, coloured paper and all sorts of embellishments for endless design options. For older children, numbers can be added for scoring up the total points knocked over for fun maths practice.
 

Featured products:
Cardboard Tubes 
Craft Rolls 


*All these activities can be modified and adapted to suit different age groups, taking away small parts for children under 3 years of age and replacing them with larger safe parts. Where scissors are used, educators may use adequate supervision to suit the needs of the children or offer pre-cut shapes.


What are your favourite spooky crafts and activities to celebrate Halloween?


About the Author
Penny Groen is an Early Childhood Teacher who has been working in Early Childhood Education and Care settings around Sydney for 17 years. She has a passion for working in meaningful partnerships with families and communities, providing a responsive and engaging curriculum where everyone feels welcome to contribute. You can see Penny’s interest in the natural world with all the weird and wonderful experiments growing both inside and outside the classroom. Penny’s also known for equipping children with the tools to explore their interests and celebrate the discoveries each day brings.


Shop MTA>

Blog Home>

Posted on

Crafts To Inspire Christmas Creativity

Christmas Craft Resources flatlay

Christmas is such a special time of year, and no doubt in recent times it has become an even more important holiday where families can bond and celebrate. Inspiring joy and inviting groups of students to create festive crafts brings about warmth and connection. The act of making can have such a positive effect on our mental health, so inviting children and adults alike to break out the felt, paper and a pom pom or two will ignite the Christmas spirit as we roll into the festive season.


Personalised Christmas Bags

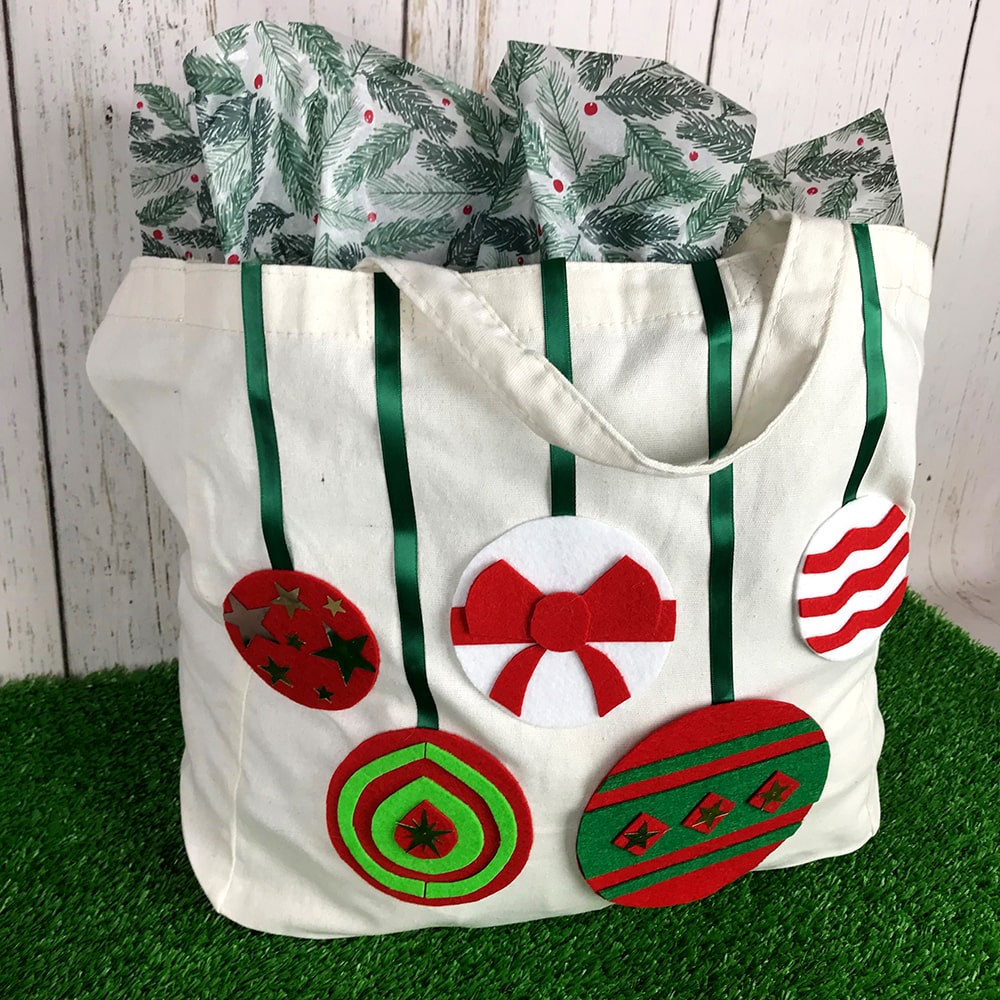
Christmas canvas bag decorated with Christmas baubles
Who doesn’t love a unique and fun reusable shopping bag nowadays, especially since the removal of single-use plastic. There are so many possibilities with a calico shopping bag, as previously seen with the block print stamps. Students will enjoy coming up with festive designs such as reindeers, baubles, Christmas trees and Santa on his sleigh, making this project an individual experience.

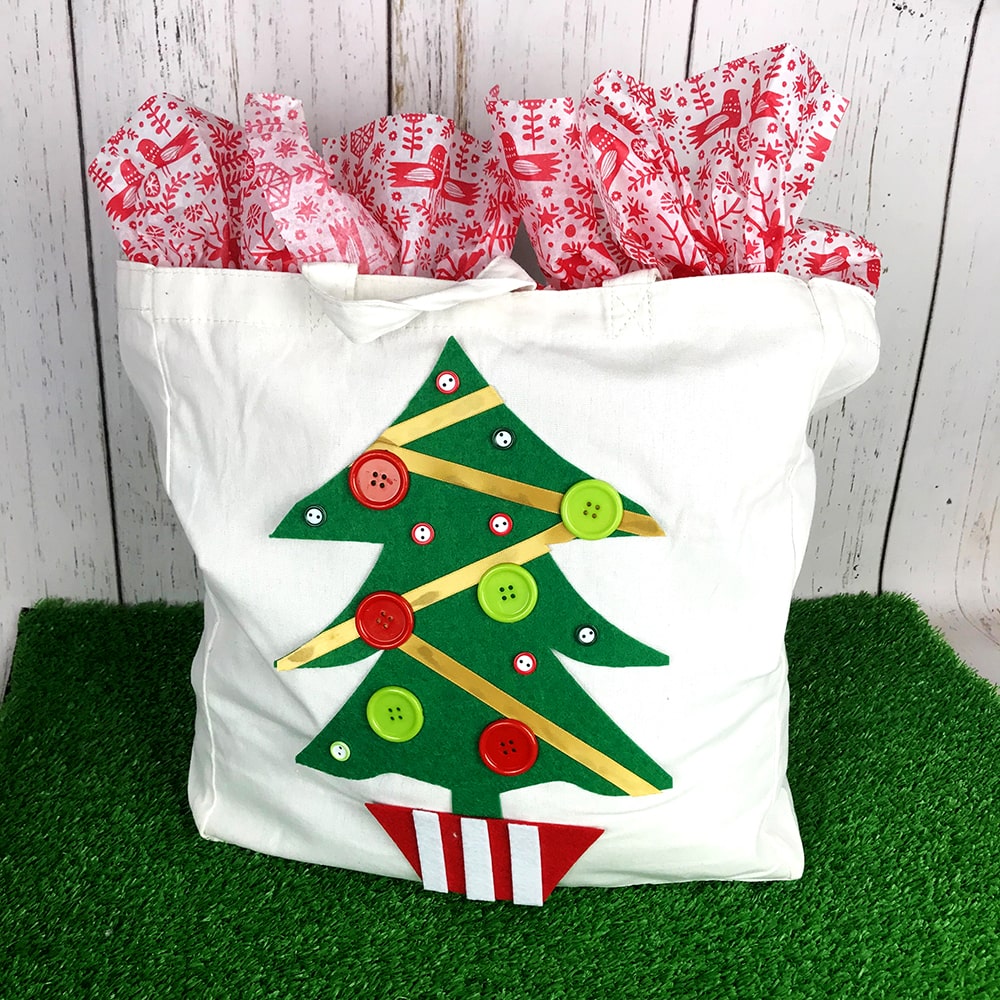
Christmas canvas bag decorated with Christmas tree

Once they have decided on their design, students can either cut felt shapes freehand or create paper patterns to pin to the fabric. Students will have fun arranging their felt pieces onto the calico bag before gluing them down. Giving students the option of adding embellishments like buttons, ribbons, pom poms and sequins to their textile arrangement adds a lovely three-dimensional texture to their final composition. Certainly a must-have to stand out from the crowd when Christmas shopping.


Featured Products:

Calico Shopping Bag – Pack of 10
Christmas Felt- Pack of 50


Simple Mosaicking

Christmas Tree and baubles
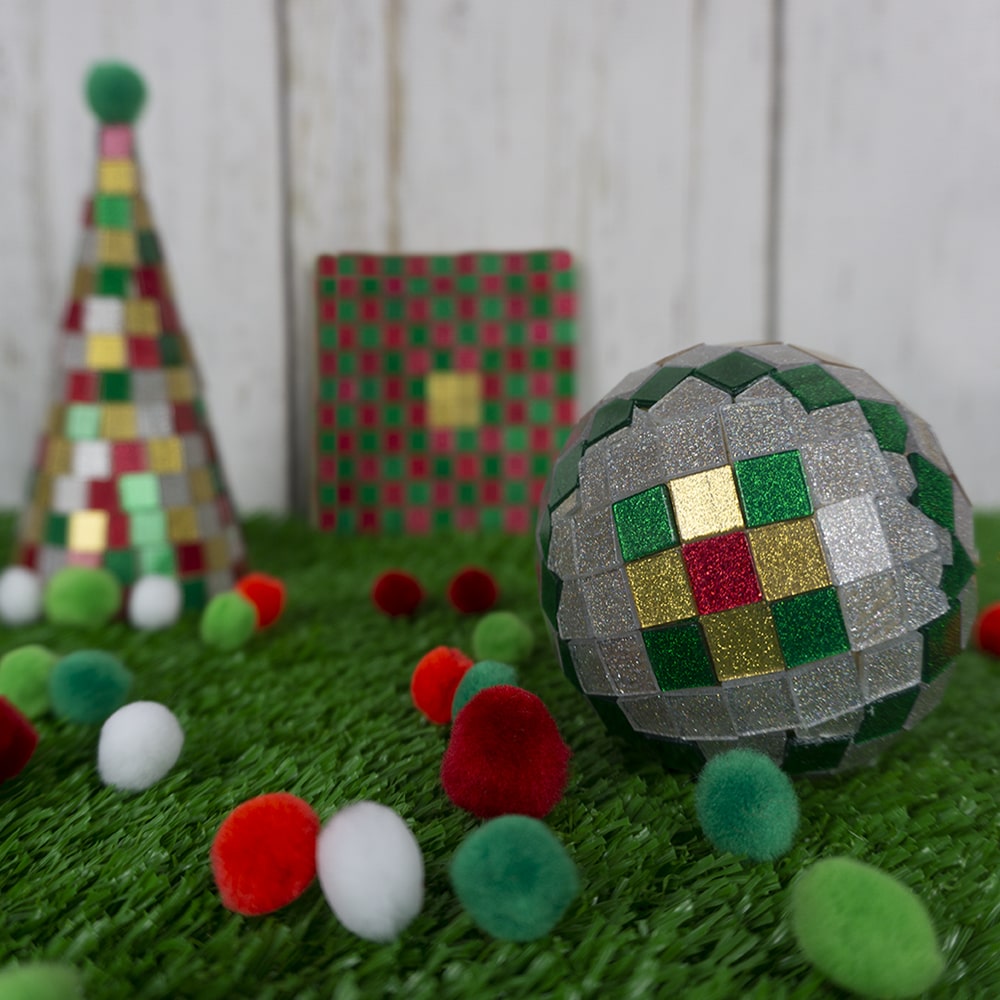
When thinking about the art of mosaicking, I know sometimes the process can be quite daunting. Especially the idea of using tile adhesive and grout with students. However, these resin mosaic tiles are fantastic as they can be used on all types of surfaces, can be cut with scissors if necessary and can be adhered with craft glue or pushed into mediums like Magiclay. Students can adorn papier-mache shapes such as baubles or cones since the process is not too complex. They can explore patterns when making Christmas coasters and photo frames, and for young children it will develop their fine motor skills as they pick up each little mosaic square. These mosaic tiles shimmer so brightly in the light that they are sure to spark the imagination of all who encounter them.


Featured Products:

Mosaic Tiles Christmas Colours
Square Wooden Coasters- Pack of 20

Paper Mache Cones – Pack of 6
Christmas Paper Mache Balls with Gold String

Christmas Pom Poms – Pack of 300


Fun and Easy Shrink Film

Shrink Film Christmas craft ornaments
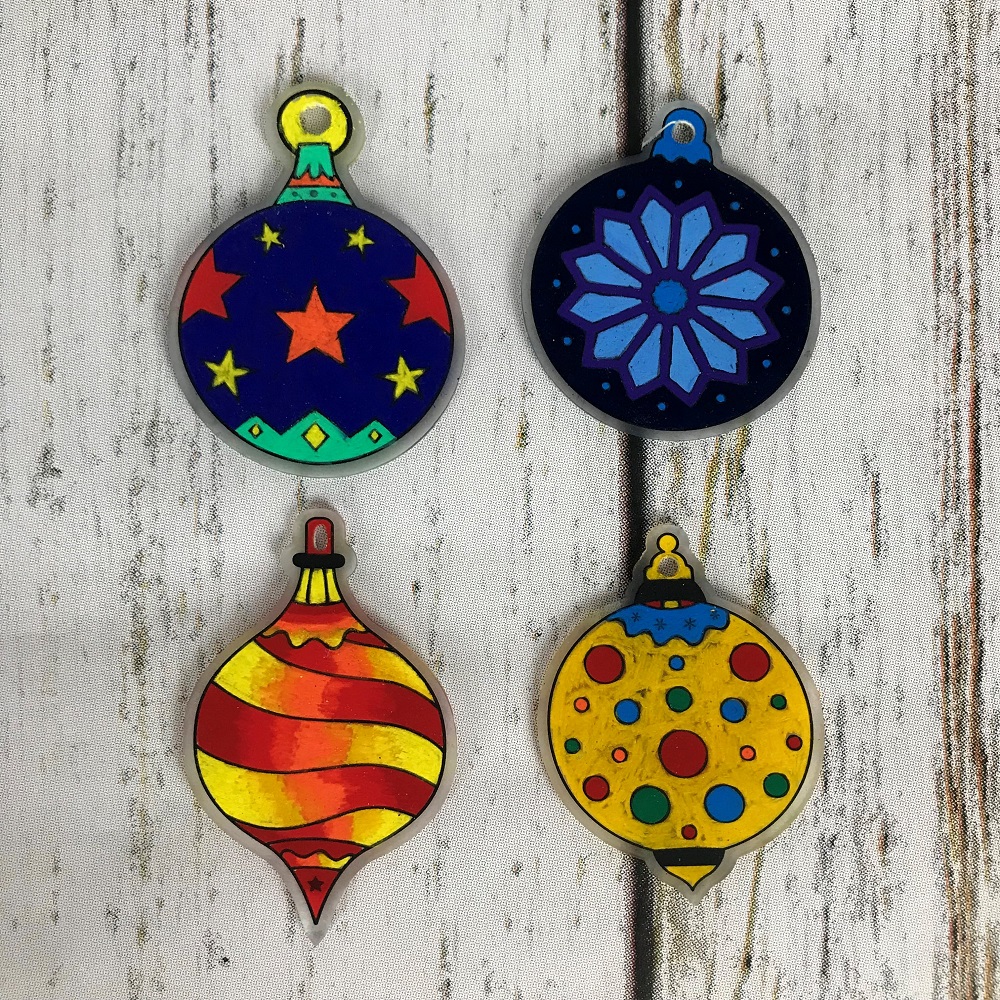
This Christmas project certainly brings back a fond memory from my childhood where I made shrinky dinks out of chip packets. The process has certainly come a long way since then with much sophistication. Your students will be absolutely fascinated with this process and will be glued to the oven door as they watch their decorations bend and contort before laying flat.
These Christmas Shrink Film Decorations have lovely patterns and designs where students can use permanent markers or pencils to add colour. I personally like pencils as they enable students to explore ombres and blending, which looks striking when shrunk to a miniature size. Paired with leather thronging for a necklace or placed on a metal key ring, they become a brilliant present or keepsake.


Featured Product:

Christmas Shrink Film Decorations- Pack of 12


Christmas Stamping

Christmas wooden block stamps
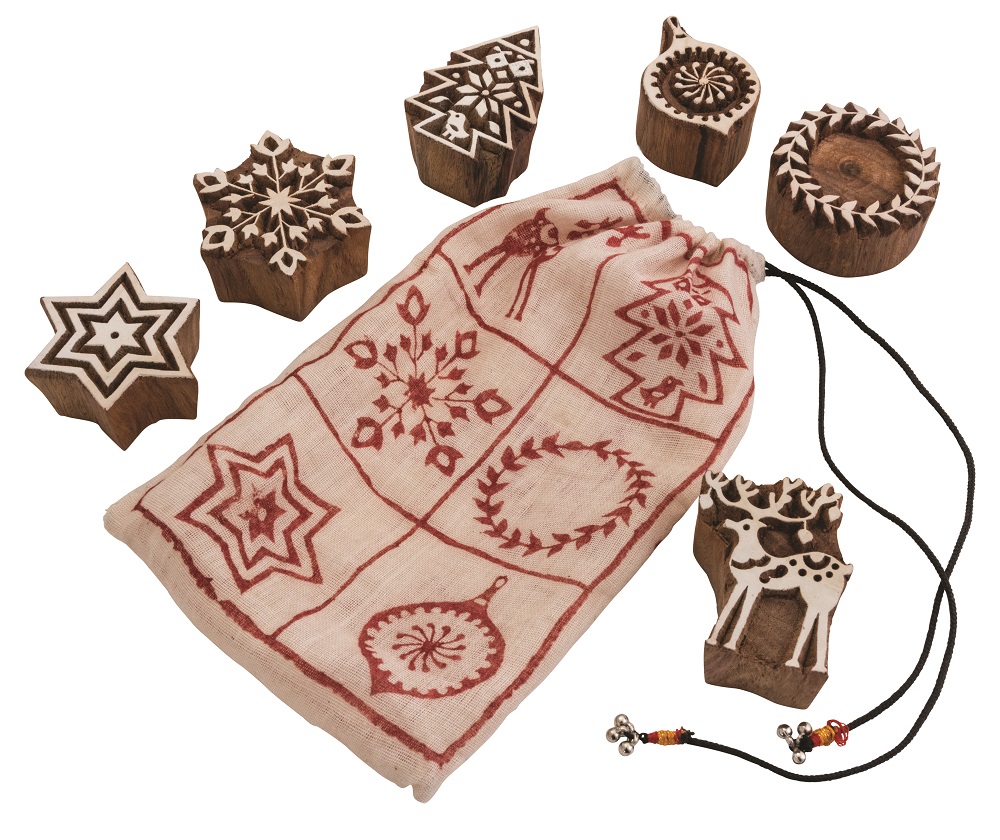
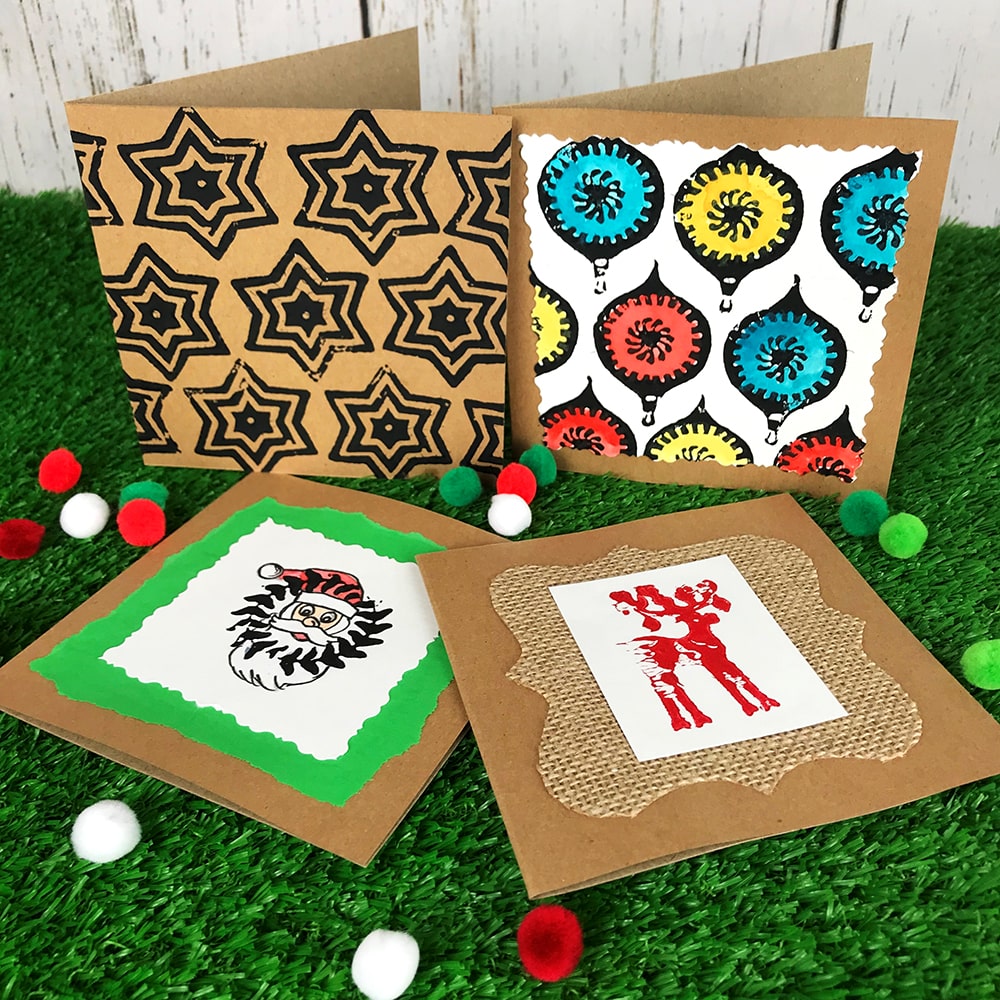
Who doesn’t love a stamp, especially when it is adorned with an iconic Christmas object! Stamps are so versatile for this time of year and can be applied to a wide variety of materials. Pair them with acrylic paint, block ink, embossing fluid or ink pads, the medium and colours that can be used are endless and expose students to the concept of repetition. Whether stamping on fabric or paper, the final print can be used to create many different Christmas-inspired delights.

Christmas Craft Cards and pom poms on grass background

These include Christmas cards where prints can be layered on top of paper, fabrics and hessian. Santa portraits can be drawn inside wreath prints and stamps can be repeated over the surface of a card. A lovely way to add colour to your prints is with watercolours or pencils; this not only enhances the print but also allows students to explore different colour combinations. This type of project is always a favourite as people of all ages enjoy giving cards to their loved ones.

Christmas craft brooches on grass background

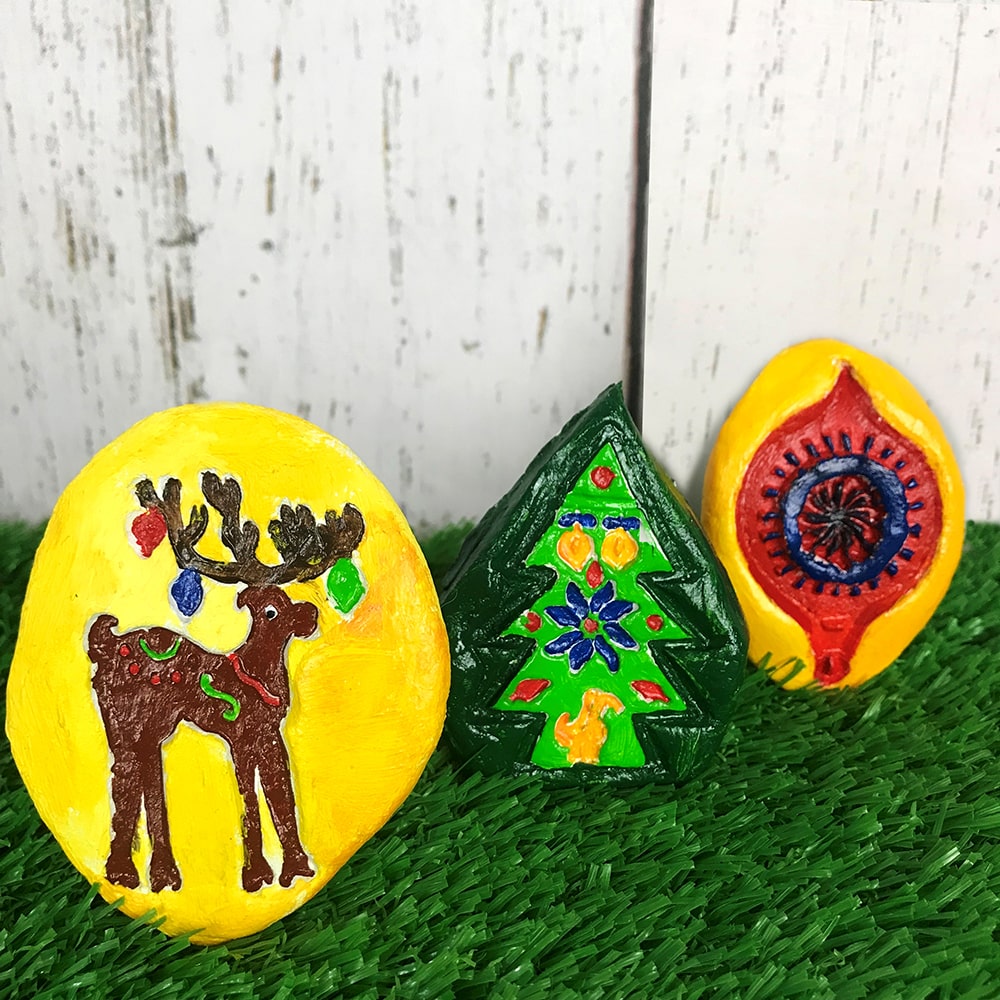
If Christmas cards are not your thing, stamps can also be pushed into clay to leave an impression on its surface. Whether you use air-dried clay or earthenware, these lovely pieces can be turned into pendants and brooches by adding holes or pin backs. Once dried or fired, you can have so much fun adding colour to these stamp designs and, when complete, a spot of gloss really brings them to life. Students will really treasure these as well as delight in giving them to special people in their lives.

Christmas canvas reindeer block print bag


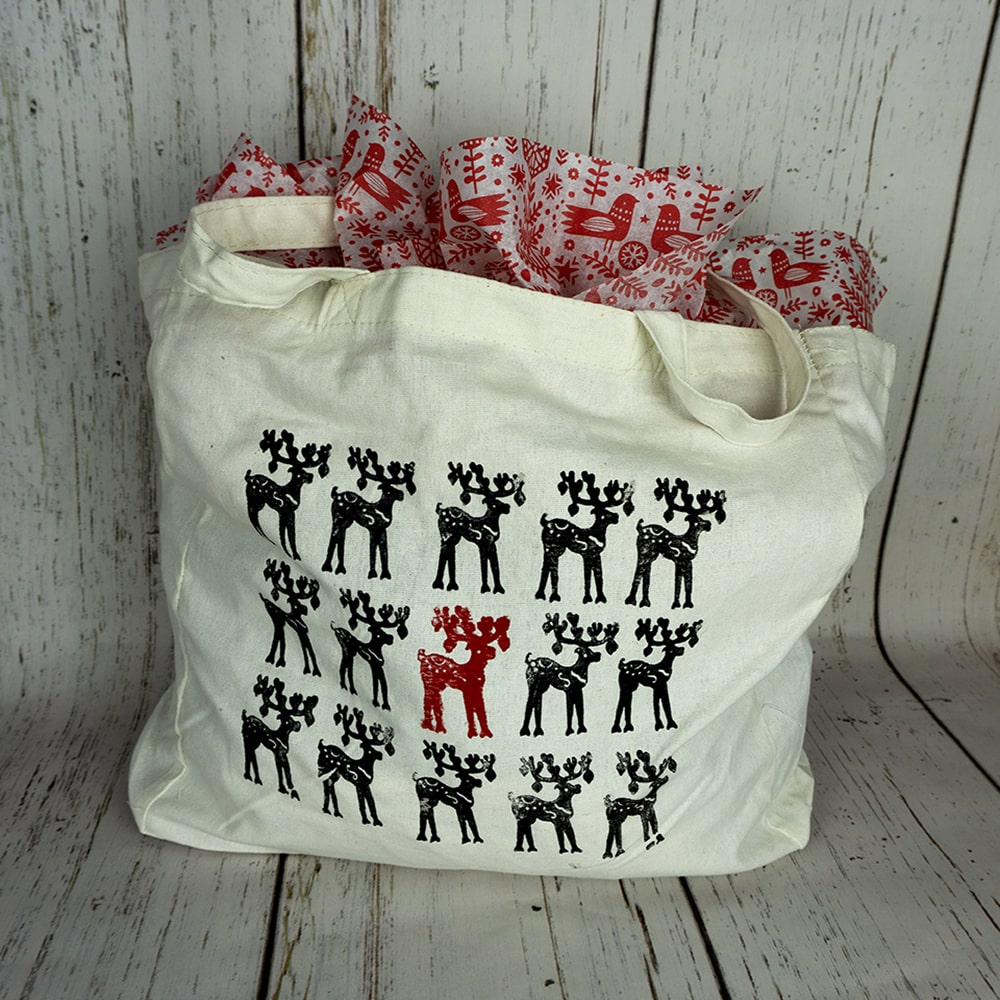
If fabric is more your cup of tea, then these stamps are just delightful. Using fabric paint and a roller, they can be used to create repetitive designs onto T-shirts and calico shopping bags. Students will love coming up with their own compositions with the different stamps and can play with pattern when choosing colours.


Featured Products:

Christmas Block Print Stamps- Set of 6

Christmas Pom Poms – Pack of 300

Creatistics Air Dry Ceramic Clay

Calico Shopping bag- Pack of 10


Bling up Your Favourite Artwork

Christmas Glitter Frames on
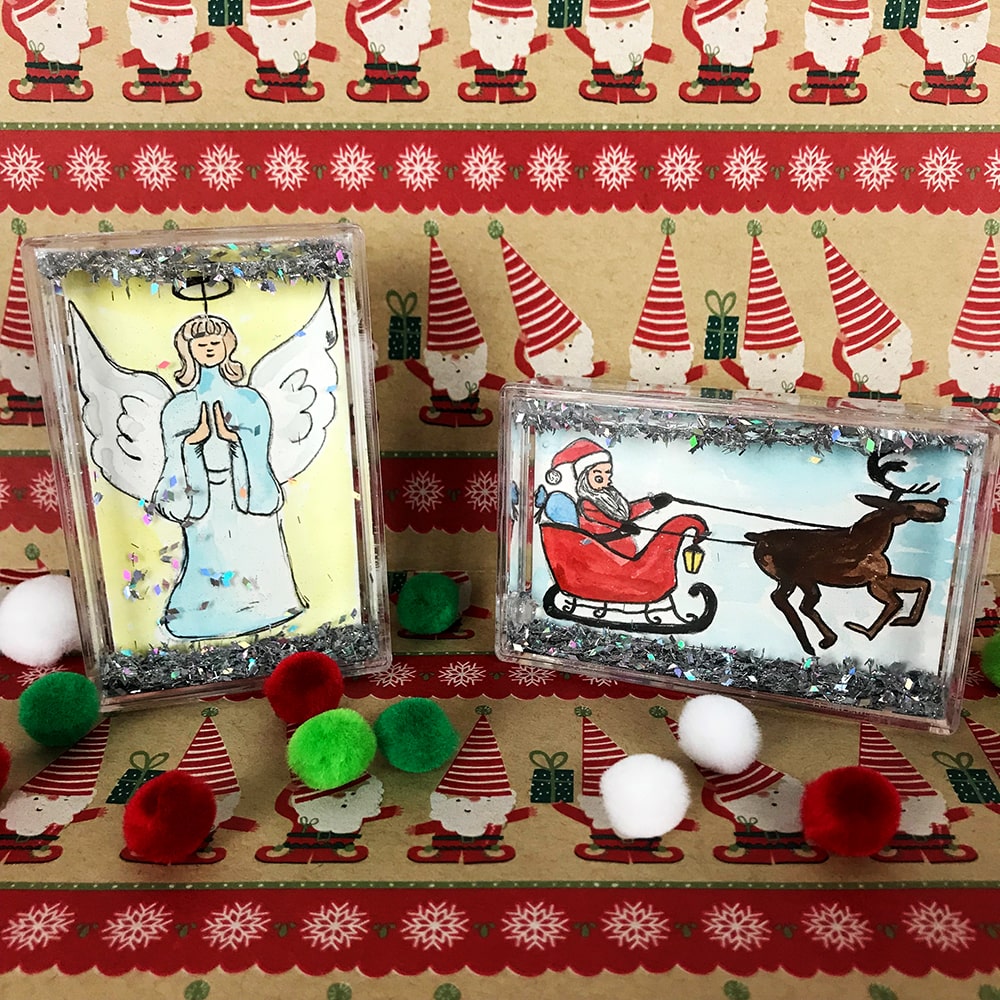
A framed artwork from a young artist would have to be the most special Christmas gift a child can give you. Whether it is a pencil drawing, a watercolour painting or a printout of a digital piece, these glitter photo frames are just fabulous. Imagine combining your students’ artwork with a snow globe. Students will love placing their work on one side and then filling the other side up with water to give their masterpiece a touch of sparkle. Students can make artwork specifically to the size of these frames or artwork can be photographed and resized digitally before being printed out. Who doesn’t love a little glitter in their life?


Featured Products:

Glitter Liquid Photo Frame – Pack of 10

Christmas Pom Poms – Pack of 300


Cute as a Button Reindeers

Christmas craft ornaments sitting on Christmas paper
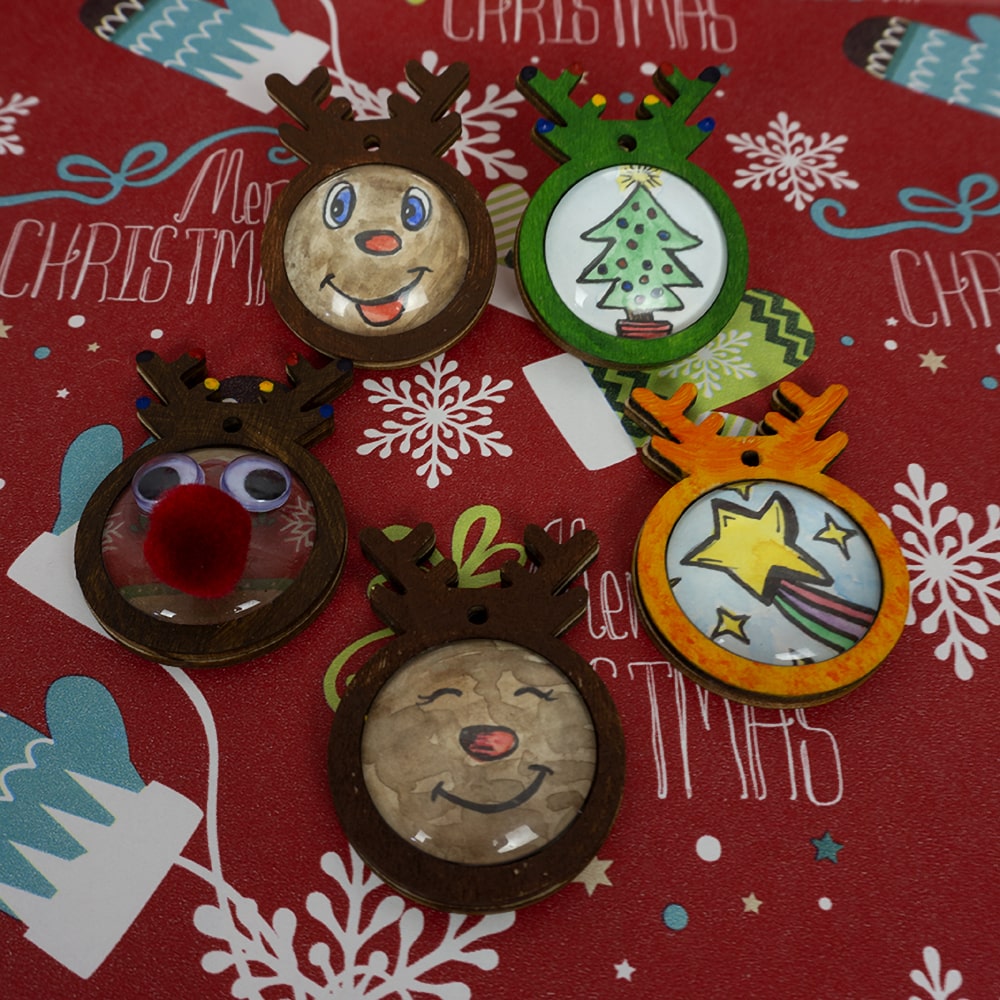
Can you name all the reindeer that pull Santa’s sleigh? These reindeer ornaments are just the cutest and I know your students will think so too. Their most obvious use is to create a reindeer face, whether it be with markers, pencils or watercolours, and it is then placed inside and covered with the glass cabochon. Another alternative to creating the reindeer would be to place a pattern piece of paper under the cabochon and then add eyes and a nose to the surface of the glass with craft materials. Either way, these reindeers can then become pendants or ornaments where they can be further personalised when adding colours and embellishments to the wooden backing.
There will always be that student who will think outside the box and do something a little bit different. Who said it had to be a reindeer? I certainly agree. You can also fill these pendants with small paintings of Christmas icons and adorn your backing to match. The creativity is endless.


Featured Product:

Wooden Reindeer Ornaments- Pack of 10


Versatile Paper

Tissue paper Christmas bauble with festive background
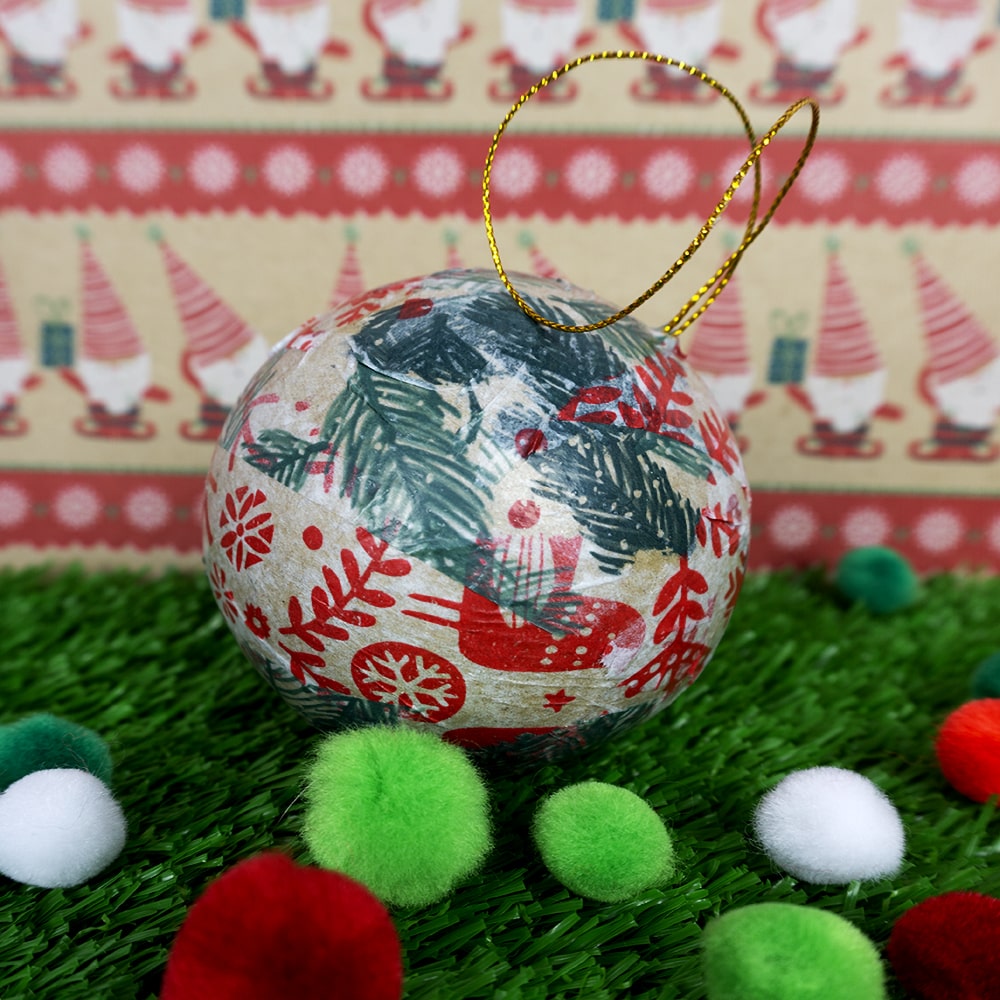
Ah, don’t you just love the smell of paper during the festive season! It is the aroma of a million ideas and possibilities for an abundance of folded, cut and collaged crafts. Whether it be patterned paper or tissue paper, they are equally fun and useful, so it is fantastic when they come in a single handy pack. From origami folded stars to Christmas cards and decoupage Christmas baubles, what is your favourite way to use paper during the festive season?

Christmas Tree and pom poms on grass background
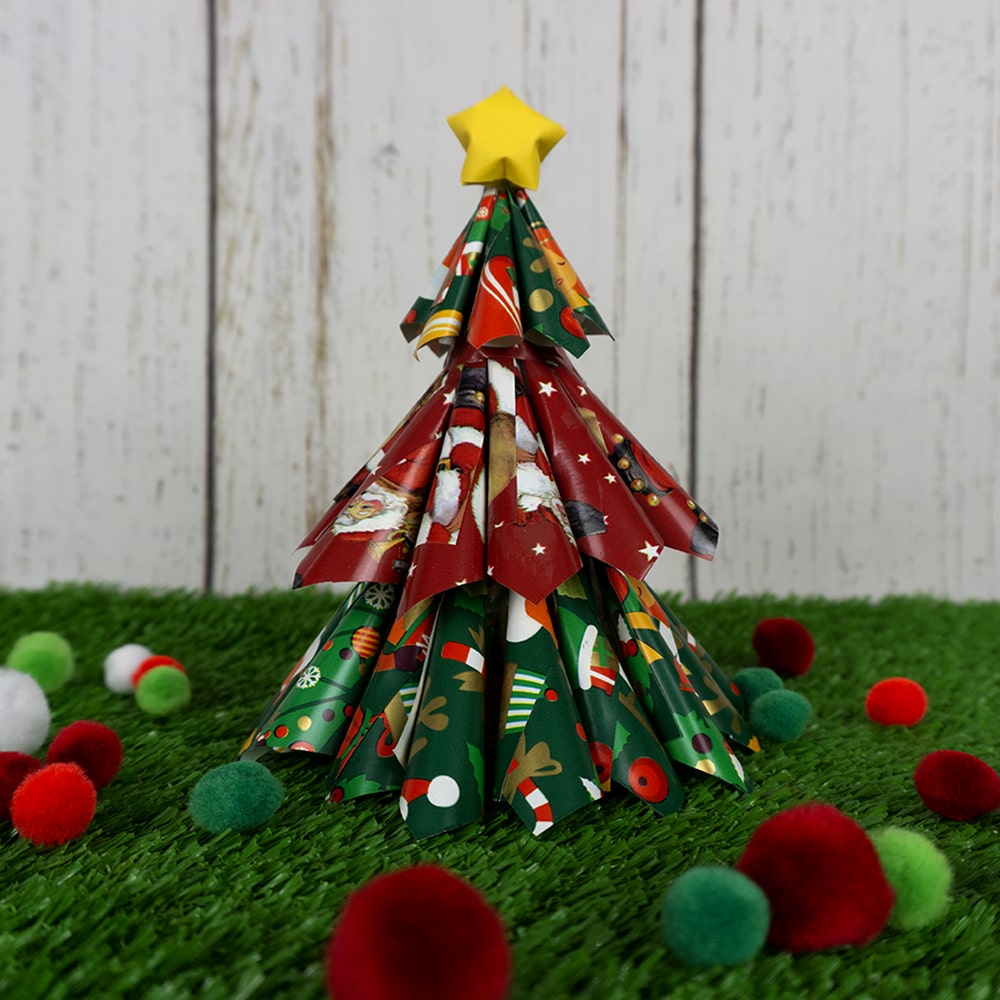
I particularly love to show students how to fold and roll paper into different shapes that can then be used on three-dimensional forms. A cone is the perfect beginning of a Christmas tree where paper can be applied in different ways to create interesting forms. Paper can be fringed or rolled into little cones and layered all the way up to form the tree. I always tell my students that paper is so versatile and that with a little snip and a twist it can become something amazing!


Featured Products:

Christmas Paper & Tissue Pack of 300

Christmas Papier Mache Balls Pack of 10
Paper Mache Cones – Pack of 6


This year, I hope Christmas brings an extra bit of magic and joy to us all. I hope that Christmas projects and crafts can be enjoyed and used to highlight how special the festive season is to families, friends and communities. I hope that the act of creating and giving can bring us together to regain that feeling of pure happiness that we experience when exploring and expressing ourselves creatively.


About the Author
Olivia is a specialist Visual Art Teacher in an ELC, primary and secondary school setting. She has a broad breadth of experience with inquiry learning and is an IBO qualified educator. Olivia particularly enjoys developing Visual Art units around STEAM which include electronics, technology, and science concepts. Follow Olivia on Instagram in her quest to inspire creativity @creativemindsinbloom.


Shop MTA>

Blog Home>

Posted on

Spark The Christmas Imagination

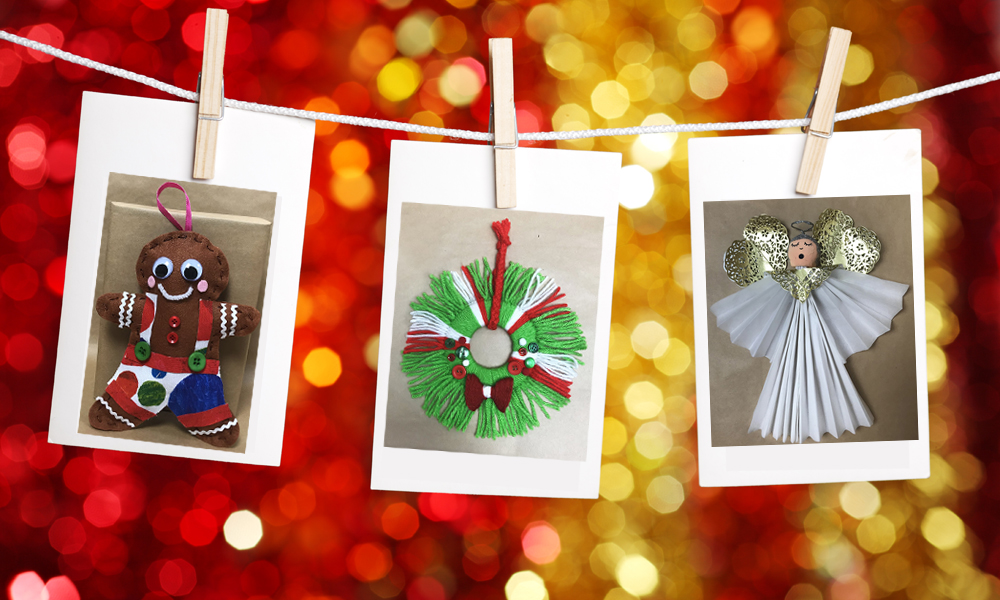
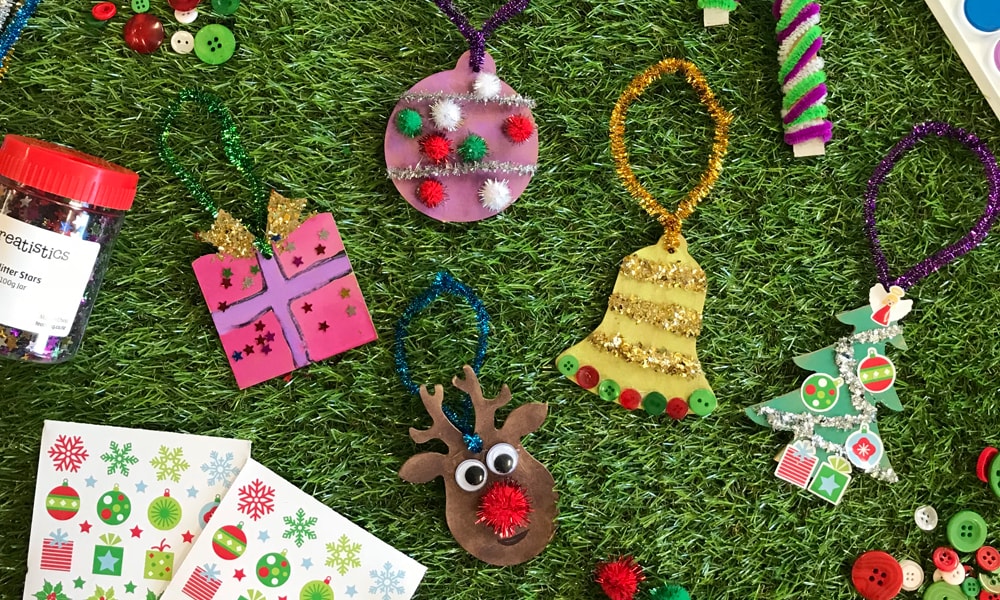
Christmas Craft images hanging on string with pegs with Christmas themed background

Christmas is such a delightful time of the year. The anticipation of this joyous occasion brings such an amazing atmosphere to the art room as the impending holidays approach. Students of all ages embrace the opportunity to create festive-themed pieces that are treasured on trees and shelves in their family homes. With such a wide array of art and craft that can be produced, the hardest part is choosing what to create!

Christmas Wreath

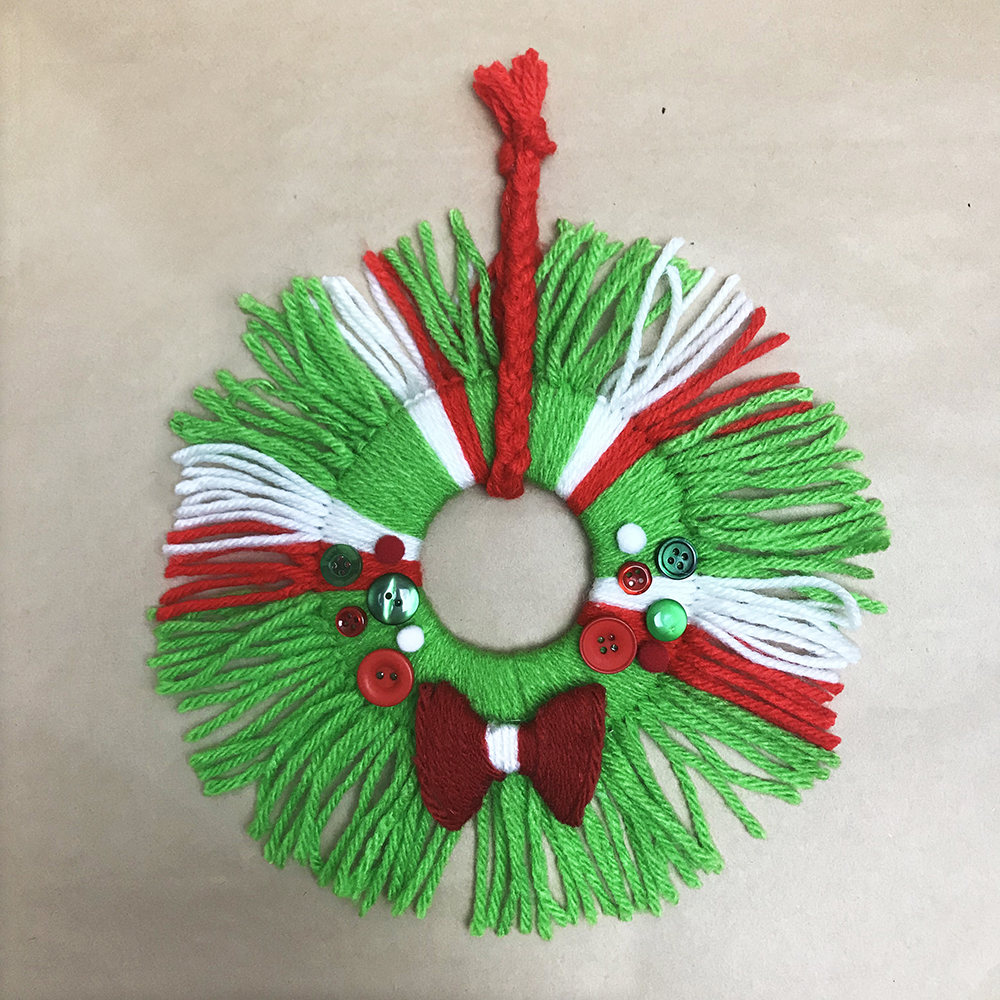
Christmas wreath yarn craft project.

We hang them with such love and care on our doors during the Christmas period as a symbol of family and eternity, it is only fitting that they should feature in any festive crafting project.
This wreath kit is just perfect as you can make it as is or you can add your own unique touches to it. The creating process will build and develop fine motor skills as each strand of yarn is attached to the cardboard ring. Students can personalise their wreaths with different coloured yarn, extra pompoms, bows, buttons, bells or even felt cut-outs. I have used the centre cardboard circle and some yarn to make a bow. This would be a lovely addition to any Christmas tree.

Featured Products:
Wreath Yarn Kit
Red Acrylic Yarn  
White Acrylic Yarn


Paper Angel

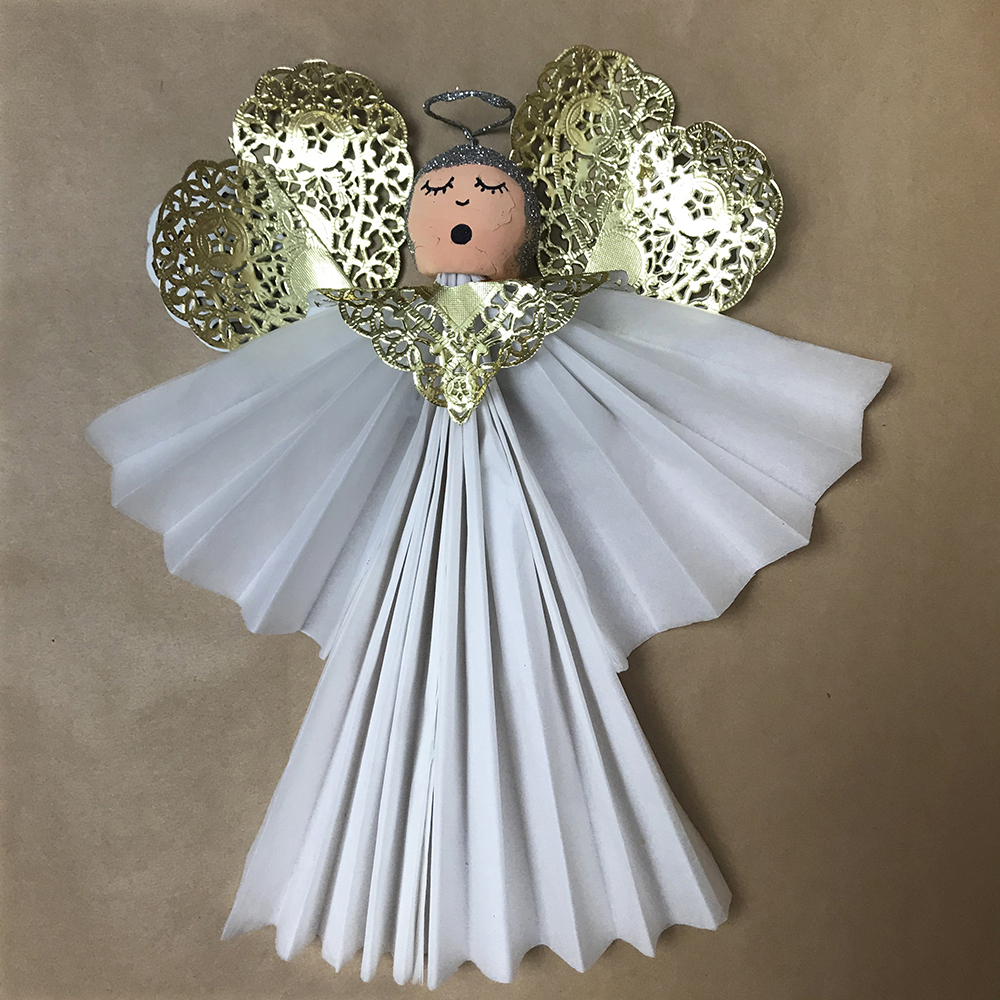
Christmas Angel Craft Project.

What a classic, the Christmas angel has been re-imagined in so many ways in classrooms and art rooms alike. Their angelic form and principal position on any tree make them a delight to create.
This version can be produced simplistically or can have all the bells and whistles added to it to make it sparkle bright. The basis for the angel is paper which can be white cartridge paper or tissue paper that is then concertina folded. When using cartridge paper students can use gold and silver pens to add patterns before folding. The heart-shaped doilies are divine for this project, just the ideal shape to fashion wings and an elaborate collar for the angel’s dress before adding a Magiclay head adorned in glitter. A halo can be made from various materials such as armature wire or a tinsel pipe cleaner and is the perfect finishing touch for an angel that will capture many hearts.


Featured Products:
Coloured Tissue Paper
Gold Heart Shaped Doileys
Candy Coloured Paper Magiclay 
Creatistics Glitter Shakers


Christmas Printmaking

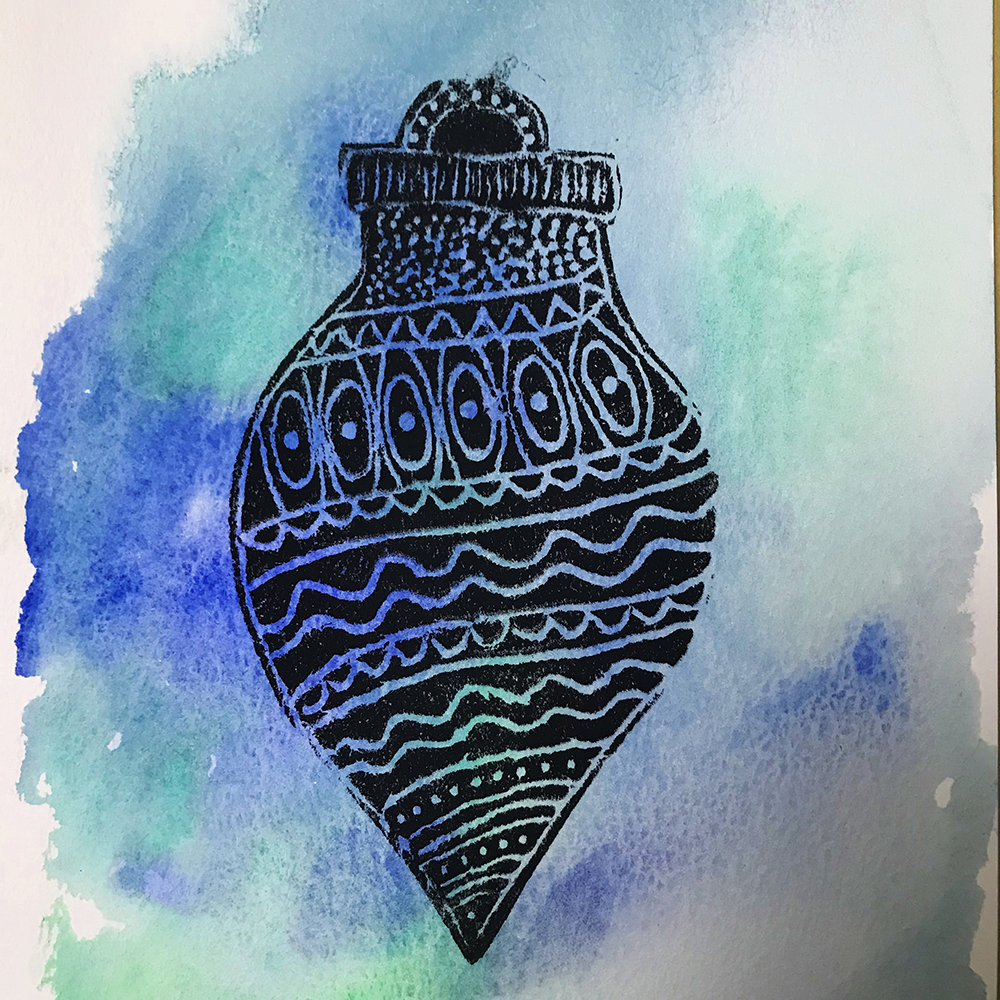
Print Making piece of art on canvas

There are so many different symbols that we associate with Christmas time. Printmaking is a wonderful process to use to give your students’ illustrations a new life. Using the A4 printing foam, a Christmas-inspired drawing and a blunt pencil or ballpoint pen students can transfer their design onto the printing plate which can be cut to any size or shape. The creative process from here is limitless where different backgrounds can be created to apply the print such as tissue paper collages, watercolour washes and textured papers.

Featured Products:
A4 Printing Foam 
Coloured Tissue Paper
Printing Ink


Australiana Christmas

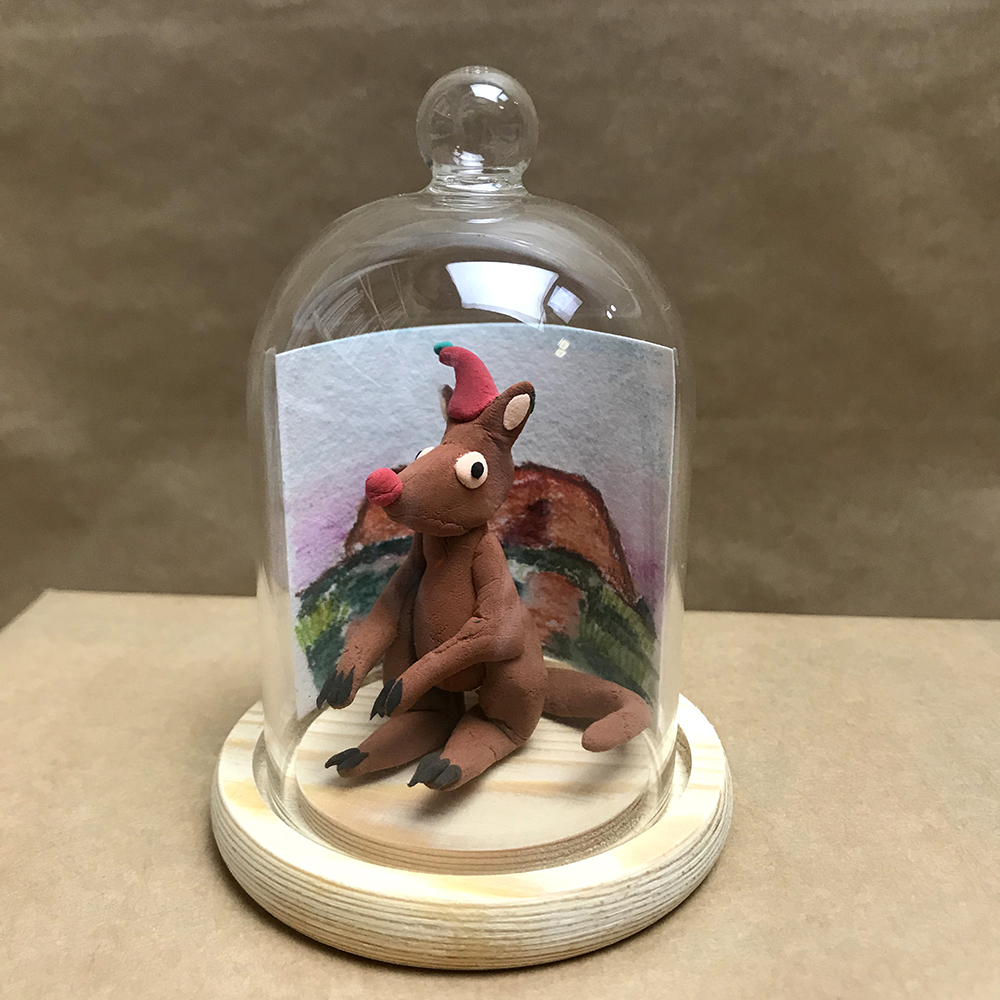
Christmas Kanagaroo Craft Project inside a Cloch.

From Santas on surfboards to kangaroos pulling a ute sleigh, an Australiana Christmas is unique and wonderful and is the inspiration for this artwork using a glass cloche. This activity has a lovely depth to it as it combines sculpture and drawing. Students can imagine Australian Christmas scenes, drawing the background on paper to curve around the glass cloche, and then add to their scene with Magiclay models. A task that will have their imaginations running wild with a hint of humour. This piece will be treasured by all and is one that all children will place on the shelf every year during the festive period.

Featured Products:
Candy Coloured Paper Magiclay 
Glass Cloche


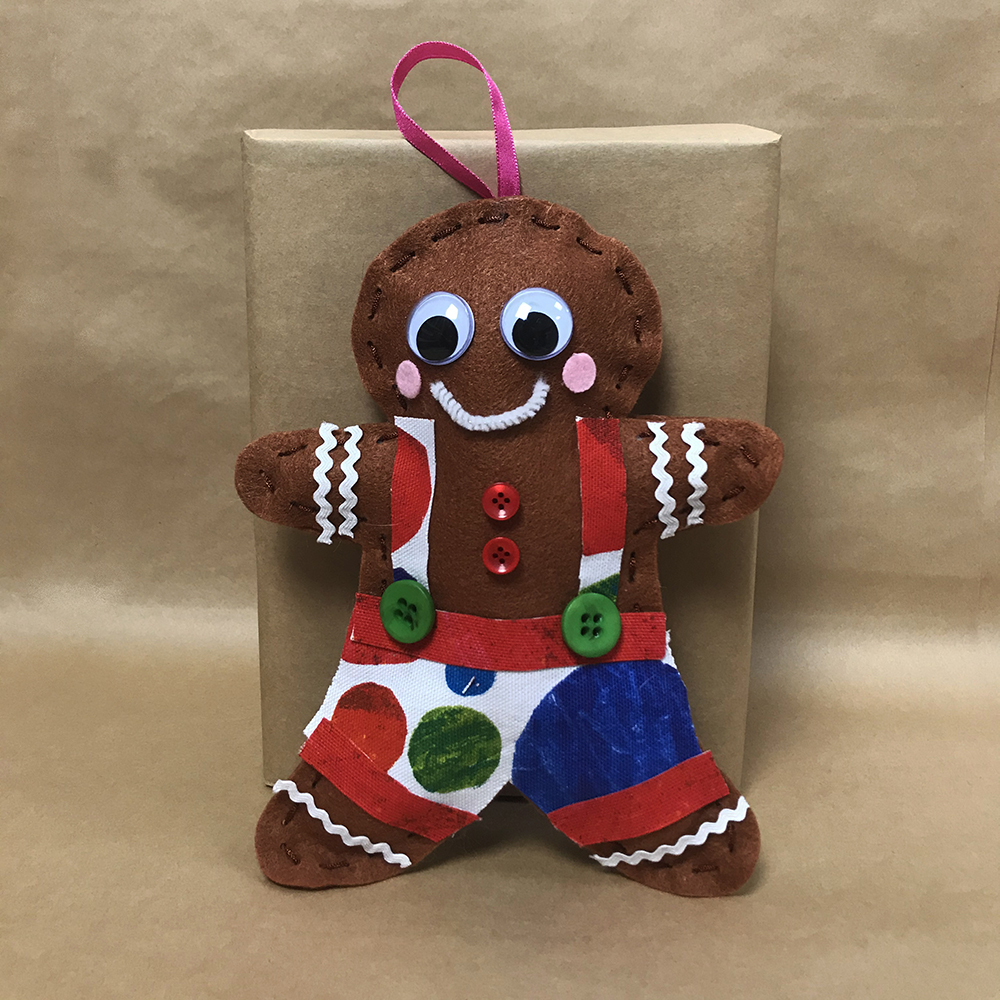
Gingerbread People

Gingerbread an Christmas Craft Project .

A character that has inspired songs and been in movies, the beloved gingerbread man has personality and style.
The Felt Gingerbread Sewing Kit comes complete to assemble your very own plush gingerbread person. Fantastic for beginner sewing skills with the pre-cut holes, the plastic needle supplied glides through to make each stitch. Once the student’s gingerbread person is filled with stuffing then the creativity can begin. Use the accessories supplied with the kit to bring them to life or give students the option of other craft materials such as buttons, fabric, glitter and felt shapes and pieces to add their own unique touches.

Featured Product:
Felt Gingerbread Sewing Kit


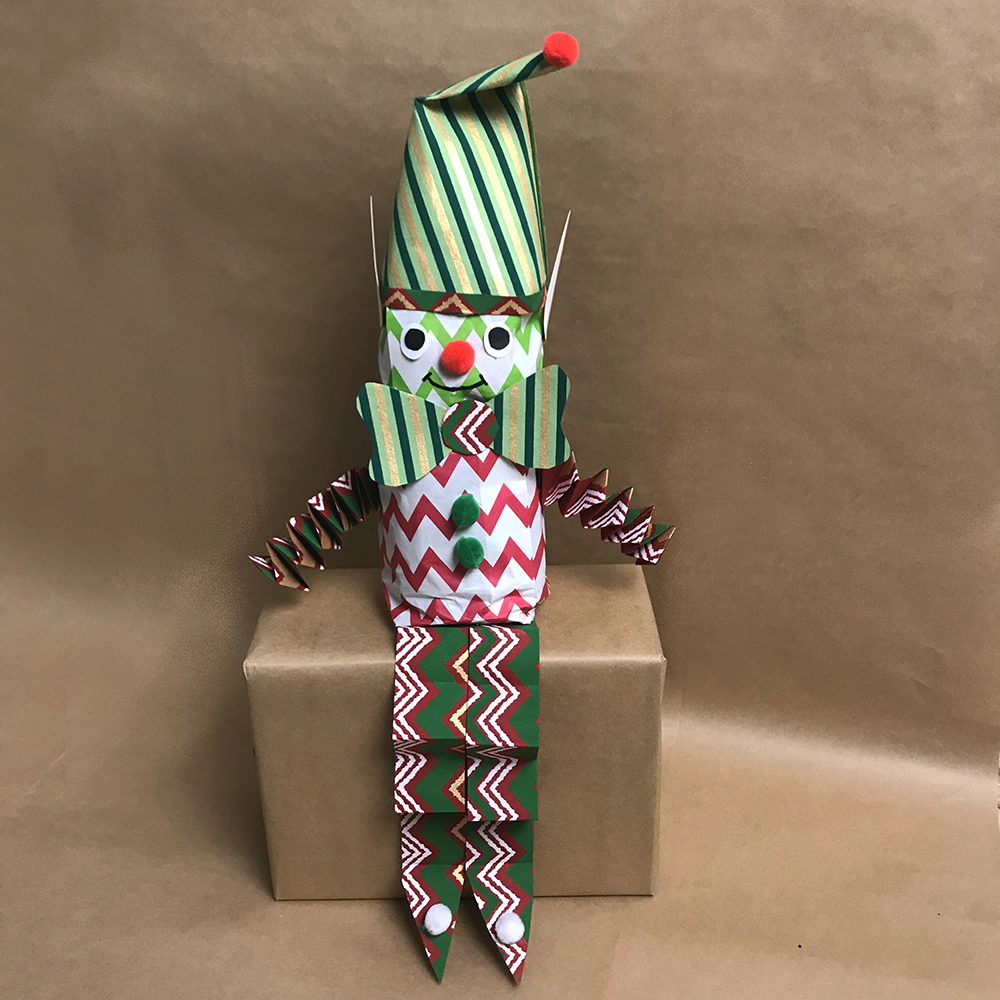
Paper Bag Elf

Christmas Craft Paper Bag Elf Activity

It would not be Christmas without Santa’s fabulous little helpers, the elves, busily working away in the toy shop. Inspired by “The Elf on the Shelf” this paper bag sculpture will enhance any students paper techniques. From concertina folds to jack-in-the-box springs, this elf has it all. Two Christmassy-coloured paper bags form the base shapes that are packed with low gsm paper, closed and glued together to form the head and body. Now it is time to add character using patterned paper. This step is where each student can make their own creative choices to decide what their elf will look like. From bows to buttons and hats, each student can give their elf a unique style.

Featured Products:
Christmas Coloured Paper Bags
Handmade Christmas Paper


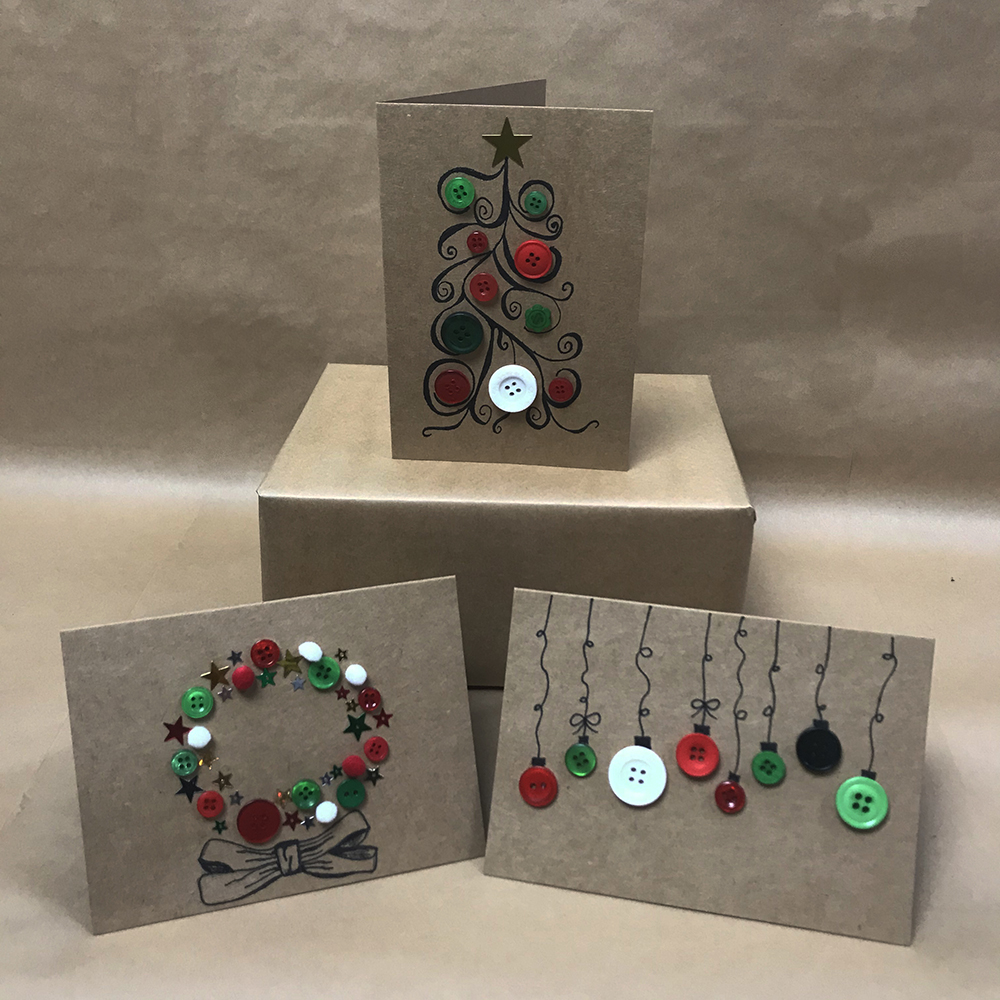
Christmas Cards

Christmas Craft Card Activy displayed on top of brown box

Christmas wishes and joy are spread across the globe in folded pieces of card and paper. Students love giving these to their families as well as their friends. There are so many different materials you can use to create, and these natural coloured cards are the perfect canvas for creative ideas to adorn their surfaces. Buttons are so versatile, and students can imagine them into anything.


Featured Products:
Natural Cards and Envelopes
Christmas Coloured Buttons
Christmas Sequins Mix 

How do you spark the Christmas imagination in your learning environment? We’d love to hear from you!


About the Author
Olivia is a specialist Visual Art Teacher in an ELC, primary and secondary school setting. She has a broad breadth of experience with inquiry learning and is an IBO-qualified educator. Olivia particularly enjoys developing Visual Art units around STEAM which include electronics, technology and science concepts.


Shop MTA>

Blog Home>