Posted on

Explicit Instruction – What Does This Mean?

Children reading in classroom

I started my career as an occupational therapist. My job was to help people relearn how to do things in their everyday life after experiencing an illness or disability. To do this I had to do two things: firstly, I had to analyse the task to establish exactly what the person needed in order to be able to carry out the task and secondly I had to find out what they could and could not do. Only then could I develop a plan to help them master the task. I have applied this same approach – task analysis and assessment of skills and knowledge – to the process of teaching and learning literacy skills.

Mastering a skill of any sort usually involves learning strategies and techniques with lots of practice to hone the skill so that it can be used in different situations. Think about how we teach young children to play a sport. Children who want to play football for example, spend a lot of time learning the skills of ball handling, working with others and understanding the rules of the game. With those skills in place, they are then ready to start playing a game of football.

Whether children start playing football as pre-schoolers or come to the game later, they still have to master these skills and learn the rules of the game. Practice sessions continue to teach and refine these skills and budding footballers spend a lot of time honing their skills so that they can use them automatically and efficiently in a game.

This approach to teaching a sport works well when teaching literacy. Writing and reading are complex processes. Just like a game of football, they require the ‘player’ to master a range of skills and knowledge and to understand how to use them. Just like in football, some children pick up the skills effortlessly and master them with only a small amount of practice. Others take longer, and some decide that football is not for them because the skills required seem too hard to master. Being able to read and write is not like football – playing football is optional, learning to read and write is not. The way we teach children to read and write has to be successful. We need to explicitly teach the skills and knowledge they need to learn if they are to become successful readers and writers.


So what does explicit instruction mean for literacy?

It means understanding what is involved in learning to read and write. It means finding out what skills and knowledge students already have and where they have gaps. It means using assessment to drive instruction – to teach the skills and knowledge students have not mastered but need to learn. Sometimes this means whole class instruction and sometimes it means giving students the extra instruction and practice they need in small groups or individually.


Explicit instruction to close the gaps

I wrote Catch Up Your Code’ and Sort Out Your Syllables’ to address gaps in literacy knowledge for students in upper primary and secondary classrooms. From Year 5 and beyond, students are required to read more and more complex texts in subject areas that are often new to them. The language is more formal, and many words are multisyllabic, abstract and technical. Students who have not mastered the ability to decode automatically and efficiently will struggle. It is estimated that the average fifth year student encounters about ten thousand new words – described as an “orthographic avalanche” that overwhelms most of those without adequate decoding skills.


Teach decoding explicitly

If decoding is not automatic, the skills and knowledge needed must be taught explicitly. First and foremost, students need an in-depth knowledge of how the alphabetic code of English works. ‘Catch Up Your Code teaches this. To decode efficiently, students must recognise graphemes and be able to pronounce them in different ways. Once they have a conscious understanding of the diverse nature of grapheme-phoneme relationships, they can use this knowledge as a foundation for learning to decode unfamiliar multisyllabic words.

That’s where Sort Out Your Syllables’ comes in. Students use their knowledge of the code for the vowel sounds of English, to find and pronounce syllables in unfamiliar words. These two areas of knowledge and skill – alphabetic code knowledge and strategies for decoding multisyllabic words – will dramatically improve decoding skills in the upper years. If decoding isn’t efficient by Year 5, it will not become so, without explicit instruction that targets gaps in knowledge and skills.


Sorting vowel spelling patterns – the key to finding syllables in words

These Year 7 and 8 students are working collaboratively to learn about the nine types of vowel spelling patterns they will find in syllables.

Sorting spelling patterns activity on classroom deskSorting vowel patterns activity on classroom desk


Teach the skills for writing explicitly

From Year 5 onwards, students are required to write longer, more complex scripts in different writing genres. The expectation is that they should have mastered the foundation skills for writing: to write speedily and legibly, to spell most high-frequency words correctly, to use spelling strategies to spell most words close to correctly, to write in paragraphs, to use punctuation correctly, to proofread their writing for spelling and punctuation errors, to revise and edit their work to improve the content. Unfortunately, many students who find handwriting and correct spelling a challenge will struggle to master the other higher-order skills of writing, regardless of their potential to write as well as they can speak.

The way to improve writing skills is to explicitly target the areas that need improvement, starting with the foundation skills. If handwriting is a major challenge by Year 5, students may be best to use a digital device to avoid illegible handwriting hindering their writing progress.

If they struggle to spell words correctly, a range of strategies are needed. Firstly, students need to be able to write every sound of English in at least one way and they also need knowledge of the diversity of the code. ‘Catch Up Your Code’ teaches this. They need to know how to write multisyllabic words they can say but not spell. Sort Out Your Syllables’ teaches this.

They then need to learn about the spelling system of English – the rules and conventions that affect why words are written the way they are. Once they are fluent in getting words on the page in a form that can easily be read – even if they are not all spelt correctly – they can then be taught strategies for punctuation and paragraphing, authorship, proofreading and editing. All the skills for writing need to be taught explicitly, starting with those that build the foundation for authorship.


Summary

Explicit instruction for literacy is simply targeting the knowledge and skills that research has shown to be essential for students to learn to read and write, and ensuring they are taught in a logical, sequential and direct way. It doesn’t matter whether students have just started school or have been at school for a while – everyone benefits from explicit instruction.

Use assessments to find out what students know and can do. Teach what they need to learn.
Check they have learned it. Leave nothing to chance.


The way we teach has to ensure all students become successful readers and writers. Teaching skills and knowledge explicitly is the best way to ensure this happens.


Featured Products:

Catch Up Your Code

Sort Out Your Syllables


About the Author
Joy Allcock (M.Ed). Independent Literacy consultant, facilitator of teacher professional
development throughout New Zealand and internationally. Presenter at NZ and international literacy conferences (IRA, ASCD/ACEL). Author of a range of literacy resources for teachers and students (
www.joyallcock.co.nz). Leader of Shine Literacy Research Project (designed and evaluated by Massey University – www.literacysuccess.org.nz)


Blog Home>

Shop MTA>

Posted on

Books For Brighter Times

Brighter Times Books inside spread preview

Rise and shine, it’s book blog time!

Welcome back to the MTA Book Blog, this month coming to you bright-eyed and bushy-tailed from a very different-looking Sydney.

We were thrilled that so many of you enjoyed and responded to the last post, Picture Books For Unsettling Times, in which we looked at some beautiful books to help open up a dialogue and support students during various challenging times in their lives. Now, as many of us begin to see the light at the end of the tunnel after a very challenging 18 months, what better time to look forward and celebrate the brighter days ahead!

For many students, the lifting of lockdown restrictions heralds a return to the classroom, a reduction in screen-based interaction and a rediscovery of many fun social activities they have likely missed out on throughout the pandemic. In this post, I’ll be shining a spotlight on four dazzlingly delightful books that celebrate some of the aspects of post-lockdown life that students can look forward to, steering them towards a positive frame of mind as they refamiliarise themselves with face-to-face learning and social experiences.

So, draw back the curtains and settle down with me as we bathe in the glow of these glorious books for brighter times.


‘Your Birthday Was The Best!’ by Maggie Hutchings and Felicita SalaBrighter Times: Your Birthday Was The Best Book cover and quote

We begin with a shiny new picture book (shortlisted for this year’s CBCA Book of the Year Awards) that will have your students giggling, squirming and then giggling some more! In ‘Your Birthday Was The Best’, we meet a cockroach who reminisces fondly about all the fun he had at a children’s birthday party, seemingly unaware that he wasn’t invited…

‘I was happy to see you. And you were so excited to see me you screamed!’

The hilarious juxtaposition between the narrative led by the endearingly earnest cockroach and the reality of the human characters’ experience – captured so magnificently by the horrified expressions of the guests in Sala’s gorgeous illustrations – will not only have your students falling about with laughter but is also a fabulous opportunity to promote and develop visual literacy skills.

Your students will likely have experienced very different birthdays during lockdown; whether that means a smaller celebration within the household, a Zoom party or a procession of drive-by well-wishers, there’s a good chance that many of them will have missed out on the shenanigans associated with a birthday party with all the trimmings. This hilarious and cheeky tale will evoke memories of lively birthday parties gone by and will certainly spark an excitable discussion of future party plans. ‘Your Birthday Was the Best’ also provides an excellent springboard for a fun creative writing prompt, perhaps directing students to recount their own birthday hijinks or to rewrite the account of the cockroach-crashed party from the perspective of one of the human guests.


‘Dinosaur Day Out’ by Sara ActonBrighter Times: Dinosaur Day Out Book cover and quote

In the delightfully charming ‘Dinosaur Day Out’, we join Sally and Max as they head to the museum with Dad to visit the dinosaur exhibit, only to discover that they are not the only ones enjoying a day out. The children embark on a tremendous hands-on dino experience, while the totally oblivious Dad narrates from his book. Similarly to ‘Your Birthday Was The Best’, the comical contrast between the different experiences of the characters in ‘Dinosaur Day Out’ is conveyed entirely through the illustrations, again supporting those important visual literacy skills. The irony that the adult character remains completely unaware of the extraordinary events taking place right under (or above) his nose is sure to delight your students.

Excursions have been largely off the cards for the past 18 months and this sweet, imaginative tale of an extra-special interactive day out captures the thrill of exploration and discovery that only an excursion brings. It will reignite students’ excitement for hands-on, real-life learning experiences as opposed to digital ones.


‘Lots of Frogs’ by Howard Calvert and Claudia BoldtLots Of Frogs Book cover and quote

Next, we come to one of my favourite rhyming picture books, ‘Lots of Frogs’, where we join Tommy Fox on his doomed quest to keep a lid on his box of trouble-making frogs. This brilliant rhyming story is positively leaping with laugh-out-loud imagery and is propelled forwards by a rhythm that’s as lively and bouncy as Tommy’s frogs.

‘Net’s quite full, halfway there. Look! There’s five on teacher’s chair!’

The book takes us all around the school as we follow Tommy on his mission to get those naughty frogs back in their box, and even the staffroom isn’t off limits! Students will delight in the hilarious images of frogs wreaking havoc around the school and I guarantee that the whole classroom will erupt in a fit of giggles when you reach the line about a frog jumping in the headteacher’s hair! This fast-paced rhyming story is bursting with positive imagery and language associated with the school environment and is sure to help strengthen and reinforce students’ associations with the classroom as a place of enjoyment and enrichment.


‘Unplugged’ by Steve AntonyBrighter Times: Unplugged Book cover and quote

Yes, I know I say this a lot, but this is one of my favourite ever picture books! In ‘Unplugged’, by author/illustrator Steve Antony, we meet Blip, an adorable robot who spends her days completely absorbed by her computer, which is just fine by her. However, when a power cut leads to Blip becoming unplugged, she suddenly finds herself blinking in the bright lights of ‘outside’…

Anthony’s clever narrative device of repeating the exact same activities that Blip enjoys on her computer as she does outside (learning new things, playing fun games, dancing to music and visiting faraway places) allows him to sidestep a preachy or judgemental tone when comparing the two different environments for these experiences. Equally, the artistic technique of having the screen-based illustrations in black and white and the outside illustrations in full colour subtly conveys the idea of the richness and depth of analogue experiences compared to two-dimensional digital ones without being overtly critical of screen-based activities.

For the past 18 months, our entire lives have been lived mostly online, our learning, teaching and even our socialising have all been confined to the digital space. ‘Unplugged’ is a celebration of what happens when we switch off our digital lives and enjoy an analogue adventure! This is the perfect tale to help students reflect on the positive aspects of the transition away from screens and appreciate the opportunity to enjoy some hands-on learning and experiences. A follow-up discussion that encourages students to think about the things that you can’t do online, or that aren’t as good online, will help students focus on the benefits of moving out from behind the screen.


The titles in this collection are all wonderful celebrations of a post-lockdown world, perfect for reinforcing positive emotions and associations and supporting students as they transition back into face-to-face learning and social situations. Come rain or shine, picture books provide uniquely accessible springboards to broach wider conversation topics, and all of the books in this collection are rich sources of writing and discussion prompts to encourage students to make connections with each other and their own lives and experiences.

Join me again next time, when we’ll decking the shelves with boughs of books, getting excited for the festive season and looking ahead to a brand-new year.

The future’s looking bright.


About the Author

Emily Bruce is the Managing Editor at Modern Teaching Aids (although she prefers the term Grammar-Wrangler-in-Chief). She has worked in children’s publishing in the UK and Australia for eight years and is passionate about finding the spark that ignites a lifelong love of literacy in the next generation of storytellers.


Blog Home>

Shop MTA>

Posted on

Crafts To Inspire Christmas Creativity

Christmas Craft Resources flatlay

Christmas is such a special time of year, and no doubt in recent times it has become an even more important holiday where families can bond and celebrate. Inspiring joy and inviting groups of students to create festive crafts brings about warmth and connection. The act of making can have such a positive effect on our mental health, so inviting children and adults alike to break out the felt, paper and a pom pom or two will ignite the Christmas spirit as we roll into the festive season.


Personalised Christmas Bags

Christmas canvas bag decorated with Christmas baubles
Who doesn’t love a unique and fun reusable shopping bag nowadays, especially since the removal of single-use plastic. There are so many possibilities with a calico shopping bag, as previously seen with the block print stamps. Students will enjoy coming up with festive designs such as reindeers, baubles, Christmas trees and Santa on his sleigh, making this project an individual experience.

Christmas canvas bag decorated with Christmas tree

Once they have decided on their design, students can either cut felt shapes freehand or create paper patterns to pin to the fabric. Students will have fun arranging their felt pieces onto the calico bag before gluing them down. Giving students the option of adding embellishments like buttons, ribbons, pom poms and sequins to their textile arrangement adds a lovely three-dimensional texture to their final composition. Certainly a must-have to stand out from the crowd when Christmas shopping.


Featured Products:

Calico Shopping Bag – Pack of 10
Christmas Felt- Pack of 50


Simple Mosaicking

Christmas Tree and baubles
When thinking about the art of mosaicking, I know sometimes the process can be quite daunting. Especially the idea of using tile adhesive and grout with students. However, these resin mosaic tiles are fantastic as they can be used on all types of surfaces, can be cut with scissors if necessary and can be adhered with craft glue or pushed into mediums like Magiclay. Students can adorn papier-mache shapes such as baubles or cones since the process is not too complex. They can explore patterns when making Christmas coasters and photo frames, and for young children it will develop their fine motor skills as they pick up each little mosaic square. These mosaic tiles shimmer so brightly in the light that they are sure to spark the imagination of all who encounter them.


Featured Products:

Mosaic Tiles Christmas Colours
Square Wooden Coasters- Pack of 20

Paper Mache Cones – Pack of 6
Christmas Paper Mache Balls with Gold String

Christmas Pom Poms – Pack of 300


Fun and Easy Shrink Film

Shrink Film Christmas craft ornaments
This Christmas project certainly brings back a fond memory from my childhood where I made shrinky dinks out of chip packets. The process has certainly come a long way since then with much sophistication. Your students will be absolutely fascinated with this process and will be glued to the oven door as they watch their decorations bend and contort before laying flat.
These Christmas Shrink Film Decorations have lovely patterns and designs where students can use permanent markers or pencils to add colour. I personally like pencils as they enable students to explore ombres and blending, which looks striking when shrunk to a miniature size. Paired with leather thronging for a necklace or placed on a metal key ring, they become a brilliant present or keepsake.


Featured Product:

Christmas Shrink Film Decorations- Pack of 12


Christmas Stamping

Christmas wooden block stamps
Who doesn’t love a stamp, especially when it is adorned with an iconic Christmas object! Stamps are so versatile for this time of year and can be applied to a wide variety of materials. Pair them with acrylic paint, block ink, embossing fluid or ink pads, the medium and colours that can be used are endless and expose students to the concept of repetition. Whether stamping on fabric or paper, the final print can be used to create many different Christmas-inspired delights.

Christmas Craft Cards and pom poms on grass background

These include Christmas cards where prints can be layered on top of paper, fabrics and hessian. Santa portraits can be drawn inside wreath prints and stamps can be repeated over the surface of a card. A lovely way to add colour to your prints is with watercolours or pencils; this not only enhances the print but also allows students to explore different colour combinations. This type of project is always a favourite as people of all ages enjoy giving cards to their loved ones.

Christmas craft brooches on grass background

If Christmas cards are not your thing, stamps can also be pushed into clay to leave an impression on its surface. Whether you use air-dried clay or earthenware, these lovely pieces can be turned into pendants and brooches by adding holes or pin backs. Once dried or fired, you can have so much fun adding colour to these stamp designs and, when complete, a spot of gloss really brings them to life. Students will really treasure these as well as delight in giving them to special people in their lives.

Christmas canvas reindeer block print bag


If fabric is more your cup of tea, then these stamps are just delightful. Using fabric paint and a roller, they can be used to create repetitive designs onto T-shirts and calico shopping bags. Students will love coming up with their own compositions with the different stamps and can play with pattern when choosing colours.


Featured Products:

Christmas Block Print Stamps- Set of 6

Christmas Pom Poms – Pack of 300

Creatistics Air Dry Ceramic Clay

Calico Shopping bag- Pack of 10


Bling up Your Favourite Artwork

Christmas Glitter Frames on
A framed artwork from a young artist would have to be the most special Christmas gift a child can give you. Whether it is a pencil drawing, a watercolour painting or a printout of a digital piece, these glitter photo frames are just fabulous. Imagine combining your students’ artwork with a snow globe. Students will love placing their work on one side and then filling the other side up with water to give their masterpiece a touch of sparkle. Students can make artwork specifically to the size of these frames or artwork can be photographed and resized digitally before being printed out. Who doesn’t love a little glitter in their life?


Featured Products:

Glitter Liquid Photo Frame – Pack of 10

Christmas Pom Poms – Pack of 300


Cute as a Button Reindeers

Christmas craft ornaments sitting on Christmas paper
Can you name all the reindeer that pull Santa’s sleigh? These reindeer ornaments are just the cutest and I know your students will think so too. Their most obvious use is to create a reindeer face, whether it be with markers, pencils or watercolours, and it is then placed inside and covered with the glass cabochon. Another alternative to creating the reindeer would be to place a pattern piece of paper under the cabochon and then add eyes and a nose to the surface of the glass with craft materials. Either way, these reindeers can then become pendants or ornaments where they can be further personalised when adding colours and embellishments to the wooden backing.
There will always be that student who will think outside the box and do something a little bit different. Who said it had to be a reindeer? I certainly agree. You can also fill these pendants with small paintings of Christmas icons and adorn your backing to match. The creativity is endless.


Featured Product:

Wooden Reindeer Ornaments- Pack of 10


Versatile Paper

Tissue paper Christmas bauble with festive background
Ah, don’t you just love the smell of paper during the festive season! It is the aroma of a million ideas and possibilities for an abundance of folded, cut and collaged crafts. Whether it be patterned paper or tissue paper, they are equally fun and useful, so it is fantastic when they come in a single handy pack. From origami folded stars to Christmas cards and decoupage Christmas baubles, what is your favourite way to use paper during the festive season?

Christmas Tree and pom poms on grass background
I particularly love to show students how to fold and roll paper into different shapes that can then be used on three-dimensional forms. A cone is the perfect beginning of a Christmas tree where paper can be applied in different ways to create interesting forms. Paper can be fringed or rolled into little cones and layered all the way up to form the tree. I always tell my students that paper is so versatile and that with a little snip and a twist it can become something amazing!


Featured Products:

Christmas Paper & Tissue Pack of 300

Christmas Papier Mache Balls Pack of 10
Paper Mache Cones – Pack of 6


This year, I hope Christmas brings an extra bit of magic and joy to us all. I hope that Christmas projects and crafts can be enjoyed and used to highlight how special the festive season is to families, friends and communities. I hope that the act of creating and giving can bring us together to regain that feeling of pure happiness that we experience when exploring and expressing ourselves creatively.


About the Author
Olivia is a specialist Visual Art Teacher in an ELC, primary and secondary school setting. She has a broad breadth of experience with inquiry learning and is an IBO qualified educator. Olivia particularly enjoys developing Visual Art units around STEAM which include electronics, technology, and science concepts. Follow Olivia on Instagram in her quest to inspire creativity @creativemindsinbloom.


Shop MTA>

Blog Home>

Posted on

Picture Books For Unsettling Times

MTA Book Blog August Picture Books

Welcome back to the MTA Book Blog, this month coming to you from my lockdown book cave here in Sydney.

If you haven’t had chance yet, do check out the previous book blog post, Telling the Story of Lockdown, posted back in June. At the time, I could never have guessed that we were only days away from a new and challenging chapter of Australia and New Zealand’s own pandemic story.

The events of the past 18 months have certainly highlighted the importance of being able to cope with unexpected change and challenges, so, for this post, I have selected five gorgeous picture books that feature characters who are experiencing disruption in all shapes and sizes. From the inconvenient and frustrating to the utterly life-changing, these stories span the spectrum of sources of disruption and challenge in a child’s life and, crucially, offer hope through their various outcomes.

So, relax your shoulders, unclench your jaw, put the kettle on and settle down with me to discover these perfect picture books for unsettling times.


‘We’re Stuck’ by Sue DeGennaro We're Stuck book & quote banner

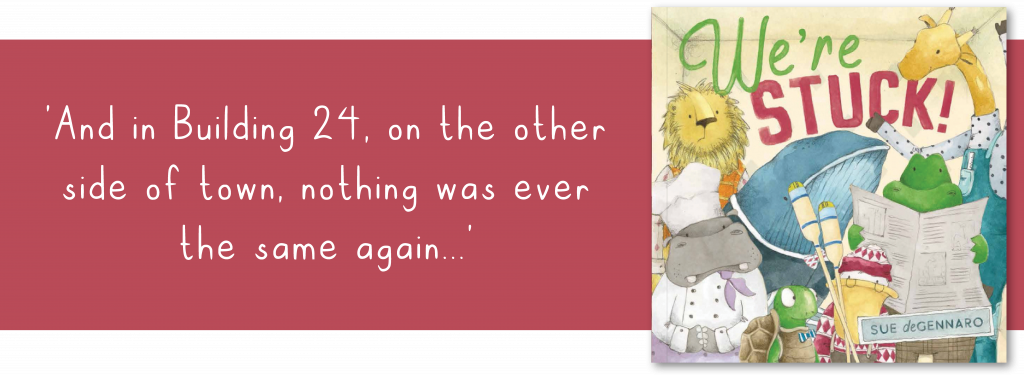
Let’s start by getting stuck into the adorable ‘We’re Stuck’ by Australian author/illustrator, Sue deGennaro. When the residents of Building 24 shuffle into their lift one morning, they are all far too preoccupied with their own busyness to even notice one another. But, when the lift suddenly breaks down, with a dismayed birthday boy trapped inside, the lift’s occupants soon shift their focus from their own needs to each other’s.

A sweet and heart-warming tale of resilience, adaptability and community, students will certainly be able to relate to the themes addressed in ‘We’re Stuck’. A follow-up discussion that invites students to share their own experiences of being stuck in place and having to put their plans on hold will create a meaningful text-to-real-world connection and encourage them to reflect on the importance of recognising that some of life’s unsettling challenges are merely a moment in time.


‘Norton and the Bear’ by Gabriel EvansNorton and the Bear book and quote banner

Is imitation the sincerest form of flattery? Or is it just annoying? This is the question at the heart of the delightfully charming ‘Norton and the Bear’ by Aussie author/illustrator Gabriel Evans. Norton prides himself on his unique dress sense, so when the relentlessly complimentary Bear insists on copying Norton’s outfit at every turn it is simply unbearable! However, after Norton loses his temper with the Bear and insists that he stop copying him, the Bear turns up with a new accessory that Norton really, REALLY likes…

Between the ages of 3 and 5 is when children begin to form a sense of self, developing their identity and individuality. ‘Norton and the Bear’ perfectly illustrates how challenges to our identity can loom large, especially for young children for whom the sense of self is still relatively fragile. Whether you identify more with the frustrated Norton or the endearingly earnest Bear, I guarantee that you and your students will instantly fall in love with this story and find comfort in the knowledge that, unsettling though it may be, imitation is almost always a form of flattery!


‘Florette’ by Anna WalkerFlorette book and quote banner

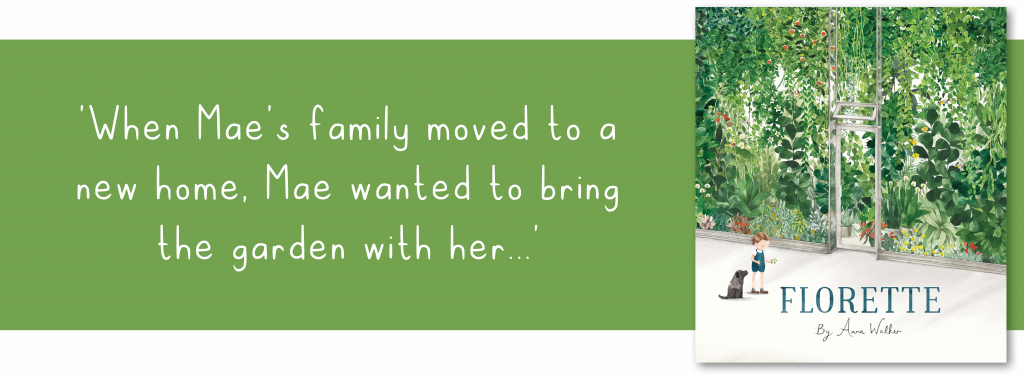
Yet another stunning picture book from an Australian author/illustrator extraordinaire, ‘Florette’ by Anna Walker introduces us to Mae, whose life has been uprooted by her family’s decision to move to the city. Mae misses her friends, she misses her old life and, most of all, she misses her garden. However, when she ventures further into her new environment, Mae finds something that plants the seed for a different type of garden, and some new friends along with it.

Moving house is an immensely unsettling and disruptive event that many of your students will likely be able to relate to. Through Walker’s skilful visual storytelling, ‘Florette’ quietly celebrates children’s emotional resilience in adapting to environmental change and shows us that, ultimately, home is not a place, but a feeling, and one which we can carry with us and recreate wherever we go.


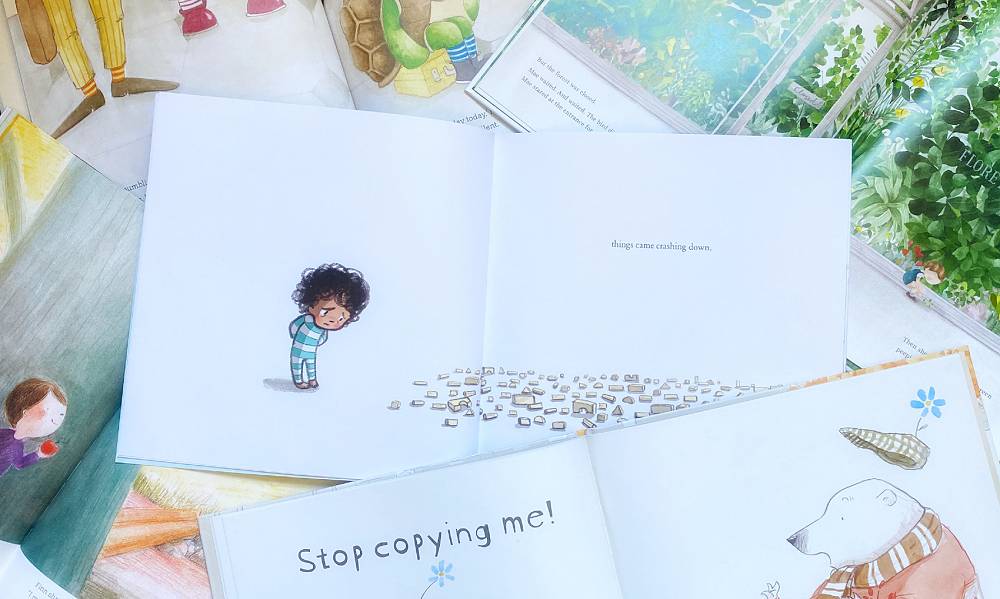
‘The Rabbit Listened’ by Cori DoerrfeldThe Rabbit Listened book and quote banner

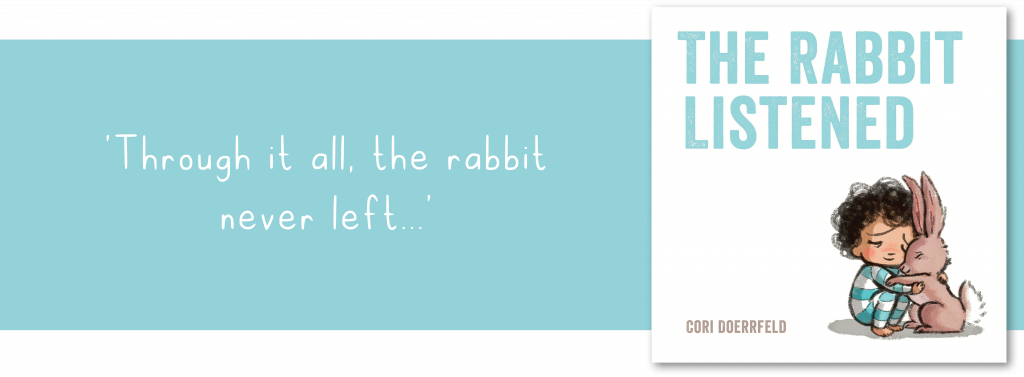
Next up, we have ‘The Rabbit Listened’, and I should put in my disclaimer up front and say, I absolutely love this book. In this gentle, insightful story we meet Taylor, who is struck by a sudden loss that brings his day (literally) crashing down. Everyone around Taylor tries to coach him in how he should cope with his sadness, but it is only when they all leave and a little rabbit comes to sit and listen that Taylor finds the space to adequately process his emotions.

When someone we care about is upset, it can be a very natural response to try and impose our own coping strategies on them, and to even lose patience when they aren’t responsive to our efforts to ‘fix’ the situation. This is something that can be especially difficult for young children to understand, and ‘The Rabbit Listened’ provides the perfect framework to begin that discussion around different approaches to processing trauma, both for the one who is suffering and, importantly, for those around them.


‘Finn’s Feather’ by Rachel Noble and Zoey AbbottFinns Feather book and quote bannr

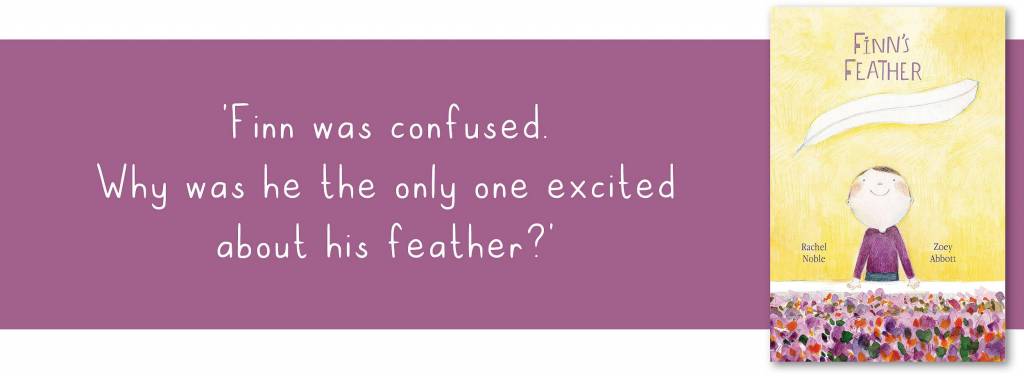
Tissues at the ready for this one. In the heart-wrenchingly touching ‘Finn’s Feather’ we join Finn, who, on the first day of spring, opens his front door to find a feather on his doorstep. Confident in the knowledge that the feather is a gift from his recently deceased brother, Hamish, Finn excitedly shows the feather first to his mother and then to his teacher, neither of whom seem to want to encourage Finn’s belief that the feather was sent by his brother. However, when Finn shows the feather to his best friend Lucas, he immediately matches Finn’s excitement and the two boys set about finding ways to make the feather the centrepiece of their games.

Similarly to ‘The Rabbit Listened’, the beauty of ‘Finn’s Feather’ is the way it illustrates the highly unique and personal ways in which trauma manifests, particularly in children, and demonstrates the ineffectiveness of trying to impose our own coping mechanisms or perceived acceptable patterns of behaviour on the one who is suffering. The hero of this story is certainly Finn’s best friend Lucas who, far from dismissing Finn’s belief in the provenance of the feather, simply meets him where he is and allows him to exist in the reality of his grief.


Although the collective disruption that we are all currently experiencing will not last forever, unexpected change and challenge will rear their heads regularly throughout a child’s life. Books like these are fantastic tools to help build emotional resilience and provide a safe and accessible springboard for discussion during all manner of unsettling times.

And now, as I retreat into my book fort, I leave you with these wise words from beloved children’s author, E.B White.

‘A library is a good place to go when you feel unhappy, for there, in a book, you may find encouragement and comfort. A library is a good place to go when you feel bewildered or undecided, for there, in a book, you may have your question answered. Books are good company, in sad times and happy times, for books are people – people who have managed to stay alive by hiding between the covers of a book.’

Stay safe out there.


About the Author

Emily Bruce is the Managing Editor at Modern Teaching Aids (although she prefers the term Grammar-Wrangler-in-Chief). She has worked in children’s publishing in the UK and Australia for eight years and is passionate about finding the spark that ignites a lifelong love of literacy in the next generation of storytellers.


Blog Home>

Shop MTA>

Posted on

Hands-On Learning Experiences With Osmo

OSMO Coding Game and Tablet

The Osmo range features some of my favourite classroom resources for introducing coding and integrating technology across multiple key learning areas. Today I’m going to share with you the top five things I love about Osmo. Read along to find top-rated products and resources that my students and I love to use in our classroom.


Literacy & Numeracy Integration

Osmo has a large range of apps that cater to English and mathematics curriculum links as well as literacy and numeracy general capabilities. I began my Osmo journey with the Genius Starter Kit (ages 6-10), which allowed me to explore apps such as Osmo Words, Osmo Numbers and five other great programs. The Genius Starter Kit encourages versatile use of accessories across multiple apps and allows students to explore concepts they are developing whilst extending their understanding to new settings. Purchasing the Genius Starter Kit provided me with opportunities to explore various accessories such as the word tiles, number tiles and tangram pieces. It was as simple as unpacking the box and downloading the app!

OSMO Starter Kit and tablet on white background

The Osmo Words app has been a crowd favourite in my learning space and fantastic for promoting letter recognition, decoding and spelling rules across various age groups. Students can work alongside a computer guide or challenge their friends to a multiplayer competition. Adjusting the ability level has allowed flexible use of the product across various users and their needs. The Osmo accessories can be purchased separately and the Osmo support team can quite often generously provide replacements. No one likes missing pieces, right?


OSMO Word game and Tablet on carpet


The Osmo Math Wizard series (ages 6-8) has been recently launched, which focuses on place value and measurement concepts within the mathematics curriculum. These new additions to the Osmo range provide engaging ways to promote fluencies within these concept areas. Both programs include interactive guides, printed student workbooks, sturdy game pieces, storage solutions and game-based learning opportunities. The Osmo reflector and the interactive guide provides feedback to the child on their place value and measurement work. This app enables multiple users to create accounts which allows for the product to be used by a classroom shared audience.


OSMO Math Wizard Place Value game on carpet OSMO Math Wizard Measurement game on carpet


The Osmo range includes various other apps such as Osmo Kaleidoscope and Osmo Tangram, which assist in promoting discrete parts of the mathematics curriculum or combining the ICT General Capability and Numeracy General Capability in your play-based learning experiences.


Projector App

The Osmo Projector app was launched during peak COVID-19 home learning in Australia. Responding to urgent requests from educators seeking the right tool to teach in an online or remote learning environment, Osmo created this free app to use in conjunction with the Osmo base and reflector. The app allows educators to scribe on whiteboards, worksheets or manipulate objects in front of the reflector and base, and the iPad will display this in the correct orientation for viewers. When combined with online conferencing platforms such as Zoom or by using AirPlay to stream from your device to LED displays in the classroom, this provides an innovative way to use your iPad as a projector for face-to-face and virtual learning.


OSMO Projector app with Tablet on school desk


In my classroom, I AirPlay my iPad to my Macbook which is displayed on my LED TV screen. I use the Projector app to illustrate sequencing concepts such as arrows and patterns from my work station, allowing all students to view this live-action while I’m modelling a lesson to the class. A benefit to this app is that you can screen record your learning experience and upload it to online portfolios or live cast during online conferencing.


Coding Starter Kit

The Osmo Coding Starter Kit (ages 5-10) provides users with access to the Osmo Coding Awbie, Osmo Coding Jam and Osmo Coding Duo apps. These hands-on learning apps provide various ways to access the Digital Technologies curriculum concepts of directional sequencing, algorithms and abstraction. This kit provides fabulous introductory and intermediate learning opportunities with self-paced programs and built-in computer support guides. With a mix between structured learning tasks and free-play opportunities, the Coding Starter Kit is a go-to product of mine as a Specialist Digital Technologies teacher. Plus, if the students are begging to use them at lunch time- the resources must be fairly awesome!


    • OSMO Coding Jam Game and Tablet on desk in classroomOsmo Coding Awbie Game and Tablet on carpet


I use these resources in my Digital Technologies lessons, lunch-time coding clubs and before/after school at the students’ requests. To introduce the activities, I model and co-complete tasks with the students first and then allow them to continue to complete the programs independently. After a couple of structured lessons, my students can now access this resource as an independent activity as a fast-finisher task.


Osmo Pizza Co.

The Osmo Pizza Co. Game is easily my personal favourite game to play using the Osmo base and reflector. Have you ever watched a child play a game where you are itching to move them aside so that you can have a go? You will feel that way with this game. The premise of the game is to serve customers in a pizza shop by taking orders then preparing and presenting pizzas to the customers. Additional curriculum links can be made to financial mathematics as the user is also responsible for billing the customers at the end of their visit. As the timer counts down and the customer lines grow longer, you’ll find your competitive side shines as you succeed as a virtual small business pizza shop owner.

OSMO Pizza Co Game and tablet on white background


Storage

Storage! The thing that makes almost every educator’s heart sing. Osmo considers their storage to make it easy for students and teachers alike to grab-and-go with their products. Every accessory and starter kit comes in durable storage solutions that allow every piece to have its own home. As someone who owns various Osmo kits, I organise the storage containers into a large plastic container so students know exactly how to access the resources when needed. The items stack together neatly and come with clear, colour-coordinated labels which means even my youngest students can find what they’re looking for and pack them away efficiently.


    • OSMO open storage containers birds eye viewOsmo games and storage containers on floor


There you have it! My top five favourite things about the Osmo range! Osmo has made a positive difference in my classroom and has been a fantastic way to easily and efficiently integrate technology across multiple key learning areas.

Featured Products:

Osmo Genius Starter Kit

Osmo Coding Starter Kit

Osmo Pizza Co. Starter Kit


About the Author

Taylor is a Specialist Digital Technologies Teacher. In her five years of teaching, she has found a passion for integrating a range of technologies into her classroom and strives to share these experiences with those around her. Follow Taylor along in her teaching journey on Instagram @taylorteachestech


Shop MTA>

Blog Home>

Posted on

Using Electricity As An Art Medium

Electricity Art Medium Preview

Visual art lessons have progressed over time, and art educators have pushed beyond the humble papier-mâché pig and into the realm of endless possibilities. A mixture of new mediums and technologies paired with classic favourites, a well-rounded art program can provide students with the necessary skills and tools, to not only become well-developed artists, but also critical thinkers with strong visual literacy capabilities.

There are many contemporary artists that explore the idea of light and sound as art elements and engage their audience with auditory moments and light sequences. For an artist like Haroon Mirza, electricity has become his medium of choice. I was lucky enough to experience his exhibition at ACCA Melbourne and I was particularly fascinated by the installation hanging from the ceiling which, to me, mimicked a modern-day chandelier. I stood and watched the light sequences for quite some time, and it made me think about the idea of electricity as an art medium and how I could implement it further into my primary art program.


Embroidery Characters with Copper Tape Circuits

Electrical Embroidery Character on Yellow backgroundLED Characters fabric embroidery on Black background


I initially began the investigation into this concept by exploring the use of copper tape circuits. The unit they were implemented into was one that explored characters using a variety of different provocations for idea development. The students developed many character designs using shapes, pavement cracks and ink blobs to decide on a design they would pursue further.

Their drawing was then transferred to fabric and they were placed in an embroidery hoop so that threads could be added to the final composition. The students were then shown how to create a parallel circuit using copper tape with the shape of this circuit being determined by the LED light placement in their design.

Embroidery Character Circuit building featuring child's hands, paper and copper circuit wire

They learnt how to construct a chibitronics paper battery holder for a coin cell battery that would power their circuit and they adhered chibitronic LED light stickers. When applying the stickers, the students learnt about the importance of the positive and negative sides as they related to their battery and were able to problem-solve when a sticker didn’t work or wasn’t shining brightly. The delight on each student’s face when the circuit was then placed behind their fabric was priceless.

Featured Product:
Metallic Embroidery Thread – Pack of 24


Google Earth Inspired Maps with a Copper Tape Circuit

Google Map Artwork Student Example 1Google Map Artwork Student Example 2

Seeing the great learning moments that were taking place when adding electricity as another art element, I implemented this notion into another unit where the circuit was viewed as more than just light. The students explored maps as not only a record of a place but also as an individual’s journey. This included places of importance to the student and it also enabled them to delve into typographical maps and cartography as provocations.
The students began by exploring places on Google Earth and they used either oil or dry pastels to represent them on cartridge paper. This process enabled each young artist to identify colour and shapes where they could enlarge elements of the map on their iPads with ease.

Student working on Map Overlay art Example, featuring student's arms, pen, paper & desk

An acetate overlay was added to the artwork to represent the topographical component of a map. The acetate enabled the colour map underneath to be seen clearly whilst building patterns and layers to the artwork.
The final element added was the circuit. These were intended to represent the idea of a pathway or journey. These copper tape circuits were more complex than the characters as the artworks were larger, more angles and turns were made, and more lights were used. We soon realised that the connections needed to be firmly stuck together for each light on the circuit to shine brightly. A wonderful moment for them to problem-solve. The students really enjoyed adding the LED light component to their artwork, as it enabled them to represent the idea of mapping and journeys on their work whilst giving them the opportunity to learn about the mechanics of a circuit.

Featured Products:
Cartridge Paper 125gsm A2 – Pack of 500
Soft Pastels Portrait – Pack of 24
Oil Pastels Large – Pack of 12


Soft Sculpture Characters with E-Textiles Circuits

Felted Character Art Example 1Felted Character Art Example

After exploring copper tape circuits, I wanted to find another way to add light to artworks that could be more organic in its shape rather than being determined by the copper tapes form. This is what led me to e-textiles.

Again in a unit based around characters, the students followed the same brainstorming and designing process, but this time created their characters out of felt. They then needed to determine where their lights would go and were shown how to create parallel circuits with conductive thread that was sewn into the felt. This time, rather than a paper they used a LilyPad battery holder with a switch that was paired with the LilyPad LEDs. They had to make sure that the positive and negative terminals matched for their circuit to be a success.

Etextiles Circuit Example 2Etextiles Circuit Example 1

Students found very creative places to put their lights within their character designs and we had glowing bow ties, sparkling cheeks and shining crowns.

Felted Character Example 4

They were also very innovative when determining ways to cover the battery holder with felt flaps and disguising their stitches with 3D paint.

Felted Character Art Example, battery flap 2Felted Character Art Example, battery flap 1


When reflecting on the process of this soft sculpture character, the students identified the LED light circuit as one of the most successful parts of their work. Not only did the process enable them to develop an understanding of circuitry but it also enhanced their sewing skills as well as enabling them to use light as a creative component of their design.

Featured Products:
Felt Sheets 10 Colours 20 x 30cm – Pack of 50
Kids PVA School Glue – 1 Litre
Conductive Thread – 23m
Colour Slix 3D Paint – Pack of 8


I believe I have only just scratched the surface when it comes to electricity as an art medium where I could be inspired further by artist Haroon Mirza. This could include exploring the idea of light sequencing and programming within artworks that could extend the creative possibilities further for students. Giving them greater control over how the light components of their pieces are viewed by their audience and giving them the opportunity to develop their skills with programming as well as circuitry. The possibilities are endless.


About the Author
Olivia is a specialist Visual Art Teacher in an ELC, primary and secondary school setting. She has a broad breadth of experience with inquiry learning and is an IBO qualified educator. Olivia particularly enjoys developing Visual Art units around STEAM which include electronics, technology and science concepts.


Shop MTA>

Blog Home>

Posted on

Exploring Screen-Free Robotics With KUBO

Kubo Robotics Birds eye view on carpet

Finding the right Digital Technologies resources for your classroom can be tricky, especially when there are so many to choose from. This blog post is going to put a special spotlight on one resource that may help to support your curriculum and engage your young learners. Let me help you take the guesswork out of selecting a robotic resource to support your early years classroom!

Firstly, let’s think about the curriculum. The Australian Curriculum Achievement Standard for Digital Technologies in the Foundation-Year 2 band  states, ‘Students design solutions to simple problems using a sequence of steps and decisions.’ Digging deeper, the Processes and Production Skills Content Descriptors encourage students to ‘Follow, describe and represent a sequence of steps and decisions (algorithms) needed to solve simple problems (ACTDIP004)’.

Directional sequencing is an important step towards more abstract coding and programming that develops in the higher bands of the Digital Technologies curriculum. The concept of directional sequencing can quite easily be coupled with the Mathematics discipline and the Numeracy General Capabilities. Finding meaningful ways to integrate approaches to learning is a key indicator of working smarter, not harder. But how can we make this meaningful and relevant in an everyday classroom?

Introducing Kubo!

Kubo Robotics Kit on Floor Birds Eye View


Kubo is not only a fantastic support for directional sequencing, but it can also be used to extend basic sequencing skills to include iteration. Plus, he’s super cute. Kubo uses unique technology, puzzle-like TagTiles® and colour activity maps to provide playful access to the Digital Technologies curriculum and engaging activities for students.

In my specialist Digital Technologies lessons, I use a range of digital and unplugged resources to approach the concept of sequencing. Providing a range of activities builds comfortability in the discrete skills and capabilities we intend to pass on to students. Kubo is quickly becoming a crowd-favourite activity!

In particular, the ability to record and play back sequences of code has maintained high engagement in our lessons. The activity shown below illustrates a sample line of code that has been created and recorded by the robot. It’s as simple as building the line of code, placing the ‘record’ TagTiles® at the beginning and end and allowing Kubo to roll over the top to memorise the code. Then, simply move your Kubo onto the mat and discover the successes of the sequence. This activity has flexible differentiation, where students can begin with simple lines of code and then continue to extend as their skillset increases to lengthen the code or to include iterations.


Kubo Robotics Tagtiles birds eye view


A new rotational activity that I’ve been incorporating with my Year 2 classes is called ‘Kubo Challenges’. This includes students using challenge task cards to sequence their Kubo robots to ‘collect’ various items on the town map or reach various alpha-numeric grid references. Students use their iPads and digital portfolios to take video evidence of them completing each challenge task card. This is increasing student ICT General Capabilities and providing an easy way for myself to flick through the various work samples of a large number of students within a cohort. Additionally, publishing this evidence to a digital portfolio provides students with a platform to reflect and build on previous learning experiences.

Incorporating the alpha-numeric grid referencing is also a great way to add value to the lesson by touching on the Numeracy General Capability. Students can refine their understanding of location and transformation and activate prior knowledge of concepts within the Mathematics curriculum. Click here to download a free copy of the challenge cards I use.


Kubo Challenge Birds Eye ViewKubo Challenge -side on view


I like to partner students up for these Kubo Challenges to encourage teamwork, peer support and resilience. This is an enjoyable rotation for the students to participate in and, better yet, it’s super simple and resourceful to set up each lesson. After investing in a few ‘training lessons’ for the students to understand the procedures, techniques and expected behaviours, this rotational activity now simply runs itself.

Inside the Kubo product box you will receive a range of TagTiles®, Micro-USB charging cord, easy-to-store coloured activity map and the Kubo robotic device. The Micro-USB attachment makes storage while charging very simple and compact. Kubo also have a YouTube channel  with plenty of tutorials for setting up, implementing and extending on coding concepts.


Kubo Robotics inside box content


Robotics resources may be difficult for schools to fund and in any sense, the robotics need to be respected by all users. A few rules I have my students practise when using the Kubo are:

    • Hold the Kubo with two hands (one on top, one underneath).
    • Walk, don’t run! You might knock over, drop or step on a robot.
    • Do not push and pull the Kubo like a toy car.
    • Always count and place the TagTiles® back in the container neatly.
    • Sharing is caring.
    • Always charge the robot when finished.

Having rules in place for the use of robotics in the classroom will also boost student ownership of the learning experience. Students will develop a respect and appreciation for the resources they are accessing and will show a higher level of focus on the activity in front of them.

Selecting the right robotic device for your classroom can be overwhelming. I recommend checking out the Kubo information and videos available on the MTA website  if you’re interested in giving Kubo a go! Finding resources that support meaningful engagement within the field of Digital Technologies is key for the effective implementation of the curriculum. Find what works for your classroom and I challenge you to find further cross-curricular links you can make with the technology you have. I’m confident you’ll find the best way that works for you, allowing you to share the passion you have for your lessons with your students.

Featured Product

Kubo Coding Core Kit


About the Author

Taylor is a Specialist Digital Technologies Teacher in a primary school setting. In her five years of teaching, she has found a passion for integrating a range of technologies into her classroom and strives to share these experiences with those around her. Follow Taylor along in her teaching journey on Instagram @taylorteachestech


Blog Home>

Shop MTA>

Posted on

Loose Parts: An Invitation To Play

Loose parts activity on table BIV

‘Open-ended’, ‘sustainable’, ‘creativity’ and ‘infinite possibilities’ are just some of the words that come to mind when we think about loose parts in play. Loose parts are becoming increasingly popular in early childhood settings and it’s not surprising to consider why. Here at Explore & Develop Narraweena, we have looked to the principles of Reggio Emilia to inspire and guide some of our practices. Their use of loose parts provides many wonderful ideas on how to incorporate them into the learning environment and thus our journey into the use of loose parts began.

“The wider the range of possibilities we offer children, the more intense will be their motivations and the richer their experiences.”

-Loris Malaguzzi, Founder of the Reggio Emilia Approach

Wooden bowl with jewels stones and shell with child hand square

So what exactly are loose parts? Loose parts are objects or materials that have no particular intended purpose or use. They can be used in a multitude of ways and often rely on the imagination of the individual who is using them. They are usually strategically placed in different areas of the learning environment and are often accompanied by a provocation for learning. When engaging with loose parts, children are encouraged to be creative, inventive, resourceful, innovative and imaginative. Loose parts work well for both individual and group experiences and can be explored both indoors and outdoors. It is important to consider the ways in which you store loose parts to ensure that they are inviting, organised and can be easily packed away for the next use.

Sorting trays full of various loose parts square

Our preschool rooms were some of the first to begin exploring loose parts. We began to recognise that there were a range of loose parts that could be incorporated into play spaces that particularly focused on opportunities for creative expression. Items such as shells, corks, buttons, feathers, bottle tops and leaves were placed in small divider boxes near the art area. These small parts were separated to highlight each individual resource and so that children could easily see what was on offer. The potential for creativity was evident as educators observed the children utilising the same parts to create an array of different masterpieces. This supported our philosophy that art should not necessarily have a defined end but instead be open-ended to encourage children to experiment and explore the possibilities of art. We continue to offer art experiences in this way, and over time have refined the process, at times adding provocations that provoke ideas and imagination. To support this, educators will carefully select items that support this provocation.

It is important to note that the way in which loose parts are placed can make a distinct difference to their use. Having carefully selected resources that are placed in divided or separate spaces ensures that they are visually appealing and do not overwhelm children. This can encourage the notion that each resource possesses its own unique properties and promotes a child’s respect for individual resources. They should also all have a space or place where they belong, as loose parts are designed to be assembled and pulled apart. Having a designated space allows these loose parts to be easily packed away, not only by educators, but also by the children, thus empowering them further.

Sensory play activity set up on table Square

Natural objects became a frequent feature of loose part play. These resources were not only easily accessible and sustainable, they also offered many opportunities in play. Natural loose part resources could be collected on a simple nature walk and then added to small world play, used as a point of investigation, used in art experiences or even incorporated into construction. Beyond creativity, we also then began to see these resources as a wonderful way to explore STEM concepts in play. Exploring sticks, stones, shells, leaves and pine cones encouraged children to think about size, shape, matter, volume and even patterning. This also opened up the opportunity to explore transient or ephemeral art; an art system that encourages resources to be assembled into patterns, designs, symmetry, lines or shapes and then pulled apart to create again. Children could spend time considering their creations and then piecing together a design with similar or opposing attributes. We then began to add these to construction which meant our children who love construction would be more likely to use them.

Reaching a wider audience makes a resource more valuable and something we truly believe in at our service. Loris Malaguzzi suggests that children have a hundred languages in which to explore, create and express themselves; open-ended resources such as these encourage children to do exactly that. Through construction, children could use rocks, shells, coloured stones and more to add depth, balance and imagination to their designs. All the while, these children were also using measurement, balance and one-to-one correspondence to extend and build upon mathematical concepts.

Giant Shiny Pebbles In Child's Hands Square

Blocks and jewels standing on mirrored surface square

“A ‘loose-parts’ toy, as Nicholson defined it, is open-ended; children may use it in many ways and combine it with other loose parts through imagination and creativity . . . Nature, which excites all the senses, remains the richest source of loose parts.”

Richard Louv

Pine cones and tree bark in wooden tray with open book display ocean behind square

seashells in wooden tray

While the benefits of loose parts indoors became evident for art, then construction and other forms of creativity, the outdoors soon became a place where loose parts could also be incorporated. When looking to add loose parts items to the outdoors we looked to collaborate with our families and bring along carefully selected items for play.


natural loose parts in children's hands Square


We invited our families and educators to source pipes, tyres, wood and old pots and pans. This again highlighted the sustainable benefit of using old parts which may otherwise end up in landfill. There were many areas of the outdoor space that these could be added to and they became carefully placed around the yard. The sandpit became a hive of activity with pipes and sieves being added. This challenged the children’s thinking and we observed them being used to fill, tip pour and dig.


In other areas of the outdoor space we saw loose parts incorporated into play. Pipes became binoculars, tunnels or robot arms. Pieces of material turned into pirate ship sales, cubby houses, forts and butterfly wings. Pots and pans turned into an entire instrumental band with drums and cymbals, or were added to the mud kitchen for hours of muddy exploration. Loose parts became permanent structures in our outdoor garden as we added old pots and combined pieces of wood to create new garden beds. It was now evident that loose parts were here to stay and they continue to feature in all areas of our learning spaces, used and reused for different experiences.

Pots and pans hanging from wooden frame in garden

If you are beginning your journey into loose parts, you will not look back. One word of advice would be to introduce them slowly and carefully. Find a space for each new item before including another and have the children become familiar with using them. Before long, you will realise the endless potential of loose parts and observe the many ways they can be used over and over again to create open-ended, imaginative play spaces.


How do you explore loose parts in your learning environment? We’d love to hear from you!


About the Author:

Mel Ishkhanian has over 15 years experience in the early childhood industry and is currently employed at Explore & Develop Narraweena. She has a bachelor degree in Early Childhood education and engages in frequent professional development in order to keep up to date with current theory and research within the industry. As Educational Leader of the service she applies current research into practice and strives to connect the service to both the local and wider communities. With a passion for treating children as capable and confident beings, she applies theories of play, the 8 ways of Learning Pedagogy and is also influenced by the Reggio Emilia principles. Check out regular social posts by Mel @explore&developnarraweena.

Featured Products

Round Sorting Tray

Wooden Counting Tray

Mirrored Pebbles

Shop MTA>

Posted on

Sphero Bolt And SPRK+ In The Classroom

Sphero Shape Activity birds eye view featuring Sphero Bolt & SPRK robotics and 2 students on carpet.

The way we engage our students and support their learning continues to evolve as we move further into the 21st century. There are now many technological tools, resources and applications that can enhance our students’ learning when used to redefine their learning experiences.

The Sphero robot is one such tool that has positively enhanced students’ learning. The amazingly versatile Sphero robot will engage and empower your students with hands-on learning. A tennis ball-sized robot connected via Bluetooth to a mobile device, the Sphero can be used to transform teaching and learning across various curriculum areas. In this blog post, we will look at the range of Sphero products on the market and their varying capabilities and prices.

Sphero SPRK+
The Sphero SPRK+ can roll at a speed of up to 7km/h in any direction. It can also spin, flip and change colour. Using a range of apps, students can code the Sphero to direct its movement.

Sphero Spark


Sphero BOLT
The Sphero BOLT is the latest product in the Sphero range and includes all the features of the SPRK+ along with the addition of a striking LED matrix and advanced sensors to track speed, acceleration and directions. The Sphero BOLT also features infrared communication, allowing it to “talk” to other BOLTs.

Sphero Bolt on white background


Creatively designed lessons incorporating Spheros can develop many of the skills we want for our learners. Students will be designing and creating code to direct the Sphero while collaborating, problem-solving, testing and thinking critically and creatively, all fundamental characteristics of 21st-century learners.


Lesson Ideas:

Sphero Mini Golf

Sphero golf hole with tablet and number 1

Students develop their coding skills by creating and playing a game of Sphero Mini Golf.

Materials:

    • Spheros (one per group)
    • Masking tape or chalk
    • Kinder squares and circles
    • Mini Golf template (free Sphero Mini Golf  PDF download)


  •  Sphero golf hole with 2 students and number 3

Procedure:

    • Create nine mini-golf holes around the classroom. Using masking tape, chalk or other materials, clearly mark the outline of each hole and use a kinder circle to number each hole.
    • Students code the Sphero in the Sphero Edu App to get it to make its way to the hole (coloured circle).
    • Students record how many lines of code it took for them to code the Sphero to each hole on the scoring sheet.


Angles and Shapes

Sphero Angles and Shapes birds eye view

Students apply their knowledge and understanding of shapes and angles by creating them with the Sphero.

Materials:


Sphero Angles and Shapes activity. Track on floor students holding tabletSphero Angles and Shapes activity. Track on floor.

Procedure:

    • Design a 2D shape that includes three different types of angles on planning sheet.
    • Create the shape on the classroom floor using masking tape or chalk and a protractor.
    • Code the Sphero in the Sphero Edu App to manoeuvre around their shape.


Chariots

Sphero Chariot activity. Sphero Robotic & Chariot created out of art & craft materials

Students create chariots using various art and craft materials to dress the Sphero.

Materials:

    • Sphero (one per group)
    • Various arts and craft materials

Sphero Chariot activity. Sphero Robotic & Chariot 2 created out of art & craft materialsSphero Chariot activity. Sphero Robotic & Chariot 3 created out of art & craft materials


Procedure:

    • On paper, students design a chariot for their Sphero.
    • Students create their chariot and place it on their Sphero.
    • Students code the Sphero in the Sphero EDU app to race the chariots to find a winner and to test if their creations stay assembled.


Sphero Swimming

Sphero swimming activity. Sphero robot tablet and bowl of water on table.

As the Sphero robot is waterproof, you can design lessons that incorporate water.

Materials:

    • Sphero
    • Tub of water or school swimming pool
    • Rubber bands

Sphero swimming activity. Sphero robot floating in water.

Procedure:

    • Place the Sphero in a tub of water or school swimming pool.
    • Have students predict what will happen.
    • Add a rubber band around the Sphero and have students predict what changes may take place in the water and then test again.
    • Explore what happens when you add multiple rubber bands to the outside of the Sphero.


Sphero Art

Sphero Art activity. Finished painted artwork on canvas.

Using water-based paint, the Sphero can be dipped into any colour to then create a masterpiece.

Materials:

    • Sphero
    • Water-based paint
    • Baby wipes (used for cleaning Sphero)
    • Paper
    • Walls to keep Sphero contained (I suggest using the lids of A4 or A3 paper boxes)

Sphero Art activity. Sphero robots painting canvas inside boxes. Paints and tablet on table.

Procedure:

    • Dip or cover the Sphero in paint.
    • Students code the Sphero in the Sphero EDU app or drive the Sphero over their paper to create their masterpieces.
    • Make sure you use baby wipes to clean the paint off each Sphero.


Integrated Learning

Sphero Integrated learning Activity. When you go to Melbourne book. Paper mache bus & Sphero Robot on table Sphero Integrated learning activity. Structure & bus made from newspapers. Pictures of Melbourne landmarks

With creative lesson design, there are many ways to integrate the Sphero in your units of work.

Connecting to our Year 3 unit looking at the history of Melbourne, the Sphero was used to integrate these curriculum areas;

    • History
    • Mathematics – 3D objects
    • Art – Design
    • Digital Technologies

Materials:

    • Sphero
    • Newspaper
    • Small boxes

Sphero Integrated learning activity. Structure & bus made from newspapers. Picture of stadium Sphero Integrated learning activity. Structure & bus made from newspapers. 2 Pictures of Melbourne landmarks

Procedure:

    • Students use newspaper to design and create iconic Melbourne buildings or landmarks.
    • Students use boxes to design and create a Melbourne tram.
    • Situate the buildings and landmarks around the classroom to represent the city.
    • Placing the Sphero inside the trams, students code the Sphero in the Sphero EDU app to manoeuvre to each building or landmark in the city.


Each of these activities demonstrates the versatility of using Spheros in your classroom and how they can be used creatively to support student learning. The hands-on learning experiences reinforce learned concepts while developing the key 21st-century skills of communication,  problem-solving, creativity and critical thinking. There really are limitless possibilities of how Sphero can be integrated into student learning.


Featured Products:

Sphero SPRK+

Sphero Bolt


How have you used Sphero in your classroom?


About the author

Eleni Kyritsis is an award-winning Year 3 teacher and Leader of Curriculum and innovation from Melbourne, Australia. Eleni facilitates professional learning workshops around the world that focus on unleashing creativity and curiosity in classrooms. You can contact her at elenikyritis.com and @misskyritsis


Shop MTA>


Blog Home>

Posted on

10 Name Activities For Early Learners

Peg name activity featuring pegs with letters on clipped to card with name spelt out

Most young children are very interested in their name and it is incredibly personal to them. Often, a child’s name is the first word they learn how to read and write, which leads to further interest in reading and writing activities. When a child starts kindergarten or in the lead up to school, this is a great time to start fostering an interest in name recognition. This often helps children settle into their learning environment as they feel more confident being able to recognise their named belongings amongst their peers. In a school setting, there are lots of times where a child will need to recognise their named belongings, for example, when trying to find their school hat or bag. At the beginning of Prep (or first year of school equivalent), there will be a big focus on name recognition and writing, which will help support students with this learning.
Whether your little one is becoming interested in their name or if you’re a teacher looking for some ideas on how to support your students, the following blog will share many ideas and activities that will develop children’s ability to recognise, write and spell their name.

Sign In Area

Classroom sign in area for students

This ‘sign in area’ was a set-up I had in my kindergarten classroom a few years ago where children could practise writing their names each morning when they came to kindy. Not only was this developing children’s ability to write their name, it also fostered a sense of belonging in the classroom and formed part of the morning routine. Children also developed their name recognition skills as they had to find their own name card in the class pile.


Playdough Stamping

Playdough stamping, purple playdough and green alphabet stamps

Many early childhood teachers would argue that there is no better resource than playdough. It is such a fabulous manipulative that can help develop fine motor skills and it can be used in so many different ways. In my classroom, we love using our Alphabet Dough Stampers to stamp out our names, which builds children’s confidence in recognising and spelling their names.

Featured Product:
Alphabet Dough Stampers


Sensory Tray Sand Writing


Sensory sand tray writing spelling out Ellie letters

Sensory writing trays are a great way for children to explore writing and drawing, without the stress of holding a pencil. There are many materials you can put in a sensory writing tray, such as sand, salt or even coloured rice. At the beginning of the year, I usually set up sensory trays containing sand during our daily English rotations where students can have the opportunity to practise writing their names.


Can You Spell Your Name?


Can you spell your name activity

This is one of my students’ absolute favourite name activities! They love using the diggers and dump trucks to find and transport the alphabet rocks they need to make their names.

name spelling diggers featuring diggers pebbles with letters written on. sitting on grass backgroundIt’s a super fun and engaging activity that encourages students to recognise and find the letters in their name and then assemble the alphabet rocks in the correct order.


Threading With Letter Beads


Threading letter beads spelling out childrens names on grass background
I use beads in my Prep classroom a lot as it gives students the opportunity to develop their fine motor skills, as well as whatever additional skill we are practising at the time. My students often use these Chunky Alphabet Beads to spell their names and they’re perfect for this task because they come in uppercase and lowercase letters, so children can practise spelling their names the proper way with a capital letter at the beginning, followed by lowercase letters.

Featured Product:
Chunky Alphabet Beads


Peg It!


Peg name activity featuring pegs with letters on clipped to card with name spelt out

I’m all about the fine motor skill activities, can you tell?! Pegs are a great manipulative to help with the development of fine motor skills. Making these alphabet pegs was super simple and I use them in my classroom for a range of activities. One of the ways they are used is for name activities at the beginning of the year. I love this activity because students build their confidence with recognising and spelling their names, all while building their fine motor skills!


Nature Names


Nems written on wooden blocks and a leaf on a grass background
This is a fun name activity that can be done outdoors and is an opportunity for children to engage with nature. It’s as simple as it looks – children can find and collect leaves and then stamp their name onto the leaf. Much more engaging than stamping onto plain paper!


Fine Motor Name Craft


Fine motor name craft featuring collage of names spelt out glued to card

Yep, you guessed it, another fine motor focused activity! A lot of the name activities I am suggesting in this blog have a fine motor aspect to them because of my experiences as a Prep teacher. At the beginning of the school year there is a huge focus on name activities as well as developing fine motor skills, so being able to integrate them together is ideal when there is only so much time during the day! This name craft activity is great for developing both of these skills and they are perfect for brightening up the classroom at the beginning of the year!


Make It and Write It!


Make it write it activity featuring whiteboard and pen with magnetic letters

This is another favourite activity of mine that is usually implemented during our daily English rotations at the beginning of the year. Students can use the magnetic letters to make their name and then write it underneath on the whiteboard. I love that these magnetic letters differentiate the vowels and consonants by colour and children can easily recognise the different types of letters in their name.

Featured Product:
Teachables Magnetic Whiteboard and Letters Set


Rainbow Names


Rainbow names activity featuring clouds cut out of card with matching colourful name tags

A few years ago, my class made these rainbow name crafts and I loved them so much that we proudly hung them in our room for the entire year! This was a great activity for my students to practise writing their names, with the focus being on starting with a capital letter followed by lowercase letters, as well as forming their letters correctly. Plus, anything rainbow is just awesome, right?!


What is your favourite Name Activity for Early Learners?
We would love to hear from you!


Featured Products:

Alphabet Dough Stampers

Chunky Alphabet Beads

Teachables Magnetic Whiteboard and Letters Set


ABOUT HEIDI:
Heidi Overbye from Learning Through Play is a Brisbane based, Early Years Teacher who currently teaches Prep, the first year of formal schooling in Queensland. Heidi is an advocate for play-based, hands-on learning experiences and creating stimulating and creative learning spaces. Heidi shares what happens in her classroom daily on her Instagram page, Learning Through Play. See @learning.through.play for a huge range of activities.


Shop MTA>