Hop into Easter with a Crafty Eggs-Travaganza
Easter is a time for family, friends, and of course adorable Easter craft! From super simple pre-cut ‘everything in the box’ activities to egg-citing multi-step projects for older students to have a crack at, we’ve rounded up 10 of the best!
Read on to adorn your classroom in Easter cheer, assemble the most adorable gifts for some-bunny special and organise an egg-stra special hat parade that’ll be the talk of the town.
So grab your best Easter bonnet and let’s hop to it.
Easter Hunting Baskets
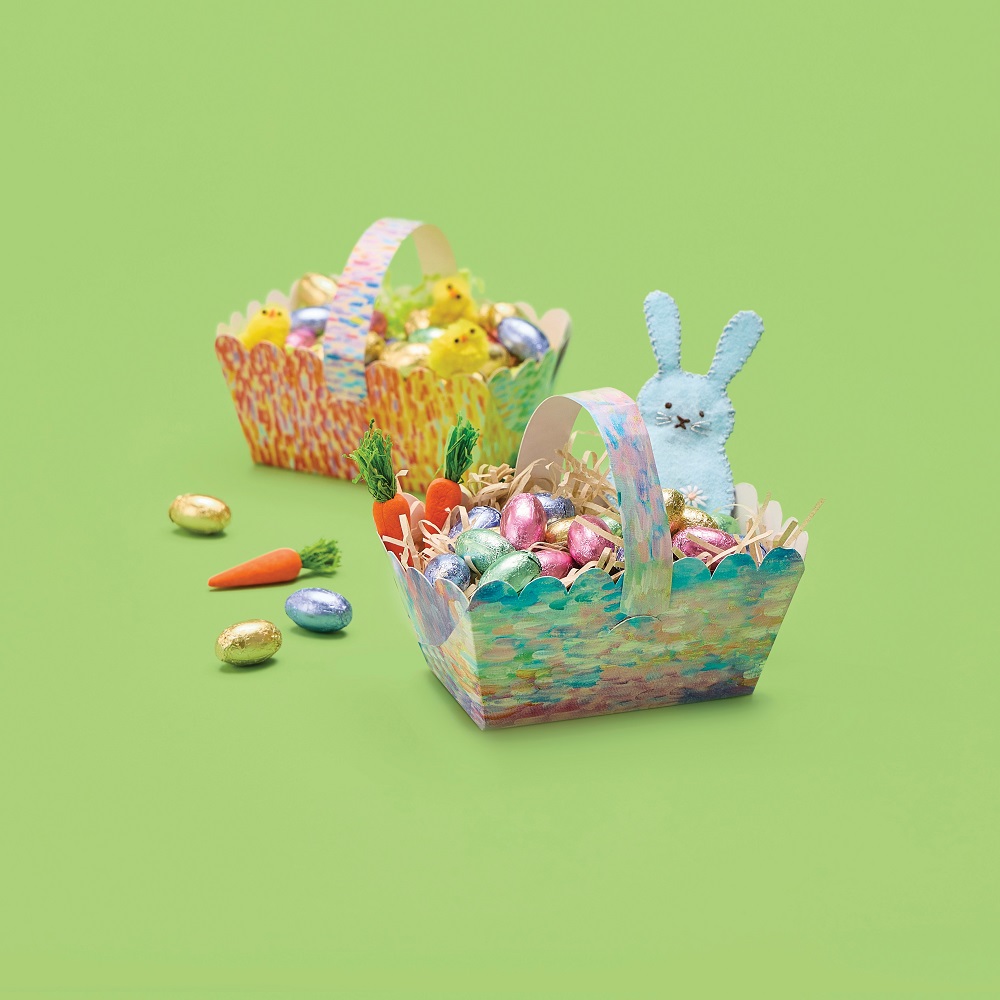
The traditional Easter hunting basket has formed part of our Easter memories for generations, with happy little hunters excitedly gathering hidden choccy eggs around the garden or school grounds. The basket making in the days and weeks before hand would build the anticipation of the festivities to come – and finally the day would arrive!
But it doesn’t need to be chocolate! There’s plenty of treasures for children to hunt for, why not try Easter sticker sheets, felt bunny stickers, mini carrots and fuzzy chicks for imaginative Easter hunting that’s bound to delight.
Simple to make and fun to craft, these cardboard baskets are pre-cut with slots and perforated lines to guide your basket folding. All you need to do is decide how you’ll decorate yours!
STEP-BY-STEP
- Apply the glue stick to the backing of your Easter basket and handle.
- Press the glue side of the basket onto the backing side of the pattern paper and gently smooth down with your fingers to remove any air bubbles, set aside to dry.
- Carefully cut away the excess pattered paper and recut along the pre-cut Easter basket lines
- Use the pre-fold lines of the basket to fold the basket into its shape and glue into place.
- Decorate your basket with Easter stickers, paper shred and chicks.
Done! The perfect hunting basket is ready for chocolate egg hunting!
*TOP TIP – Younger children will enjoy decorating their baskets with scraps of paper or paint, rather than one sheet of patterned paper.
Products Used;
Impressionist Pattern Papers OR Gingham Paper
Kraft Paper Shred OR Green Crinkle Paper Shred
Creatistics Superstik Glue Stick
Felt Threading Easter Chicks
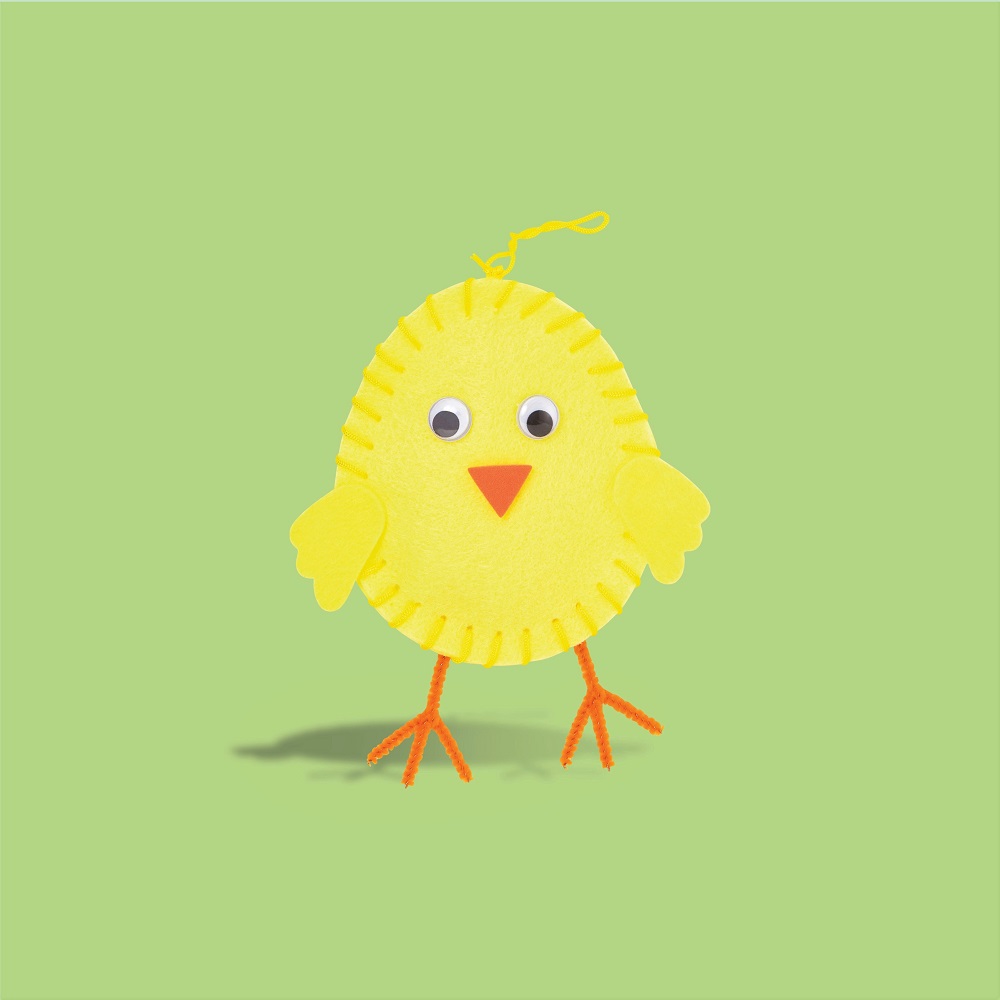
Mess free crafts like these soft & sweet Easter Chicks are super simple to navigate. With all the pre-cut pieces supplied in the kit, students can experiment with sewing techniques as they assemble the components using the accompanying visual instructions. You’ll just need a tiny dab of glue at the end to adhere the little chicks’ eyes, beak, and wings. And ta-da! Your adorable textile creation is finished.
There are so many incredible developmental benefits for young students engaging in basic sewing, including patience and confidence, fine motor dexterity, the ability to cognitively following instructions, the building of valuable life skills and many more.
These little chickees are just about bouncing out of the packet to be assembled! Read on to follow the steps to make one for your very own.
STEP-BY-STEP
- Assemble all your pieces – 2 x yellow felt body pieces, filling, plastic sewing needle & yellow weaving thread, 2 x wings, 2 x eyes, a beak and length of orange pipe cleaner to form the legs.
- Bend your orange pipe cleaner over to that it forms a long semi-circle.
- Using scissors, carefully snip two short lengths off the ends, and use these lengths to twist around the legs to form the chick’s feet, and then set aside.
- Thread your plastic needle with the yellow weaving thread and tie a knot in one end.
- Place your yellow body pieces together, and using a whip stitch, begin to sew the two pieces together at one side.
- Place leg piece inside the 2 body pieces and continue to whip stitch, locking the legs into the body as you continue around the edge.
- When you have stitched most of the way around, carefully place your filling evenly into the body and finish off stitching the two pieces closed, tying off with a firm knot (the remaining thread can form a hanging loop if desired).
- Using a small dab of tacky glue, attach the 2 eyes, the beak and wings to chick and set aside to dry thoroughly.
Done! Your felt Easter chick is ready.
*TOP TIP – Holding the pieces together with a few pegs will help keep everything stable while younger students sew it all together.
Products Used;
Eco Plate Roosting Nests
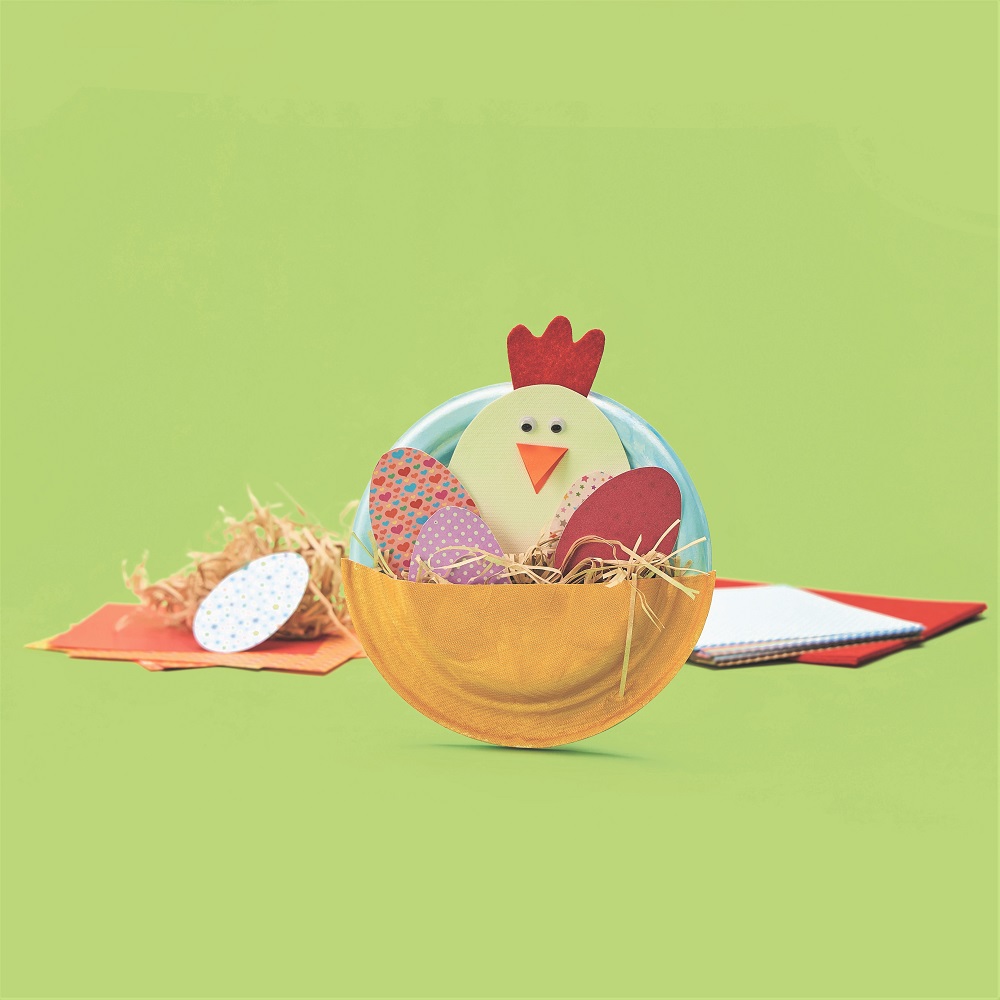
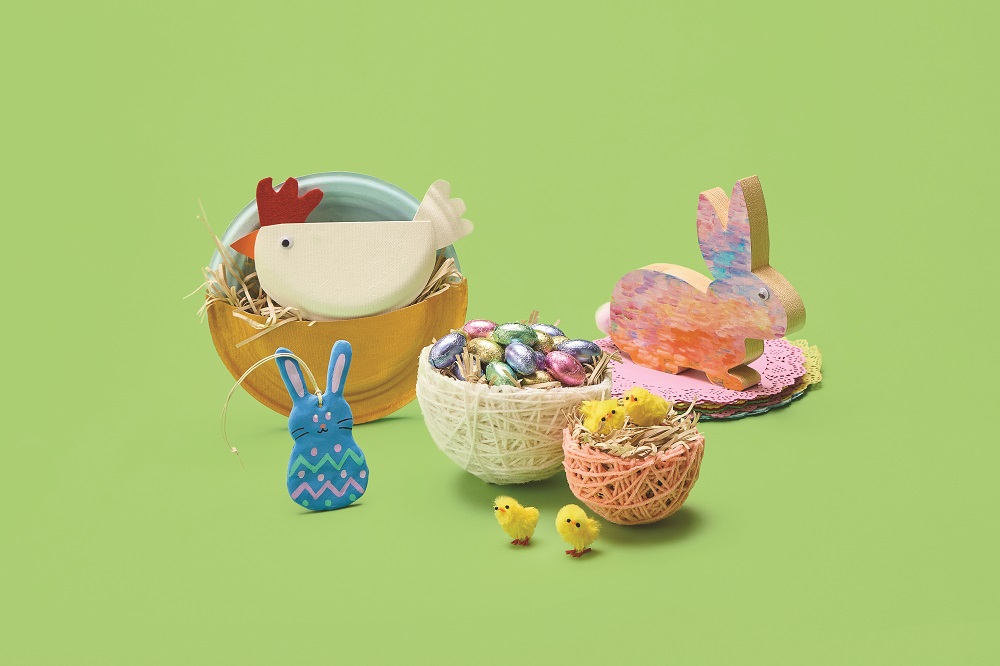
Paper plates – a classroom favourite! It’s amazing what you can transform them into. With just a snip of some scissors, a splash of colour, a dab of glue and a sprinkle of creativity, you’re able to make any creative creature.
For this activity we’ve transformed the trusty paper plate into an adorable roosting nest. We know little ones will love filling their nests with Mama Hen and her beloved eggs & chicks. We love the texture and stability the eco sugarcane ‘paper’ plates gave to this activity, providing value for children to engage in pretend play and storytelling with their creations.
STEP-BY-STEP
- For the background, apply your choice of pastel paint onto the front side of a plate and set aside to dry.
- To make the nest, cut one plate in half, apply gold paint to the back side, and set aside to dry.
- To make Mama Hen, cut the remaining half plate into a semi-circle or large egg shape.
- Using coloured felt or paper, cut out one white tail, one orange beak and one red comb.
- Glue the beak, comb and tail onto Mama Hen and glue on some joggle eyes so she can keep watch over her chicks.
- When the painted plates have dried, glue the nest onto the background plate and set aside to dry again (a few pegs will help everything stay in place while the glue dries).
- When Mama Hen and her nest is thoroughly dry, pack in Kraft Paper Shred and then rest Mama Hen and her chicks inside their cosy home.
Done! Your very own Easter Roosting Rest is ready.
*TOP TIP – Add some extra goodies to Mama Hen’s nest by gluing patterned paper onto sugar cane plates and cut into oval egg shapes.
Products Used;
18cm White Sugar Cane Eco Plates
23cm White Sugar Cane Eco Plates
Weaving Eggs & Bunnies
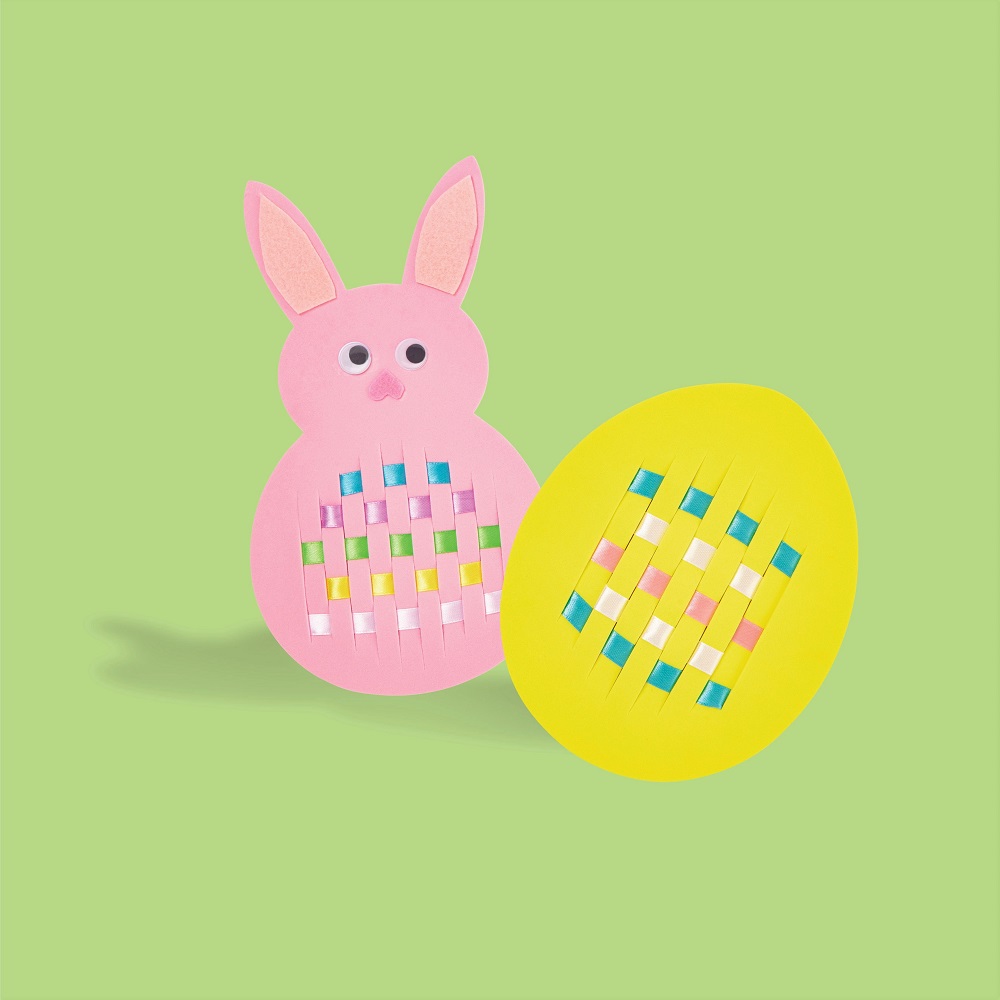
Create fantastic weaving patterns this Easter with the Weaving Eggs & Bunnies set. This is a brilliant introduction for children working with textiles as they gain an understanding of the fundamentals of weaving and pattern designs. They’re perfect to decorate the classroom, home or make the sweetest Easter gifts for loved ones. Extend children’s vocabulary as they discuss secondary colours and pastel shades and positional language to describe the action of ‘over and under’ as they work with the satin weaving ribbons.
Take the activity to the next level by adding eyes, nose and decorative details to the bunnies or create a nest for the eggs. Add them to Easter hats and bonnets, use them for storytelling or combine two together to make Easter themed hinting baskets. When children’s creativity is involved, there’s absolutely no limit!
STEP-BY-STEP
- Choose your design and pre-cut lengths of satin ribbon.
- Weave each length of ribbon over and under the pre-cut slots to form a pattern.
- Use a dab of tacky glue to hold the ribbon in place on the reverse side.
- Add your choice of detail such as bunny’s joggle eyes and pastel felt facial features or decorate both shapes with adhesive rhinestones or glitter flowers and daisies.
- If using glue, set aside to dry thoroughly.
Done! The perfect Easter weaving eggs & bunnies are ready.
*TOP TIP – Experimenting with pattern making and sequences in the classroom will help younger children get the hang of the over and under action to form weaving patterns.
Products Used;
Colourful Wooden Bunnies
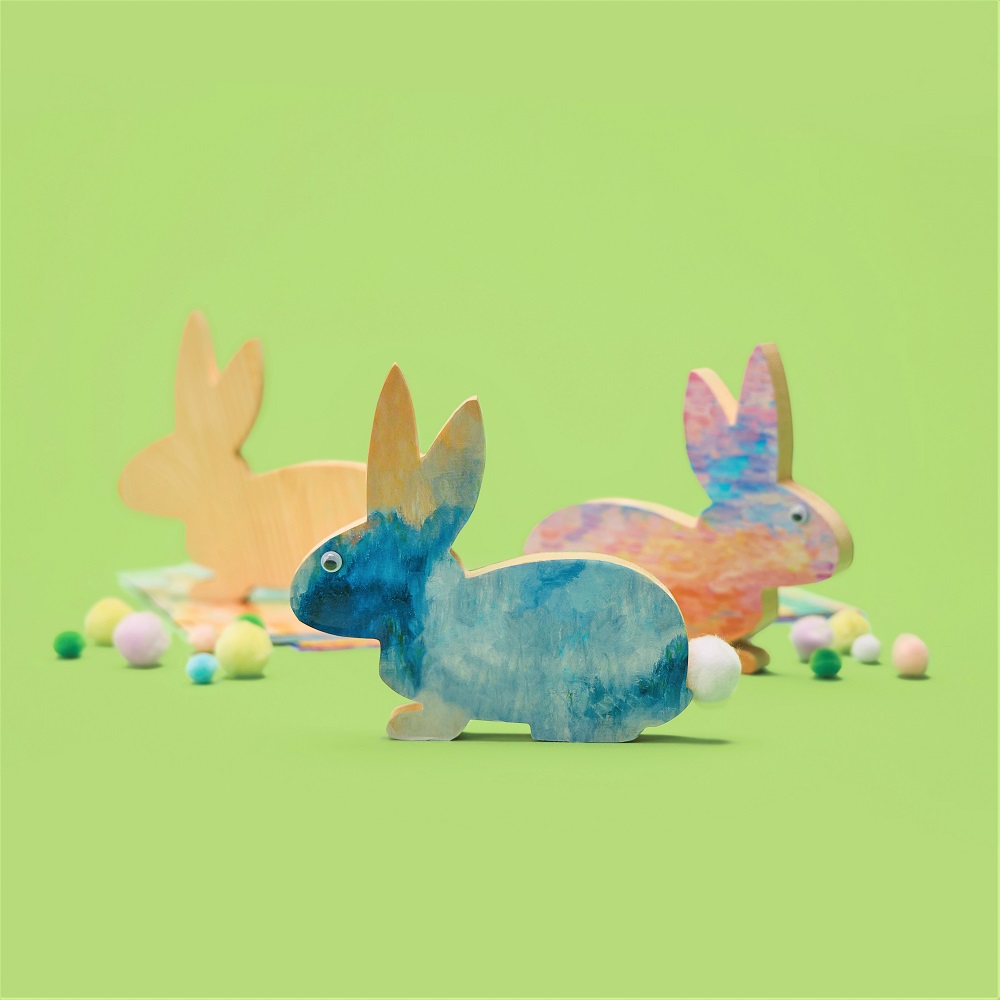
These solid pre-cut wooden bunnies are a terrific experience to incorporate woodwork to the younger year’s classroom. Made from a solid block of unfinished pinewood, they lend themselves to all sorts of decorations. Whether it’s patterned paper, paint, wood markers, POSCA pens, glitter glue or a combination of them all, there’s bound to be a colony of bunnies full of individual personality in no time!
Read on to follow the steps to make the illustrated impressionist artwork inspired bunnies.
STEP-BY-STEP
- Lay the wooden bunny onto the impressionist paper and trace around with a pencil.
- Lift the bunny off and carefully cut around the pencil markings.
- Cover one side of the wooden bunny with Creatistics Superstik glue stick and place the blank side of the paper onto the wooden bunny, matching the bunny paper shape to the corresponding wooden bunny side.
- Repeat for the second side.
- Apply Tacky glue to Joggle eyes and a Pom Pom tail and adhere in place and set aside to thoroughly dry.
- Draw whiskers and other details on your bunny as desired) or add on some Easter themed embellishments. Don’t forget Bunny’s crunchy carrot to nibble on too.
Done! Your adorable Easter Bunnies are ready.
*TOP TIP – Cutting the paper just on the inside of the pencil markings will ensure it fits the wooden bunny exactly.
Products Used;
Creatistics Superstik Glue Stick
Easter Block Print Stamps
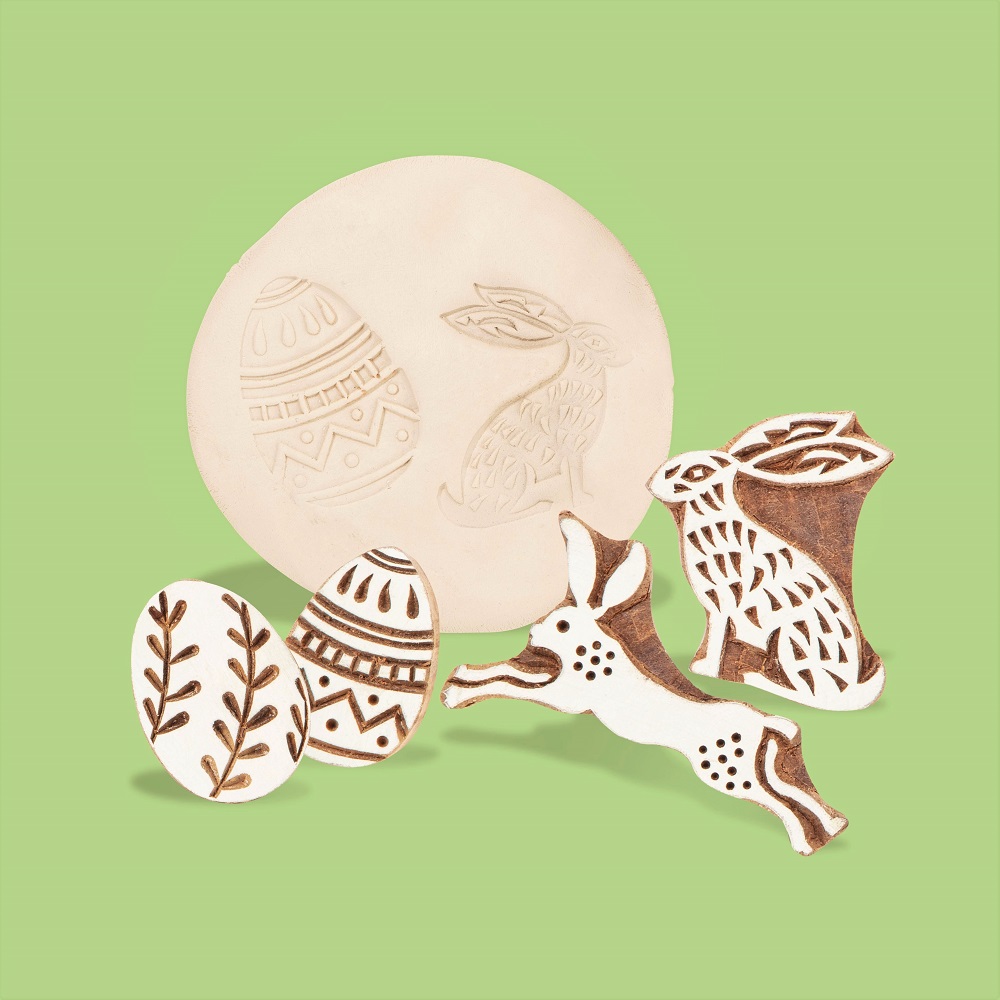
Clay is a medium that lends itself to all age groups and crafting abilities – from beginners right through to experienced potters. And the beauty of air-dry clay is the ability to form incredible works without needing the hassle and expense of firing ovens. Simply use your hands to form coil or pinch pots, shallow dishes, birds in nests, necklaces, wall art, hanging decorations, nature prints, paper weights and so much more!
These adorable Easter themed wooden Block Print Stamps add festive flare to your Easter clay works. Perfectly paired with natural beading cord or leather cord, to make all sorts of jewellery or decorative works. Form your own clay beads or grab yourself convenient packs of beads in natural wood, pearl pony, or painted pink & white wood.
Don’t forget to add a finishing-off sparkle with Creatistics Bio-glitter, and you’re all done!
*TOP TIP – If your clay dries out while you’re using it for extended periods, use a little water on your hands to form a smooth surface. This is particularly handy for smoothing the edges of your works.
Products Used;
Creatistics Air Dry Ceramic Clay
Flowers of Australia Block Stamps
Wooden Easter Ornaments
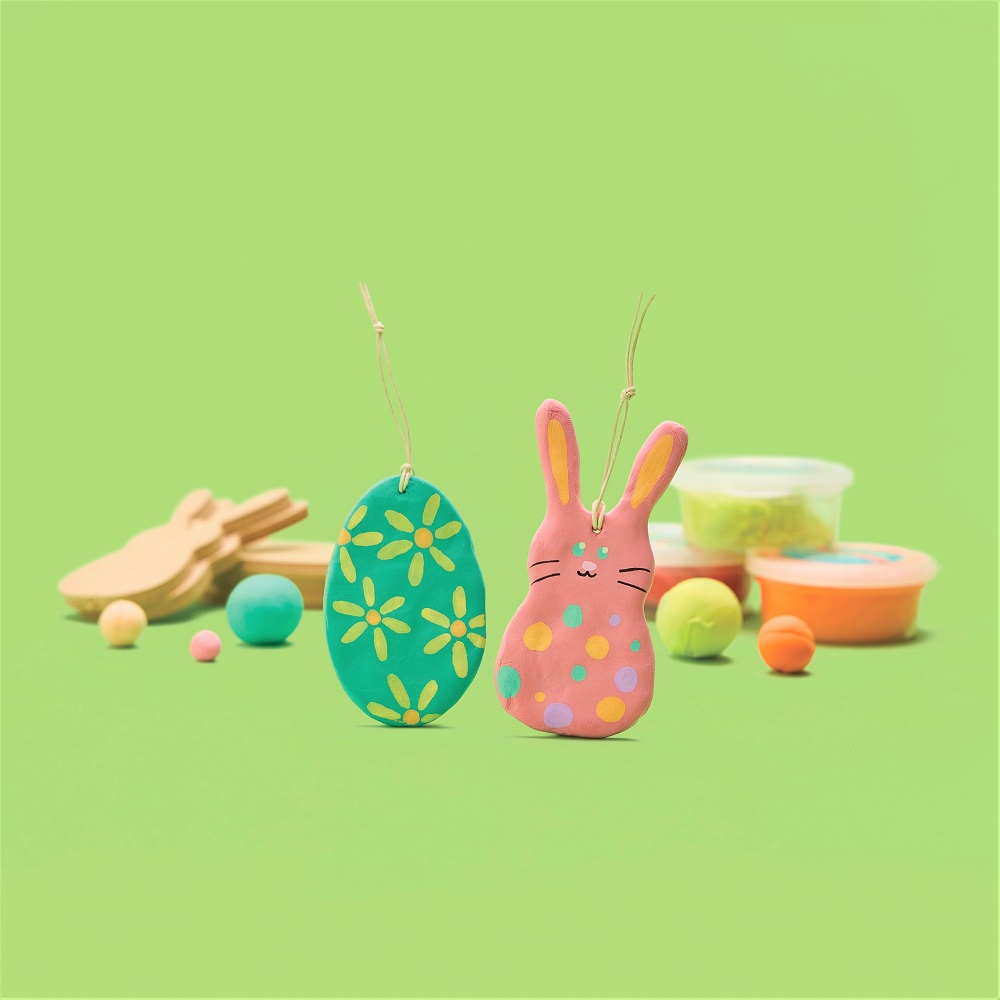
These wooden Easter ornaments are the cutest little blank canvases, allowing for plenty of personalisation as children decorate them to their liking. The finished product can make all sorts of goodies – traditional hanging decorations, key chains, school bag accessories, car rear view mirror accessories, gift tags, Easter hat additions, hunting basket treasures and so much more.
For colourful multi-step creations, the following activity combines modelling with drawing. Although, the beauty of a blank wooden shape ensures there’s no end to the types of mediums that can be used – paint, patterned paper, collage, embellishments, glitter and more.
How will you transform your Easter ornaments?
STEP-BY-STEP
- Divide each Magiclay colour pot into 3 portions (each 20g container will cover approx. 3 Wooden Easter Ornaments).
- Using your fingers, gently press your portion of Magiclay into a flat rough circle.
- Place it onto the wooden ornament and wrap it around, covering the ornaments entire front surface.
- Gently mould the clay onto the back of the ornament, using your fingers to manipulate the Magiclay into place. Your ornament should now be completely covered.
- Carefully poke a skewer through the ornaments hole to ensure it can still hang when dry.
- Set aside to dry for 24 to 48 hours.
- Use POSCA paint pens to decorate your shapes and set aside to dry again.
- Thread a length of twine/ribbon through the ornament’s hole and tie off securely into a loop.
Done! The perfect Easter decorations for the classroom and home are ready.
Products Used;
Standing Cardboard Easter Bunny
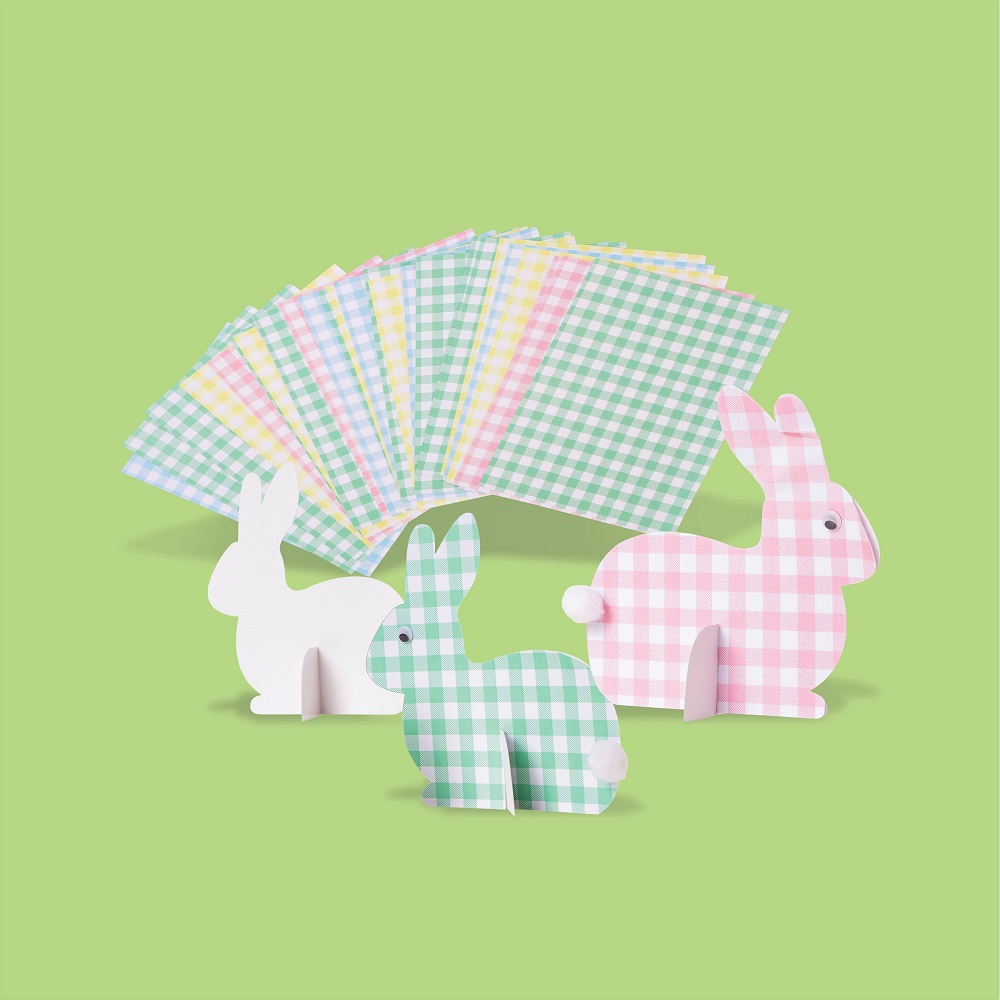
These cute Standing Cardboard Bunny shapes are sure to capture children’s attention. They’re supplied in plain white cardboard to provide opportunities for creativity to shine – collage, paint, draw or stick on any number of embellishments. Add joggle eyes, a nose, a pom pom tail or even tie a decorative bow around the collar. You’re Peter Cottontail is ready to hop down the bunny trail!
Read on to work through the steps for creating your very own pastel toned gingham patterned bunny.
STEP-BY-STEP
- Apply a layer of glue stick to one side of the bunny and set aside to dry.
- Carefully cut the excess paper from around the bunny, and along the pre-cut standing slot.
- Repeat steps 1 and 2 on the reverse side of the bunny if desired.
- Use tacky glue to adhere joggle eyes, a pom pom tail (and any other embellishments) and set aside to thoroughly dry.
- Slot the bunny-shaped cardboard piece neatly into the pre-cut holder.
Done! Your adorable standing bunny is ready to decorate your desk, mantel, or Easter lunch table.
*TOP TIP – When using glue, allow your decorated pieces to thoroughly dry before slotting the bunny into its standing base.
Products Used;
Creatistics Superstik Glue Stick
Easter Yarn Nests
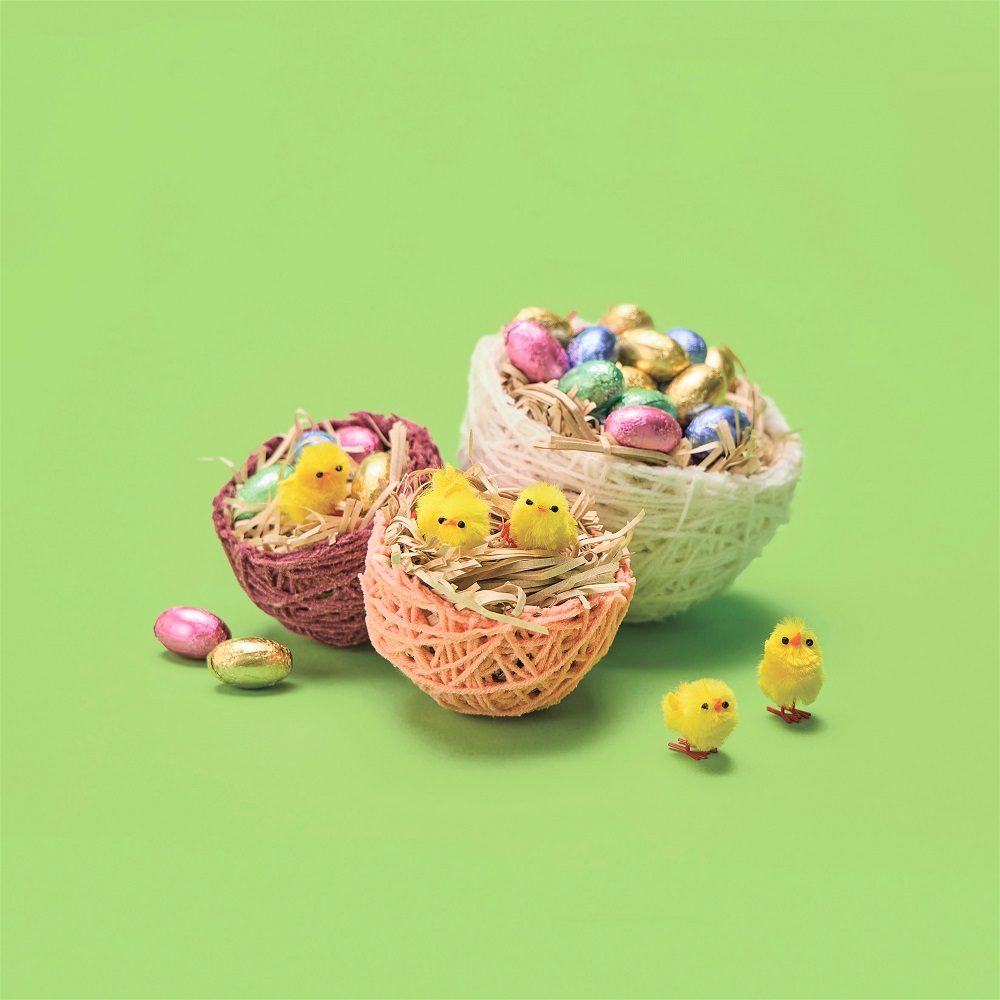
Are you looking for an oh-so-cute project for older students? This utterly adorable Easter activity uses a process similar to papier mache, in this case using yarn in place of paper, with PVA glue acting as the moist adhesive to bind the yarn onto a balloon and then hardening into a nest as it dries.
Buttery soft pastel toned yarn in light blue, pink, purple and white will make for a super sweet Easter theme while bright & bold coloured yarn will lend itself to artistic flare. When your nest is ready, it can be filled with paper shred in pastel rainbow or green or even snuggly feathers in pastel, bright or natural. Add in some little chickees and hide your choccies away.
In any colour way you choose, your yarn nests will sit proudly on display!
STEP-BY-STEP
- Blow up the balloon with a small amount of air so that it resembled an egg shape, firmly tie a knot and set aside.
- Pour approx. 1 cup of PVA glue into a shallow bowl.
- Cut long lengths of coloured yarn and carefully place them into the glue to avoid tangling, making sure all parts of the yarn are covered in glue.
- Slowly wind the PVA covered yarn around the balloon, using fingers to gently move the yarn into place and remove excess glue when wrapping.
- Hang to dry (depending on the weather this may take up to a week).
- When the glue is thoroughly dry, pop the balloon and remove all pieces while carefully cutting the yarn egg in half to form 2 nests.
- Fill each nest with paper shred and decorate with chicks and chocolate eggs.
Done! The perfect cosy Easter nest is ready.
*TOP TIP – Letting the PVA yarn dry between layers will speed up the process (too many layers of yarn and PVA will make it tricky to dry). Be patient, it can take days for some layers to dry thoroughly.
Products Used;
Creatistics PVA Washable School Glue
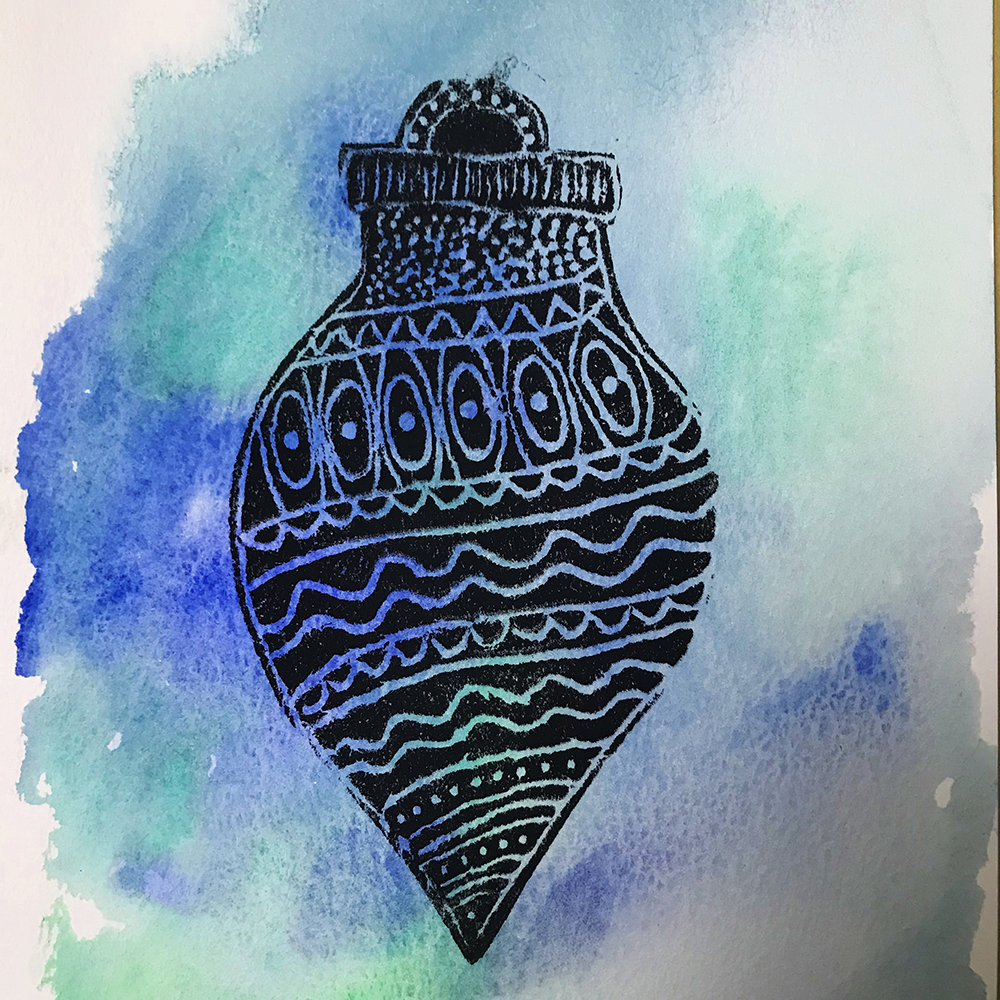
Shrink Film Easter Eggs
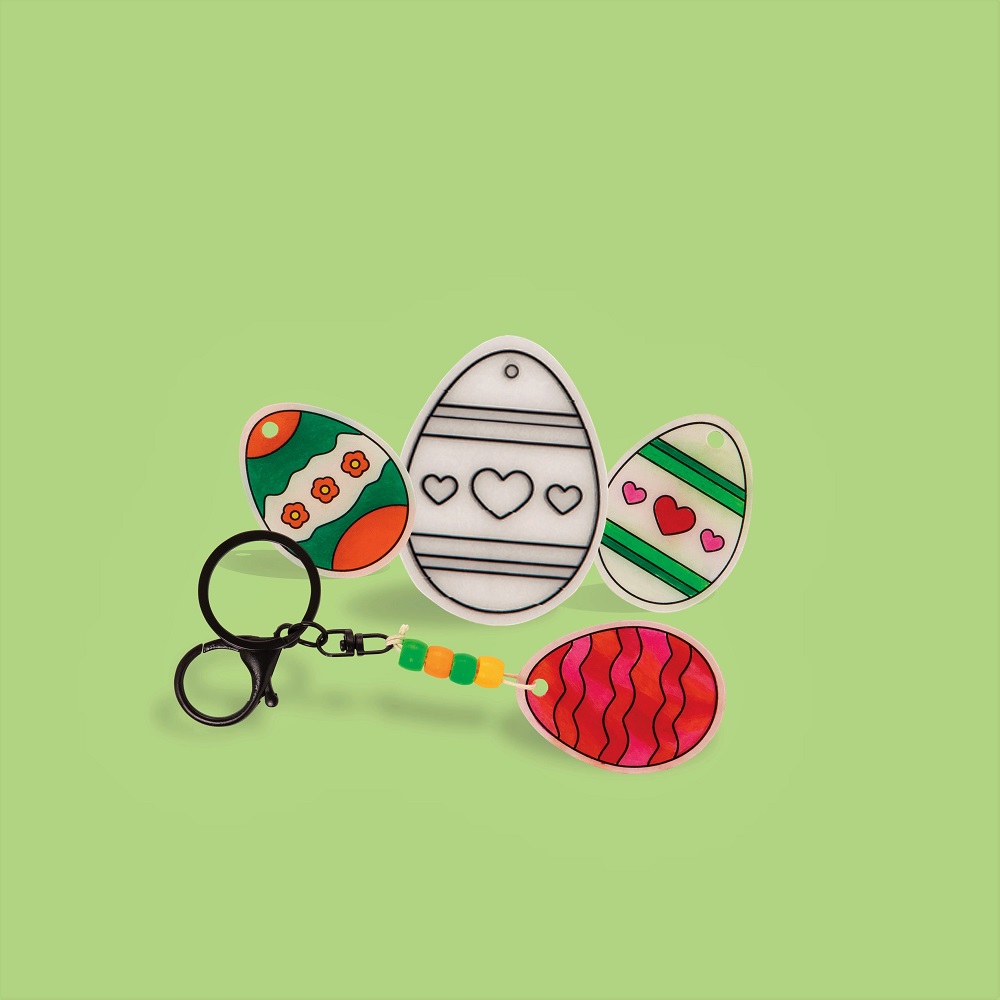
Have you tried shrink film before? Simply colour, bake, and watch it shrink!
Shrink film is a brilliantly mesmerising activity, and these new handy pre-cut Shrink Film Easter Eggs are sure to create a buzz in the classroom. Use the different patterns to make trinkets, jewellery, and decorations – and the happiest of Easter craft memories.
STEP-BY-STEP
- Colour in your design on the matt side of the shrink film using coloured pencils or permanent markers (remember to pop out the pre-cut hanging hole before baking).
- Pre-heat oven to 150°C.
- Place design on a lined tray (matt side up) and bake.
- Plastic will begin to shrink after 10 seconds (to approx. 60% of its original size).
- When the plastic has returned to its flat shape remove the tray from the oven.
- Wait for the shrink film to cool completely before handling.
- When thoroughly cool, thread a length of cord into the hole, and firmly tie off.
- Thread desired number of beads onto the cord and firmly attach to your keychain with several firm knots.
Done! The perfect Easter themed key ring is ready!
*TOP TIP – With shrink film, coloured pencils go a long way. A very light shading will result in bold and vibrant colours.
Products Used;
Easter Clay & Dough Cutters
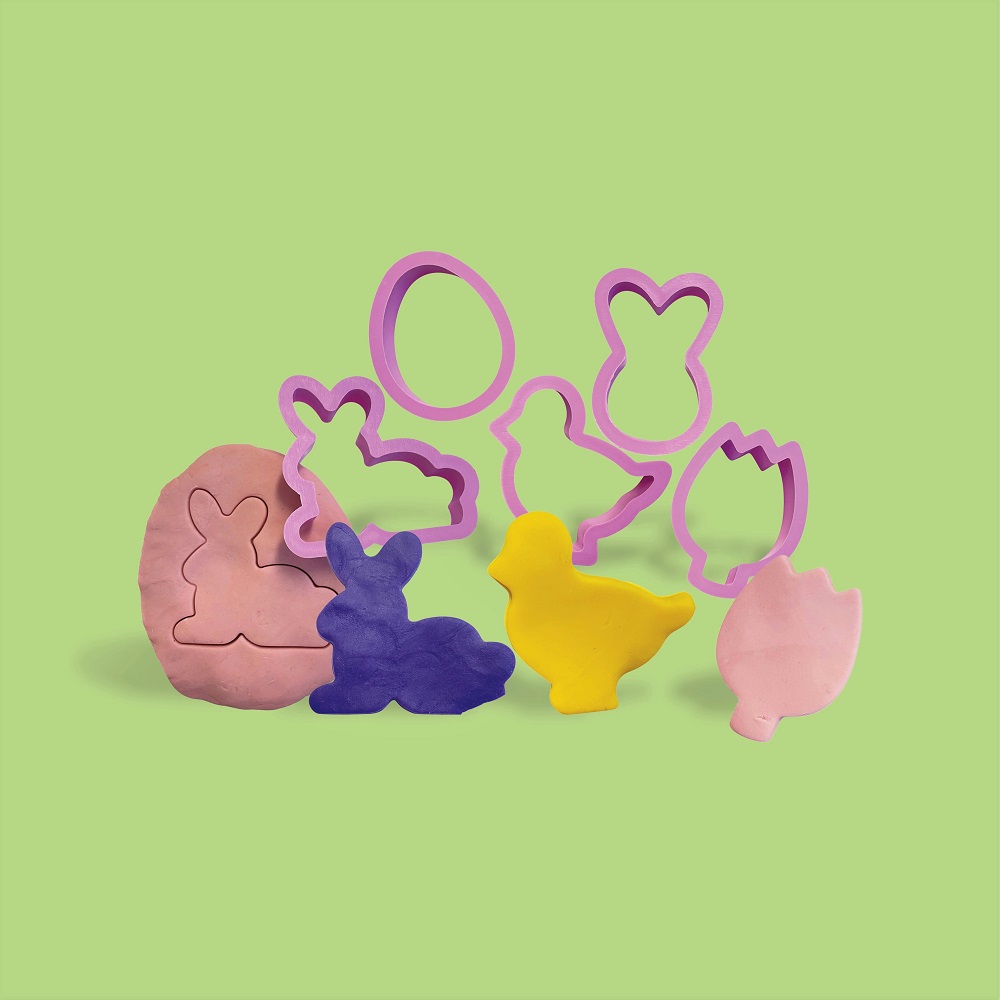
Working with dough is a satisfying way to entertain children’s tactile stimulation and creativity. It’s also an activity rich with physical benefits – from fine motor strength and dexterity to coordinating dough tools to form creations out of the chosen medium.
This set of Easter Clay and Dough Cutters offers incredible possibilities for children to make and create Easter goodies. In each set there’s an egg, baby chick, rabbit, tulip, and bunny face shape for children to stamp in any number of dough options (play dough, cookie dough, modelling clay, or plasticine).
For children to make permanent works, air dry clay is a handy option, simply roll the clay out as you would for dough, press the Easter shaped cutter into the clay, remove the excess and set your clay ornament aside to dry. Before it’s dry, use a pencil or skewer to carefully poke a hole into the top of the shape will ensure there’s somewhere to tie cording and beads for simply stunning Easter decorations.
*TOP TIP – A light sprinkling of Bio-Glitter will add an extra-special sparkly touch to the experience.
Products Used;
We hope you’ve enjoyed the latest eggs-travaganza of Easter crafts and are bursting with inspiration for an egg-stra special Easter!
Download: Easter activities PDF Bundle