Posted on

Hands-On Learning Experiences With Osmo

OSMO Coding Game and Tablet

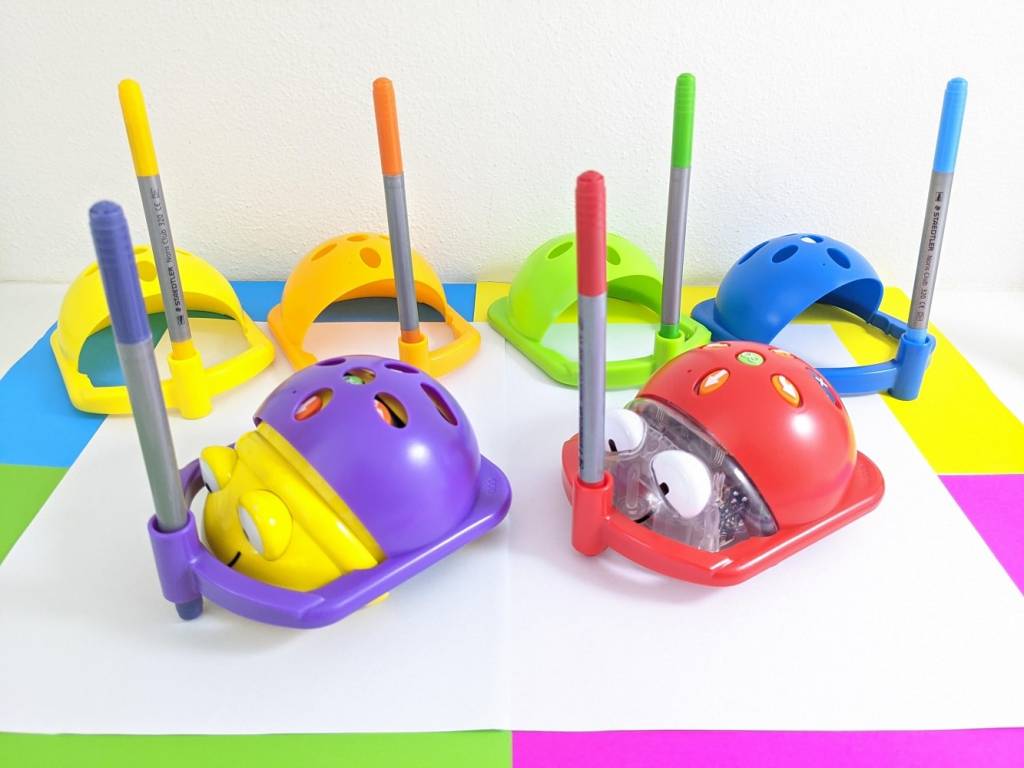
The Osmo range features some of my favourite classroom resources for introducing coding and integrating technology across multiple key learning areas. Today I’m going to share with you the top five things I love about Osmo. Read along to find top-rated products and resources that my students and I love to use in our classroom.


Literacy & Numeracy Integration

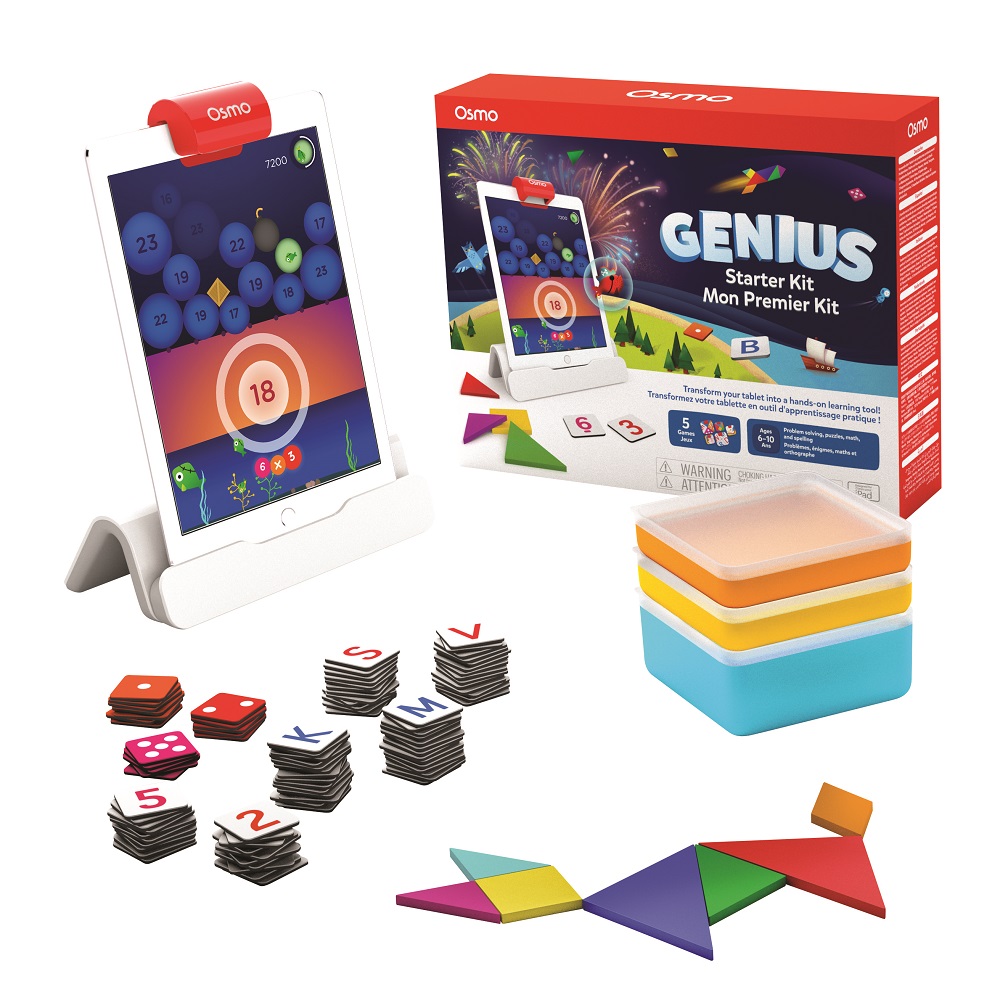
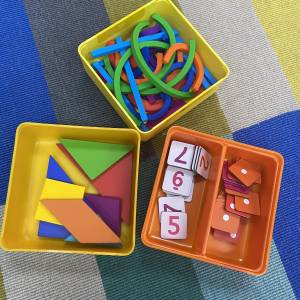
Osmo has a large range of apps that cater to English and mathematics curriculum links as well as literacy and numeracy general capabilities. I began my Osmo journey with the Genius Starter Kit (ages 6-10), which allowed me to explore apps such as Osmo Words, Osmo Numbers and five other great programs. The Genius Starter Kit encourages versatile use of accessories across multiple apps and allows students to explore concepts they are developing whilst extending their understanding to new settings. Purchasing the Genius Starter Kit provided me with opportunities to explore various accessories such as the word tiles, number tiles and tangram pieces. It was as simple as unpacking the box and downloading the app!

OSMO Starter Kit and tablet on white background

The Osmo Words app has been a crowd favourite in my learning space and fantastic for promoting letter recognition, decoding and spelling rules across various age groups. Students can work alongside a computer guide or challenge their friends to a multiplayer competition. Adjusting the ability level has allowed flexible use of the product across various users and their needs. The Osmo accessories can be purchased separately and the Osmo support team can quite often generously provide replacements. No one likes missing pieces, right?


OSMO Word game and Tablet on carpet


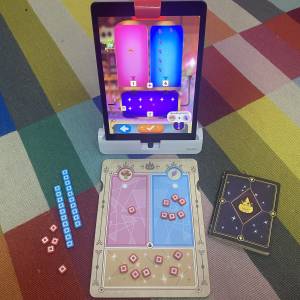
The Osmo Math Wizard series (ages 6-8) has been recently launched, which focuses on place value and measurement concepts within the mathematics curriculum. These new additions to the Osmo range provide engaging ways to promote fluencies within these concept areas. Both programs include interactive guides, printed student workbooks, sturdy game pieces, storage solutions and game-based learning opportunities. The Osmo reflector and the interactive guide provides feedback to the child on their place value and measurement work. This app enables multiple users to create accounts which allows for the product to be used by a classroom shared audience.


OSMO Math Wizard Place Value game on carpet OSMO Math Wizard Measurement game on carpet


The Osmo range includes various other apps such as Osmo Kaleidoscope and Osmo Tangram, which assist in promoting discrete parts of the mathematics curriculum or combining the ICT General Capability and Numeracy General Capability in your play-based learning experiences.


Projector App

The Osmo Projector app was launched during peak COVID-19 home learning in Australia. Responding to urgent requests from educators seeking the right tool to teach in an online or remote learning environment, Osmo created this free app to use in conjunction with the Osmo base and reflector. The app allows educators to scribe on whiteboards, worksheets or manipulate objects in front of the reflector and base, and the iPad will display this in the correct orientation for viewers. When combined with online conferencing platforms such as Zoom or by using AirPlay to stream from your device to LED displays in the classroom, this provides an innovative way to use your iPad as a projector for face-to-face and virtual learning.


OSMO Projector app with Tablet on school desk


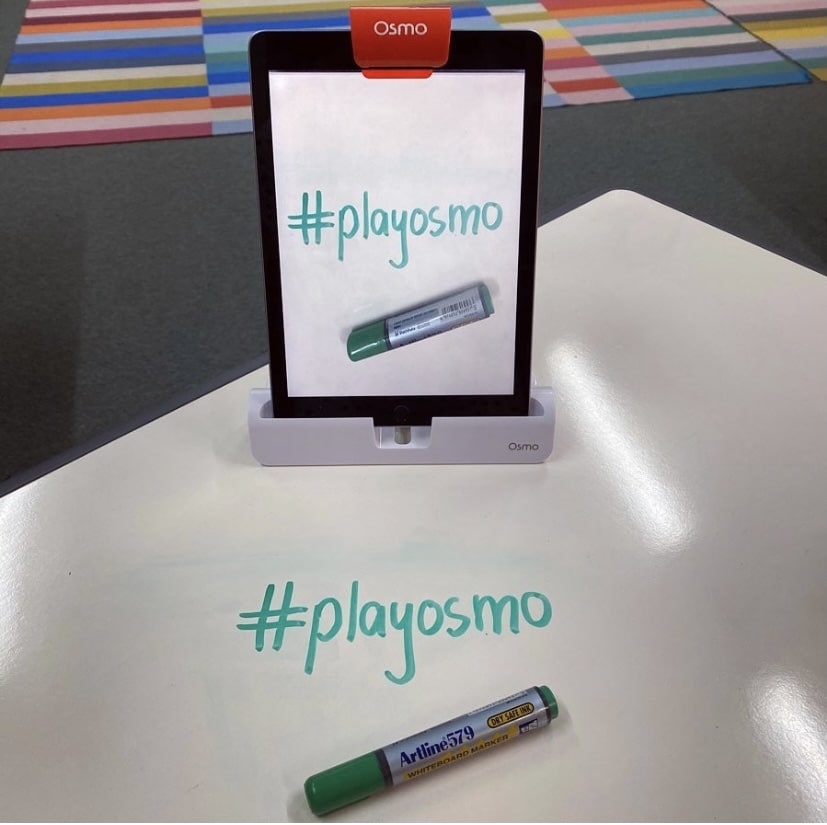
In my classroom, I AirPlay my iPad to my Macbook which is displayed on my LED TV screen. I use the Projector app to illustrate sequencing concepts such as arrows and patterns from my work station, allowing all students to view this live-action while I’m modelling a lesson to the class. A benefit to this app is that you can screen record your learning experience and upload it to online portfolios or live cast during online conferencing.
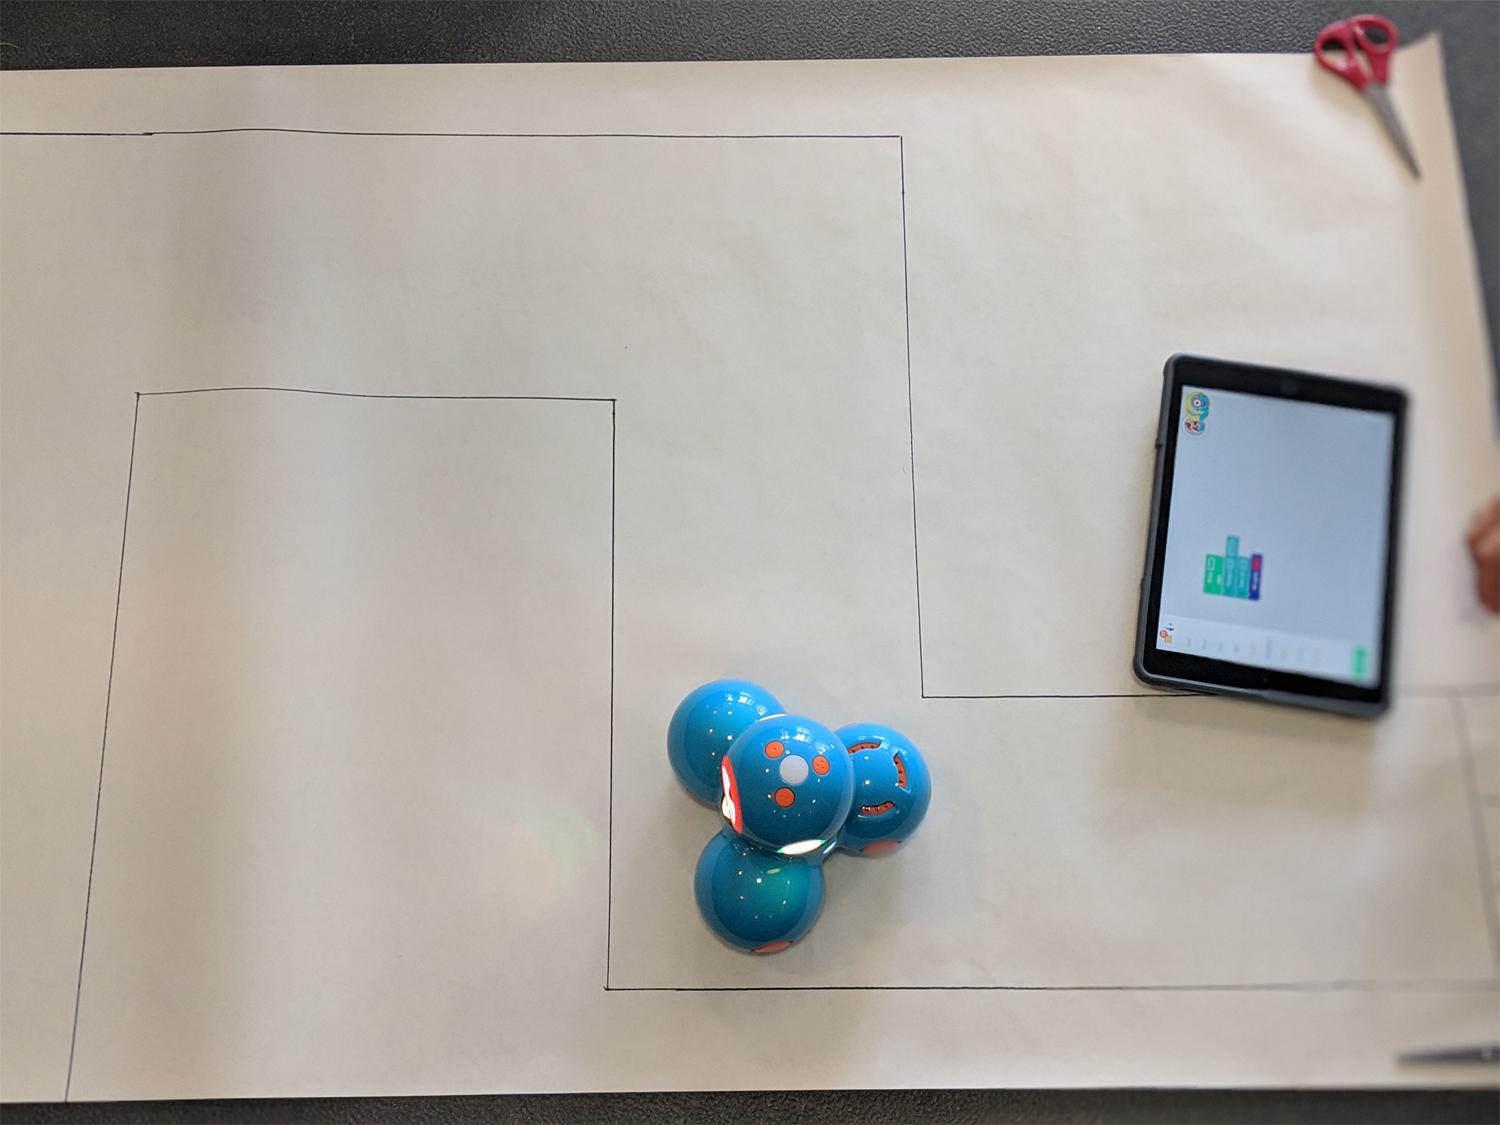
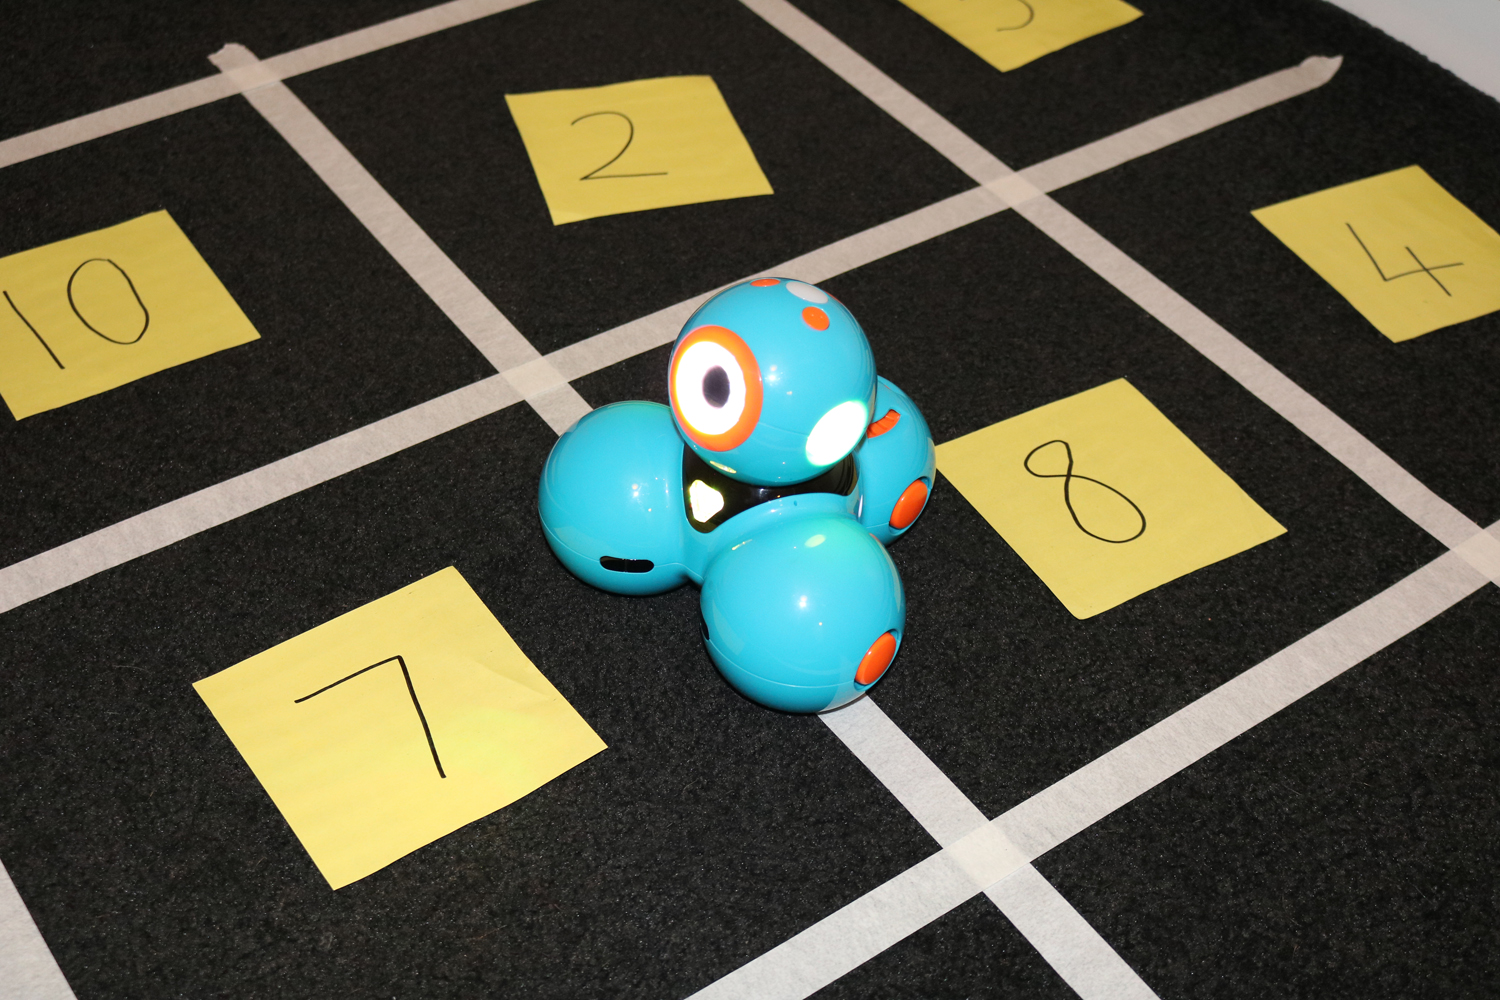
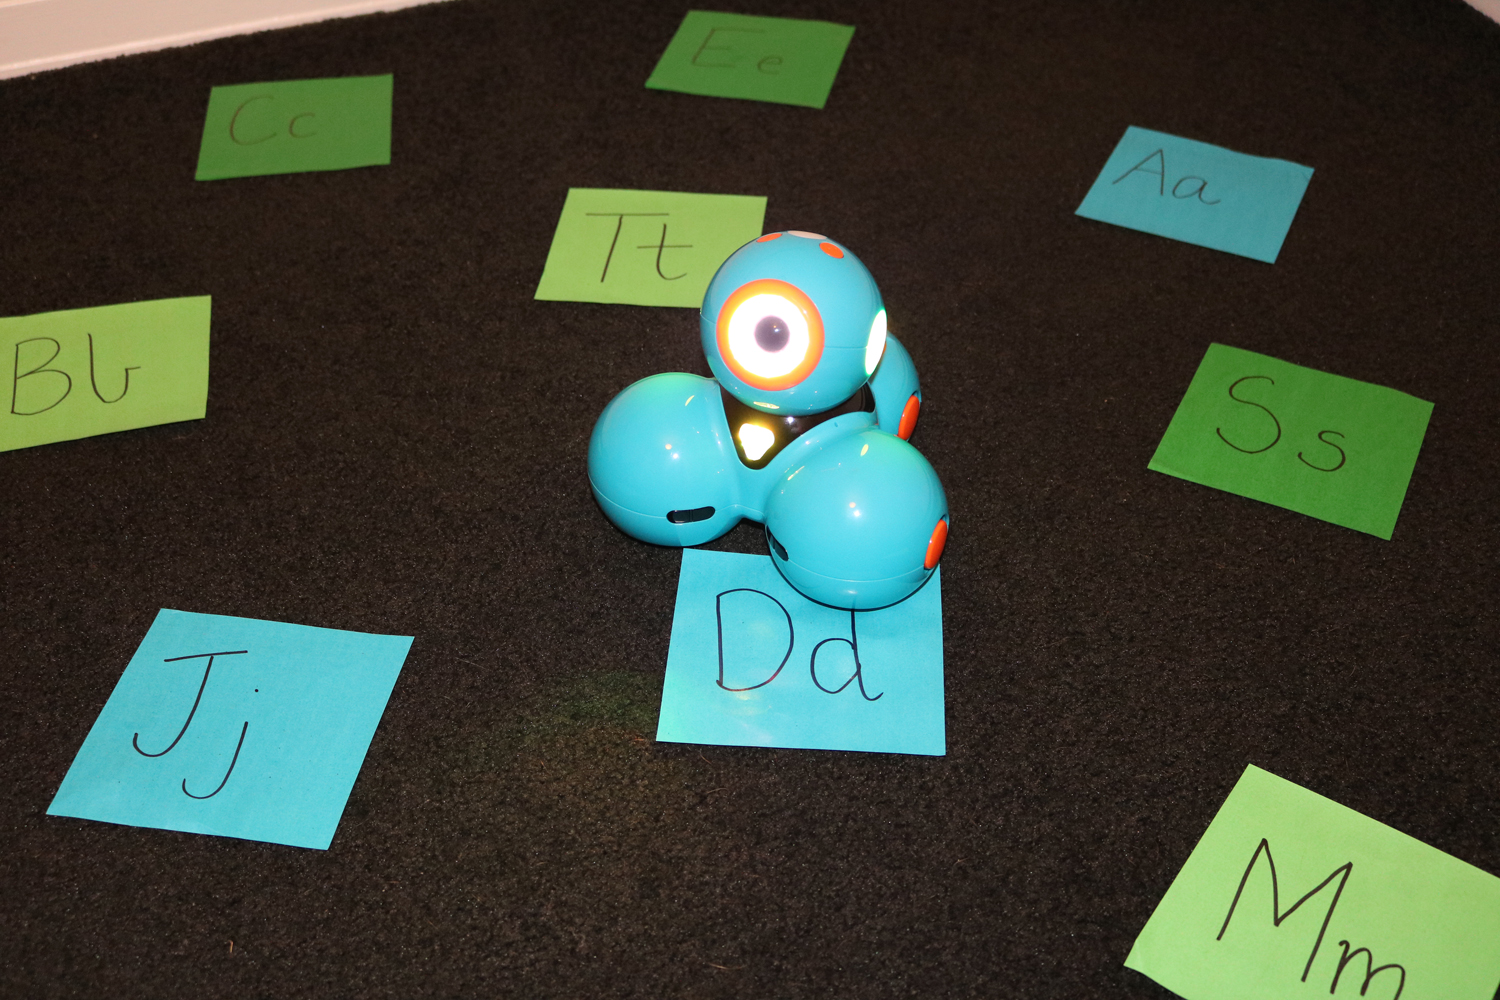
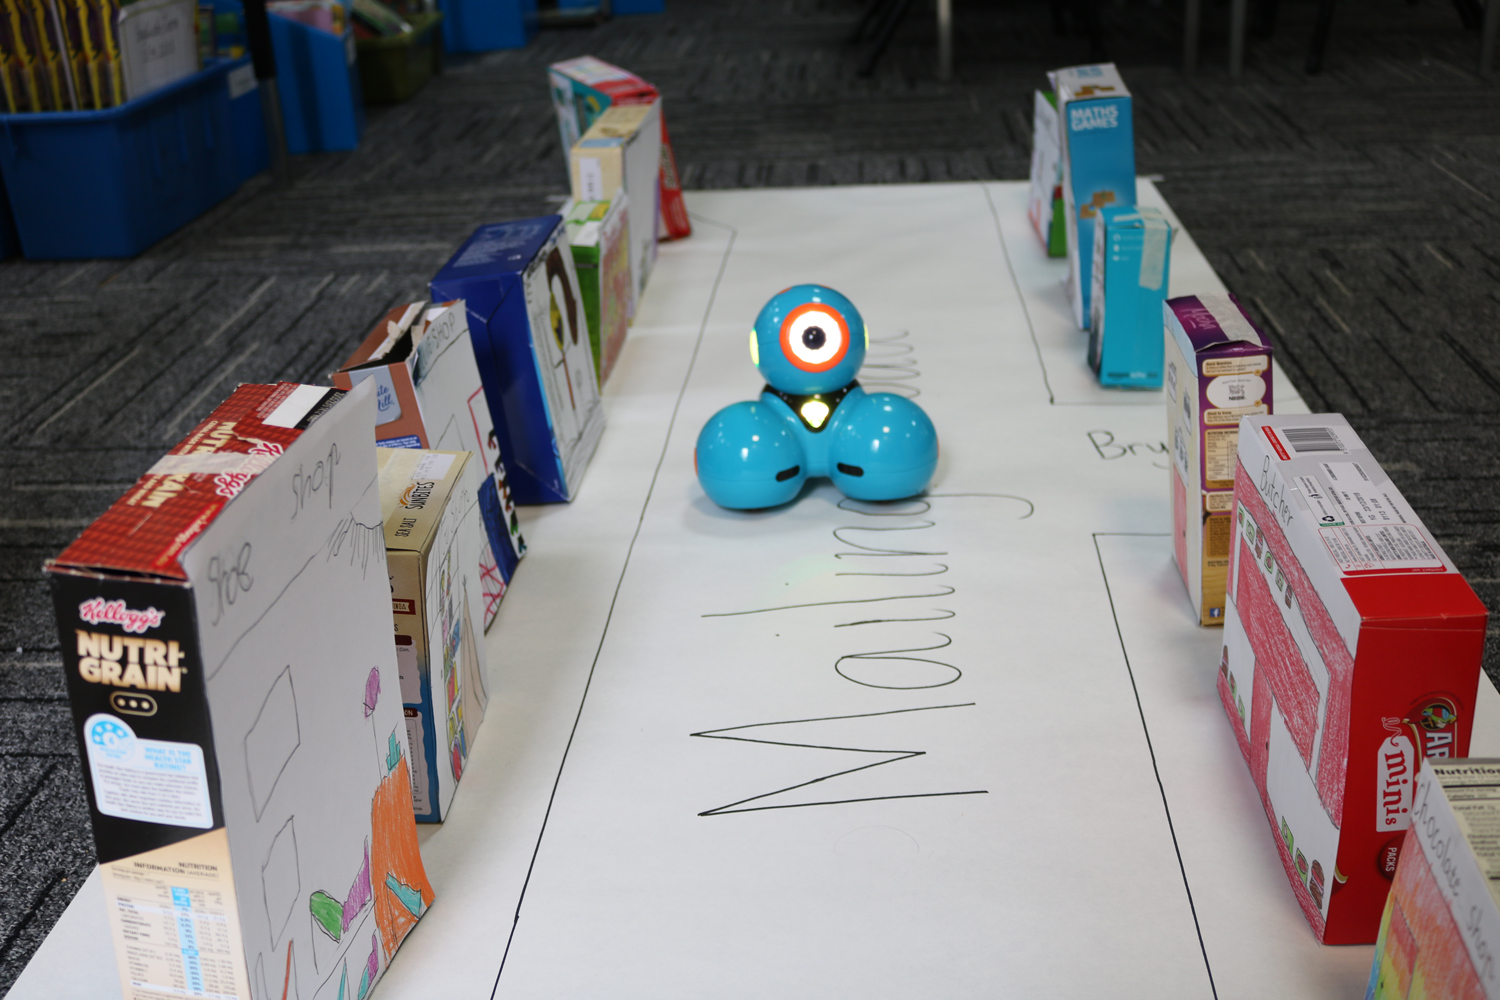
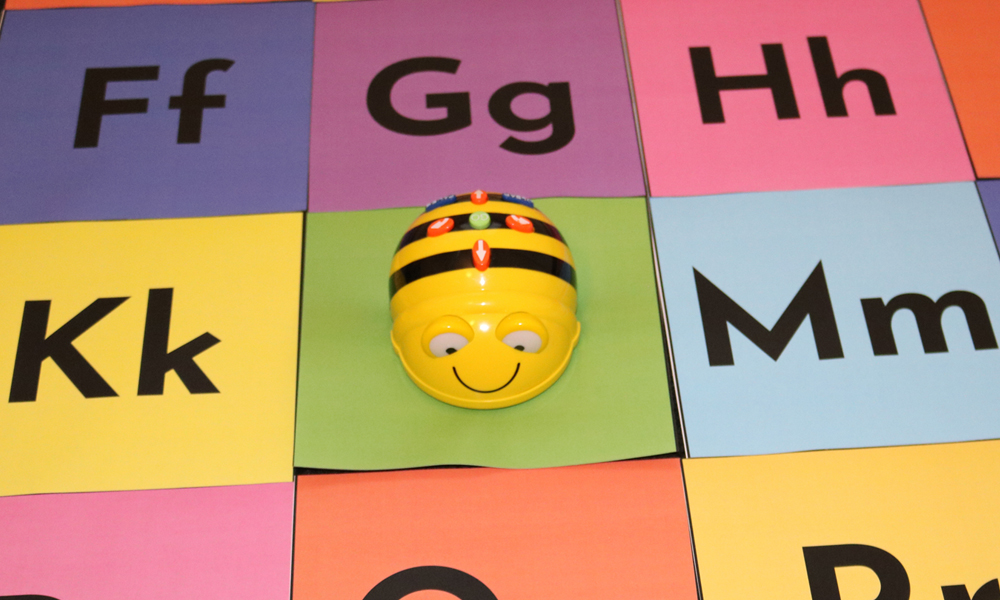
 

Coding Starter Kit

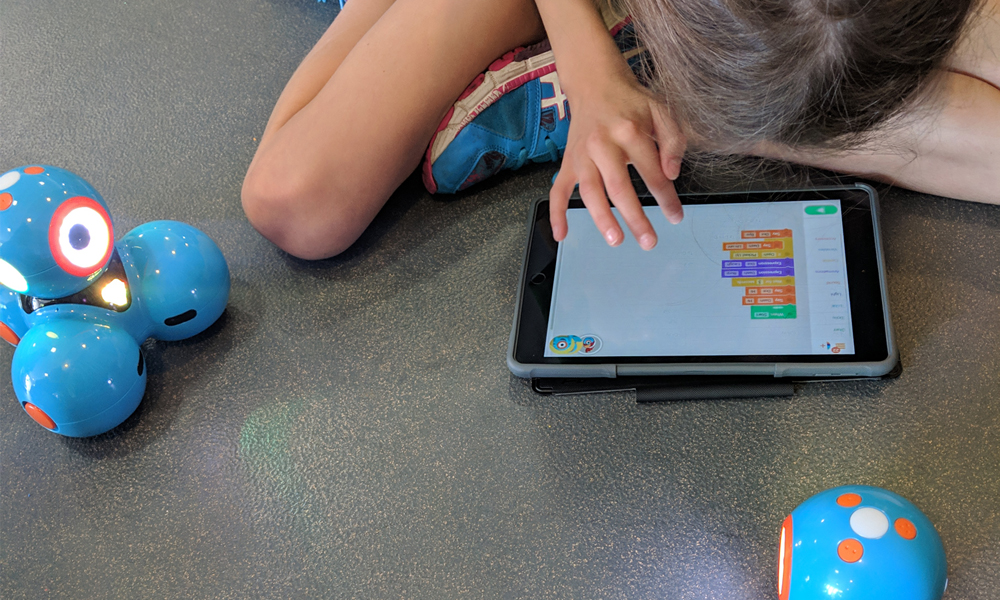
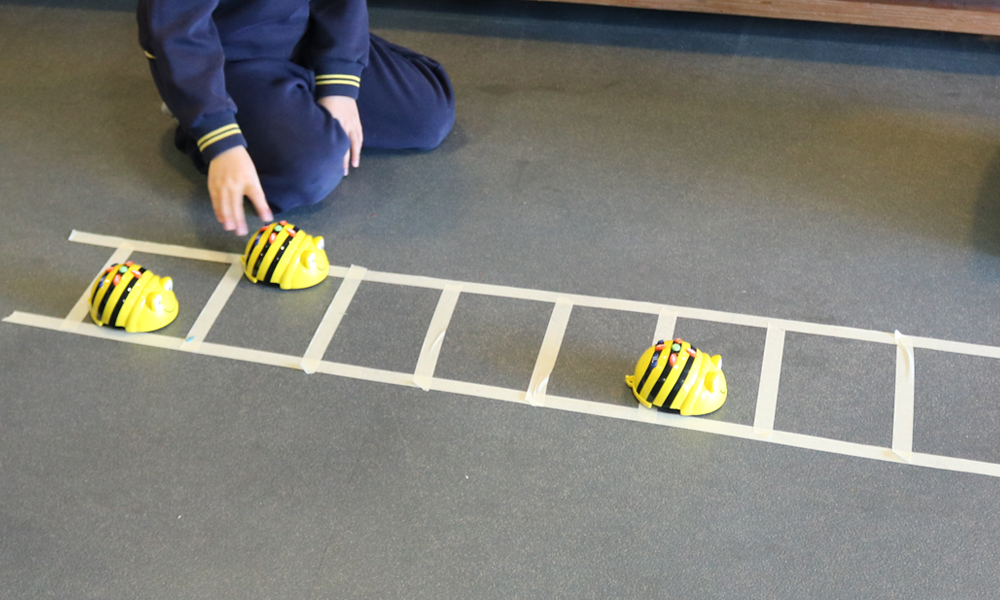
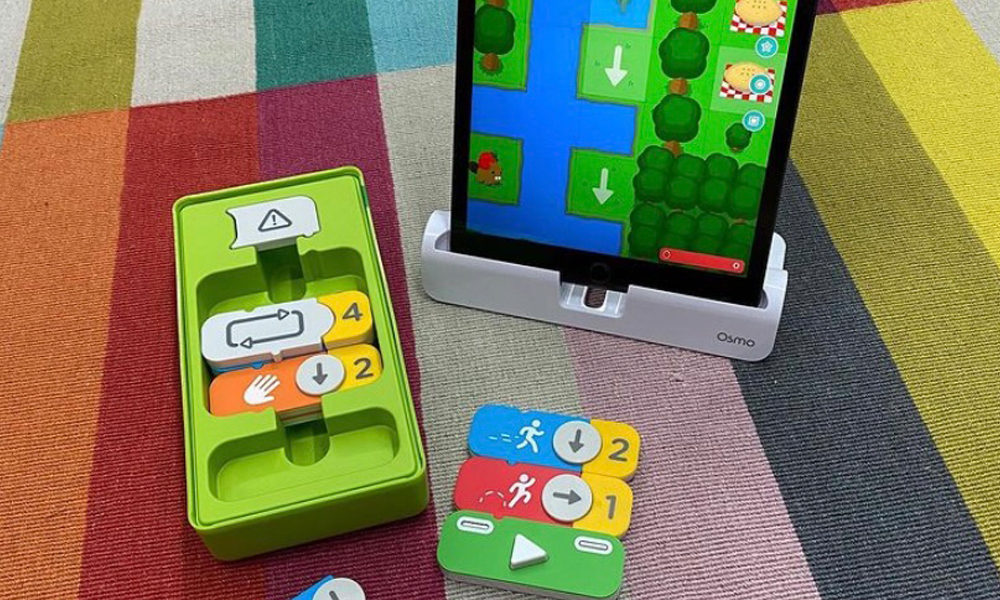
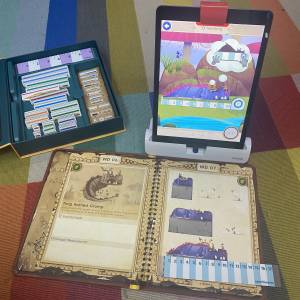
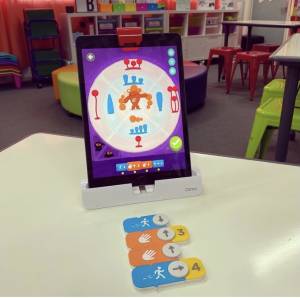
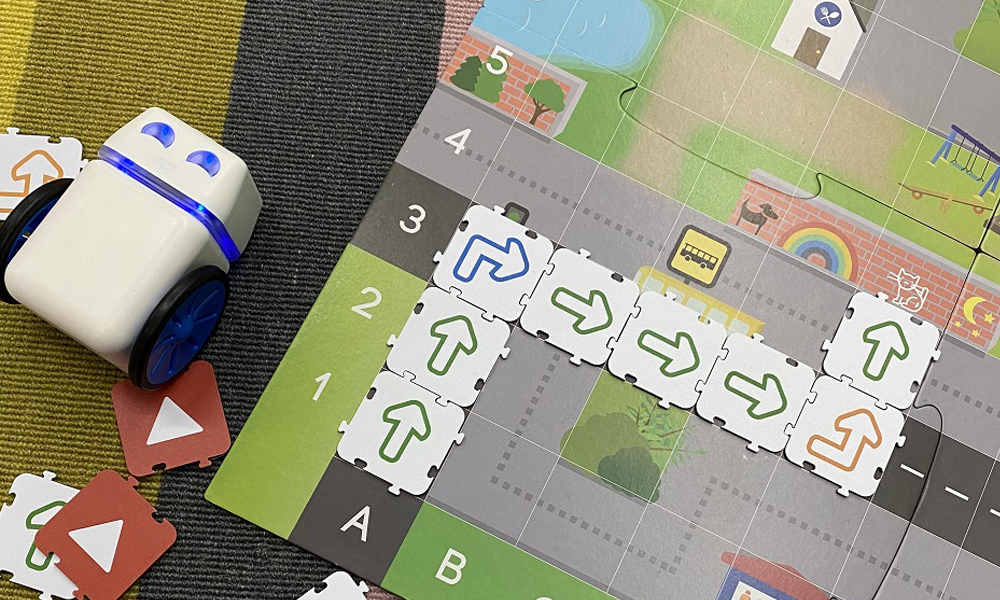
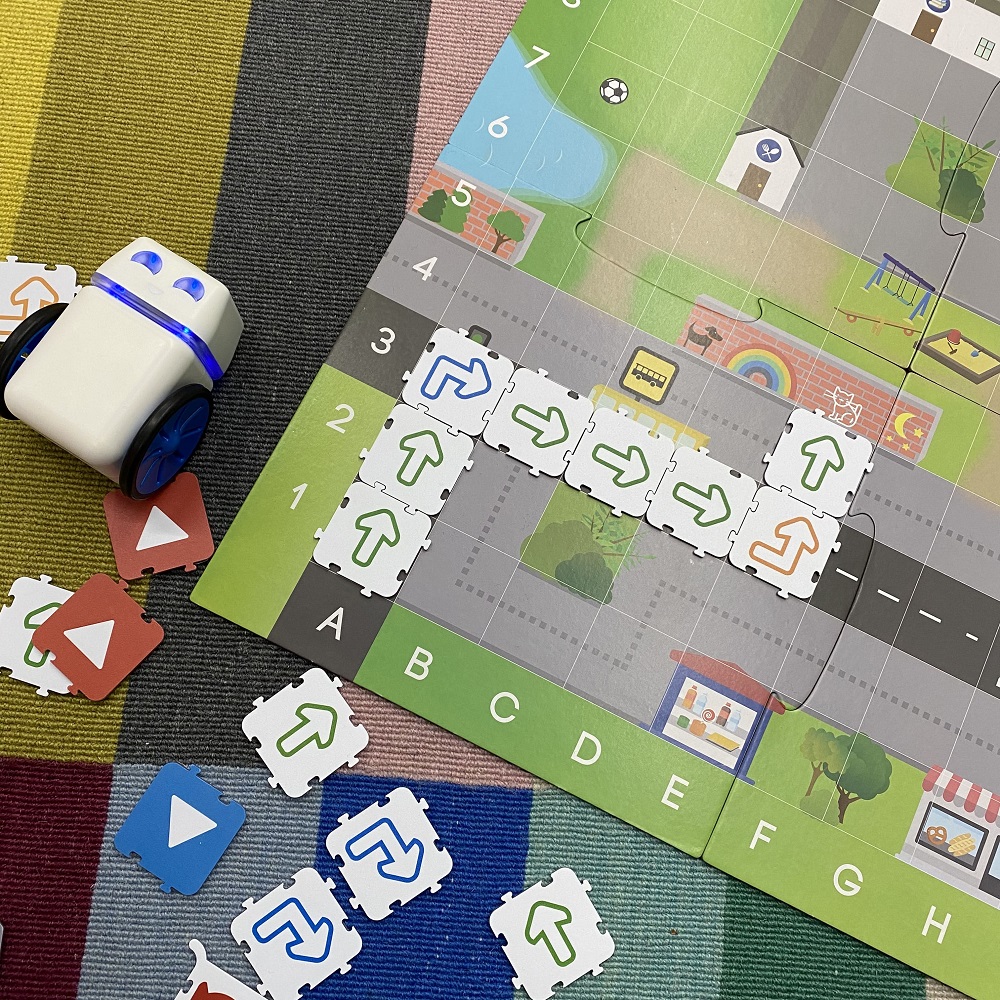
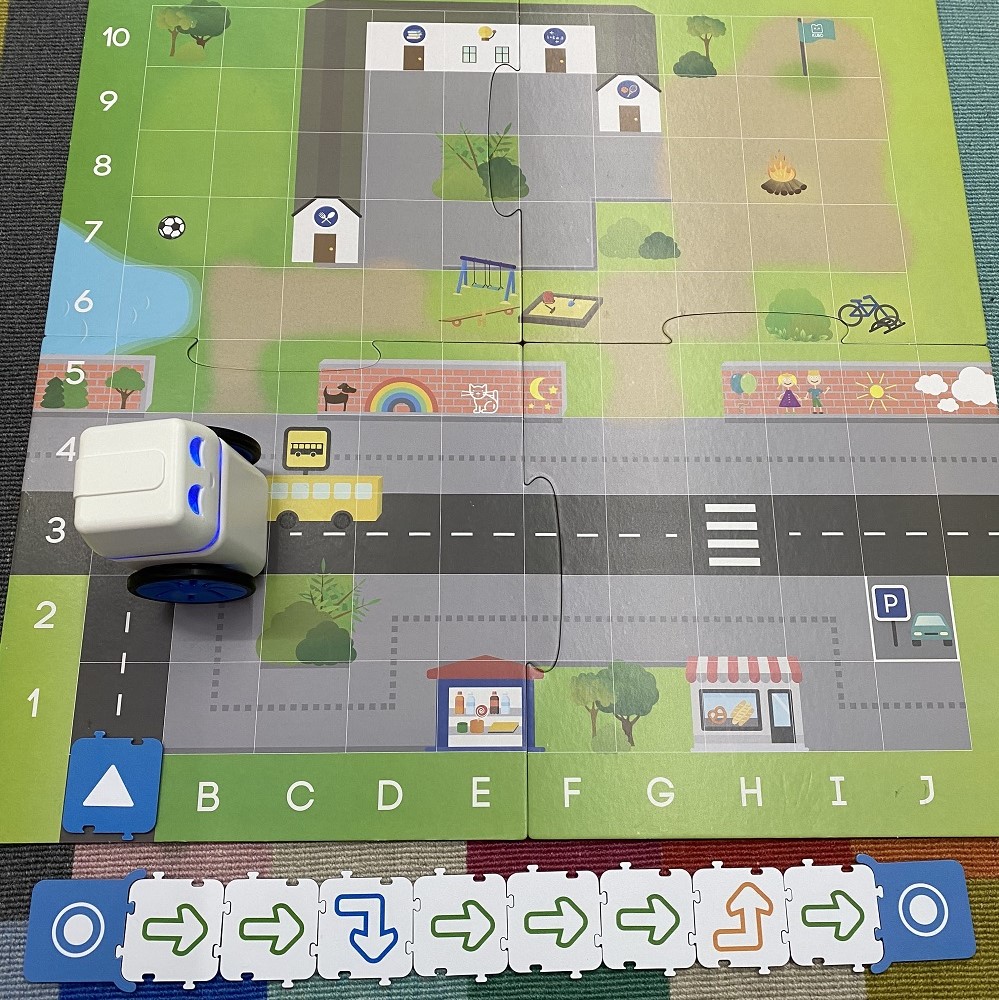
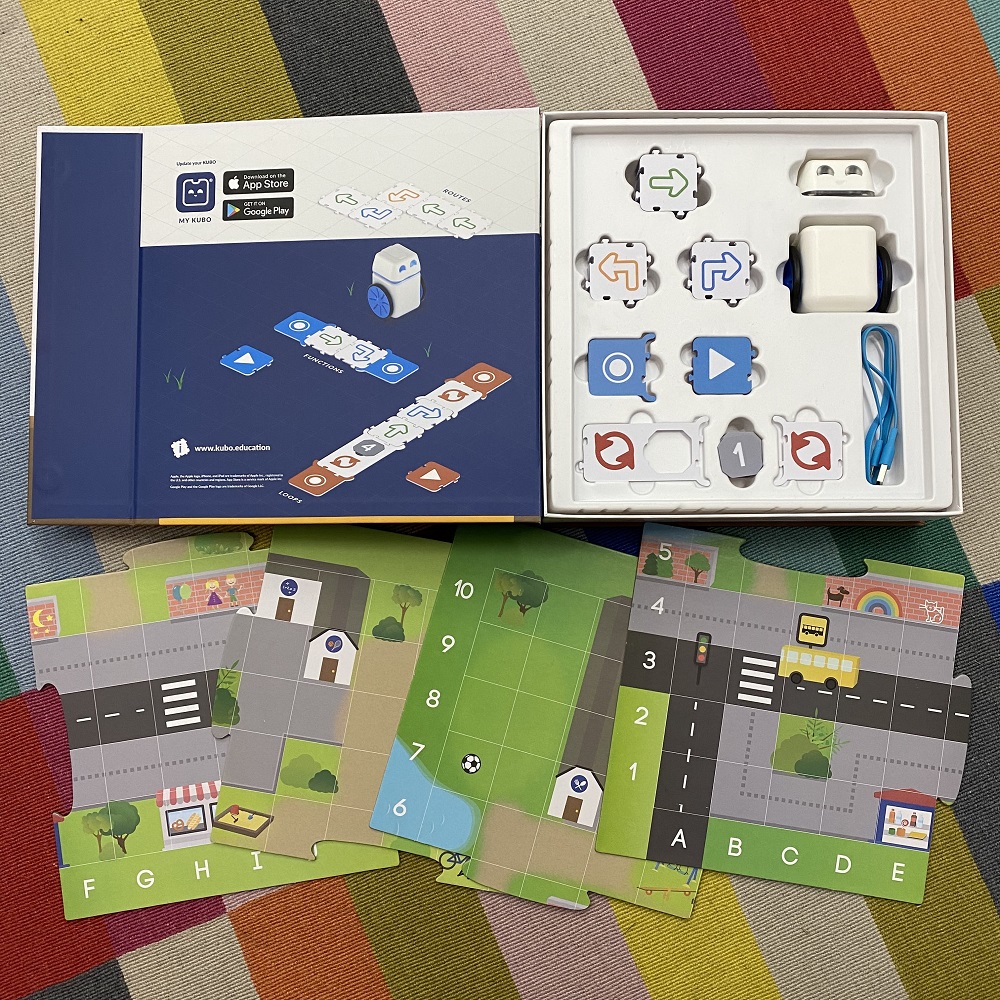
The Osmo Coding Starter Kit (ages 5-10) provides users with access to the Osmo Coding Awbie, Osmo Coding Jam and Osmo Coding Duo apps. These hands-on learning apps provide various ways to access the Digital Technologies curriculum concepts of directional sequencing, algorithms and abstraction. This kit provides fabulous introductory and intermediate learning opportunities with self-paced programs and built-in computer support guides. With a mix between structured learning tasks and free-play opportunities, the Coding Starter Kit is a go-to product of mine as a Specialist Digital Technologies teacher. Plus, if the students are begging to use them at lunch time- the resources must be fairly awesome!


    • OSMO Coding Jam Game and Tablet on desk in classroomOsmo Coding Awbie Game and Tablet on carpet


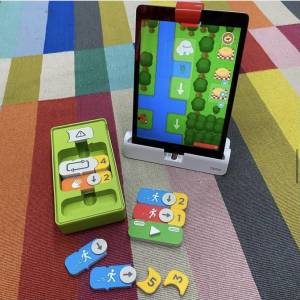
I use these resources in my Digital Technologies lessons, lunch-time coding clubs and before/after school at the students’ requests. To introduce the activities, I model and co-complete tasks with the students first and then allow them to continue to complete the programs independently. After a couple of structured lessons, my students can now access this resource as an independent activity as a fast-finisher task.
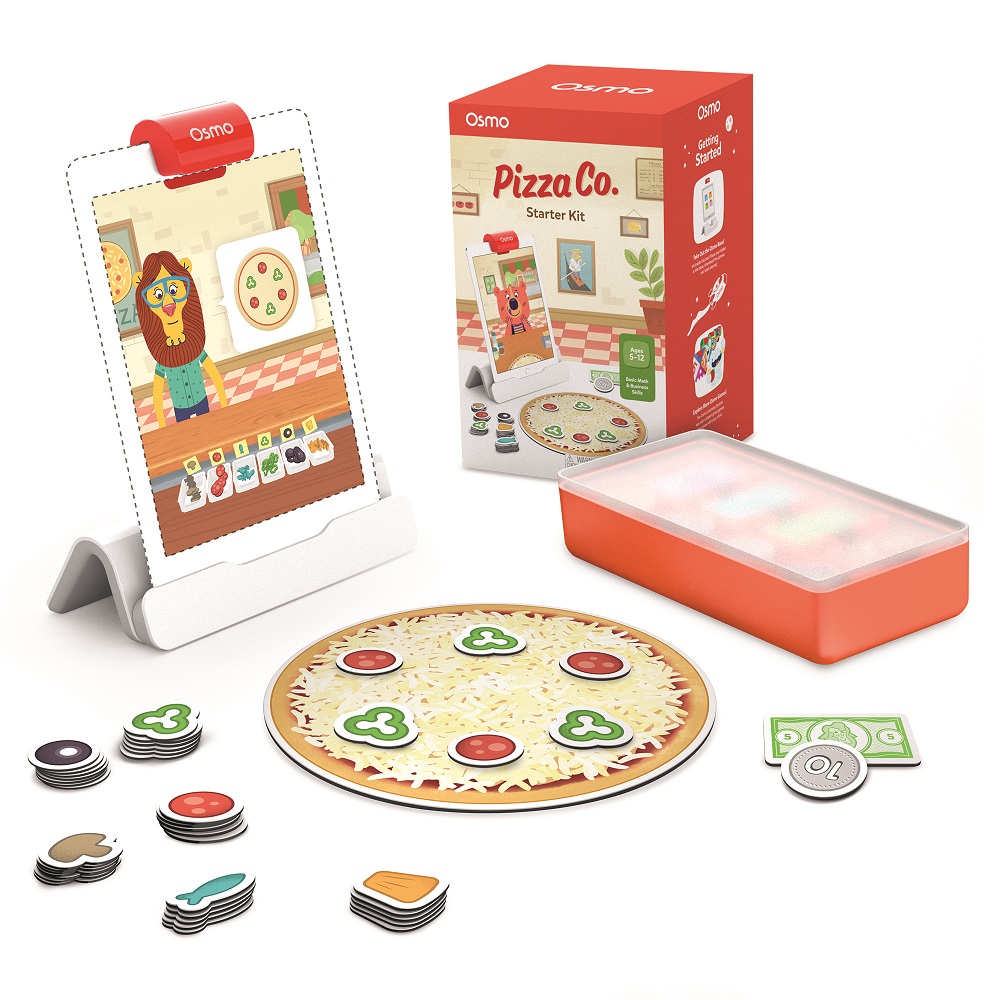
 

Osmo Pizza Co.

The Osmo Pizza Co. Game is easily my personal favourite game to play using the Osmo base and reflector. Have you ever watched a child play a game where you are itching to move them aside so that you can have a go? You will feel that way with this game. The premise of the game is to serve customers in a pizza shop by taking orders then preparing and presenting pizzas to the customers. Additional curriculum links can be made to financial mathematics as the user is also responsible for billing the customers at the end of their visit. As the timer counts down and the customer lines grow longer, you’ll find your competitive side shines as you succeed as a virtual small business pizza shop owner.

OSMO Pizza Co Game and tablet on white background


Storage

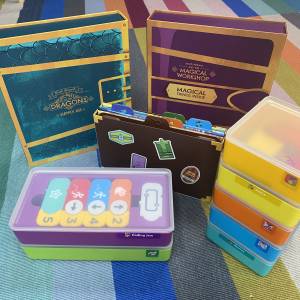
Storage! The thing that makes almost every educator’s heart sing. Osmo considers their storage to make it easy for students and teachers alike to grab-and-go with their products. Every accessory and starter kit comes in durable storage solutions that allow every piece to have its own home. As someone who owns various Osmo kits, I organise the storage containers into a large plastic container so students know exactly how to access the resources when needed. The items stack together neatly and come with clear, colour-coordinated labels which means even my youngest students can find what they’re looking for and pack them away efficiently.


    • OSMO open storage containers birds eye viewOsmo games and storage containers on floor


There you have it! My top five favourite things about the Osmo range! Osmo has made a positive difference in my classroom and has been a fantastic way to easily and efficiently integrate technology across multiple key learning areas.

Featured Products:

Osmo Genius Starter Kit

Osmo Coding Starter Kit

Osmo Pizza Co. Starter Kit


About the Author

Taylor is a Specialist Digital Technologies Teacher. In her five years of teaching, she has found a passion for integrating a range of technologies into her classroom and strives to share these experiences with those around her. Follow Taylor along in her teaching journey on Instagram @taylorteachestech


Shop MTA>

Blog Home>

Posted on

Exploring Screen-Free Robotics With KUBO

Kubo Robotics Birds eye view on carpet

Finding the right Digital Technologies resources for your classroom can be tricky, especially when there are so many to choose from. This blog post is going to put a special spotlight on one resource that may help to support your curriculum and engage your young learners. Let me help you take the guesswork out of selecting a robotic resource to support your early years classroom!

Firstly, let’s think about the curriculum. The Australian Curriculum Achievement Standard for Digital Technologies in the Foundation-Year 2 band  states, ‘Students design solutions to simple problems using a sequence of steps and decisions.’ Digging deeper, the Processes and Production Skills Content Descriptors encourage students to ‘Follow, describe and represent a sequence of steps and decisions (algorithms) needed to solve simple problems (ACTDIP004)’.

Directional sequencing is an important step towards more abstract coding and programming that develops in the higher bands of the Digital Technologies curriculum. The concept of directional sequencing can quite easily be coupled with the Mathematics discipline and the Numeracy General Capabilities. Finding meaningful ways to integrate approaches to learning is a key indicator of working smarter, not harder. But how can we make this meaningful and relevant in an everyday classroom?

Introducing Kubo!

Kubo Robotics Kit on Floor Birds Eye View


Kubo is not only a fantastic support for directional sequencing, but it can also be used to extend basic sequencing skills to include iteration. Plus, he’s super cute. Kubo uses unique technology, puzzle-like TagTiles® and colour activity maps to provide playful access to the Digital Technologies curriculum and engaging activities for students.

In my specialist Digital Technologies lessons, I use a range of digital and unplugged resources to approach the concept of sequencing. Providing a range of activities builds comfortability in the discrete skills and capabilities we intend to pass on to students. Kubo is quickly becoming a crowd-favourite activity!

In particular, the ability to record and play back sequences of code has maintained high engagement in our lessons. The activity shown below illustrates a sample line of code that has been created and recorded by the robot. It’s as simple as building the line of code, placing the ‘record’ TagTiles® at the beginning and end and allowing Kubo to roll over the top to memorise the code. Then, simply move your Kubo onto the mat and discover the successes of the sequence. This activity has flexible differentiation, where students can begin with simple lines of code and then continue to extend as their skillset increases to lengthen the code or to include iterations.


Kubo Robotics Tagtiles birds eye view


A new rotational activity that I’ve been incorporating with my Year 2 classes is called ‘Kubo Challenges’. This includes students using challenge task cards to sequence their Kubo robots to ‘collect’ various items on the town map or reach various alpha-numeric grid references. Students use their iPads and digital portfolios to take video evidence of them completing each challenge task card. This is increasing student ICT General Capabilities and providing an easy way for myself to flick through the various work samples of a large number of students within a cohort. Additionally, publishing this evidence to a digital portfolio provides students with a platform to reflect and build on previous learning experiences.

Incorporating the alpha-numeric grid referencing is also a great way to add value to the lesson by touching on the Numeracy General Capability. Students can refine their understanding of location and transformation and activate prior knowledge of concepts within the Mathematics curriculum. Click here to download a free copy of the challenge cards I use.


Kubo Challenge Birds Eye ViewKubo Challenge -side on view


I like to partner students up for these Kubo Challenges to encourage teamwork, peer support and resilience. This is an enjoyable rotation for the students to participate in and, better yet, it’s super simple and resourceful to set up each lesson. After investing in a few ‘training lessons’ for the students to understand the procedures, techniques and expected behaviours, this rotational activity now simply runs itself.

Inside the Kubo product box you will receive a range of TagTiles®, Micro-USB charging cord, easy-to-store coloured activity map and the Kubo robotic device. The Micro-USB attachment makes storage while charging very simple and compact. Kubo also have a YouTube channel  with plenty of tutorials for setting up, implementing and extending on coding concepts.


Kubo Robotics inside box content


Robotics resources may be difficult for schools to fund and in any sense, the robotics need to be respected by all users. A few rules I have my students practise when using the Kubo are:

    • Hold the Kubo with two hands (one on top, one underneath).
    • Walk, don’t run! You might knock over, drop or step on a robot.
    • Do not push and pull the Kubo like a toy car.
    • Always count and place the TagTiles® back in the container neatly.
    • Sharing is caring.
    • Always charge the robot when finished.

Having rules in place for the use of robotics in the classroom will also boost student ownership of the learning experience. Students will develop a respect and appreciation for the resources they are accessing and will show a higher level of focus on the activity in front of them.

Selecting the right robotic device for your classroom can be overwhelming. I recommend checking out the Kubo information and videos available on the MTA website  if you’re interested in giving Kubo a go! Finding resources that support meaningful engagement within the field of Digital Technologies is key for the effective implementation of the curriculum. Find what works for your classroom and I challenge you to find further cross-curricular links you can make with the technology you have. I’m confident you’ll find the best way that works for you, allowing you to share the passion you have for your lessons with your students.

Featured Product

Kubo Coding Core Kit


About the Author

Taylor is a Specialist Digital Technologies Teacher in a primary school setting. In her five years of teaching, she has found a passion for integrating a range of technologies into her classroom and strives to share these experiences with those around her. Follow Taylor along in her teaching journey on Instagram @taylorteachestech


Blog Home>

Shop MTA>

Posted on

Introduction to the Bee-Bot and Blue-Bot in the Classroom

Beebot Bluebot on a Colourful Directional Robotics Mat

I have been using Bee-Bots and Blue-Bots in my classroom for several years to introduce junior primary students to computational thinking and coding. I love how the versatility of these amazing robots enables me to design learning experiences that focus on the digital technologies curriculum and also integrate literacy and mathematical concepts.

I am often asked what the difference is between the Bee-Bot and the Blue-Bot and which robot would be more suitable to purchase. Yes, they are similar, but there are some differences that could help determine which robot is more suitable for your school. Whether you are using the Bee-Bot or the Blue-Bot, both robots support students in developing their understanding of directional language and basic coding algorithms.

Beebot and Bluebot Robots on colourful directional mat


Bee-Bot
The Bee-Bot is a yellow bee-shaped robot that can remember a sequence of up to 40 commands. Users can direct it to move forwards and backwards in 15 cm increments, and to turn 90 degrees left and right using the four directional buttons, and has go, pause and delete buttons. After each command is performed, the Bee-Bot beeps and blinks, which allows students to count its movements and follow the sequence of code they developed to ensure its accuracy. This enables students to create simple algorithms while developing their problem-solving skills in a fun learning environment.


Blue-Bot
The Blue-Bot is a clear robot, allowing students to view the hardware within. It is the same size as the Bee-Bot and has the same command buttons, but the difference is the addition of its Bluetooth capability, which allows it to connect to the Blue-Bot app. Using the app, the Blue-Bot has the added functionality to turn 45 degrees and use repeats and loops in the development of code. The Blue-Bot app also works without a Blue-Bot, making it a great resource in itself for schools that don’t have the robot.

When introducing any new technology, I am a big advocate of allowing students the opportunity to play and explore the functionality and possibilities of the device. After this exploration time, a more structured approach of creating activities to engage and challenge students can be undertaken. Here are some ideas on how to introduce the Bee-Bot or Blue-Bot to your students.


Road Maze Tile Kit
The Road Maze Tile Kit provides students with roads, buildings and park puzzle pieces they connect together to create an individual mat for their robot. A total of 27 pieces include many landmarks that can be arranged in any order so students can design their very own little city. Once assembled, students can program their Bee-Bot or Blue-Bot to manoeuvre to each landmark.

Beebot Road Maze Kit and Beebot Robot


Robotics Coding Cards
The Robotics Coding Cards pack includes 60 double-sided directional instruction cards. Each card’s instruction command corresponds with the Bee-Bot and Blue-Bot’s buttons of forwards, backwards, left and right. On the reverse of the cards are more advanced commands of repeats, loops and turning degrees. These cards are a fantastic visual that students can use individually or collaboratively in small groups to structure the sequence of commands they will use to program their robot.

When the program has been entered into the robot and is ready to begin, students can follow both the robot and the coding cards to ensure their program is correct or to find where there may be an error in their program to help them understand what changes may need to be made to achieve success.

Beebot and Bluebot with Robotics coding cards


Mats – Variety
There are a variety of mats designed for both the Bee-Bot and Blue-Bot that can link student learning across curriculum areas. The Alphabet, Australia, Money, Shapes and many more themed mats are available to support cross-curricular learning as students program their robot to manoeuvre to specific locations on the mat being used.

Example: The Alphabet Mat is a great resource as students can program their robot to manoeuvre across the mat to develop letter recognition, link sounds and create words or names.

Alphabet coding mat with Beebot and Bluebot


Pen Holders

The Pen Holder is a shell that attaches to the Bee-Bot or Blue-Bot that allows students to use the robot as a drawing tool.

Pen Holder helmets on Beebot and Bluebot sitting on white paper

This is the perfect addition to the robot as students can program the robot to draw two-dimensional shapes or to trace a route the robot has travelled, giving them immediate feedback of their program.

Pen Holder Beebot and Bluebot drawing circle on white paper

View video of Blue-Bot in action here


How have you introduced Bee-Bots or Blue-Bots into your classrooms? We’d love the hear from you!

I have previously written posts on how I integrate these robots into literacy and mathematics. Here are 10 ideas that can be used in your classroom.

Five Literacy Bee-Bot Lesson Ideas for the Classroom
https://blog.teaching.com.au/5-literacy-bee-bot-lesson-ideas-for-the-classroom


Five Mathematics Bee-Bot Lesson Ideas for the Classroom
https://blog.teaching.com.au/5-mathematics-bee-bot-lesson-ideas-for-the-classroom


About the author

Eleni Kyritsis is an award-winning Year 3 teacher and Leader of Curriculum and innovation from Melbourne, Australia. Eleni facilitates professional learning workshops around the world that focus on unleashing creativity and curiosity in classrooms. You can contact her at elenikyritis.com and @misskyritsis


Shop MTA>


Blog Home>


Posted on

LEGO Education® SPIKE™ Prime: A Teacher’s Experience

lego spike on laptop and tablet with models on class desk

Louise McKinnon, a Primary Digital and Design Technologies Teacher who works at Springfield Central State School in Queensland talks to us about her experience of using LEGO® Education SPIKE Prime™ in the classroom.


  • What do you see as the key benefits of having LEGO Education in your classroom?

LEGO Education provides a conceptual platform for the Digital and Design Technologies curriculum and enables authentic collaboration in the classroom. In our school, students use LEGO Education products from grade 1 to 6 in the Technology classroom which builds familiarity and enables them to feel confident to share ideas on how to engineer and program.


  • Why do you use LEGO Education in your school?

LEGO Education provides a multi-grade-level approach to students’ computational thinking in a logical manner. Moving from WeDo to SPIKE to EV3 Mindstorms allows students to begin with an easy entry point and progress to more complex thinking with technology. It allows students to feel safe to explore their creativity, not only through engineering and building with LEGO, but also within many other critical skills, such as teamwork, computational thinking, programming and more.


  • How easy was it to integrate SPIKE into your lessons?

Being a LEGO school, SPIKE was an effortless platform to integrate into our lessons. Building upon the simplistic tasks with WeDo for the older students in grade 3-4 was super easy as their knowledge grew. Tasks on the LEGO Education website also provided an easy scaffold to build lessons around.


lego spike trays with kids hands


  • How do children respond to using SPIKE?

The children love SPIKE! They love the colours and the simplicity of the software is super accessible and promotes engagement for all students. They also love how it is built to look like Scratch, as they are all familiar with Scratch from their lesson progression in the lower grades.


  • What does SPIKE teach children about coding and conditional thinking?

SPIKE allows students to code through Scratch blocks, which is very familiar to our students. The block colours and easy-to-understand language in the blocks has helped students more easily debug and methodically work through issues, which some students found too advanced with Mindstorms.

lego spike with laptop, tablet and model

  • What challenges/obstacles has LEGO Education SPIKE Prime solution helped you to overcome?

SPIKE serves as the bridge between WeDo and Mindstorms that had been missing. The jump from WeDo to EV3 Mindstorms was intimidating for some students in relation to both the mechanical and technical sides of the platform. SPIKE has allowed for an effortless transition that is an appealing invitation for students to engage with and build the skills needed to confidently interact with Mindstorms.


  • What type of engagement do you see in your children when they’re using LEGO in the classroom?

A lot! My students love the accessibility of SPIKE. They love how the blocks stand out and are super easy to find. The new addition of the donut block has allowed students to overcome engineering issues with ease, which has helped them to feel confident and creative with the product.


  • Can you explain your experience in using LEGO Education solutions that stretched across multiple learning standards?

LEGO Education has allowed students to work within many learning standards of the curriculum simultaneously due to the nature of the product. They are working within the Design and Technologies Knowledge and Understanding side of the curriculum through the computational thinking effect LEGO provides, while also engaging in the Design and Technologies Processes and Production Skills when they get to create and be hands-on with the product.


  • How does using SPIKE in your classroom enhance students’ engagement and motivation?

Students who felt disengaged and disheartened from the large leap to Mindstorms are now more engaged. They’re taking risks and becoming problem solvers due to the simplicity of the software and hardware components of SPIKE. The colours and fewer parts provide easier construction and navigation and less downtime troubleshooting.


  • Can you tell us about a time that you used SPIKE in your school and experienced an ‘aha moment’ with a student or group of students?

The aha moment has happened a lot within the programming stage of students’ creations. Younger students are now more readily able to understand and connect the coding blocks as they are very familiar with these through Scratch. The blocks are no longer ambiguous or hard for students to understand. Lots of aha moments and smiles.


  • What would you say to another teacher who is considering using SPIKE in their school?

Give it a go. Have a play for yourselves and see the benefits it can have for teaching by being active with it. It is an amazing hands-on tool and the best way to see its abilities in the classroom is for the teacher to also be hands-on with the product.


  • What three words best describe Spike?

Engaging, accessible and interactive.


Featured Product:

LEGO Education SPIKE Prime Set


Did you know that LEGO Education has over 400 FREE Lesson plans that can be sorted by Product, Grade and Subject.

Check them out here: https://education.lego.com/en-us/lessons


Shop MTA>

Posted on

Creating Real World Solutions With The Micro:bit

microbit sleeve preview image

The BBC Micro:bit is a favourite Digital Technologies tool of mine that allows our students to design solutions to problems, create games, make music and respond to the surrounding environment.

The small handheld micro-controller can be coded by students using Block Code, Python, Javascript or Scratch 3.0, making it a versatile tool that can be adapted for students in primary and secondary classrooms.

The features of the Micro:bit are;

  • USB connector: Connects to a computer for power and to load programs onto the Micro:bit
  • 25 LED lights: Can be individually programmed to show shapes, text or numbers
  • 2 buttons (A and B): Programmable input buttons
  • Light sensor: The LEDs on the Micro:bit can also act as a light sensor to detect ambient light
  • Edge Connector: 25 external connectors, called Pins, on the edge of the Micro:bit allow you to connect to other input and output electronic hardware, including LEDs, motors and sensors
  • Battery socket: Power the Micro:bit using batteries
  • Reset button: Restarts the Micro:bit
  • Radio: Communicates with other Micro:bits
  • Bluetooth antenna: Wirelessly sends and receives signals to Bluetooth enabled PCs, smartphones, or tablets
  • Processor: Where the program is stored and executed
  • Compass: Detects the direction (north, south, east, west) the Micro:bit is facing
  • Accelerometer: Detects if the Micro:bit is being moved, tilted, shaken or in free-fall and at what acceleration
  • Temperature sensor: Detects the current temperature of the Micro:bit in degrees Celsius

microbit stepcounter

Introduction to the Micro:bit

The Makecode platform, developed by Microsoft, allows students to code using Block Code and Javascript. It has a great range of project tutorials for students to work through to develop their understanding of, and familiarity with, the Micro:bit.

Website: https://makecode.microbit.org/

My favourite tutorials:

Rock, Paper, Scissors
Name tag
Step counter

Step Counter

microbit stepcounter code blocks

Extension: Have students personalise and/or make enhancements to the code.

Step counter – Enhanced with a message displayed on the Micro:bit when the user reaches 1,000, 5,000 and 10,000 steps.

microbit stepcounter blocks

Once students have developed a basic understanding of how the Micro:bit works, they can be given a range of projects or challenges to solve individually or in small groups. These challenges will allow students to use their imagination and creativity to design their end product.

BOSON – Starter Kit for Micro:bit

microbit in box

Micro:bit is a simple micro-controller that can be enhanced with a range of add-on resources to allow students to achieve even more. The Boson Kit comes packed with easy-to-attach modular blocks to further empower student creativity and projects.

The Boson Kit features:

  • Micro:bit expansion board
  • Push button
  • Motion sensor
  • Rotation sensor
  • Sound sensor
  • LED light
  • Mini fan
  • LED strip
  • Mini servo

microbit fan sensor with button and childs hand
Incorporating the features of the Boson Kit into their designs allows students the opportunity to create solutions that can respond to a variety of inputs or sensors and respond or act with a desired output.

microbit sensor circuit setup

Micro:bit Pets

Students create their own Micro:bit Pet. The pet must react to different Micro:bit movements by using the LEDs and sounds to showcase the pet’s emotions. Students use art and craft materials to design and create their pet, integrating the Micro:bit to act as their pet’s face.

microbit pet green, faeturing laptop in background

microbit pet pink on classrom desk


microbit pet orange on classroom desk


microbit pet yellow with laptop in backgroundMaterials:


UN Sustainable Goals

There are a total of 17 goals that make up the UN Sustainable Goals. I focus on two or three that connect to the current learning themes taking place in our classroom when undertaking this project. This provides students with a real-life scenario to develop a solution using the Micro:bit.

UN Sustainable goals vector table

Students need to apply their content knowledge from our units of work in class, to generate ideas, code a solution and create a prototype.

Examples created by students aged 11-13 years old.

Automated Street Lights
Goal 7 – Affordable and Clean Energy
As pedestrians walk on the footpath at night, the light above sensors their presence and switches on. This provides light where it is needed, saving energy as they are not on all night long.

microbit automated street lights


Class Countdown
Goal 4 – Quality Education
This device will be installed in every classroom and every student wears a synced watch. As students enter the classroom they press button A to automatically mark the roll. If students require teacher assistance, they press button B on their watch. If the teacher wants all students’ attention on the floor, they get a countdown timer to appear on the LED screen of their watch. This was designed to save time in the classroom so teachers and students can work more efficiently.

microbit class countdown


Tree Cut Down Warning System
Goal 13 – Climate Action
Goal 15 – Life On Land
Trees in forests have sensors attached. When a tree is cut down it notifies the rangers, so they can then locate where the tree is and stop deforestation before it occurs.

microbit tree cut down warning system


Turtle to Clean the Ocean
Goal 14 – Life Below Water
The turtle swims in the ocean collecting rubbish. It was designed to appear like other animals in the ocean so as not to scare others.

microbit turtle to clean ocean


Wellbeing Watch
Goal 3 – Good Health and Wellbeing
This wellbeing watch helps fight mental health issues. When button A is pressed, either a joke, funny emoji or funny sound will play at random to cheer the person up. When button B is pressed, it notifies authorities of the location and that this person is in trouble and needs urgent attention.

microbit wellbeing watch


The Micro:bit and Boson Kit allow students to work through the design process to prototype and solve real-life problems. These resources give students the creative freedom to explore and generate ideas through hands-on learning experiences. How are you using these tools in your classroom?

Featured Product:

Boson Start Kit for Micro:Bit & MicroBit


How do you use Micro:bit in your classroom? We would love to hear from you!

About the author

Eleni Kyritsis is an award winning Year 3 teacher and Leader of Curriculum and innovation from Melbourne, Australia. Eleni facilitates professional learning workshops around the world that focus on unleashing creativity and curiosity in classrooms. You can contact her at elenikyritis.com and @misskyritsis

Shop MTA>

Posted on

Dash And Dot In The Classroom

Dash story telling activity with girl on iPad for the classroom

Dash and Dot robots are a fantastic resource to introduce students to the fundamentals of coding. These interactive robots have the ability to manoeuvre around the floor in all directions, sense objects, flash LED lights and record and playback audio. This functionality allows Dash and Dot to avoid obstacles, sing, dance and respond to voice commands.

Connecting via bluetooth to a mobile device, there are a variety of apps that integrate with Dash and Dot. Each of these apps not only develops students’ programming skills but also key 21st century skills such as creativity, problem solving and critical thinking.

Wonder Workshop, the creators of Dash and Dot, have developed their own range of apps that support and guide students’ learning.

Go App

Preview of the Go application main screen

The Go app allows students to manually control Dash and Dot, similarly to a remote control. This is a great introduction to the robot which allows students to become familiar with its manoeuvrability. Within the Go app, students can control the speed and light display and change the direction that Dash is facing. Sounds can be added, and up to ten voice recordings can be stored for playback.

Wonder App

Preview of the Wonder application main screen

The Wonder app provides students with a range of challenges that develop their ability to program Dash and Dot. Students can travel through a variety of levelled quests, including the African Grasslands, Arctic Wilderness and Outer Space. Once students complete these challenges, they can begin creating their own worlds.

Blockly App

Preview of the Blockley application coding screen

The Blockly app provides students with challenges to develop their understanding of block coding. They are introduced to conditional statements, loops and sensors. Students can program Dash and Dot to manoeuvre by responding to button inputs and voice commands.

Path App

Preview of the Path application main screen

The Path app, as it suggests, allows students to program Dash to follow a set path. Students can complete a range of set challenges and then create their own.


Six Ways to Implement Dash and Dot in the Classroom

    • Location and coordinates
    • Measurement
    • Number facts game
    • Storytelling
    • Sounds/ letter recognition
    • Excursion reflection


Location and Coordinates

Location and coordinates grid with letters and coloured dots on floor

Dash can be used in Mathematics to support students’ learning about location and coordinates.


Dash coordinates floor activity with letters and numbers of card

    • Teachers create a coordinate grid on the floor using masking tape or chalk.
    • Students program Dash to move to specific locations on the grid.
    • Students can program Dash to speak the coordinate when it arrives there.


Measurement

Dash measurement activity with route drawn on paper and path directed by iPas

Students need to provide Dash with specific distances to move forwards, backwards, left, or right to manoeuvre him around the floor.

    • Students draw a maze on butchers paper.
    • Alternatively, students can use on-hand materials in the classroom such as blocks, straws, string, books etc to create a maze.
    • Students program Dash by calculating the distance and angle of each of Dash’s movements to avoid obstacles and successfully complete the maze.


Number Facts Game

Dash number facts activity on square grid on floor

    • Students create a grid on the floor with numbers in each square that represent the answers to number facts.
    • Using Dash and Dot, students program Dot to say different number facts.
    • When Dot says a number fact, students program Dash to move to the correct answer on the grid.

Alternative number facts game:

    • Have two students or groups working on the grid at the same time.
    • Groups take it in turns rolling two ten-sided dice. (You can always add or remove dice depending on student abilities.)
    • Students add the numbers together then program Dash to move to the correct answer.
    • Once they get to the correct number they place a kinder square over it to claim it.
    • The group with the most coloured squares wins. If the answer is already covered, the group misses their turn.


Storytelling:

Dash story telling activity with girl on iPad

    • Students recreate stories they have read by programming Dash to move through the story.
    • At each major point in the story, students can record their own voice to give important information.
    • Example: The Three Little Pigs. Dash plays the character of the Wolf. Students create the scene and program Dash to move around making huffing and puffing noises before he blows the house down. Dot can be used as one of the Three Little Pigs stuck in a house, who can also retell parts of the story.


Sound and Letter Recognition:

Dash sound and letter recognition activity on floor

    • Students or teachers write letters or sounds on kinder squares.
    • Students then scatter the kinder squares around the floor.
    • The teacher says a letter or sound.
    • Students program Dash to move to the letter or sound that they hear.

Extension activity:

    • The teacher says a word, for example, ‘mat’.
    • Students program Dash to manoeuvre to all three letters.


Excursion Reflection

Dash excursion activity facing front

    • Example: As part of a unit of inquiry, Year 1 students explored their local shopping strip.
    • On returning to school, the students recreated the shopping strip out of cardboard boxes.
    • The students program Dash using directional movement to measure distances to manoeuvre around the shopping strip.
  •   Dash story telling activity with girl on iPad for the classroom

Featured Product: Dash & Dot Educational Robots Pack


How are you using Dash & Dot in Your classroom? We would love to hear from you!

About the Author

Eleni Kyritsis is an award winning teacher from Melbourne. She is the Leader of Curriculum and Innovation at Strathcona Baptist Girls Grammar. Eleni facilitates professional learning workshops around the world that focus on unleashing creativity and curiosity in classrooms. You can contact her at elenikyritis.com and @misskyritsis

 > Shop MTA