Posted on

Using Sphero Specdrums In The Classroom

Specdrum ring and Boomwhackers with tablet

Since the development of Sphero 2.0 and more recently SPRK+ and BOLT, Spheros have become one of the most popular tools in schools all around the world to teach students the fundamentals of coding and computational thinking. As these technologies continue to iterate and improve, so do the opportunities to empower our students’ learning experiences with creative lesson design.

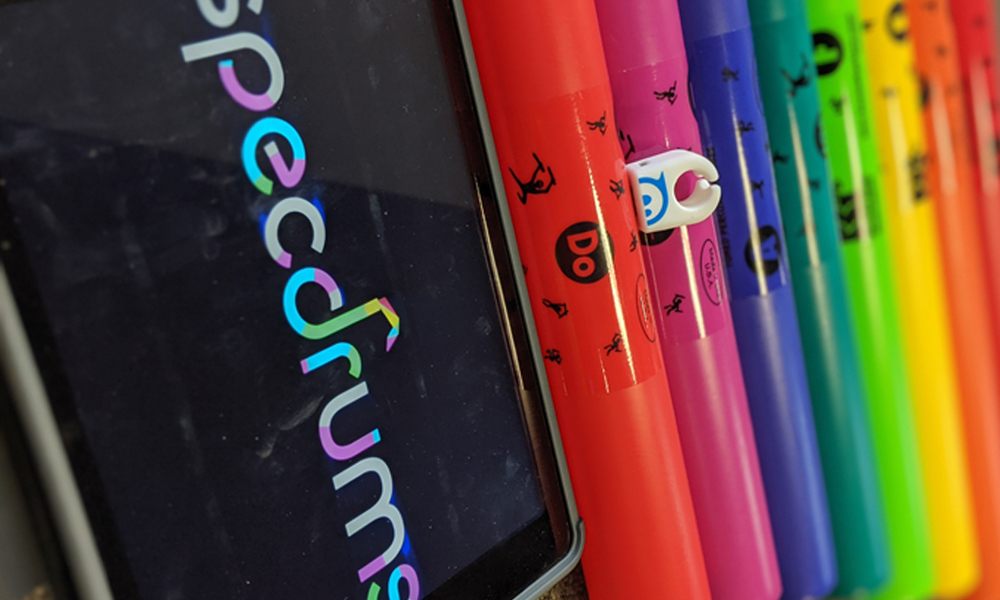
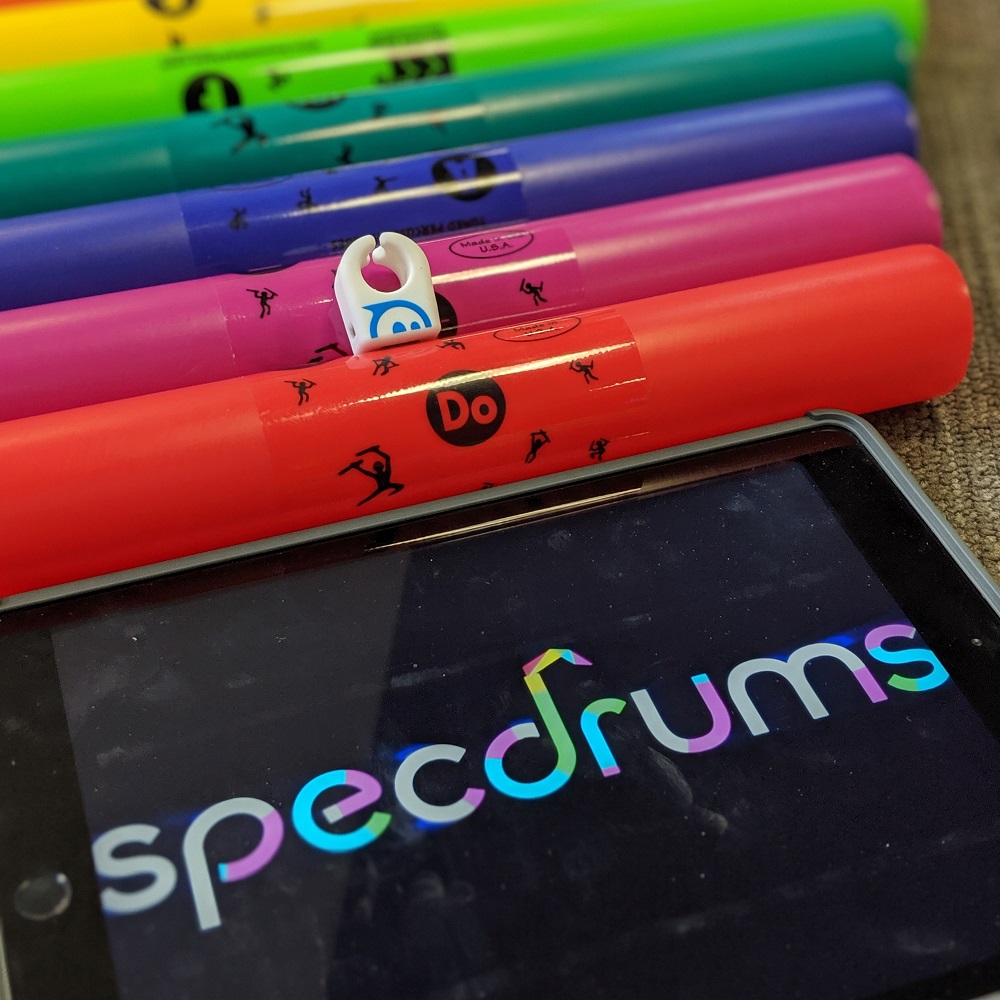
Sphero has released a new product in Specdrums. The Specdrums are rings that connect via Bluetooth to the Specdrums MIX or EDU apps, to create and play music, sounds or recorded audio when the rings touch specific colours. The great thing with Specdrums is that the rings can pick up on colours on any material, plastic, paper and even the paint on walls, making their use very versatile in the classroom.

The two apps you can use with Specdrums are;

Specdrums EDU App

EDU Logo

The Specdrums EDU app connects via Bluetooth to the Specdrums rings. It allows students to use the pre-programmed sound packs which include instruments, synths, strings, animals and sound effects. Students have the ability to create and record their own sounds. Students then link their sounds to specific colours, and when the Specdrums rings touch that colour the associated sound will play. When students have finalised their Specdrums colour codes they can be shared with others via the apps QR creator feature.

EDU App shown on phone screen

Specdrums MIX App

Mix App Logo

The Specdrums MIX app uses the Specdrums mat, which comes together with the Specdrums rings when purchased. It allows students to become their own DJ by exploring and creating their own musical remixes. Students have the ability to record their own voice and sounds that can then be played back when the ring touches the specific colours of the mat.

Sphero Specdrums was originally designed with the intention to create and produce music. Along with its use in the music classroom, Specdrums can be integrated and linked to other curriculum areas with creative lesson design. Here are some of my favourite integrated Specdrums lesson ideas;


Music
Students can explore and remix their own music by changing the colours to respond to notes and music scales in both the Specdrums EDU and the MIX apps. Within the EDU app students can click and select different instruments to play including the piano and stringed instruments, linking the notes to various colours which can be customised accordingly.

Boomwhackers Lesson:
Boomwhackers are eight polyethylene coloured percussion tubes perfectly tuned to the C major scale. As students learn about the specific sounds each note makes they can associate these with the various colours of the Boomwhackers. Using the Specdrums ring, students can then replicate these colours with the same scale.

ART
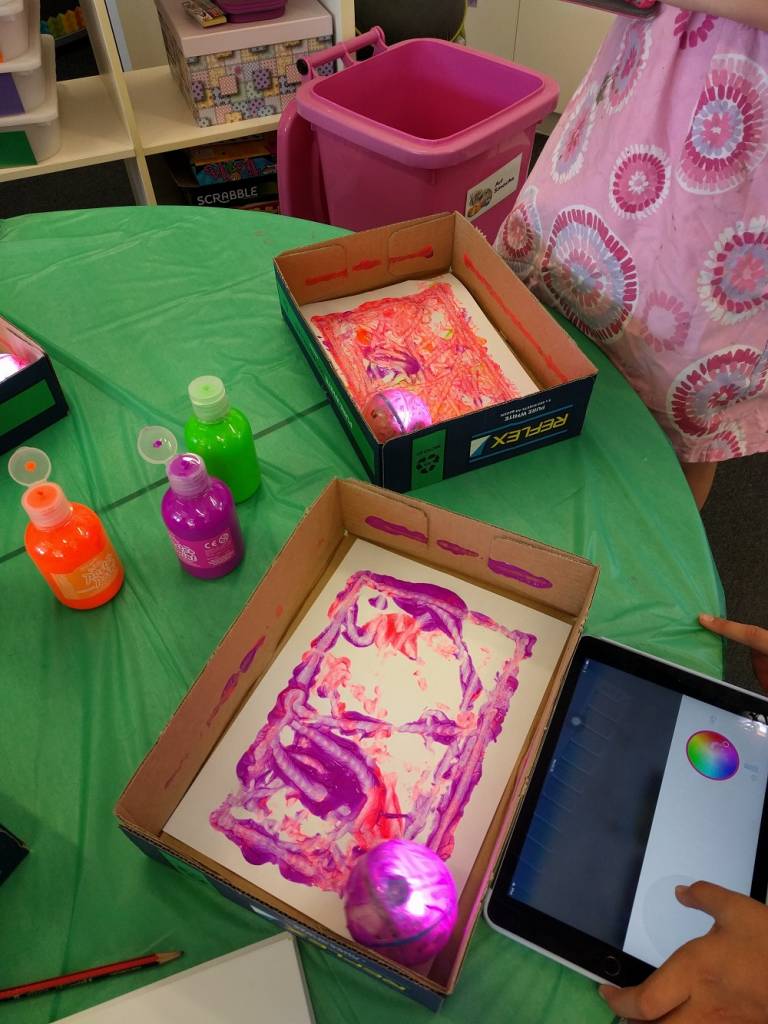
Students can bring their art masterpieces to life by creating sounds or recording explanations that are played when the Sphero Specdrums touches specific parts of their artwork.

Primary & Secondary Colours
When learning about primary and secondary colours, students can create art pieces and programme the Specdrums ring to pick up on colours within their art piece to explain their learning. For example, when the Sphero Specdrums touches a particular colour students can record themselves explaining what happens when that colour is mixed with another.

Specdrum Ring on coloured dot background

Feelings/ Emotions
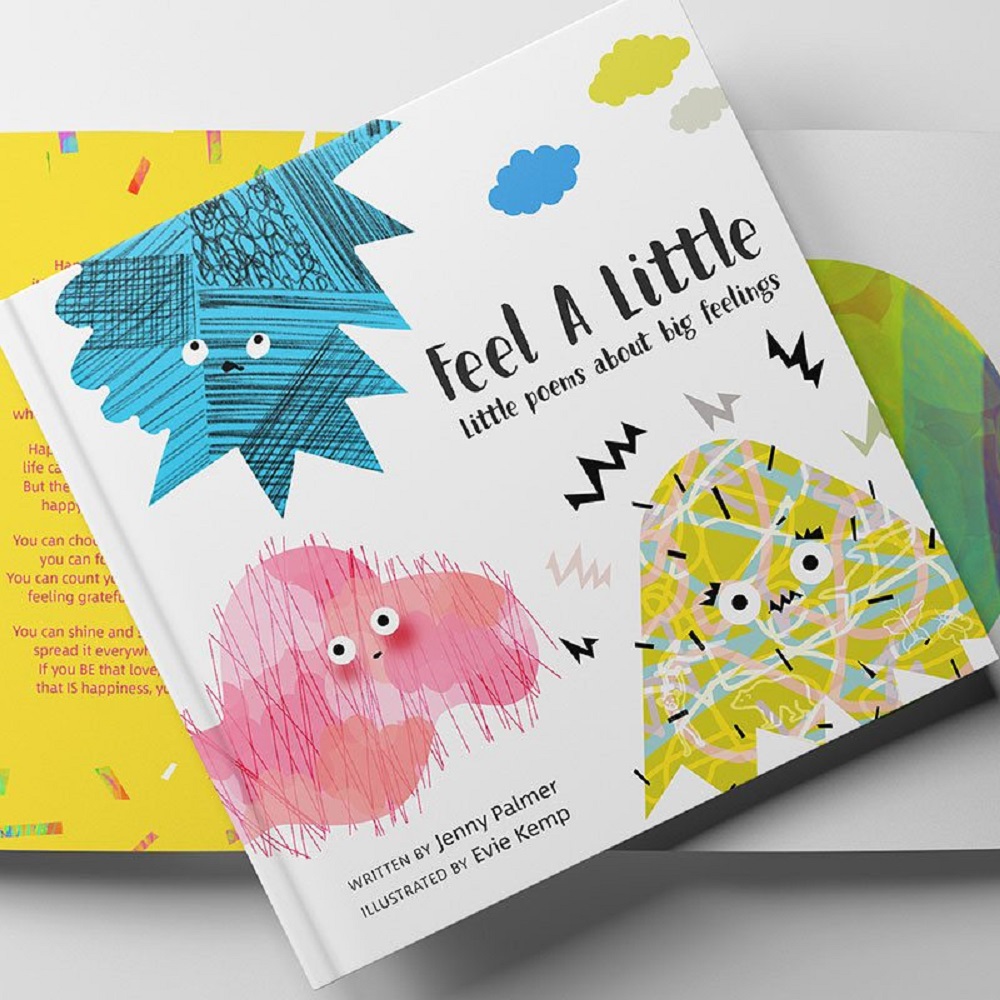
Using a provocation such as the movie ‘Inside Out’ or the picture book ‘Feel A Little: Little Poems About Big Feelings’ by Jenny Palmer, students can learn about the various emotions we experience through coloured characters. Using the Sphero Specdrums, students can explain how they feel by touching the various colours with the Sphero Specdrums to explain their feelings. Students can create a remix of sounds and have other students try to guess what emotion they are trying to portray through the use of colour and sound.

Feel A Little Little Poems About Big Feelings by Jenny Palmer

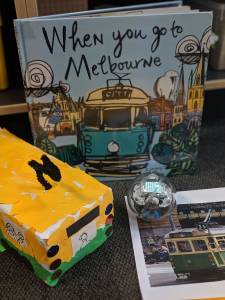
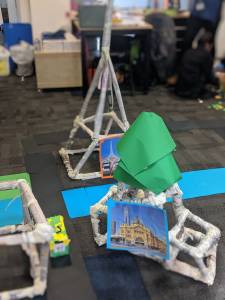
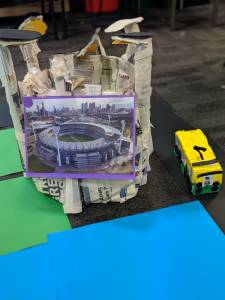
Unit of Inquiry – Melbourne
With creative lesson design there are many ways to integrate the Sphero Specdrums into your units of work.

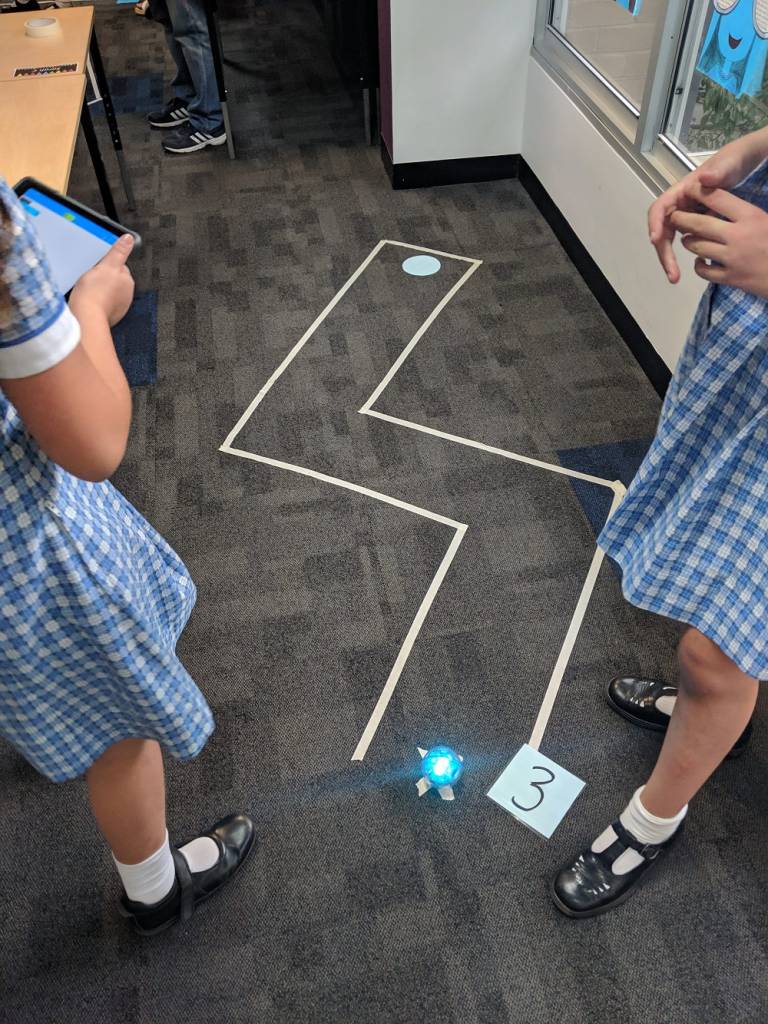
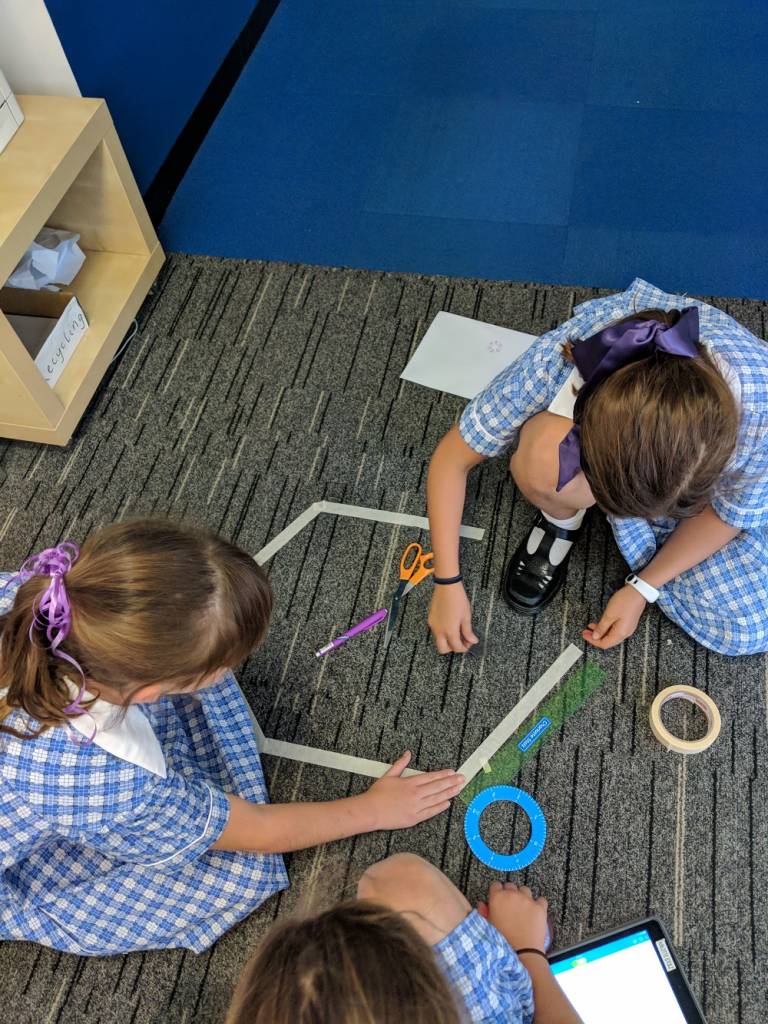
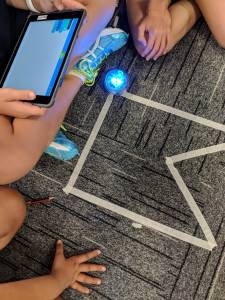
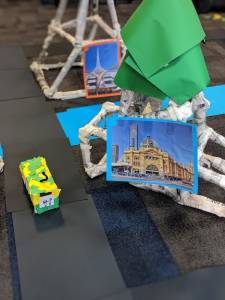
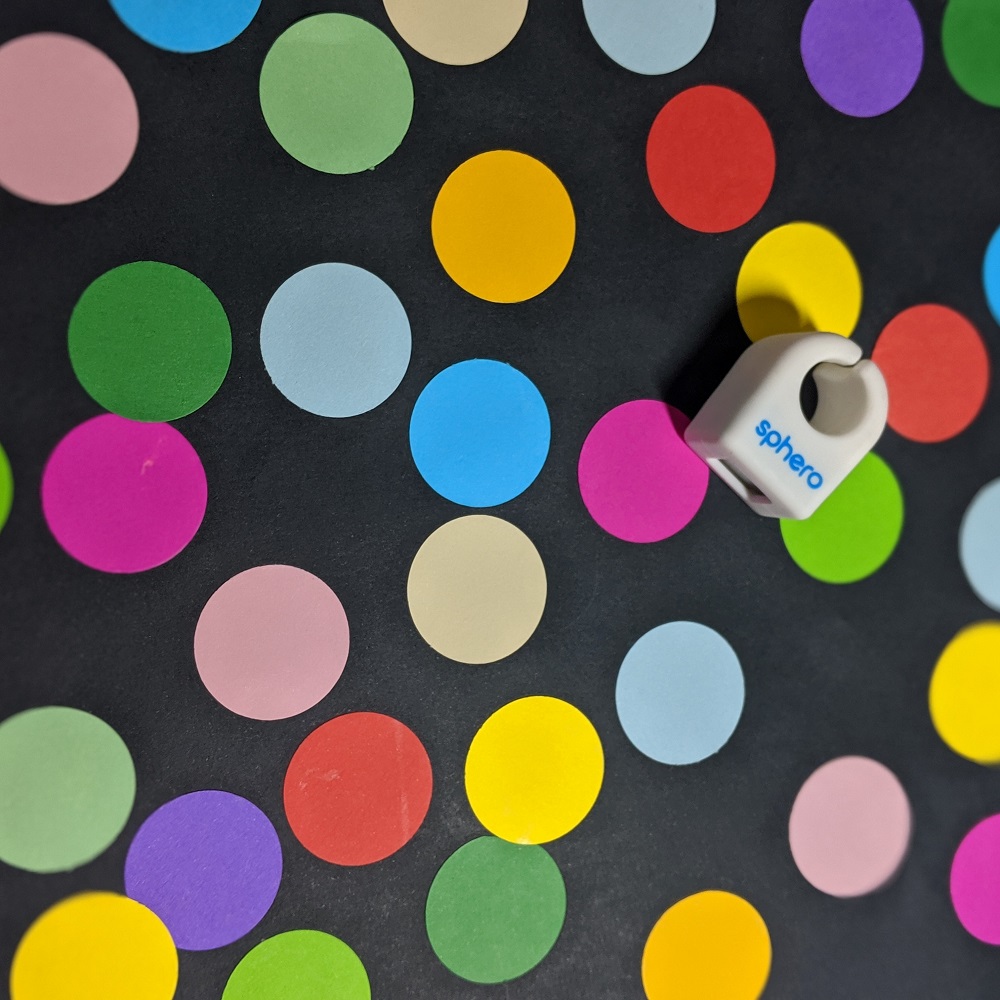
Connecting to our Year 3 unit looking at the History of Melbourne, students used the Sphero Specdrums together with a Sphero Bolt to create a model of the city of Melbourne. Students researched information about the unique buildings in Melbourne and then used coloured dots to create an interactive model where others could listen to their researched explanation. (Read previous post to read about how the Sphero Bolt was used to move the trams through the city)

Sphero bolt activity on classroom floor featuring paper contruction and melbourne pictures and tablet

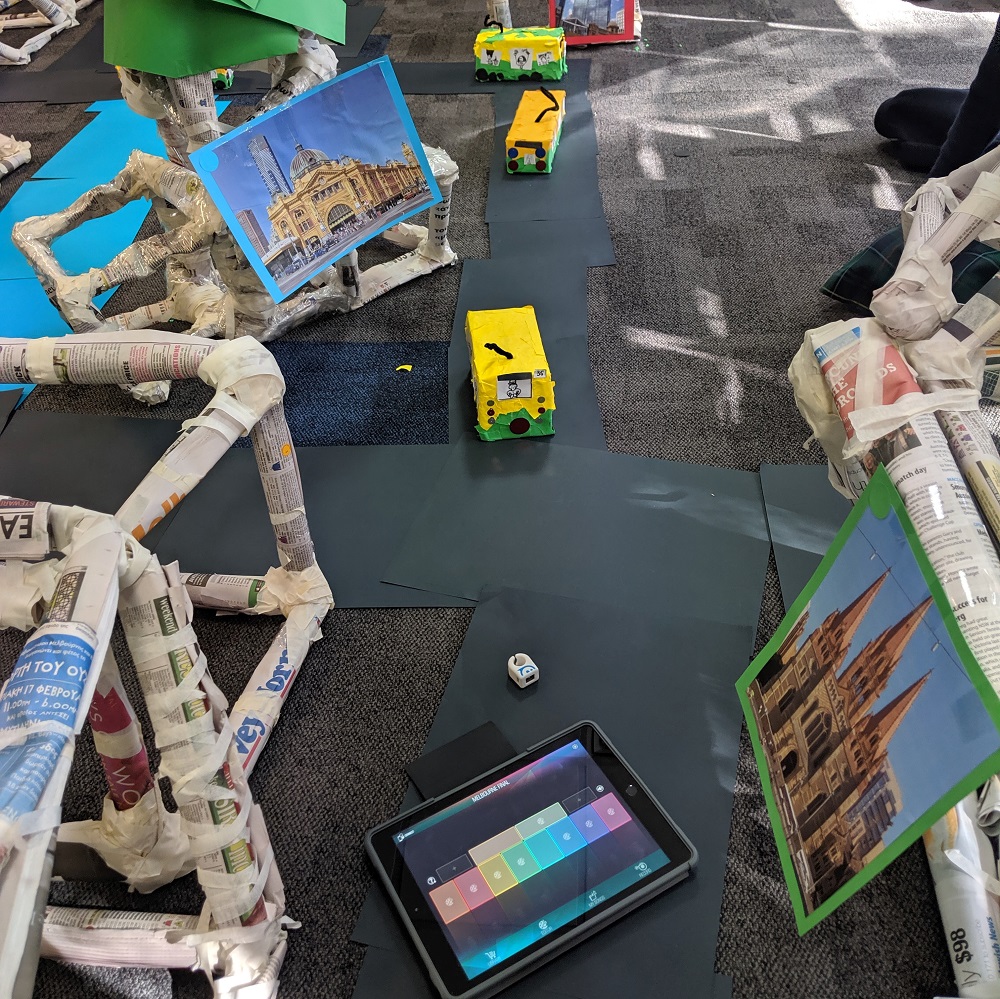
Interactive Posters:
Students create posters or brochures all the time to showcase their learning on a range of topics. Using the Sphero Specdrums, students can enhance their completed product by recording themselves read and explain each key informative aspect of their work for others to listen and learn from. Here are two examples of interactive posters;

Sphero interactive body organs posterSphero interactive poster with tablet and specdrum ring

There are so many ways to use the Sphero Specdrums in the classroom. This new technology has only been available for a very short period of time and is continually being developed and improved to transform teaching and learning in our classrooms.

How have you used the Specdrums in your classroom? We’d love to hear from you!

About the author

Eleni Kyritsis is an award-winning Year 3 teacher and Leader of Curriculum and innovation from Melbourne, Australia. Eleni facilitates professional learning workshops around the world that focus on unleashing creativity and curiosity in classrooms. You can contact her at elenikyritis.com and @misskyritsis


Shop MTA>


Blog Home>

Posted on

Exploring Screen-Free Robotics With KUBO

Kubo Robotics Birds eye view on carpet

Finding the right Digital Technologies resources for your classroom can be tricky, especially when there are so many to choose from. This blog post is going to put a special spotlight on one resource that may help to support your curriculum and engage your young learners. Let me help you take the guesswork out of selecting a robotic resource to support your early years classroom!

Firstly, let’s think about the curriculum. The Australian Curriculum Achievement Standard for Digital Technologies in the Foundation-Year 2 band  states, ‘Students design solutions to simple problems using a sequence of steps and decisions.’ Digging deeper, the Processes and Production Skills Content Descriptors encourage students to ‘Follow, describe and represent a sequence of steps and decisions (algorithms) needed to solve simple problems (ACTDIP004)’.

Directional sequencing is an important step towards more abstract coding and programming that develops in the higher bands of the Digital Technologies curriculum. The concept of directional sequencing can quite easily be coupled with the Mathematics discipline and the Numeracy General Capabilities. Finding meaningful ways to integrate approaches to learning is a key indicator of working smarter, not harder. But how can we make this meaningful and relevant in an everyday classroom?

Introducing Kubo!

Kubo Robotics Kit on Floor Birds Eye View


Kubo is not only a fantastic support for directional sequencing, but it can also be used to extend basic sequencing skills to include iteration. Plus, he’s super cute. Kubo uses unique technology, puzzle-like TagTiles® and colour activity maps to provide playful access to the Digital Technologies curriculum and engaging activities for students.

In my specialist Digital Technologies lessons, I use a range of digital and unplugged resources to approach the concept of sequencing. Providing a range of activities builds comfortability in the discrete skills and capabilities we intend to pass on to students. Kubo is quickly becoming a crowd-favourite activity!

In particular, the ability to record and play back sequences of code has maintained high engagement in our lessons. The activity shown below illustrates a sample line of code that has been created and recorded by the robot. It’s as simple as building the line of code, placing the ‘record’ TagTiles® at the beginning and end and allowing Kubo to roll over the top to memorise the code. Then, simply move your Kubo onto the mat and discover the successes of the sequence. This activity has flexible differentiation, where students can begin with simple lines of code and then continue to extend as their skillset increases to lengthen the code or to include iterations.


Kubo Robotics Tagtiles birds eye view


A new rotational activity that I’ve been incorporating with my Year 2 classes is called ‘Kubo Challenges’. This includes students using challenge task cards to sequence their Kubo robots to ‘collect’ various items on the town map or reach various alpha-numeric grid references. Students use their iPads and digital portfolios to take video evidence of them completing each challenge task card. This is increasing student ICT General Capabilities and providing an easy way for myself to flick through the various work samples of a large number of students within a cohort. Additionally, publishing this evidence to a digital portfolio provides students with a platform to reflect and build on previous learning experiences.

Incorporating the alpha-numeric grid referencing is also a great way to add value to the lesson by touching on the Numeracy General Capability. Students can refine their understanding of location and transformation and activate prior knowledge of concepts within the Mathematics curriculum. Click here to download a free copy of the challenge cards I use.


Kubo Challenge Birds Eye ViewKubo Challenge -side on view


I like to partner students up for these Kubo Challenges to encourage teamwork, peer support and resilience. This is an enjoyable rotation for the students to participate in and, better yet, it’s super simple and resourceful to set up each lesson. After investing in a few ‘training lessons’ for the students to understand the procedures, techniques and expected behaviours, this rotational activity now simply runs itself.

Inside the Kubo product box you will receive a range of TagTiles®, Micro-USB charging cord, easy-to-store coloured activity map and the Kubo robotic device. The Micro-USB attachment makes storage while charging very simple and compact. Kubo also have a YouTube channel  with plenty of tutorials for setting up, implementing and extending on coding concepts.


Kubo Robotics inside box content


Robotics resources may be difficult for schools to fund and in any sense, the robotics need to be respected by all users. A few rules I have my students practise when using the Kubo are:

    • Hold the Kubo with two hands (one on top, one underneath).
    • Walk, don’t run! You might knock over, drop or step on a robot.
    • Do not push and pull the Kubo like a toy car.
    • Always count and place the TagTiles® back in the container neatly.
    • Sharing is caring.
    • Always charge the robot when finished.

Having rules in place for the use of robotics in the classroom will also boost student ownership of the learning experience. Students will develop a respect and appreciation for the resources they are accessing and will show a higher level of focus on the activity in front of them.

Selecting the right robotic device for your classroom can be overwhelming. I recommend checking out the Kubo information and videos available on the MTA website  if you’re interested in giving Kubo a go! Finding resources that support meaningful engagement within the field of Digital Technologies is key for the effective implementation of the curriculum. Find what works for your classroom and I challenge you to find further cross-curricular links you can make with the technology you have. I’m confident you’ll find the best way that works for you, allowing you to share the passion you have for your lessons with your students.

Featured Product

Kubo Coding Core Kit


About the Author

Taylor is a Specialist Digital Technologies Teacher in a primary school setting. In her five years of teaching, she has found a passion for integrating a range of technologies into her classroom and strives to share these experiences with those around her. Follow Taylor along in her teaching journey on Instagram @taylorteachestech


Blog Home>

Shop MTA>

Posted on

Introduction to the Bee-Bot and Blue-Bot in the Classroom

Beebot Bluebot on a Colourful Directional Robotics Mat

I have been using Bee-Bots and Blue-Bots in my classroom for several years to introduce junior primary students to computational thinking and coding. I love how the versatility of these amazing robots enables me to design learning experiences that focus on the digital technologies curriculum and also integrate literacy and mathematical concepts.

I am often asked what the difference is between the Bee-Bot and the Blue-Bot and which robot would be more suitable to purchase. Yes, they are similar, but there are some differences that could help determine which robot is more suitable for your school. Whether you are using the Bee-Bot or the Blue-Bot, both robots support students in developing their understanding of directional language and basic coding algorithms.

Beebot and Bluebot Robots on colourful directional mat


Bee-Bot
The Bee-Bot is a yellow bee-shaped robot that can remember a sequence of up to 40 commands. Users can direct it to move forwards and backwards in 15 cm increments, and to turn 90 degrees left and right using the four directional buttons, and has go, pause and delete buttons. After each command is performed, the Bee-Bot beeps and blinks, which allows students to count its movements and follow the sequence of code they developed to ensure its accuracy. This enables students to create simple algorithms while developing their problem-solving skills in a fun learning environment.


Blue-Bot
The Blue-Bot is a clear robot, allowing students to view the hardware within. It is the same size as the Bee-Bot and has the same command buttons, but the difference is the addition of its Bluetooth capability, which allows it to connect to the Blue-Bot app. Using the app, the Blue-Bot has the added functionality to turn 45 degrees and use repeats and loops in the development of code. The Blue-Bot app also works without a Blue-Bot, making it a great resource in itself for schools that don’t have the robot.

When introducing any new technology, I am a big advocate of allowing students the opportunity to play and explore the functionality and possibilities of the device. After this exploration time, a more structured approach of creating activities to engage and challenge students can be undertaken. Here are some ideas on how to introduce the Bee-Bot or Blue-Bot to your students.


Road Maze Tile Kit
The Road Maze Tile Kit provides students with roads, buildings and park puzzle pieces they connect together to create an individual mat for their robot. A total of 27 pieces include many landmarks that can be arranged in any order so students can design their very own little city. Once assembled, students can program their Bee-Bot or Blue-Bot to manoeuvre to each landmark.

Beebot Road Maze Kit and Beebot Robot


Robotics Coding Cards
The Robotics Coding Cards pack includes 60 double-sided directional instruction cards. Each card’s instruction command corresponds with the Bee-Bot and Blue-Bot’s buttons of forwards, backwards, left and right. On the reverse of the cards are more advanced commands of repeats, loops and turning degrees. These cards are a fantastic visual that students can use individually or collaboratively in small groups to structure the sequence of commands they will use to program their robot.

When the program has been entered into the robot and is ready to begin, students can follow both the robot and the coding cards to ensure their program is correct or to find where there may be an error in their program to help them understand what changes may need to be made to achieve success.

Beebot and Bluebot with Robotics coding cards


Mats – Variety
There are a variety of mats designed for both the Bee-Bot and Blue-Bot that can link student learning across curriculum areas. The Alphabet, Australia, Money, Shapes and many more themed mats are available to support cross-curricular learning as students program their robot to manoeuvre to specific locations on the mat being used.

Example: The Alphabet Mat is a great resource as students can program their robot to manoeuvre across the mat to develop letter recognition, link sounds and create words or names.

Alphabet coding mat with Beebot and Bluebot


Pen Holders

The Pen Holder is a shell that attaches to the Bee-Bot or Blue-Bot that allows students to use the robot as a drawing tool.

Pen Holder helmets on Beebot and Bluebot sitting on white paper

This is the perfect addition to the robot as students can program the robot to draw two-dimensional shapes or to trace a route the robot has travelled, giving them immediate feedback of their program.

Pen Holder Beebot and Bluebot drawing circle on white paper

View video of Blue-Bot in action here


How have you introduced Bee-Bots or Blue-Bots into your classrooms? We’d love the hear from you!

I have previously written posts on how I integrate these robots into literacy and mathematics. Here are 10 ideas that can be used in your classroom.

Five Literacy Bee-Bot Lesson Ideas for the Classroom
https://blog.teaching.com.au/5-literacy-bee-bot-lesson-ideas-for-the-classroom


Five Mathematics Bee-Bot Lesson Ideas for the Classroom
https://blog.teaching.com.au/5-mathematics-bee-bot-lesson-ideas-for-the-classroom


About the author

Eleni Kyritsis is an award-winning Year 3 teacher and Leader of Curriculum and innovation from Melbourne, Australia. Eleni facilitates professional learning workshops around the world that focus on unleashing creativity and curiosity in classrooms. You can contact her at elenikyritis.com and @misskyritsis


Shop MTA>


Blog Home>


Posted on

Sphero Bolt And SPRK+ In The Classroom

Sphero Shape Activity birds eye view featuring Sphero Bolt & SPRK robotics and 2 students on carpet.

The way we engage our students and support their learning continues to evolve as we move further into the 21st century. There are now many technological tools, resources and applications that can enhance our students’ learning when used to redefine their learning experiences.

The Sphero robot is one such tool that has positively enhanced students’ learning. The amazingly versatile Sphero robot will engage and empower your students with hands-on learning. A tennis ball-sized robot connected via Bluetooth to a mobile device, the Sphero can be used to transform teaching and learning across various curriculum areas. In this blog post, we will look at the range of Sphero products on the market and their varying capabilities and prices.

Sphero SPRK+
The Sphero SPRK+ can roll at a speed of up to 7km/h in any direction. It can also spin, flip and change colour. Using a range of apps, students can code the Sphero to direct its movement.

Sphero Spark


Sphero BOLT
The Sphero BOLT is the latest product in the Sphero range and includes all the features of the SPRK+ along with the addition of a striking LED matrix and advanced sensors to track speed, acceleration and directions. The Sphero BOLT also features infrared communication, allowing it to “talk” to other BOLTs.

Sphero Bolt on white background


Creatively designed lessons incorporating Spheros can develop many of the skills we want for our learners. Students will be designing and creating code to direct the Sphero while collaborating, problem-solving, testing and thinking critically and creatively, all fundamental characteristics of 21st-century learners.


Lesson Ideas:

Sphero Mini Golf

Sphero golf hole with tablet and number 1

Students develop their coding skills by creating and playing a game of Sphero Mini Golf.

Materials:

    • Spheros (one per group)
    • Masking tape or chalk
    • Kinder squares and circles
    • Mini Golf template (free Sphero Mini Golf  PDF download)


  •  Sphero golf hole with 2 students and number 3

Procedure:

    • Create nine mini-golf holes around the classroom. Using masking tape, chalk or other materials, clearly mark the outline of each hole and use a kinder circle to number each hole.
    • Students code the Sphero in the Sphero Edu App to get it to make its way to the hole (coloured circle).
    • Students record how many lines of code it took for them to code the Sphero to each hole on the scoring sheet.


Angles and Shapes

Sphero Angles and Shapes birds eye view

Students apply their knowledge and understanding of shapes and angles by creating them with the Sphero.

Materials:


Sphero Angles and Shapes activity. Track on floor students holding tabletSphero Angles and Shapes activity. Track on floor.

Procedure:

    • Design a 2D shape that includes three different types of angles on planning sheet.
    • Create the shape on the classroom floor using masking tape or chalk and a protractor.
    • Code the Sphero in the Sphero Edu App to manoeuvre around their shape.


Chariots

Sphero Chariot activity. Sphero Robotic & Chariot created out of art & craft materials

Students create chariots using various art and craft materials to dress the Sphero.

Materials:

    • Sphero (one per group)
    • Various arts and craft materials

Sphero Chariot activity. Sphero Robotic & Chariot 2 created out of art & craft materialsSphero Chariot activity. Sphero Robotic & Chariot 3 created out of art & craft materials


Procedure:

    • On paper, students design a chariot for their Sphero.
    • Students create their chariot and place it on their Sphero.
    • Students code the Sphero in the Sphero EDU app to race the chariots to find a winner and to test if their creations stay assembled.


Sphero Swimming

Sphero swimming activity. Sphero robot tablet and bowl of water on table.

As the Sphero robot is waterproof, you can design lessons that incorporate water.

Materials:

    • Sphero
    • Tub of water or school swimming pool
    • Rubber bands

Sphero swimming activity. Sphero robot floating in water.

Procedure:

    • Place the Sphero in a tub of water or school swimming pool.
    • Have students predict what will happen.
    • Add a rubber band around the Sphero and have students predict what changes may take place in the water and then test again.
    • Explore what happens when you add multiple rubber bands to the outside of the Sphero.


Sphero Art

Sphero Art activity. Finished painted artwork on canvas.

Using water-based paint, the Sphero can be dipped into any colour to then create a masterpiece.

Materials:

    • Sphero
    • Water-based paint
    • Baby wipes (used for cleaning Sphero)
    • Paper
    • Walls to keep Sphero contained (I suggest using the lids of A4 or A3 paper boxes)

Sphero Art activity. Sphero robots painting canvas inside boxes. Paints and tablet on table.

Procedure:

    • Dip or cover the Sphero in paint.
    • Students code the Sphero in the Sphero EDU app or drive the Sphero over their paper to create their masterpieces.
    • Make sure you use baby wipes to clean the paint off each Sphero.


Integrated Learning

Sphero Integrated learning Activity. When you go to Melbourne book. Paper mache bus & Sphero Robot on table Sphero Integrated learning activity. Structure & bus made from newspapers. Pictures of Melbourne landmarks

With creative lesson design, there are many ways to integrate the Sphero in your units of work.

Connecting to our Year 3 unit looking at the history of Melbourne, the Sphero was used to integrate these curriculum areas;

    • History
    • Mathematics – 3D objects
    • Art – Design
    • Digital Technologies

Materials:

    • Sphero
    • Newspaper
    • Small boxes

Sphero Integrated learning activity. Structure & bus made from newspapers. Picture of stadium Sphero Integrated learning activity. Structure & bus made from newspapers. 2 Pictures of Melbourne landmarks

Procedure:

    • Students use newspaper to design and create iconic Melbourne buildings or landmarks.
    • Students use boxes to design and create a Melbourne tram.
    • Situate the buildings and landmarks around the classroom to represent the city.
    • Placing the Sphero inside the trams, students code the Sphero in the Sphero EDU app to manoeuvre to each building or landmark in the city.


Each of these activities demonstrates the versatility of using Spheros in your classroom and how they can be used creatively to support student learning. The hands-on learning experiences reinforce learned concepts while developing the key 21st-century skills of communication,  problem-solving, creativity and critical thinking. There really are limitless possibilities of how Sphero can be integrated into student learning.


Featured Products:

Sphero SPRK+

Sphero Bolt


How have you used Sphero in your classroom?


About the author

Eleni Kyritsis is an award-winning Year 3 teacher and Leader of Curriculum and innovation from Melbourne, Australia. Eleni facilitates professional learning workshops around the world that focus on unleashing creativity and curiosity in classrooms. You can contact her at elenikyritis.com and @misskyritsis


Shop MTA>


Blog Home>

Posted on

Dash And Dot In The Classroom

Dash story telling activity with girl on iPad for the classroom

Dash and Dot robots are a fantastic resource to introduce students to the fundamentals of coding. These interactive robots have the ability to manoeuvre around the floor in all directions, sense objects, flash LED lights and record and playback audio. This functionality allows Dash and Dot to avoid obstacles, sing, dance and respond to voice commands.

Connecting via bluetooth to a mobile device, there are a variety of apps that integrate with Dash and Dot. Each of these apps not only develops students’ programming skills but also key 21st century skills such as creativity, problem solving and critical thinking.

Wonder Workshop, the creators of Dash and Dot, have developed their own range of apps that support and guide students’ learning.

Go App

Preview of the Go application main screen

The Go app allows students to manually control Dash and Dot, similarly to a remote control. This is a great introduction to the robot which allows students to become familiar with its manoeuvrability. Within the Go app, students can control the speed and light display and change the direction that Dash is facing. Sounds can be added, and up to ten voice recordings can be stored for playback.

Wonder App

Preview of the Wonder application main screen

The Wonder app provides students with a range of challenges that develop their ability to program Dash and Dot. Students can travel through a variety of levelled quests, including the African Grasslands, Arctic Wilderness and Outer Space. Once students complete these challenges, they can begin creating their own worlds.

Blockly App

Preview of the Blockley application coding screen

The Blockly app provides students with challenges to develop their understanding of block coding. They are introduced to conditional statements, loops and sensors. Students can program Dash and Dot to manoeuvre by responding to button inputs and voice commands.

Path App

Preview of the Path application main screen

The Path app, as it suggests, allows students to program Dash to follow a set path. Students can complete a range of set challenges and then create their own.


Six Ways to Implement Dash and Dot in the Classroom

    • Location and coordinates
    • Measurement
    • Number facts game
    • Storytelling
    • Sounds/ letter recognition
    • Excursion reflection


Location and Coordinates

Location and coordinates grid with letters and coloured dots on floor

Dash can be used in Mathematics to support students’ learning about location and coordinates.


Dash coordinates floor activity with letters and numbers of card

    • Teachers create a coordinate grid on the floor using masking tape or chalk.
    • Students program Dash to move to specific locations on the grid.
    • Students can program Dash to speak the coordinate when it arrives there.


Measurement

Dash measurement activity with route drawn on paper and path directed by iPas

Students need to provide Dash with specific distances to move forwards, backwards, left, or right to manoeuvre him around the floor.

    • Students draw a maze on butchers paper.
    • Alternatively, students can use on-hand materials in the classroom such as blocks, straws, string, books etc to create a maze.
    • Students program Dash by calculating the distance and angle of each of Dash’s movements to avoid obstacles and successfully complete the maze.


Number Facts Game

Dash number facts activity on square grid on floor

    • Students create a grid on the floor with numbers in each square that represent the answers to number facts.
    • Using Dash and Dot, students program Dot to say different number facts.
    • When Dot says a number fact, students program Dash to move to the correct answer on the grid.

Alternative number facts game:

    • Have two students or groups working on the grid at the same time.
    • Groups take it in turns rolling two ten-sided dice. (You can always add or remove dice depending on student abilities.)
    • Students add the numbers together then program Dash to move to the correct answer.
    • Once they get to the correct number they place a kinder square over it to claim it.
    • The group with the most coloured squares wins. If the answer is already covered, the group misses their turn.


Storytelling:

Dash story telling activity with girl on iPad

    • Students recreate stories they have read by programming Dash to move through the story.
    • At each major point in the story, students can record their own voice to give important information.
    • Example: The Three Little Pigs. Dash plays the character of the Wolf. Students create the scene and program Dash to move around making huffing and puffing noises before he blows the house down. Dot can be used as one of the Three Little Pigs stuck in a house, who can also retell parts of the story.


Sound and Letter Recognition:

Dash sound and letter recognition activity on floor

    • Students or teachers write letters or sounds on kinder squares.
    • Students then scatter the kinder squares around the floor.
    • The teacher says a letter or sound.
    • Students program Dash to move to the letter or sound that they hear.

Extension activity:

    • The teacher says a word, for example, ‘mat’.
    • Students program Dash to manoeuvre to all three letters.


Excursion Reflection

Dash excursion activity facing front

    • Example: As part of a unit of inquiry, Year 1 students explored their local shopping strip.
    • On returning to school, the students recreated the shopping strip out of cardboard boxes.
    • The students program Dash using directional movement to measure distances to manoeuvre around the shopping strip.
  •   Dash story telling activity with girl on iPad for the classroom

Featured Product: Dash & Dot Educational Robots Pack


How are you using Dash & Dot in Your classroom? We would love to hear from you!

About the Author

Eleni Kyritsis is an award winning teacher from Melbourne. She is the Leader of Curriculum and Innovation at Strathcona Baptist Girls Grammar. Eleni facilitates professional learning workshops around the world that focus on unleashing creativity and curiosity in classrooms. You can contact her at elenikyritis.com and @misskyritsis

 > Shop MTA