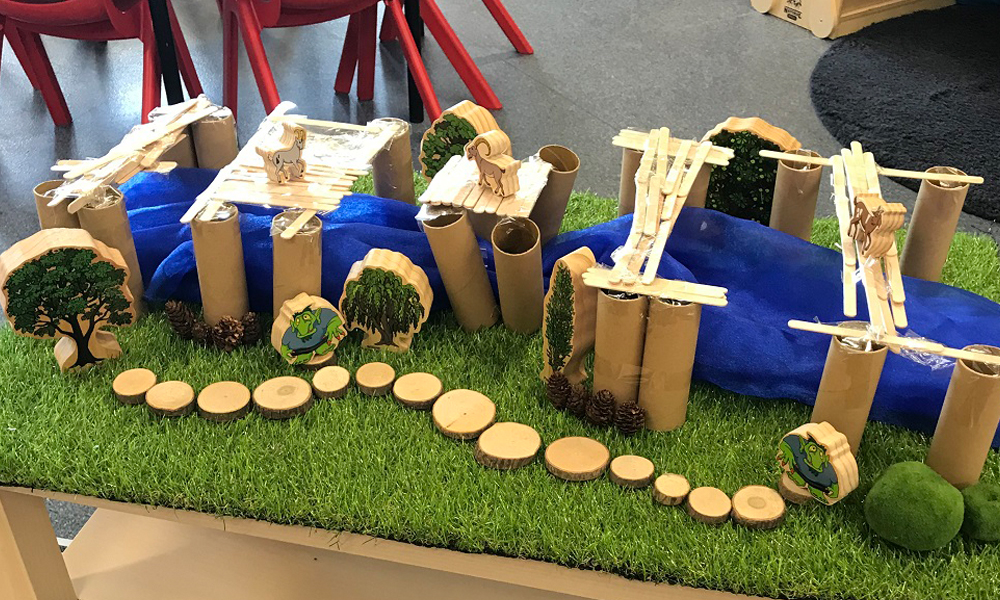
STEM! It’s a word we have all been hearing a lot about lately! At the beginning of this year, I started teaching at a new school and quickly learnt that STEM was a focus for teaching and learning. Continue reading “Early STEM Activities: Part One”
Fostering Independence
We often think of independence in young children as an end goal, something to work towards with the finish line being adulthood. What we often don’t consider, however, is that there is no magical point in time where we think, “AHA…we passed the line, independence has been achieved!” Continue reading “Fostering Independence”
10+ Maths Books For Young Learners
In my Prep classroom, one of our favourite times of the day is when we come together to enjoy a story. Some people assume that reading stories is strictly part of English lessons – this couldn’t be further from the truth! There are so many fabulous maths books out there that captivate children’s interests Continue reading “10+ Maths Books For Young Learners”
Building Resilient Kids One Classroom At A Time
In its recent review of early intervention resources for children from birth to 12 years, Australia’s National Mental Health Commission found that 83 per cent of experts agreed that ‘increasing resilience among children aged 0–12 could potentially prevent mental health issues during childhood and/or later in life’. As teachers, we know that our students’ well-being is not just related to their physical health.
Continue reading “Building Resilient Kids One Classroom At A Time”
LEGO Education® Coding Express: An Educator’s Experience
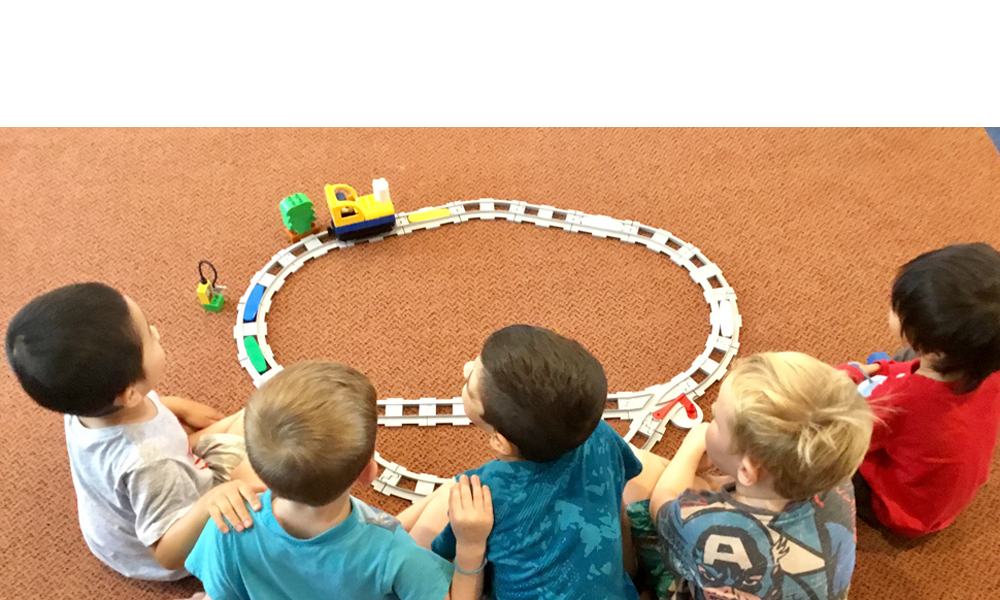
Skye Spencer, an Early Years Teacher who works at Redman House 2 Early Learning Services in Sydney talks to us about her experience of using LEGO® Education Coding Express in the classroom. Continue reading “LEGO Education® Coding Express: An Educator’s Experience”
Teaching With Teachables
You know those resources that you use every day in your classroom that make your life easier? That’s how I feel about Teachables products. I discovered these resources when I started teaching Prep last year and they are, without a doubt, the teaching tools that I use most at school.
Writing is a huge focus in my classroom, and I spend a lot of time each day engaging my students in writing through different ways and with different resources. In this blog post, I will go through how I use products from the Teachables range in my classroom as part of my writing curriculum.
Whole Group Teaching and Learning
In Prep, there are a lot of times during the day when we come together and engage in whole-group teaching and learning. Whether it be teaching proper letter formation or modelling writing sentences, I am constantly using my Teachables Magnetic Lined Write and Wipe Sheet. At my school, we teach students how to write on lines from the first term of school, so having this Lined Whiteboard near our group-time area is really handy as I am constantly using it to model writing.
Letter Formation
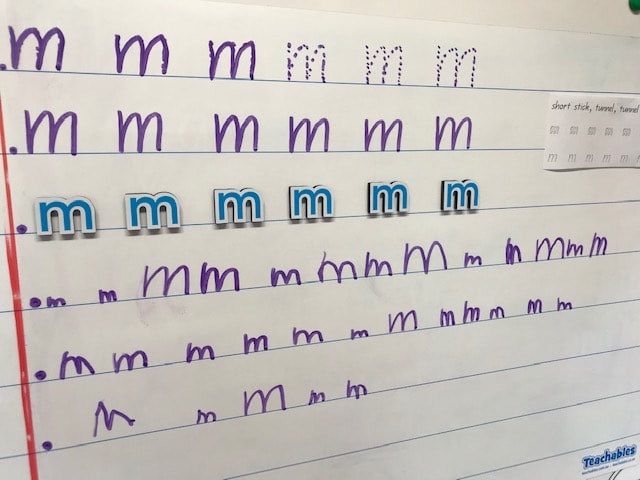
We use our Lined Write and Wipe Sheet a lot for learning about correct letter formation. When introducing a letter to my students, I will model how to correctly form that letter before students go to the tables and engage in activities to reinforce this learning. As a transition to the tables, students will come and have a go at writing this letter – my students just LOVE writing on the “teacher whiteboard”!
Sentence Work
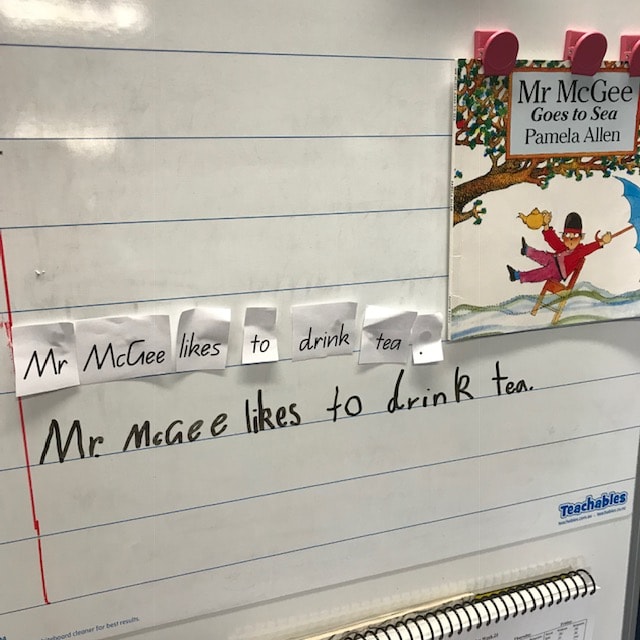
In my classroom, we also use our Lined Whiteboard a lot for sentence work. In this routine, the focus is on developing students’ confidence with writing sentences, editing sentences through proofreading, using correct punctuation, using finger spaces between each word and forming letters properly. Usually, I will have a sentence typed up and we will read the sentence together before I cut and jumble it up (for a ‘transformation’). As a class, we put the sentence back together and then write the sentence underneath. Doing this together as a class means that I can model the expectations before students complete this task independently at the tables.
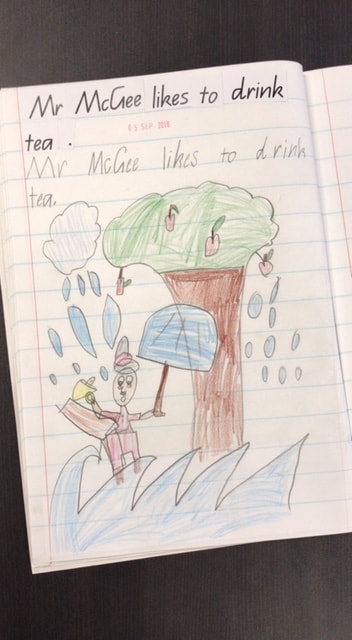
This particular sentence (pictured) was also linked to our English rhyme unit when we were exploring rhyming books and rhyming sentences.
Learning with Magnetic Letters
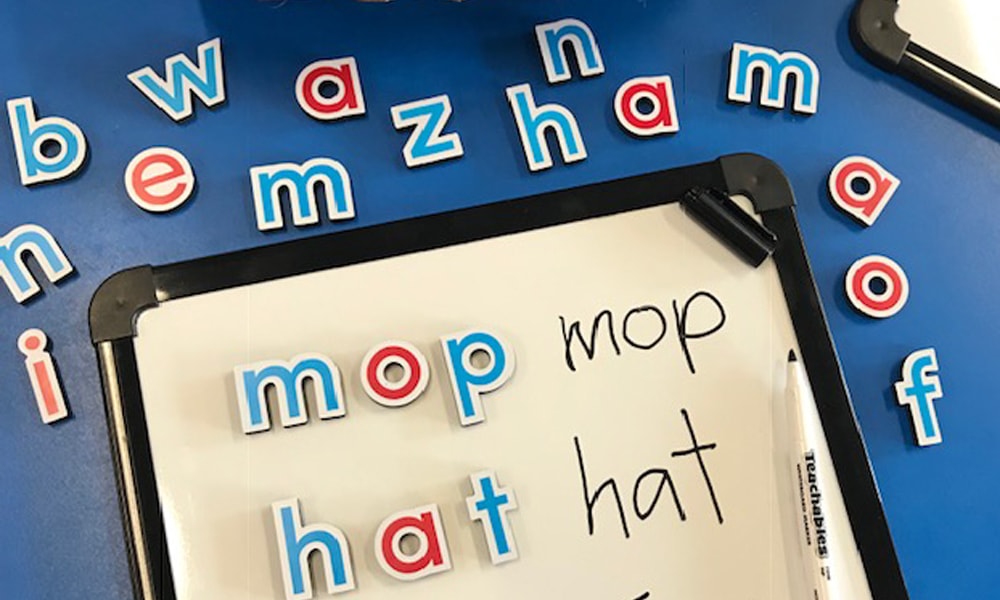
Magnetic letters are a fun and hands-on way for children to meaningfully engage with literacy. Magnetic letters are the perfect tool for developing letter recognition and letter formation as well as word building and sentence building. Over the course of my teaching career, I have used various types of magnetic letters in my classroom but the thing I love about the Teachables Magnetic Letters is that the letters are in print-sized font, there is a minimum of eight of each letter, which means students are always able to find the letters they need, and the vowels and consonants are colour-coded.
Word Building
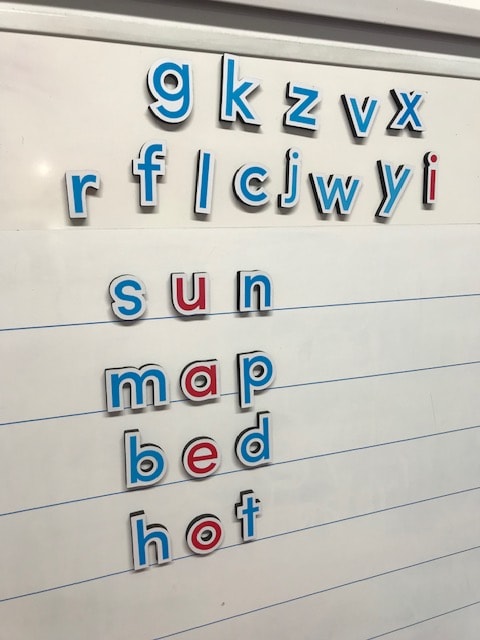
One of the ways we use our Magnetic Letters is for word building. At this time of year, most of the word building work we are doing is around CVC (consonant-vowel-consonant) words. I will say to my students, “Let’s make a blue-red-blue word” so they can visually see that these words are made up of three letters – two consonants and one vowel.
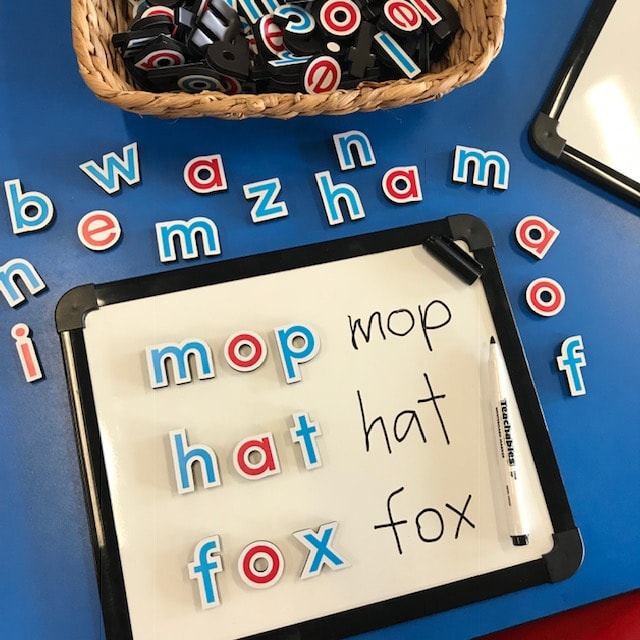
Sometimes, we do word building as a whole class where we will choose a word, stretch it out so we can hear all of the sounds and then record the sounds through selecting magnetic letters. Other times, I will implement word building as a small group activity where students will build words with the magnetic letters and then write them on their magnetic whiteboards also.
Practising our Names
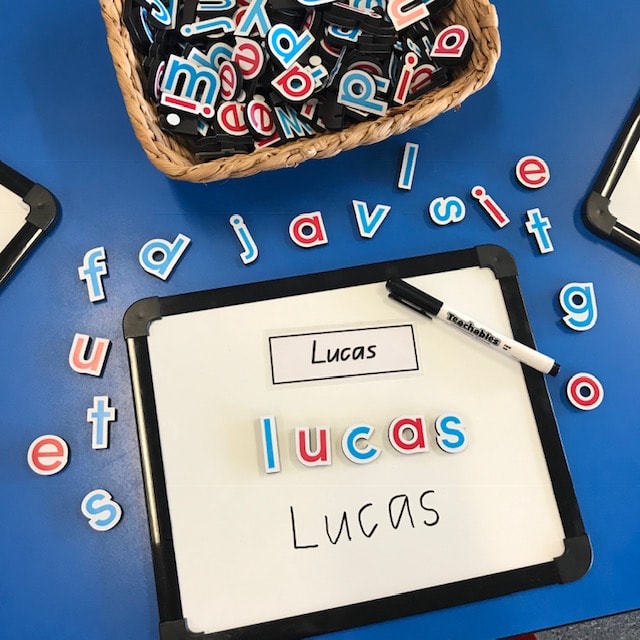
In the first term of Prep, learning to recognise, write and spell our names properly is a big focus. There are various ways I get my students to practise writing and making their names – sometimes we do artworks, sometimes we trace and other times we use hands-on materials to build and spell our names. A small group activity I like to set up during literacy rotations involves students making their names using the magnetic letters and then writing their name underneath. It’s a great way to practise!
Developing Letter and Number Formation
In Prep, we focus a lot on learning proper letter and number formation so that students can build confidence in their writing. There are several ways I encourage letter and number formation in my classroom and I love using different resources to build these skills such as sensory writing in rainbow rice or sand, on our Interactive Smartboard and using our Teachables Alphabet Whiteboard and Teachables Number Whiteboard.
Alphabet Whiteboard
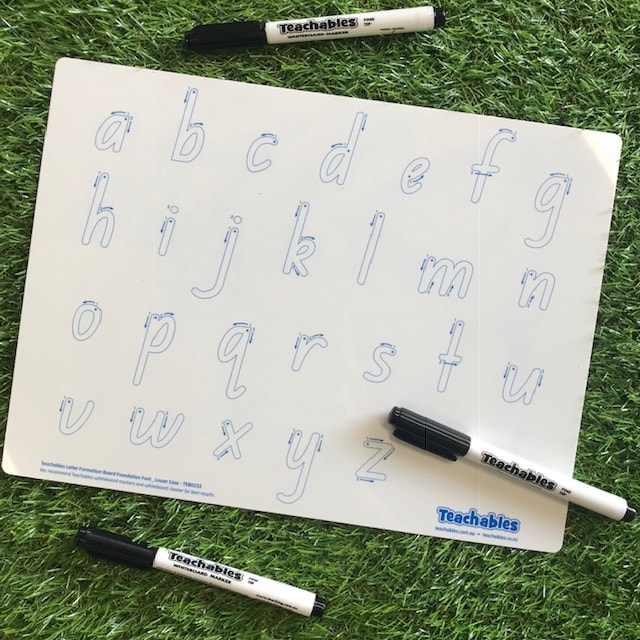
The Teachables Alphabet Whiteboard comes in Foundation font, which is perfect for my Prep students as it is almost identical to the Queensland Beginner’s Font that we use. The whiteboards are double-sided with uppercase letters on one side and lowercase letters on the other. Usually, we will trace the lowercase side first together as a class and then turn over to the uppercase as part of our writing warm up.
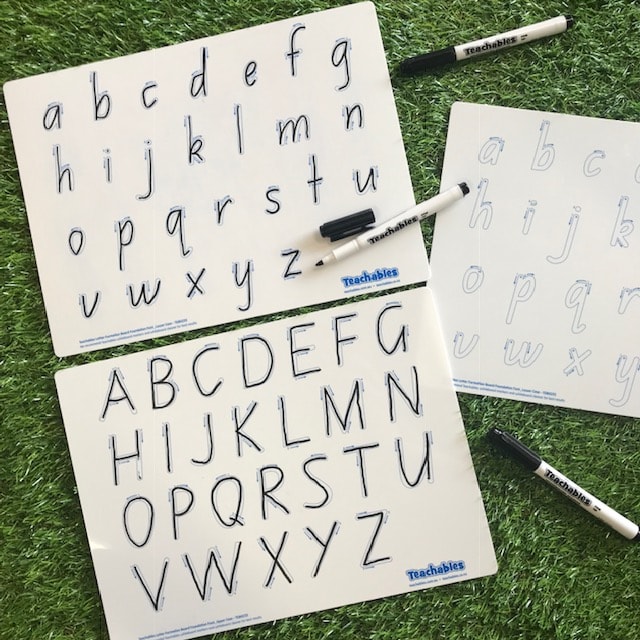
The best part about these whiteboards is that they feature directional, numbered arrows to showcase the correct way to form each letter. I have seen a huge improvement in my students’ handwriting as they transfer their knowledge and practice from using the whiteboards into their independent writing.
Number Whiteboard
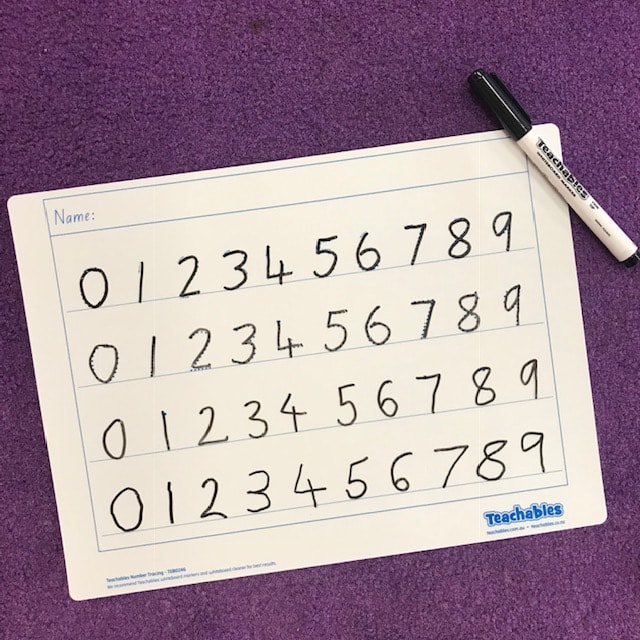
Similar to the Teachables Alphabet Whiteboard, the Teachables Number Whiteboard enables students to gain confidence with forming numerals correctly. There are four lines on the whiteboard, and as each line progresses, students must showcase increasing independence with forming numerals. I love this ‘gradual release’ system as it gives students confidence and guidance. The easy write on, wipe off surface of these whiteboards also makes it easy for students to correct mistakes and edit their work.
Encouraging Writing
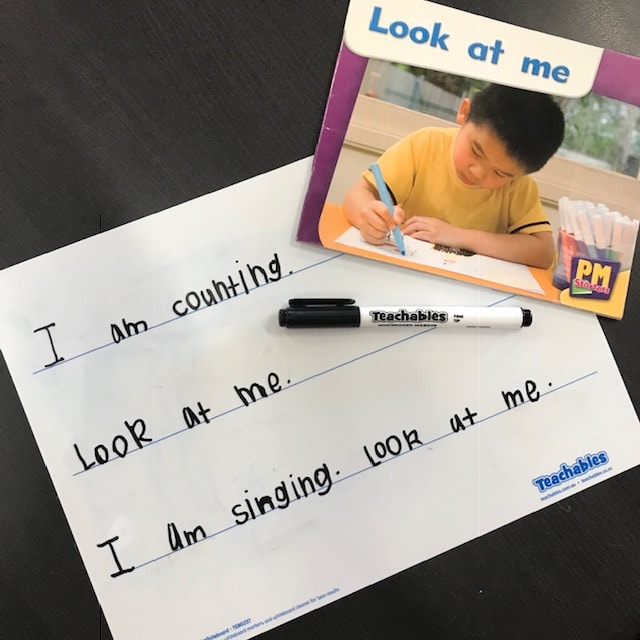
Out of all of the Teachables products, these Lined Whiteboards are the resource I use most with my students, as it is extremely versatile. The lines on these whiteboards are spaced at 5.7cm, which makes them the perfect size for students of all ages and abilities to practise their writing, no matter how big or small their letters and words are.
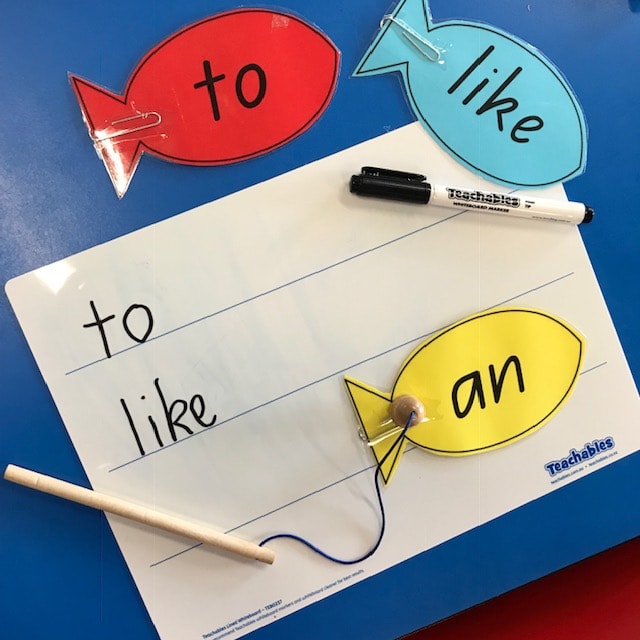
This is especially useful for Prep students who are just beginning to learn how to write on lines and are still experimenting with the sizing of letters. Some of the ways we use our Lined Whiteboards include; practising letter formation, playing sight word games, writing out our favourite page from the book we read during guided reading and independent sentence writing.
Picture Story Whiteboards
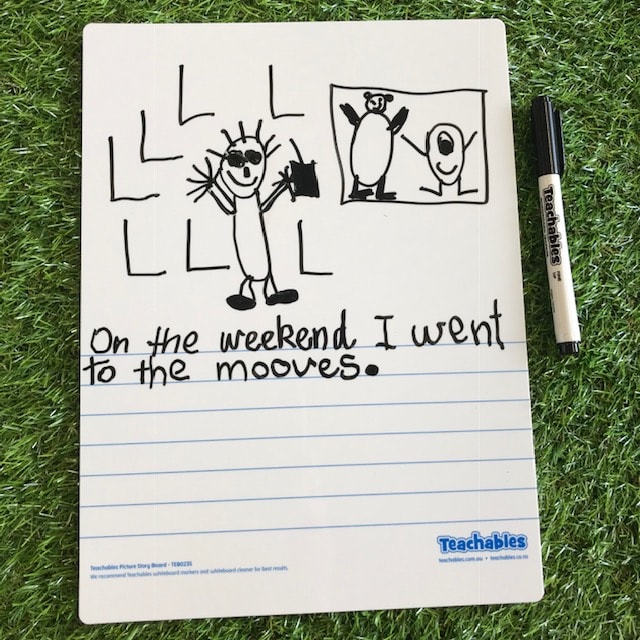
My students love using these Picture Story Whiteboards because there is room to illustrate their piece of writing, and what child doesn’t love drawing? These whiteboards are ideal for allowing students to convey their ideas through text and illustrations. We use these Picture Story Whiteboards to write and draw sentences, write and draw about what we did on the weekend, as well as write more in-depth stories. When writing on these whiteboards, (as well as with all of the other Teachables resources) we use the Teachables Thin Lined Markers as they are the perfect width and students can write on the lines successfully.
Featured Products:
Teachables Magnetic Whiteboard – 30cm x 40cm
Teachables Lined Whiteboards – Pack of 30
Teachables Magnetic Lined Write & Wipe Sheet
Thinline Whiteboard Markers Black – Pack of 12
Teachables Picture Story Whiteboard – Pack of 30
Teachables Alphabet Whiteboard Foundation Font – Pack 30
Teachables Whiteboard Number Tracing – Pack of 30
I’ve shown you some of my favourite Teachables products. Which one of them would you like to use in your classroom? We would love to hear from you!
ABOUT HEIDI:
Heidi Overbye from Learning Through Play is a Brisbane based, Early Years Teacher who currently teaches Prep, the first year of formal schooling in Queensland. Heidi is an advocate for play-based, hands-on learning experiences and creating stimulating and creative learning spaces. Heidi shares what happens in her classroom daily on her Instagram page, Learning Through Play. See @learning.through.play for a huge range of activities, play spaces and lesson ideas.
Changing Role Of Digital Technology In The Classroom
After teaching in the classroom for the past seven years, I have been fortunate and excited to have moved into the role of Leader of Curriculum & Innovation at my school. This means I no longer have my own class, and allows me the opportunity to work closely with all teachers across our school to unpack the curriculum to design, plan and implement innovative and creative learning opportunities for our students. As teachers, we need to ensure we are designing learning experiences for our students that cover a range of topics and skills to support them for their future. This is what I love.
In recent years, the addition of the Technologies strand to the Australian Curriculum has led to many teachers calling the curriculum ‘overcrowded’ and reporting that there is just ‘not enough time to teach everything’ that it encompasses. I wholeheartedly agree with these sentiments if the curriculum is taught in silos, but by taking an integrated approach across the curriculum, teachers can design learning experiences that cover several learning areas at the same time.
The Australian Curriculum states that the learning area of Technologies aims to develop the knowledge, understanding and skills to ensure that, individually and collaboratively, students:
- investigate, design, plan, manage, create and evaluate solutions;
- are creative, innovative and enterprising when using traditional, contemporary and emerging technologies, and understand how technologies have developed over time;
- make informed and ethical decisions about the role, impact and use of technologies in the economy, environment and society for a sustainable future;
- engage confidently with and responsibly select and manipulate appropriate technologies − materials, data, systems, components, tools and equipment − when designing and creating solutions;
- critique, analyse and evaluate problems, needs or opportunities to identify and create solutions.
The Technologies learning area is then separated into two components; Design and Technologies and Digital Technologies.
Design and Technologies, in which students use design thinking and technologies to generate and produce designed solutions for authentic needs and opportunities.
Digital Technologies, in which students use computational thinking and information systems to define, design and implement digital solutions.
In this post I will share ways to integrate a variety of digital technologies across the curriculum to support you in designing engaging and meaningful learning experiences. A focus of these lesson ideas is to develop students’ communication, critical thinking, creativity and collaborative skills.
Junior Primary Ideas (Foundation – Year 2) :
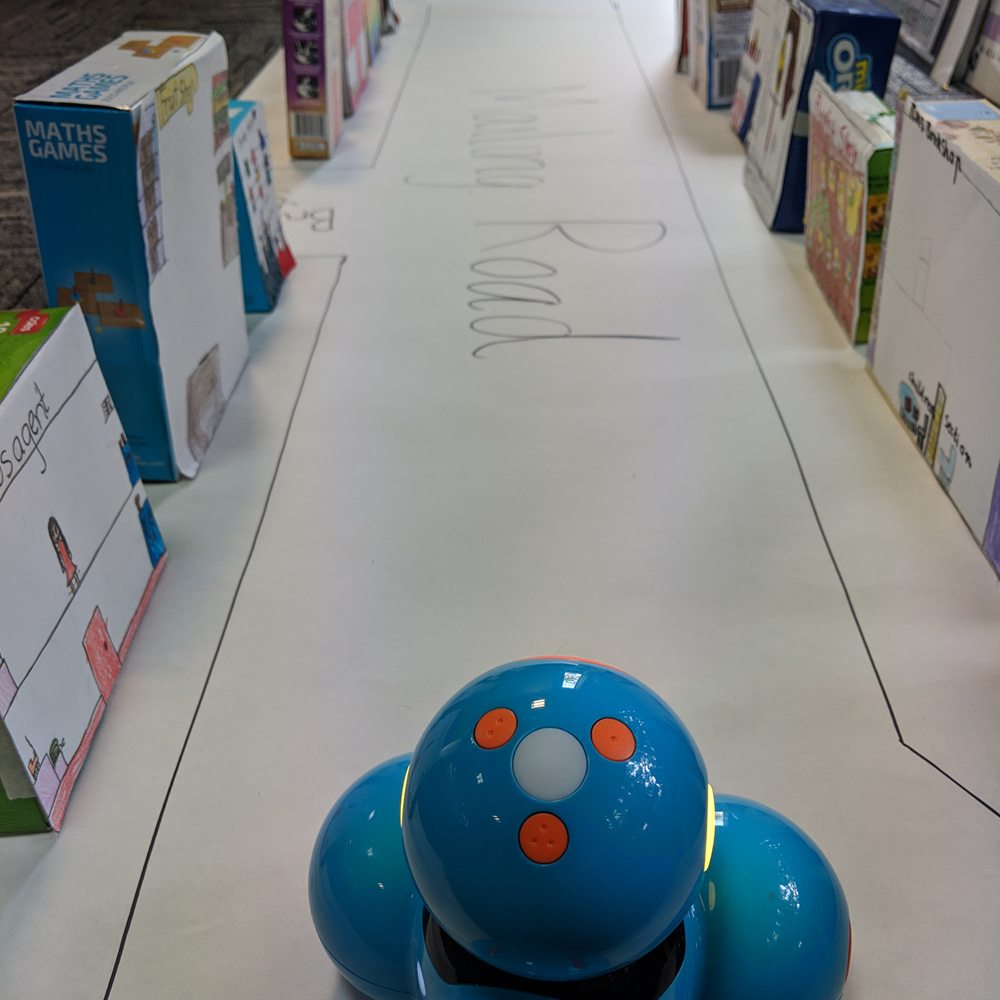
Some of my favourite digital technologies to integrate in the Junior Primary classroom include, BeeBots, Dot & Dash and Cubetto. Each of these robots is very user-friendly, allowing younger learners the opportunity to be introduced to sequencing code while developing their confidence.
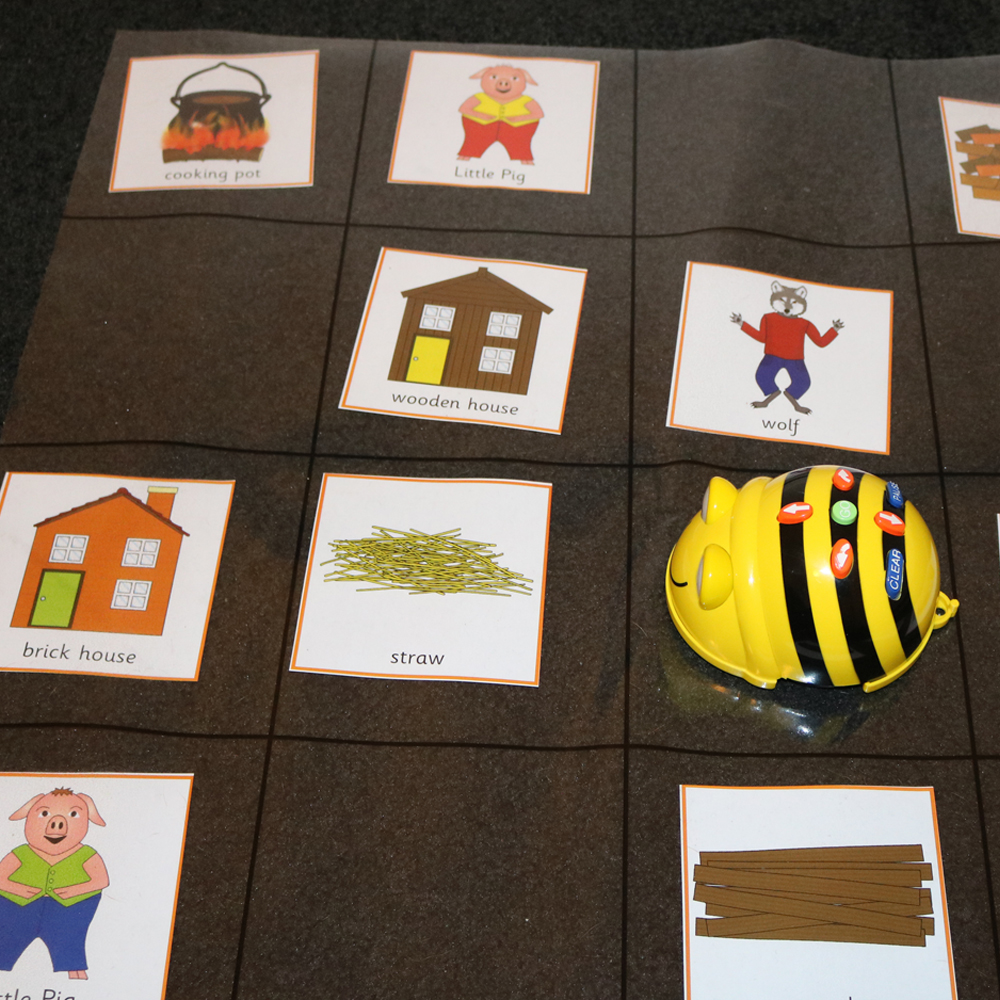
BeeBots are small robots that can move forwards and backwards in 15cm increments and turn 90 degrees left and right. They have the ability to remember up to 40 sequences of code.
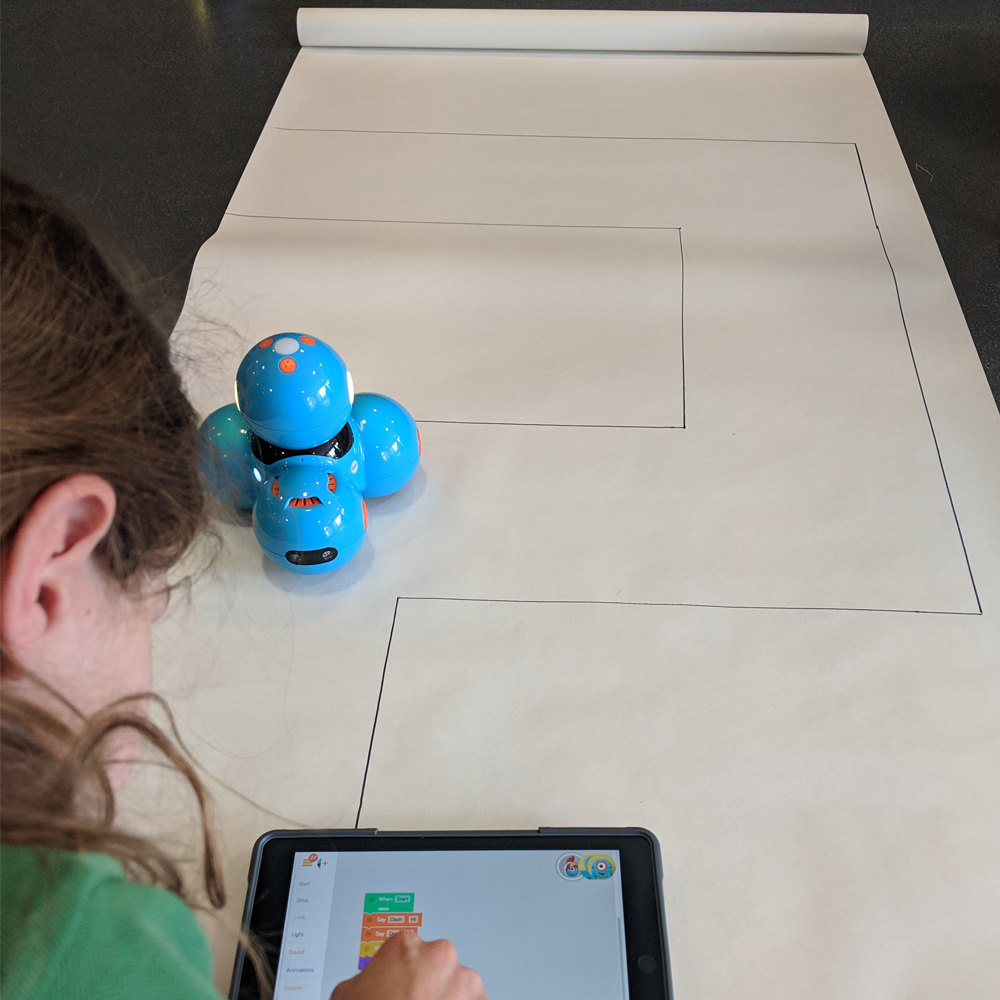
Dot and Dash are two individual robots that connect via Bluetooth to mobile devices. With a variety of Apps to control these robots, they have ability to manoeuvre around the floor in all directions, sense objects, flash LED lights and record and play back audio.
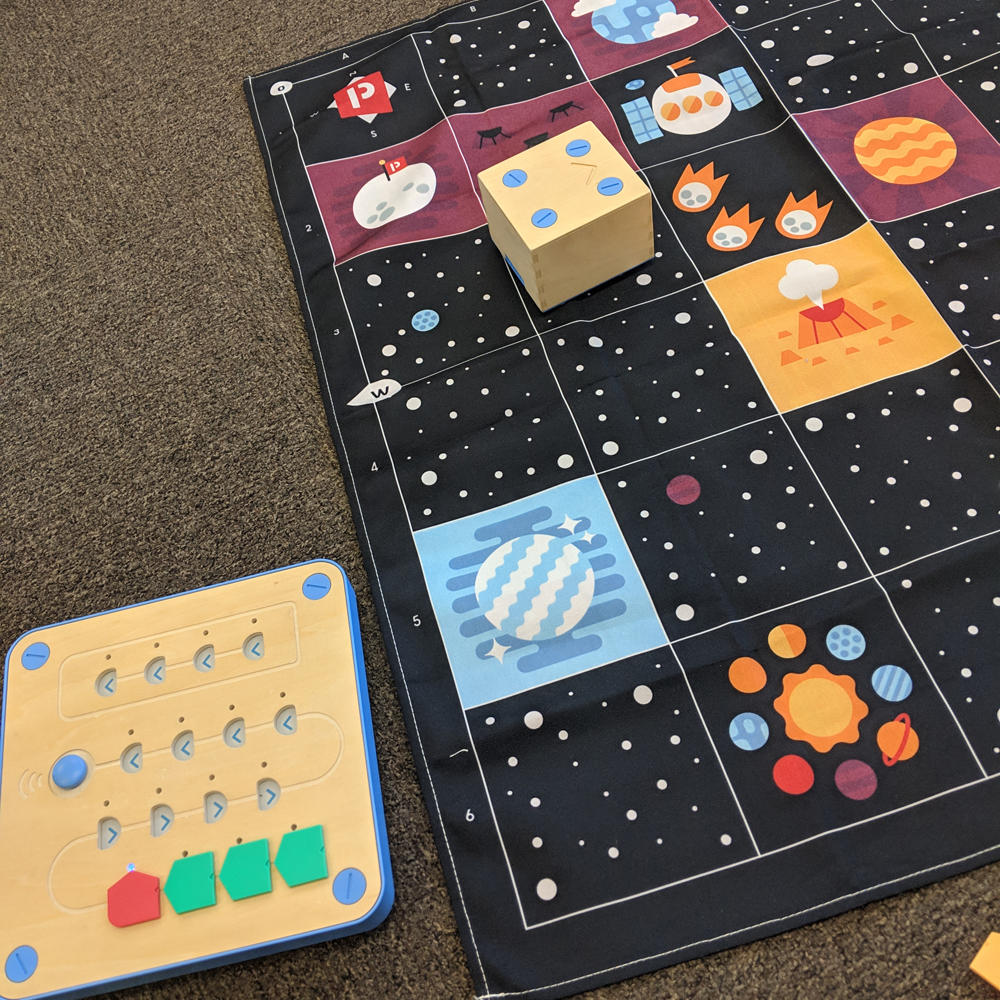
Cubetto is a wooden cube robot that moves in 15cm increments. Physical blocks are used to sequence code to manoeuvre Cubetto around a grid.
Literacy – Using story books as provocations, have students demonstrate their comprehension of the text by creating particular scenes of the story by coding any of the above robots to move around that scene.
Mathematics – Using the above technologies students develop their understanding of directional language, location and mapping skills.
I have written numerous MTA blog posts that explain lesson ideas for the Junior Primary classroom in further detail. Click the following links for more details lesson ideas. Many of these ideas can also be used with Cubetto too.
- 5 Literacy Bee-Bot Lessons for the Classroom
- 5 Mathematics Bee-Bot Lessons for the Classroom
- Bee Bots in the Classroom
- Dot and Dash in the Classroom
Australian Curriculum Links
English:
Foundation:
- Identify some features of texts including events and characters and retell events from a text (ACELT1578)
- Retell familiar literary texts through performance, use of illustrations and images (ACELT1580)
- Innovate on familiar texts through play (ACELT1831)
Year 1:
- Recreate texts imaginatively using drawing, writing, performance and digital forms of communication (ACELT1586 )
Year 2:
- Create events and characters using different media that develop key events and characters from literary texts (ACELT1593)
Mathematics:
Foundation:
- Describe position and movement (ACMMG010)
Year 1:
- Give and follow directions to familiar locations (ACMMG023)
Year 2:
- Interpret simple maps of familiar locations and identify the relative positions of key features (ACMMG044)
Digital Technologies F-2
- Follow, describe and represent a sequence of steps and decisions (algorithms) needed to solve simple problems (ACTDIP004)
Middle Primary Ideas (Year 3 & 4):
As students’ understanding of Digital Technologies and computational thinking develops, we need to design their learning experiences accordingly. My favourite resources for these classes are Bloxels Builder and Sphero.
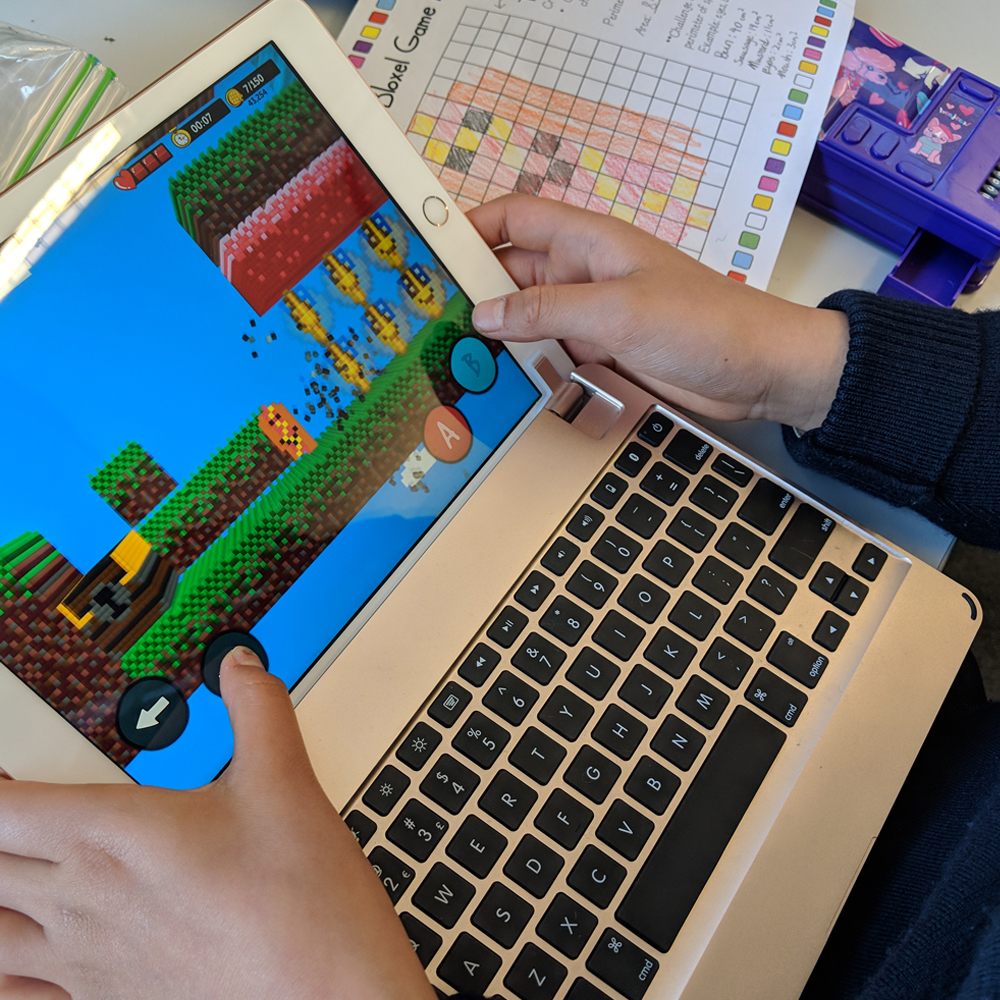
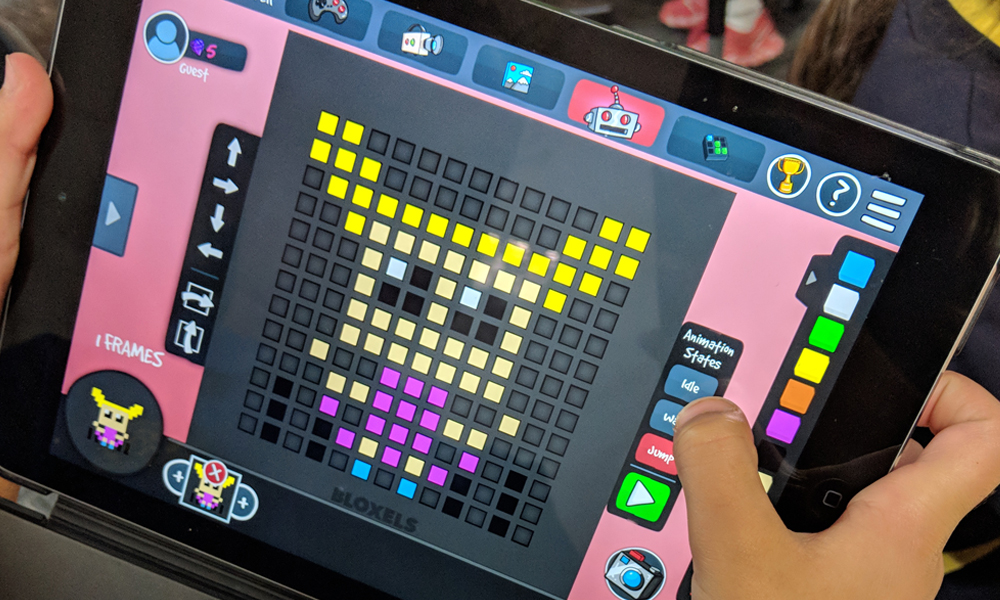
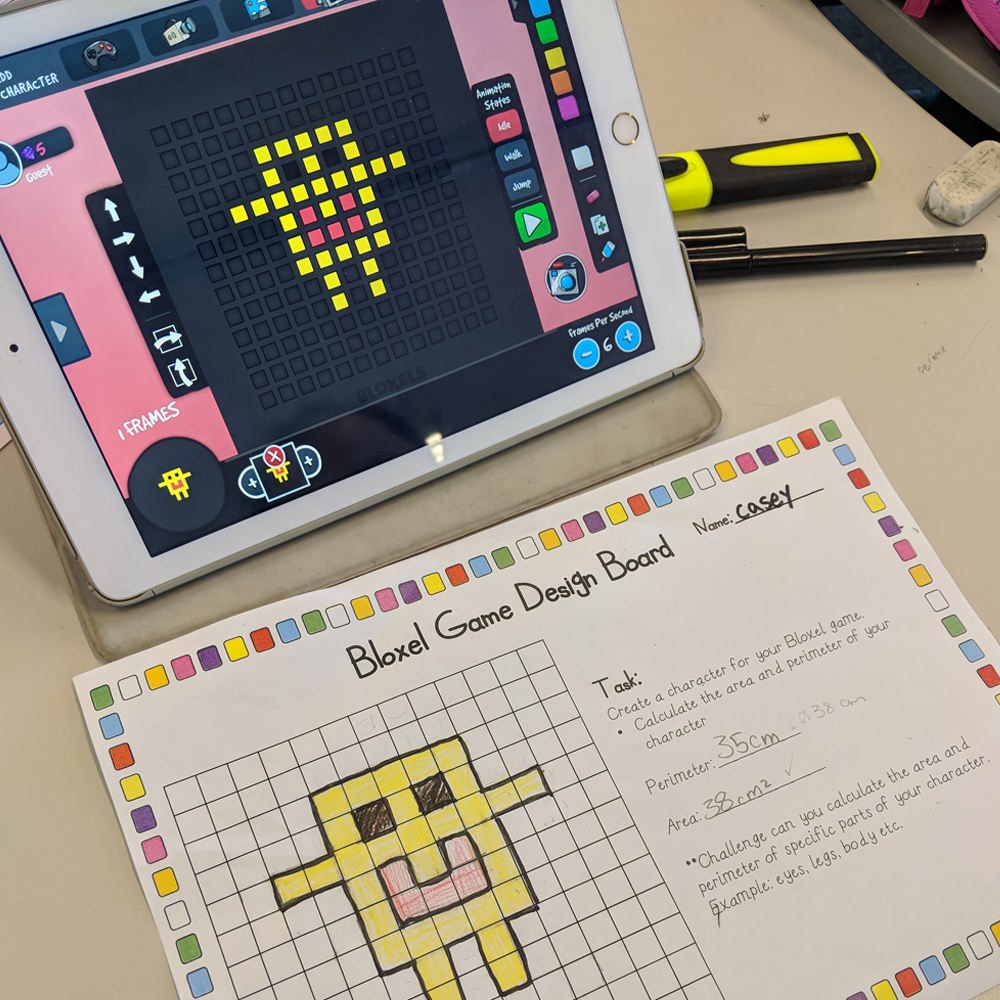
Bloxels Builder is a fantastic platform that allows students to be the creators of their own games. Using the free Bloxels Builder app or the physical gameboard, students use their creativity to design a character and game.
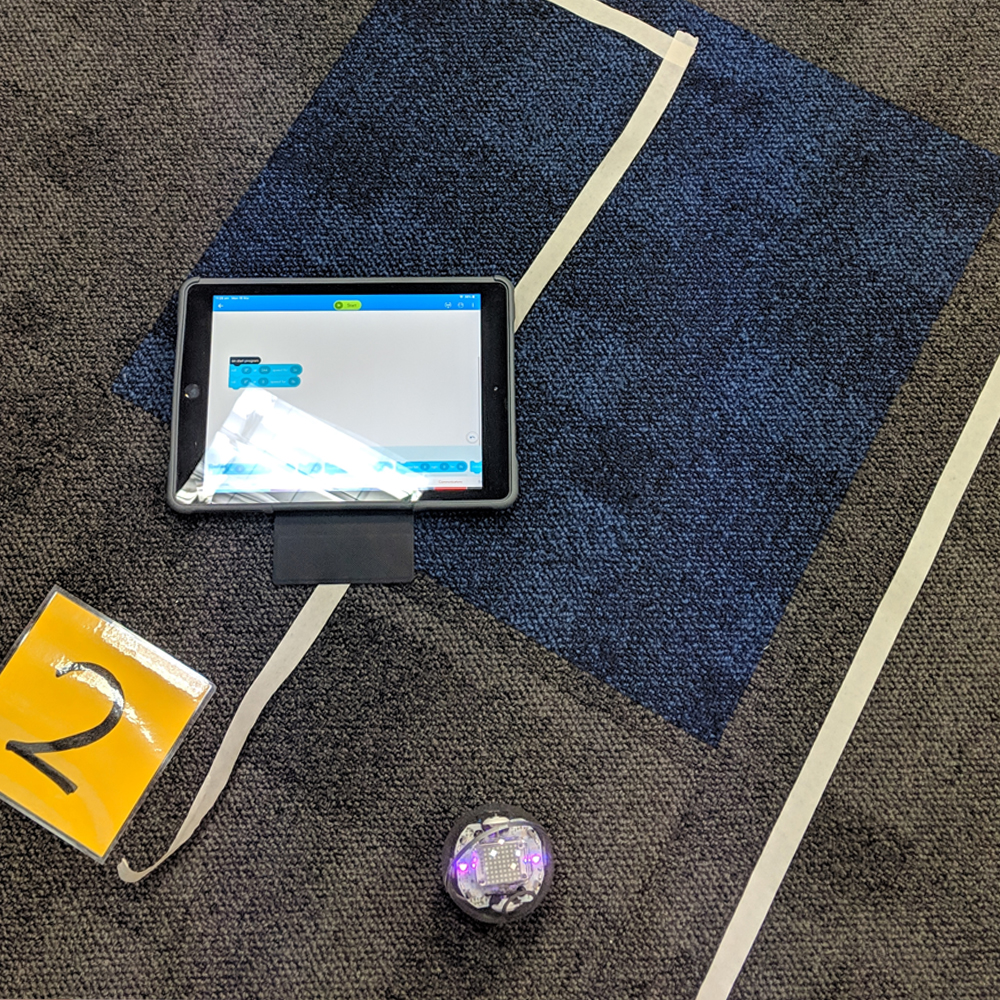
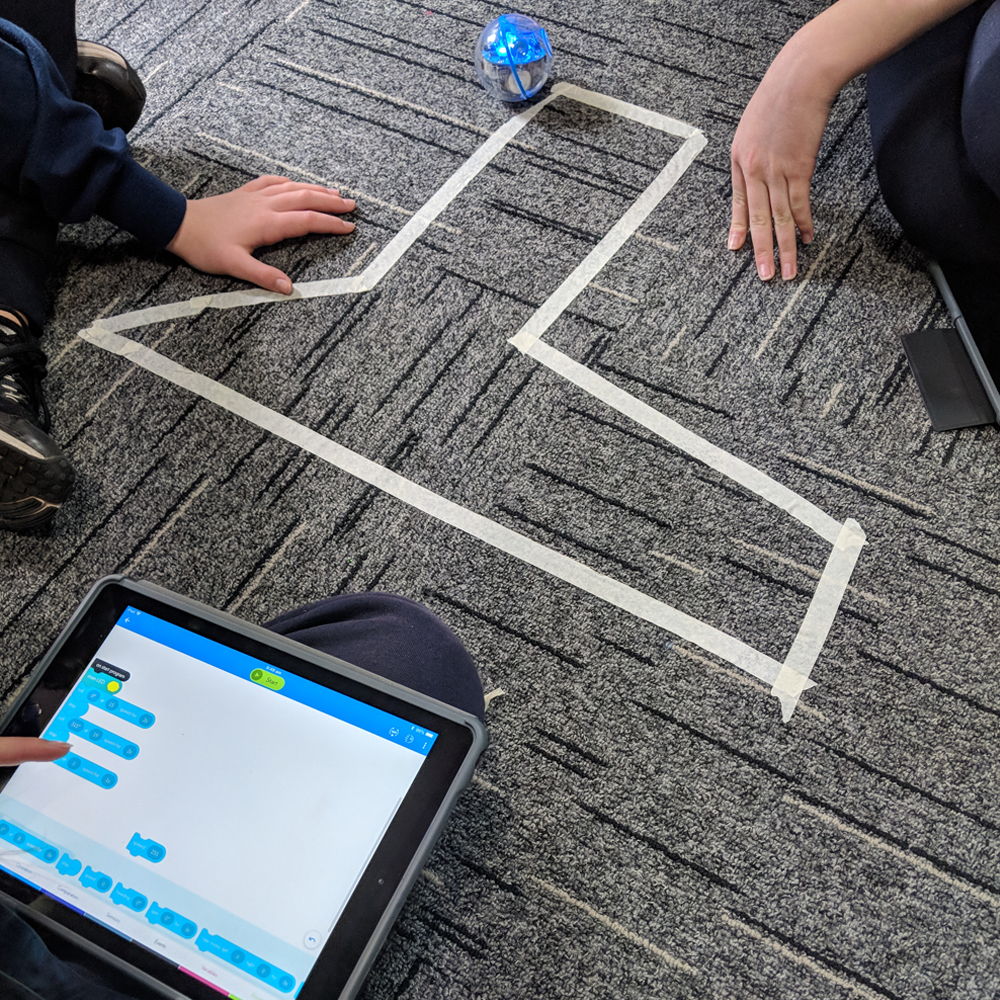
Spheros can roll at a speed of up to 7km/h in any direction, spin, flip and change colour. Using the Sphero EDU App students can accurately direct the movement of the Sphero using block code.
Bloxels
Literacy – Students create a game that represents a virtual story.
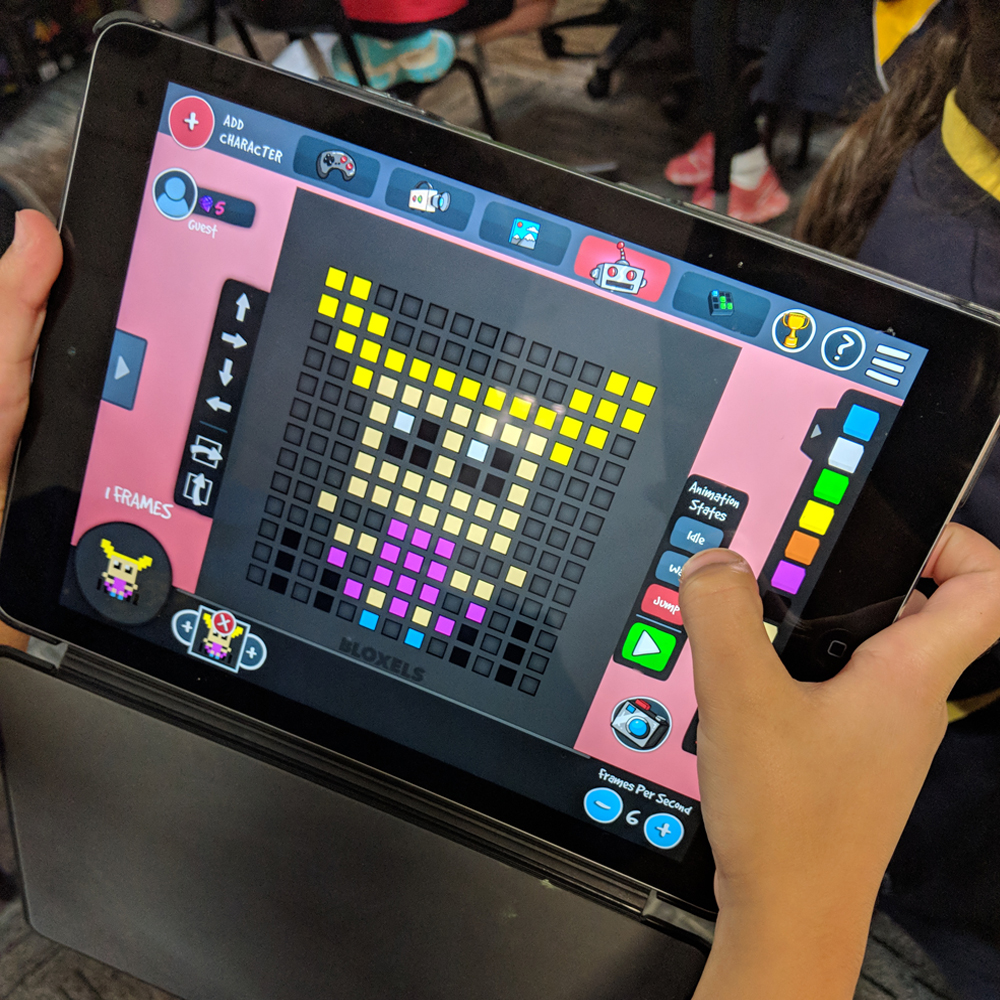
Mathematics – Using the 13 x 13 grid, students’ creations will demonstrate their understanding of multiplication, fractions, and area/perimeter.
Sphero
Mathematics – Students can create shapes, navigate mazes and obstacles and play games that require them to demonstrate their understanding of angles, length, time, speed.
Australian Curriculum Links:
English:
Year 3:
- Create imaginative texts based on characters, settings and events from students’ own and other cultures using visual features, for example perspective, distance and angle (ACELT1601)
Year 4:
- Create literary texts that explore students’ own experiences and imagining (ACELT1607)
Mathematics:
Year 3:
- Create and interpret simple grid maps to show position and pathways (ACMMG065)
Year 4:
- Use simple scales, legends and directions to interpret information contained in basic maps (ACMMG090)
- Compare angles and classify them as equal to, greater than, or less than, a right angle (ACMMG089)
- Recall multiplication facts up to 10 × 10 and related division facts (ACMNA075)
- Compare objects using familiar metric units of area and volume (ACMMG290)
Digital Technologies 3-4:
- Define simple problems, and describe and follow a sequence of steps and decisions (algorithms) needed to solve them (ACTDIP010)
- Implement simple digital solutions as visual programs with algorithms involving branching (decisions) and user input (ACTDIP011)
Upper Primary Ideas (Year 5 & 6):
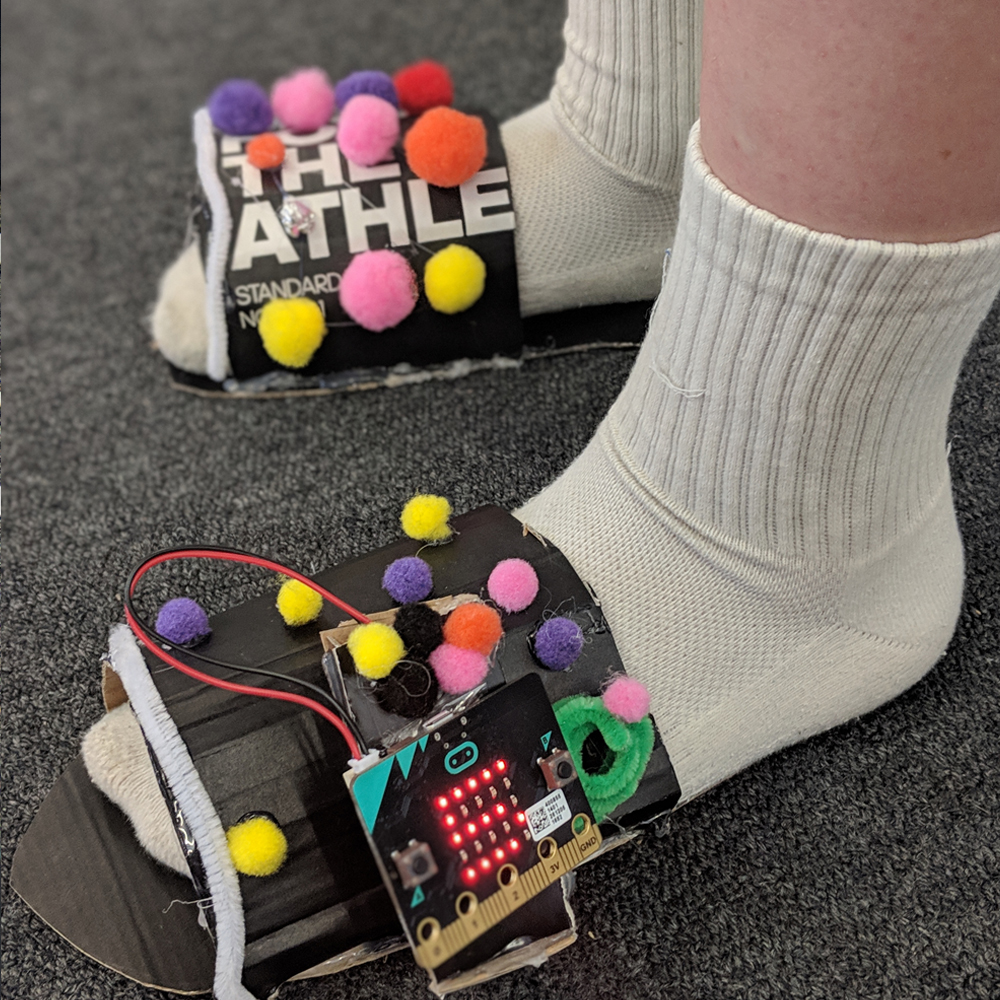
Upper Primary years students have the ability to apply their learnt skills and knowledge of digital technologies to create solutions to problems. My favourite resources for Upper Primary years are the Micro:bit and SamLabs.
The Micro:bit is a small microcontroller with LED lights, sensors, accelerometer and compass.
SamLabs are wireless blocks and accessories that connect together including motors, sliders, buttons, lights and sensors.
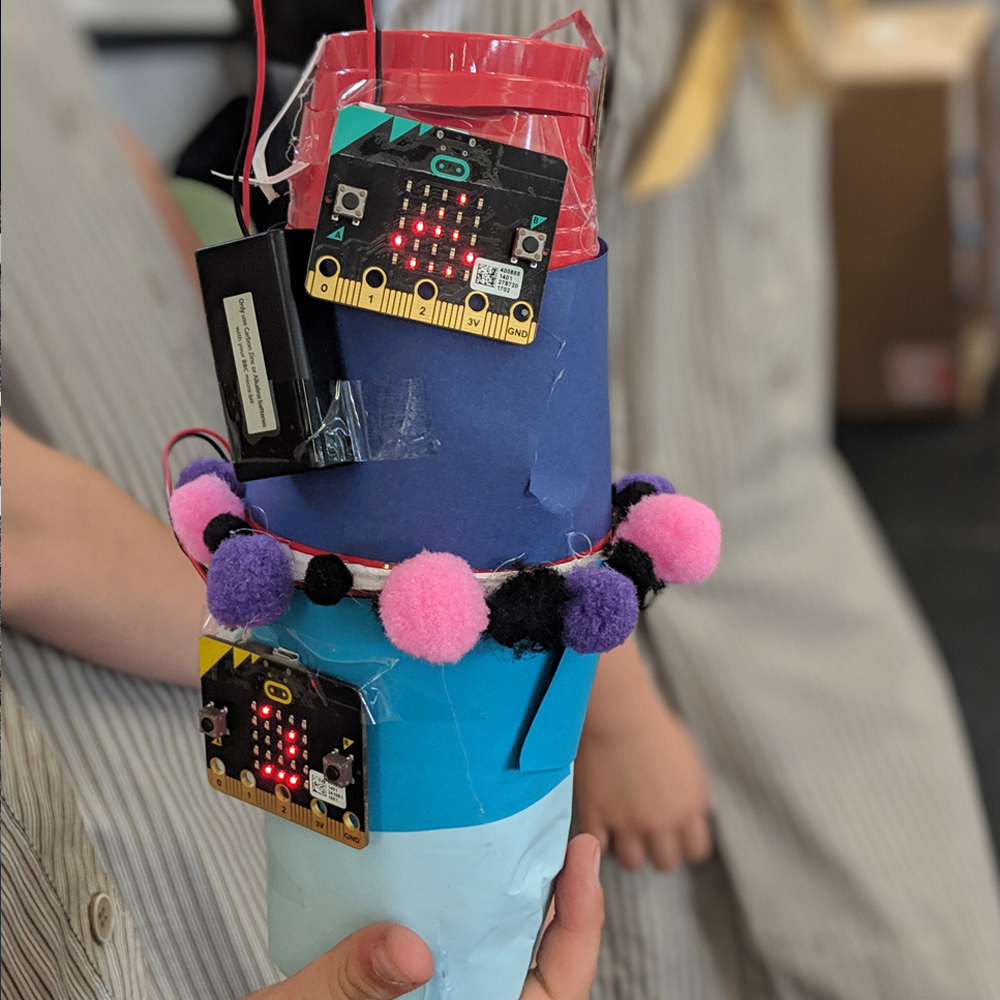
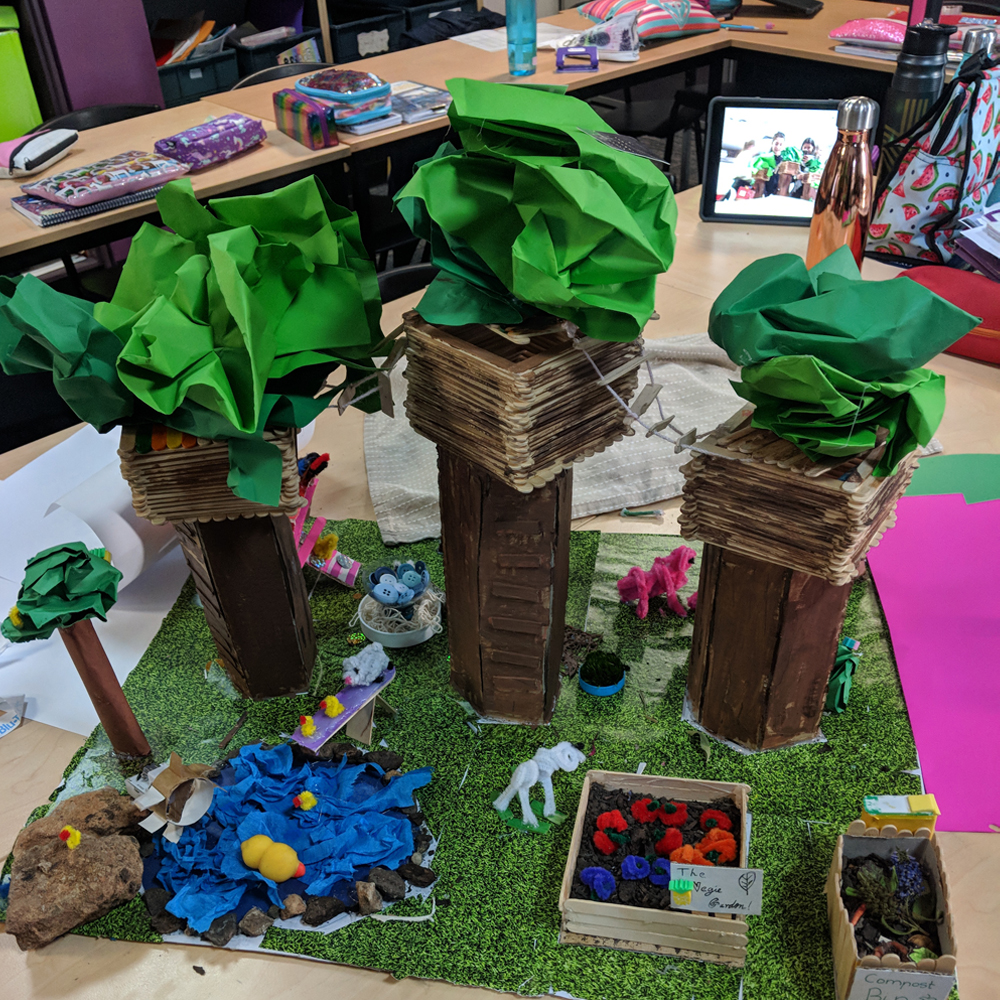
Lesson idea – Using the United Nations Sustainable Goals as a guide, I select two or three goals that link to our unit of inquiry. Students are asked to focus on one of these goals and to create a solution to this problem using either the Micro:bit or SamLabs technologies.
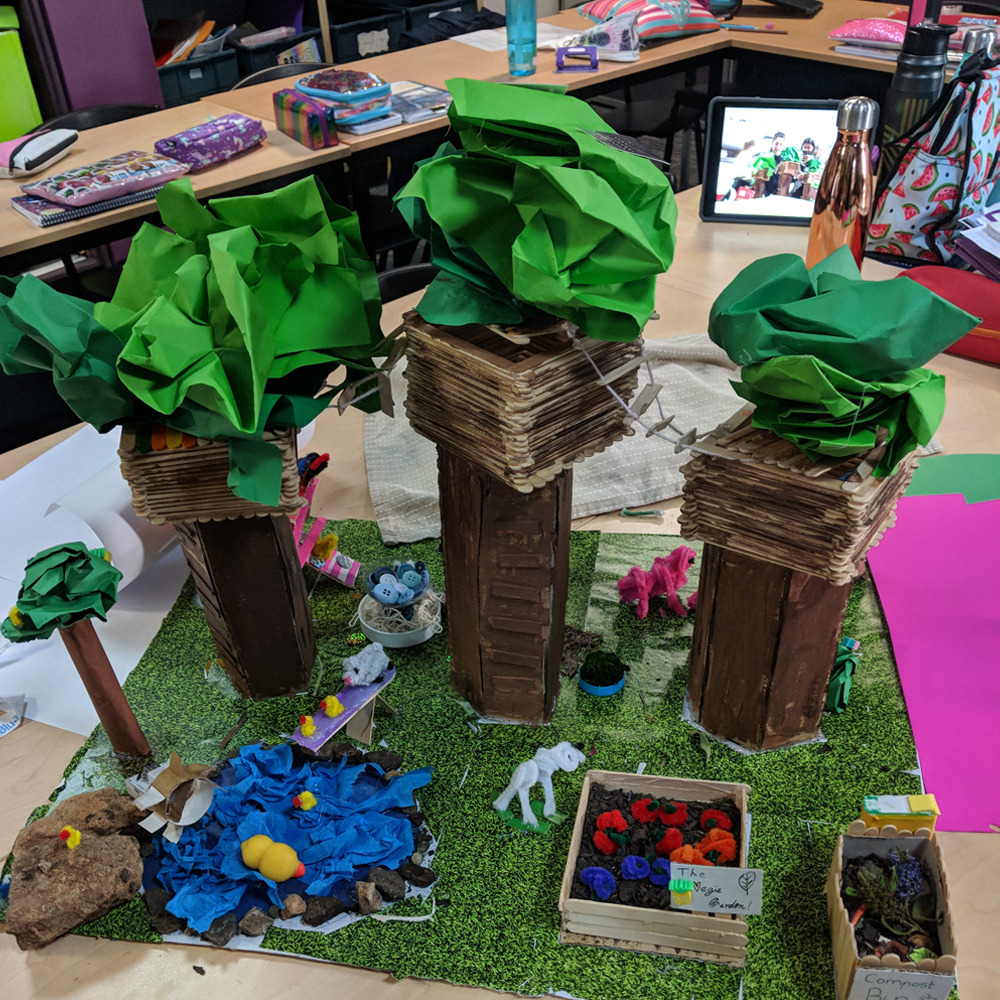
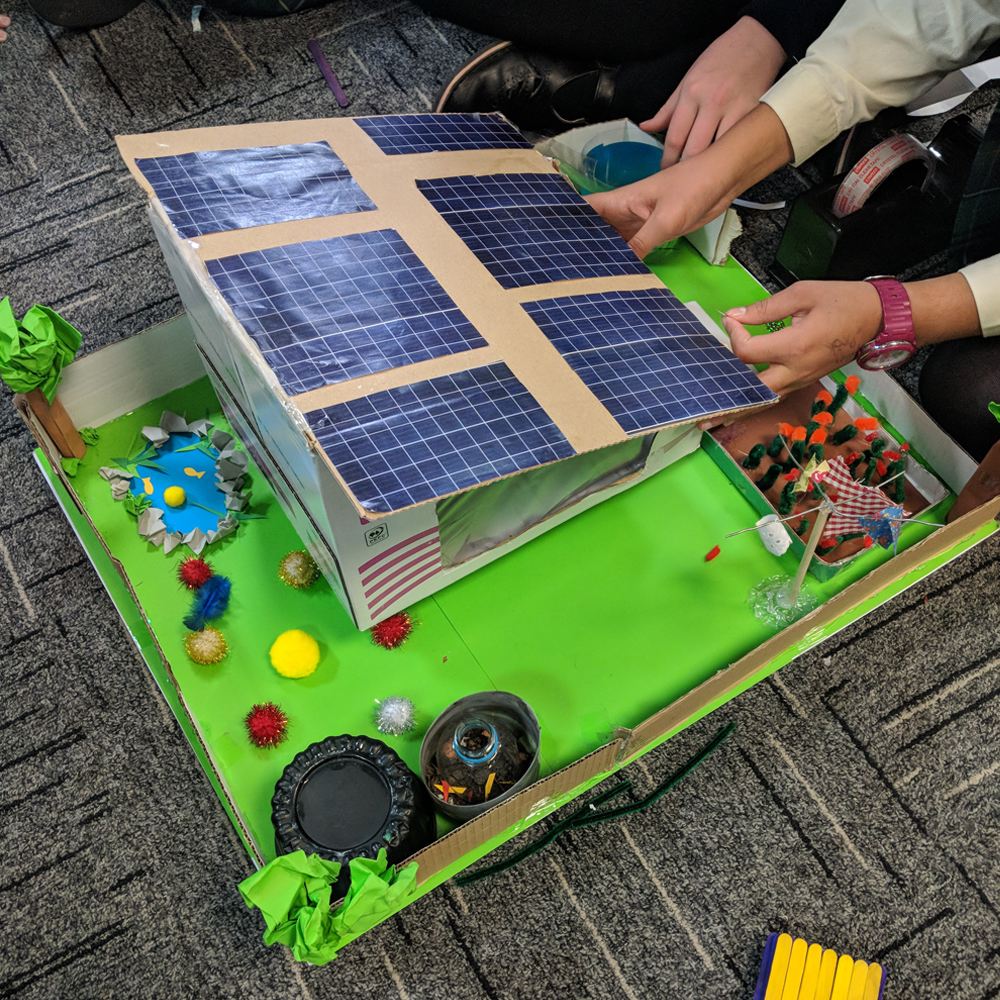
I explore this in more detail (with student examples) in my MTA Blog: Integrating Sam Labs in the Classroom
Australian Curriculum Links:
Digital Technologies 5-6:
- Define problems in terms of data and functional requirements drawing on previously solved problems (ACTDIP017)
- Design, modify and follow simple algorithms involving sequences of steps, branching, and iteration (repetition) (ACTDIP019)
- Implement digital solutions as simple visual programs involving branching, iteration (repetition), and user input (ACTDIP020)
- Explain how student solutions and existing information systems are sustainable and meet current and future local community needs (ACTDIP021)
Science:
Year 5:
- Scientific knowledge is used to solve problems and inform personal and community decisions (ACSHE083)
Year 6:
- Electrical energy can be transferred and transformed in electrical circuits and can be generated from a range of sources (ACSSU097)
- Scientific knowledge is used to solve problems and inform personal and community decisions (ACSHE100)
Whether it be the digital technologies I have highlighted, or any other, technology in our classrooms they should not be seen as something separate, but rather something that is integrated purposefully into student learning experiences. These technologies provide hands-on learning opportunities that allow for students to develop critical thinking, creativity and problem solving.
Featured Products:
Dash & Dot Educational Robots Pack
How are you using Digital Technologies across the curriculum? We would love to hear from you!
About the Author
Eleni Kyritsis is an award winning teacher from Melbourne. She is the Leader of Curriculum and Innovation at Strathcona Baptist Girls Grammar. Eleni facilitates professional learning workshops around the world that focus on unleashing creativity and curiosity in classrooms. You can contact her at elenikyritis.com and @misskyritsis
How To Incorporate Natural Resources Into The Classroom – Part Two
There are so many ways nature can be brought into the classroom as part of children’s learning, and I shared lots of ideas in Part One of How to incorporate Natural Resources Into The Classroom Many of you really enjoyed the simple and effective ways I have managed to bring bits of nature into my classroom, which inspired me to share more of these ideas. Read on to find out how I incorporate more natural resources in the classroom.
Nature patterns
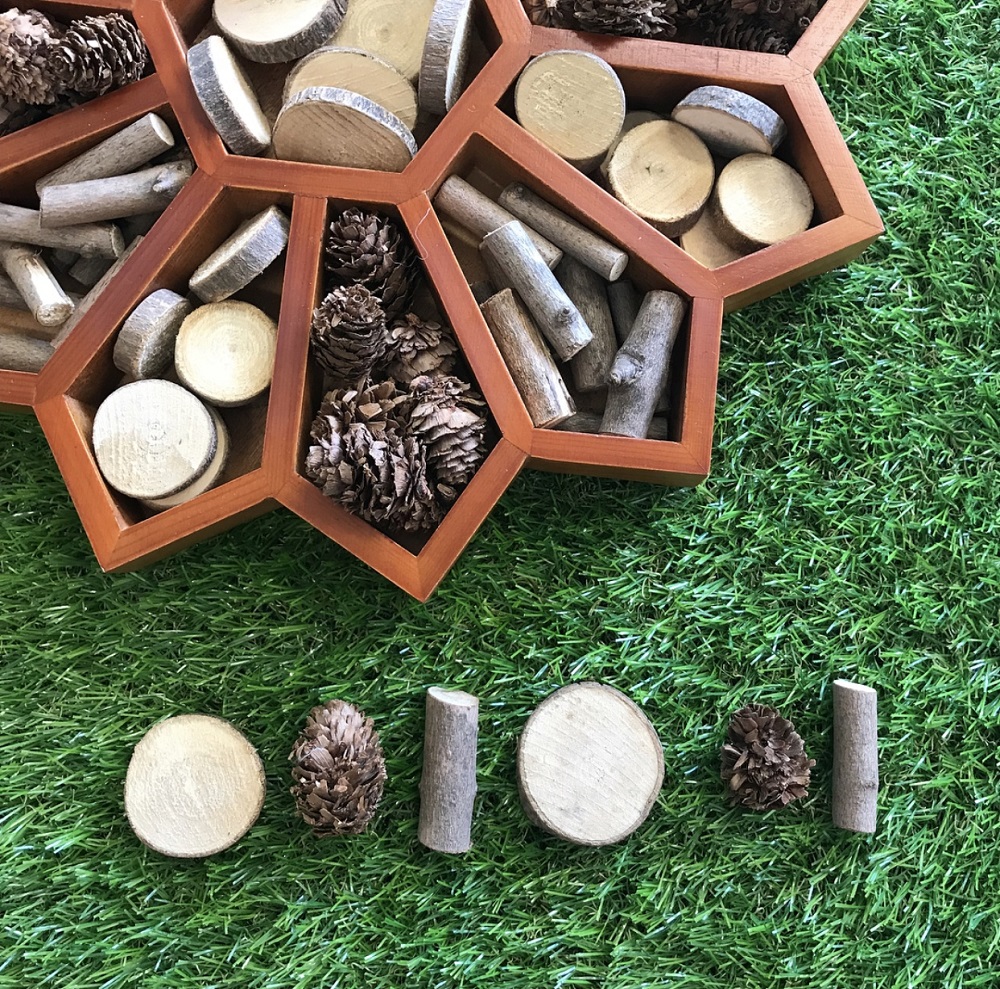
Can you create a pattern? One of my favourite times to incorporate natural items is during maths. Natural items extend themselves beautifully to teaching mathematical concepts, especially through hands-on learning. Whenever I am teaching my students about repeating patterns, I love presenting them with natural items for them to explore patterning with. In this activity, students were free to use the natural materials to create and label their own patterns.
Featured Products:
Flower Sorting Tray
Natural Resources Kit
Can you make a leaf letter?
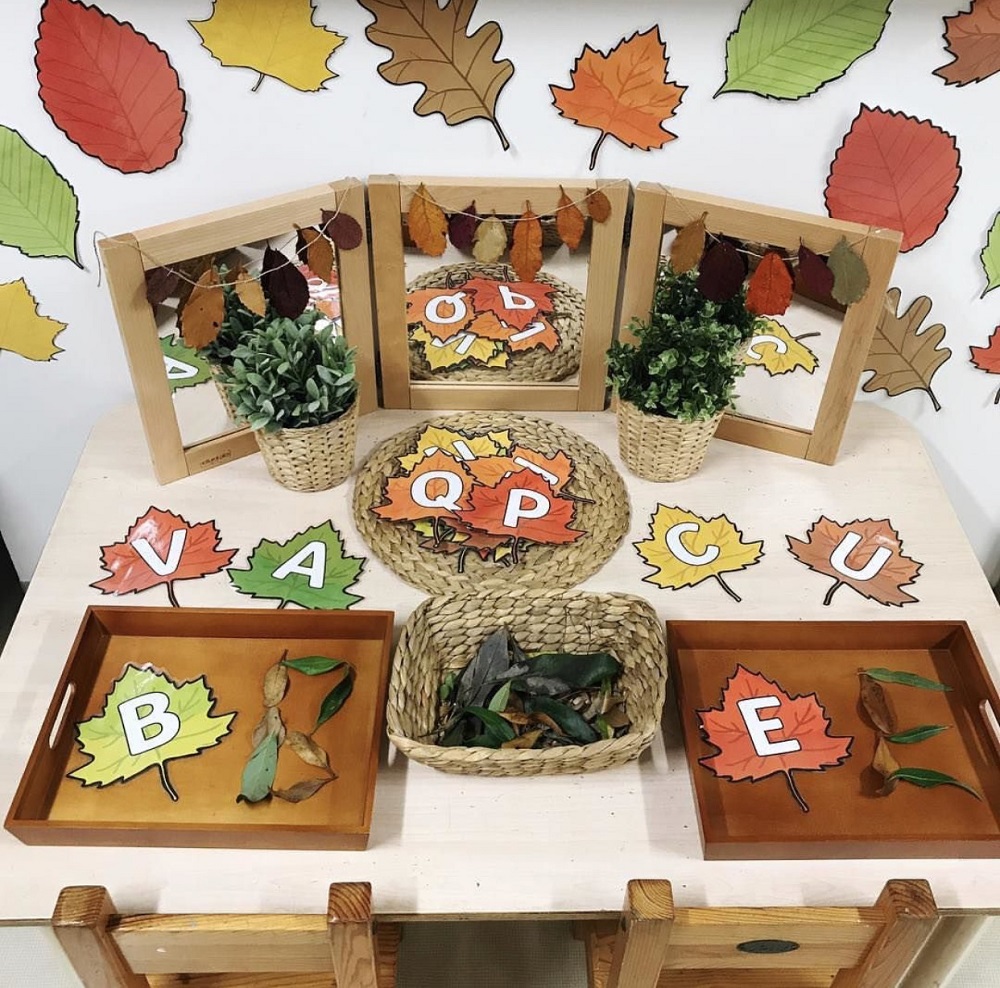
Leaves are just one of the most amazing natural resources to use in teaching and learning because they’re free, readily available and there are a plethora of ways they can be used! A few years ago, I had this learning space set up in my kindergarten classroom as an opportunity for literacy development. We read the book ‘We’re going on a leaf hunt’ and went on our own leaf hunt in the playground to collect the leaves we needed for this learning space. When children engaged with this stimulus, they created letters using the leaves and developed letter recognition skills and their understanding of letter formation.
Featured Products:
Nesting Wooden Trays – Set of 3
Three Way Mirror
Using flowers
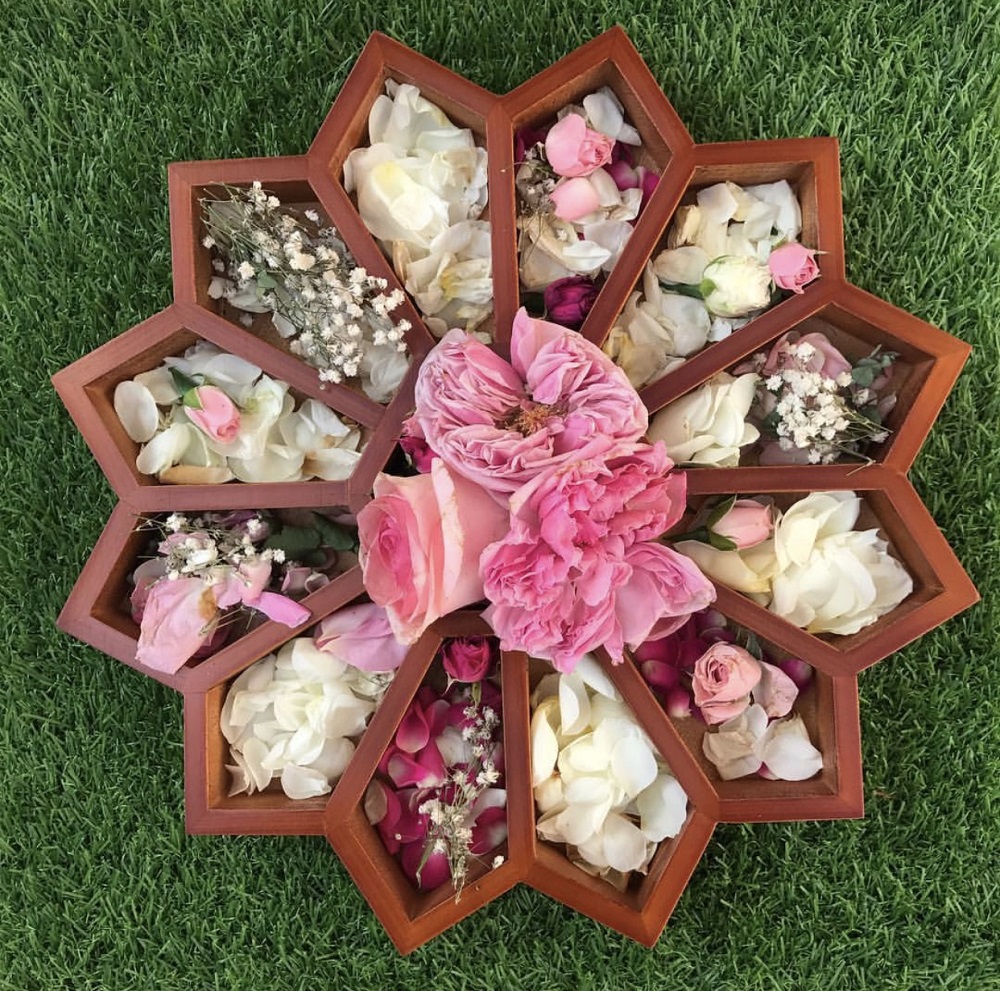
Is it just me or does anyone else get really excited when they’re given flowers? And not just because flowers are amazing and incredibly thoughtful, but also because they can be used for activities once you’ve finished enjoying them! One of my favourite ways to use flowers in the classroom is for ‘potion making’. Simply provide an ‘invitation to create’ for your students with flowers, water, leaves, glitter, bowls, wooden spoons and jars and watch them create and explore. Other activities you can do with flowers include nature-cutting, colour matching, threading and flower pressing.
Featured Product:
Flower Sorting Tray
Counting with twigs
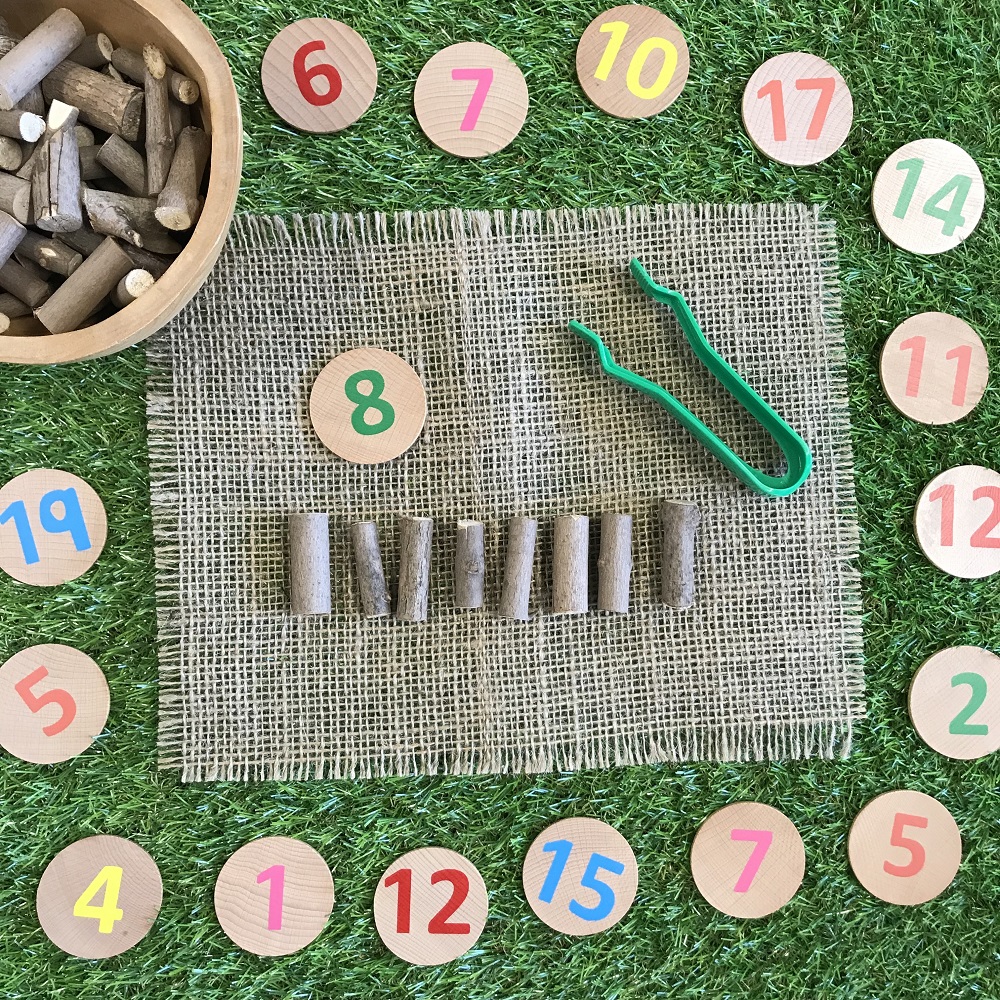
As I mentioned before, I love using natural resources during maths lessons, particularly when we are engaging in hands-on rotations. Counting using one to one correspondence, recognising numerals, and matching collections to numerals are all crucial mathematical skills that are taught in the early years. Students developed all of these skills as they engaged with this activity where they had to select and recognise a number and then make a matching collection to represent that number using twigs. The addition of the tongs enabled students to develop their fine motor skills also.
Featured Products:
Thick twigs
Tweezers
Natural Wooden Bowls
Hessian Sheets Natural
Matching Wooden Number Discs
Transient art with nature
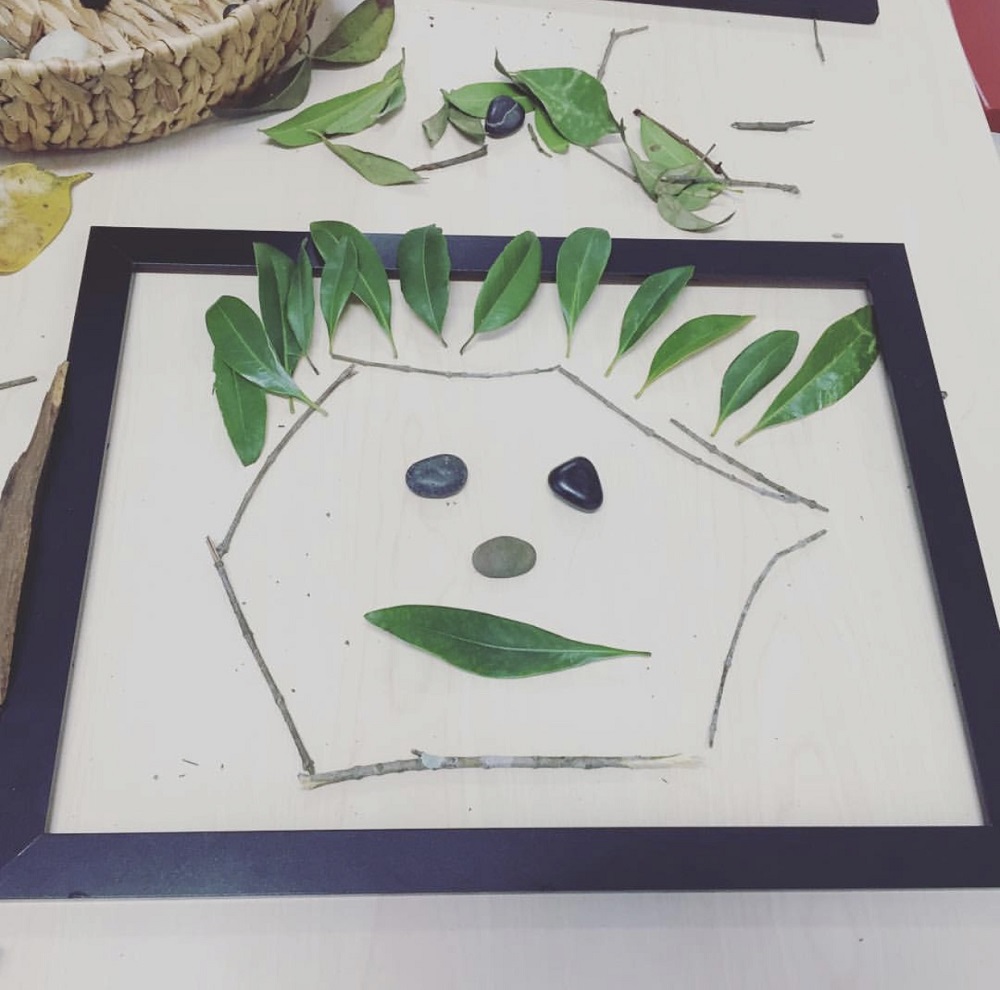
Have you heard of the term ‘transient art’? Basically, it’s just a fancy term for moveable art – art that is not ‘fixed’. Transient art is continuously evolving and the focus is on the process, not the final product. When children engage in transient art experiences, they are able to manipulate, explore and experiment with materials and let their creativity and imaginations run wild.
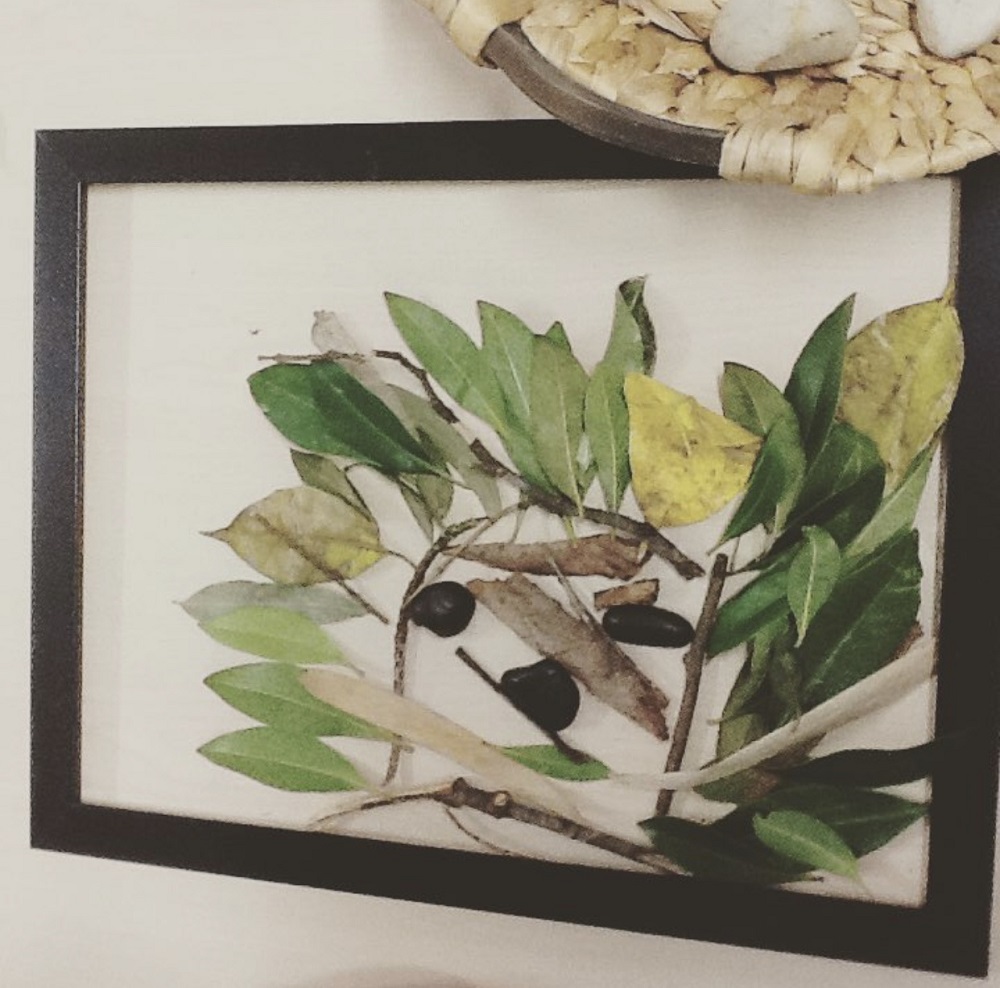 Natural resources are perfect for transient artworks because of their open-ended nature. Items that I like using in transient art include leaves, pebbles, gemstones, small pinecones, circle branch cuts, rocks, small twigs, gumnuts and flowers. In this particular transient art experience, my students created artworks inside a frame using nothing but sticks, rocks and leaves. I was amazed at their creativity!
Natural Tree Blocks
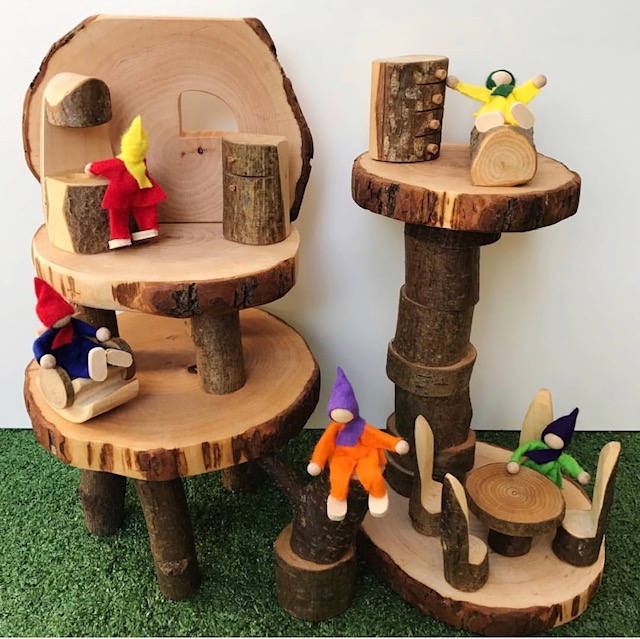
These Natural Tree Blocks are my absolute favourite construction resource that encourages children to design, create and build. The blocks are absolutely stunning and are perfect if you’re looking for a straightforward way to integrate more natural items into your classroom.
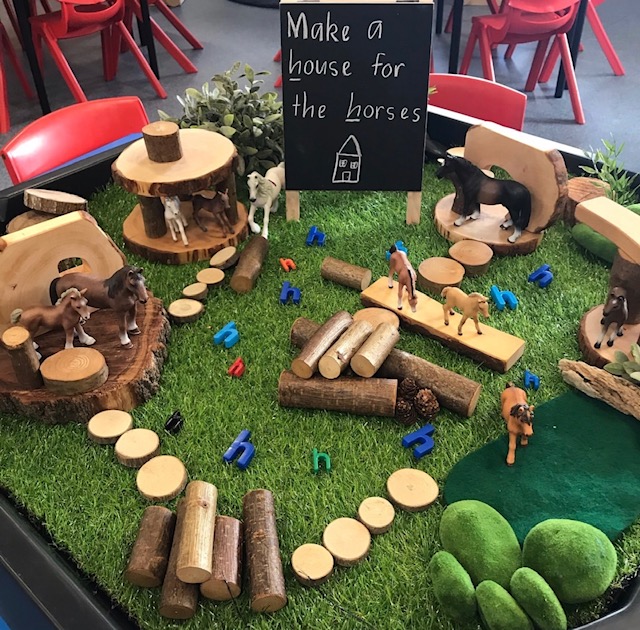
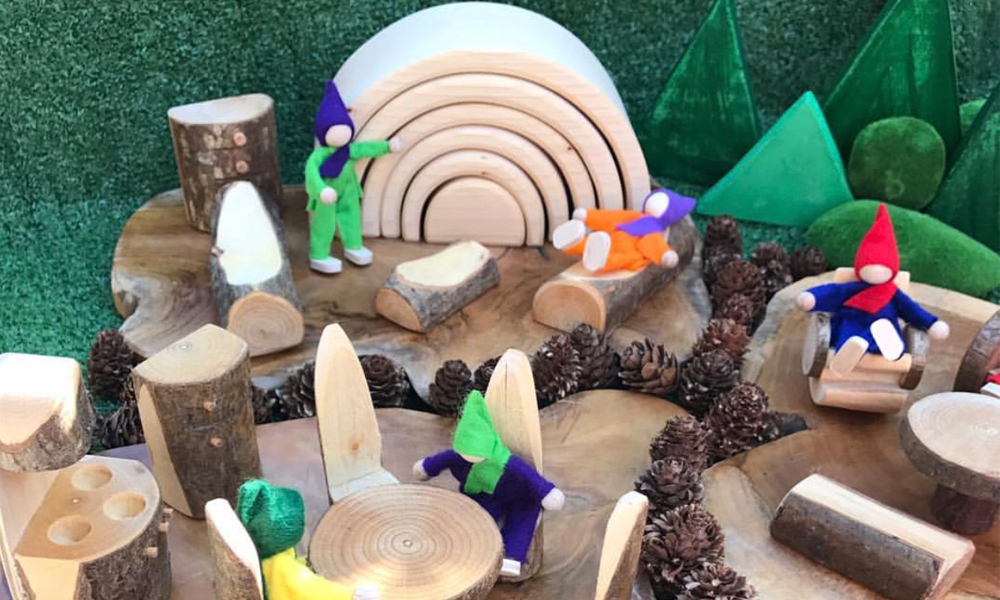
We use these blocks a lot for both construction activities and in small world set-ups. We have even used them for building on our light-box panel! My students and I particularly enjoy using these blocks in small world play set-ups because their natural look makes the play space more realistic, especially once you add a couple of mossy stones, branch cuts and rocks!
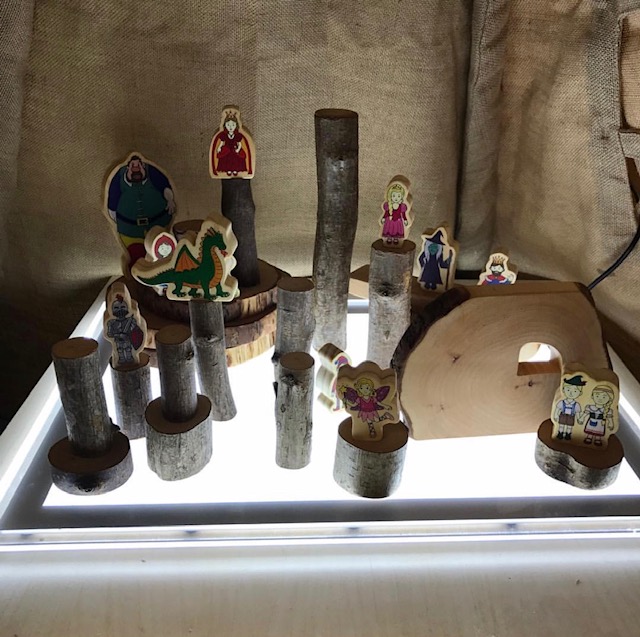
Featured Products:
Wooden Tree Blocks
Bendable Wooden Family
Natural Wooden Living Room
Natural Wood Kitchen
Natural Wood Bedroom
Explore and Discover Light Panel
Wooden Fairytale Figures
Mossy stones – Set of 8
Branch Cuts Circles
Active World Tray
Leaf crowns
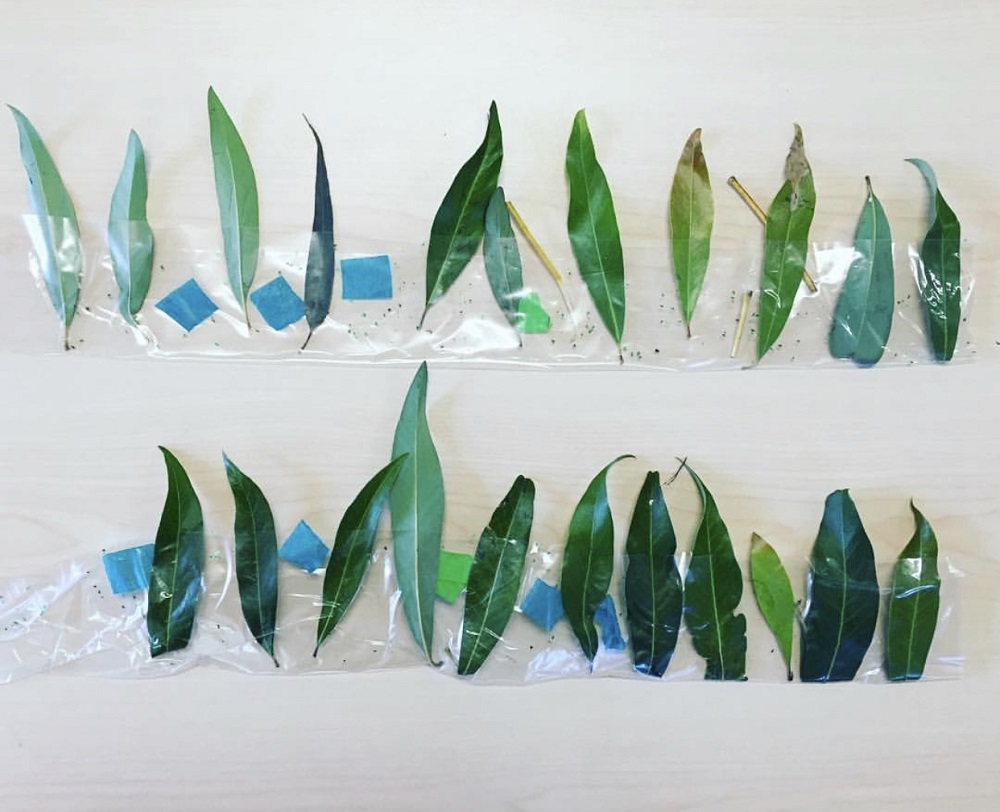
Have you ever used contact paper to create crowns before? If you haven’t, I highly recommend it! It was an activity I learnt at university and I have used it many times in my teaching career because it’s such an easy (and mess free!) way to make crowns. We made these ‘leaf crowns’ when I taught kindergarten several years ago. Simply stick your leaves and any other collage items you want to the contact paper, fold together, place around your head and voila! Your crown is ready to go!
Creating small worlds
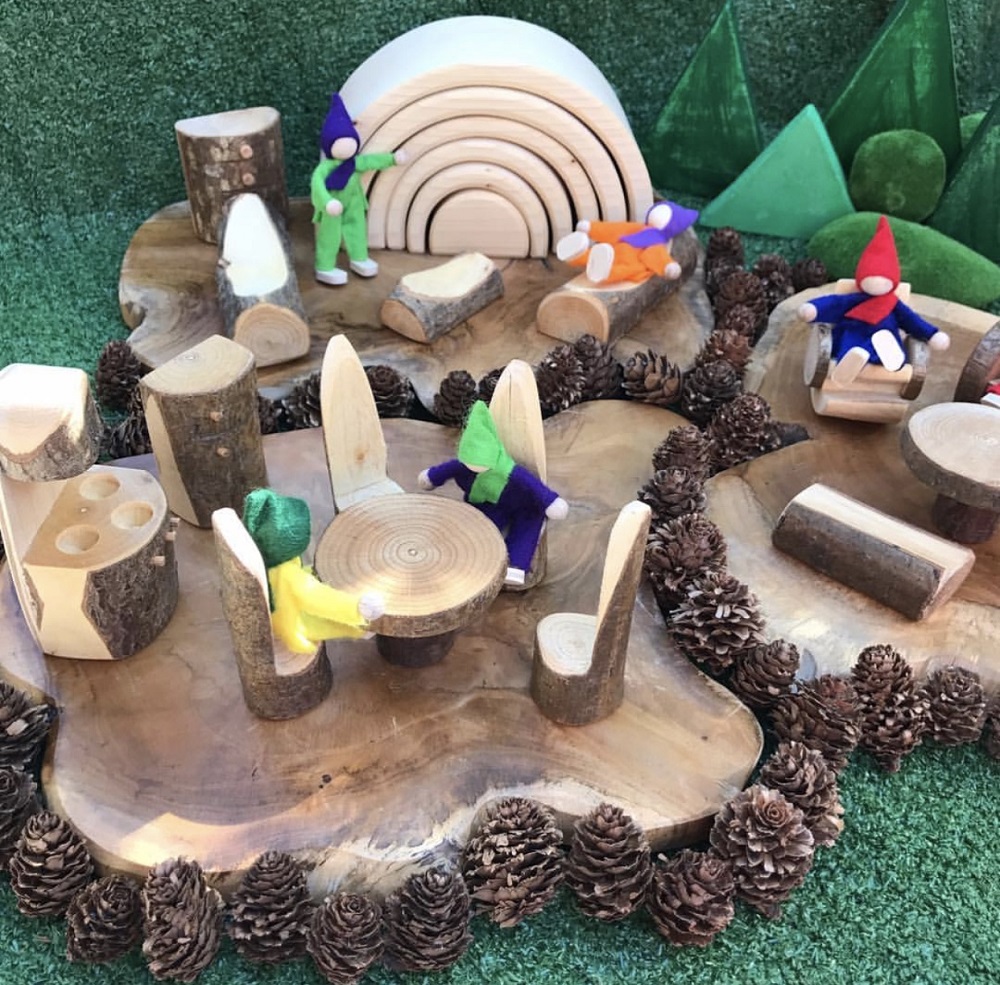
One of the most common ways I incorporate natural items into my classroom is through small world set-ups. Whether it be presenting resources as an ‘invitation to create’ or setting up a small world play tray, I always include natural resources to make it ‘life like’.
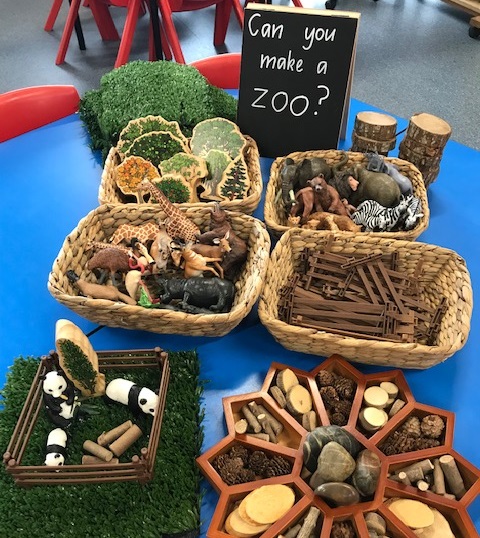
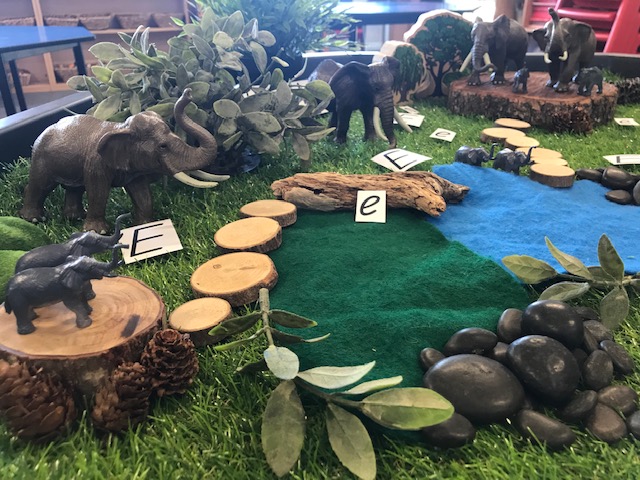
Can you imagine a jungle without trees, leaves and rocks? …Exactly! So by adding these natural pieces, the play space ‘comes to life’ and children are able to use these items in their play. My favourite natural resources to use in small worlds are; rocks, twigs, leaves, branch cut circles for stepping stones, sticks and pine cones. It is always interesting to see how children use these items creatively during their play.
Featured Products:
Flower Sorting Tray
Natural Resources Kit
Wooden Australian Trees
Branch Cuts Circles
Bendable Wooden Family
Natural Wooden Living Room
Natural Wood Kitchen
Natural Wood Bedroom
Natural Wood Tunnel
Natural Wood Slices – Set of 3
Counting with Bud Cones
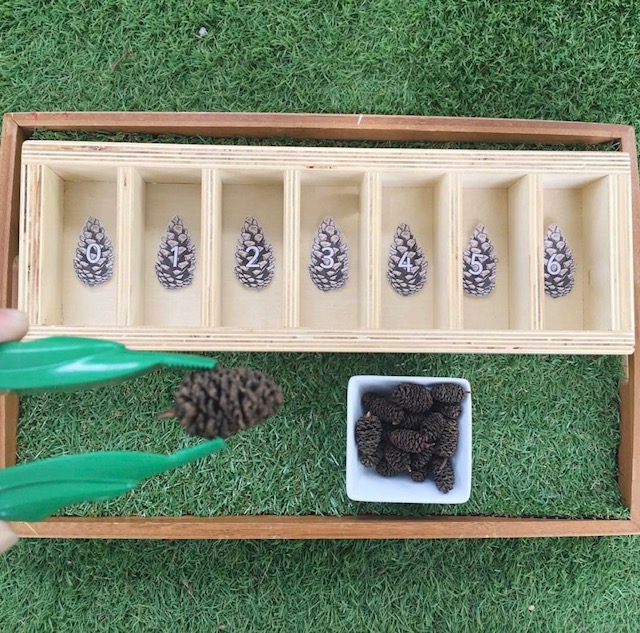
How sweet are these mini Bud Cones? I fell in love with them the first time I saw them and have been using them in my classroom ever since. A few years ago, I set up this really simple numeracy activity using these bud cones to encourage children to develop their one to one correspondence, counting skills and numeral recognition. In this activity, children were encouraged to make a matching collection using Bud Cones to represent each number. The addition of tweezers enabled children to develop their fine motor skills also.
MTA has lots of different types of sorting trays that could also be used…
Featured Products:
Bud Cones
Nesting Wooden Trays – Set of 3
Tweezers
Active World Tray
What is your favourite natural resource to use in the classroom? We’d love to hear from you!
ABOUT HEIDI:
Heidi Overbye from Learning Through Play is a Brisbane based, Early Years Teacher who currently teaches Prep, the first year of formal schooling in Queensland. Heidi is an advocate for play-based, hands-on learning experiences and creating stimulating and creative learning spaces. Heidi shares what happens in her classroom daily on her Instagram page, Learning Through Play. See @learning.through.play for a huge range of activities, play spaces and lesson ideas.
Dash And Dot In The Classroom
Dash and Dot robots are a fantastic resource to introduce students to the fundamentals of coding. These interactive robots have the ability to manoeuvre around the floor in all directions, sense objects, flash LED lights and record and playback audio. This functionality allows Dash and Dot to avoid obstacles, sing, dance and respond to voice commands.
Connecting via bluetooth to a mobile device, there are a variety of apps that integrate with Dash and Dot. Each of these apps not only develops students’ programming skills but also key 21st century skills such as creativity, problem solving and critical thinking.
Wonder Workshop, the creators of Dash and Dot, have developed their own range of apps that support and guide students’ learning.
Go App
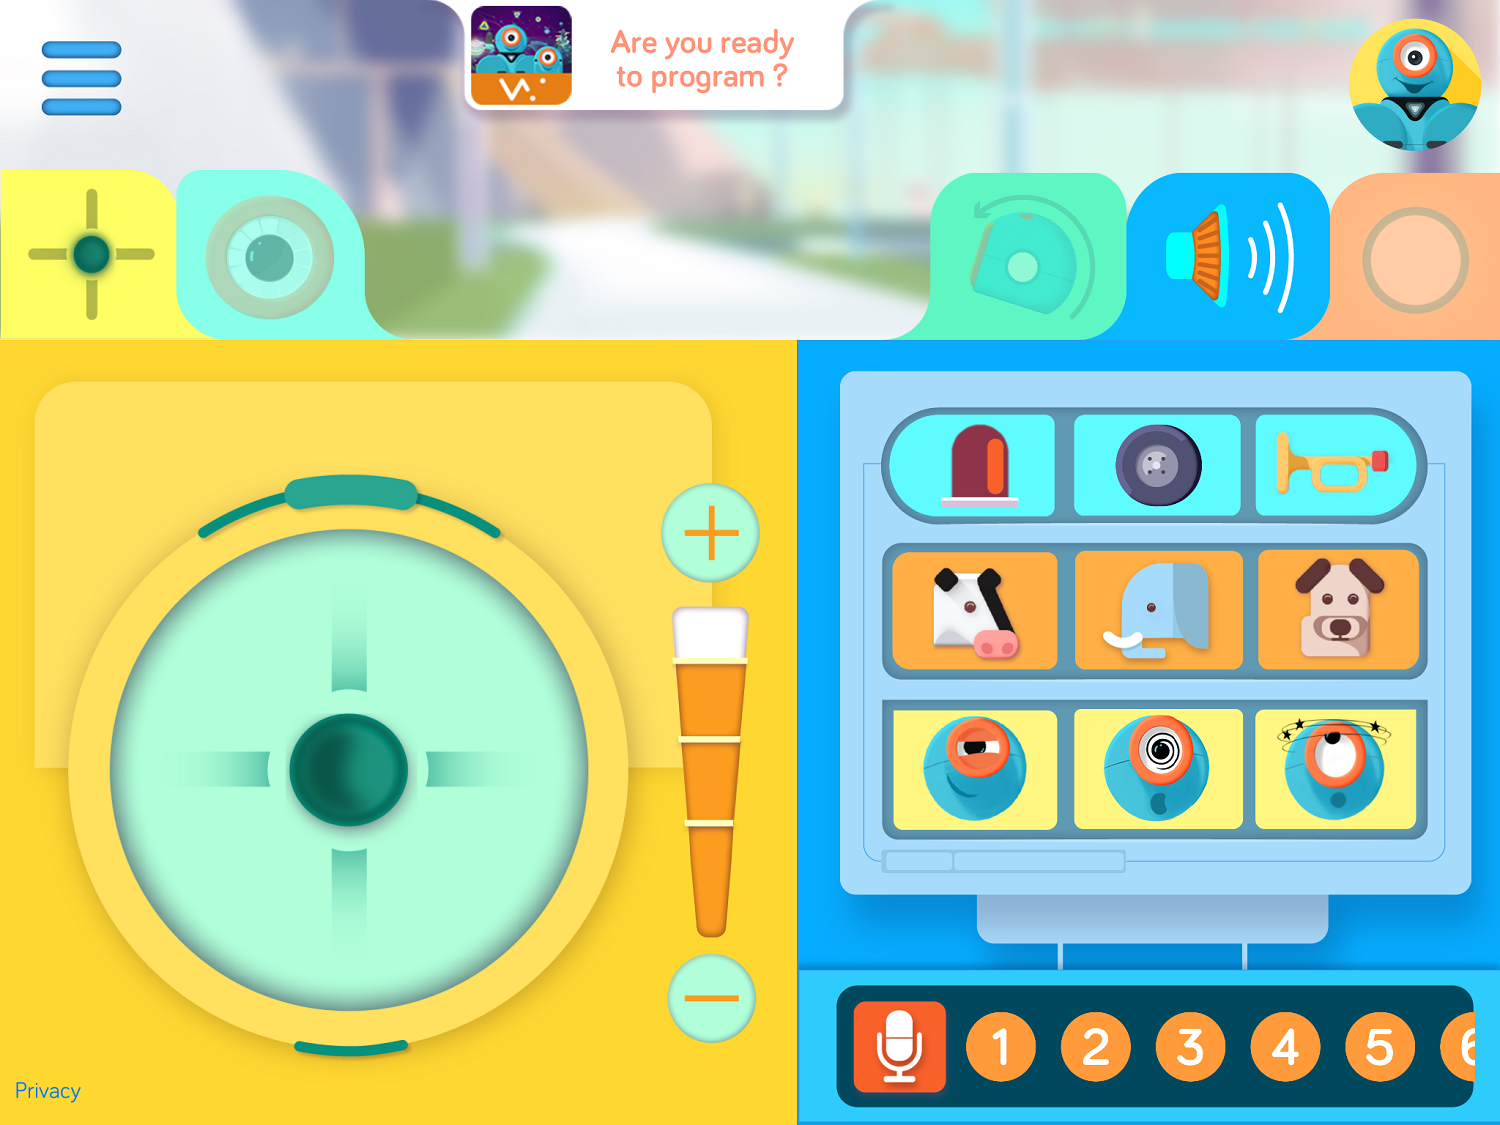
The Go app allows students to manually control Dash and Dot, similarly to a remote control. This is a great introduction to the robot which allows students to become familiar with its manoeuvrability. Within the Go app, students can control the speed and light display and change the direction that Dash is facing. Sounds can be added, and up to ten voice recordings can be stored for playback.
Wonder App
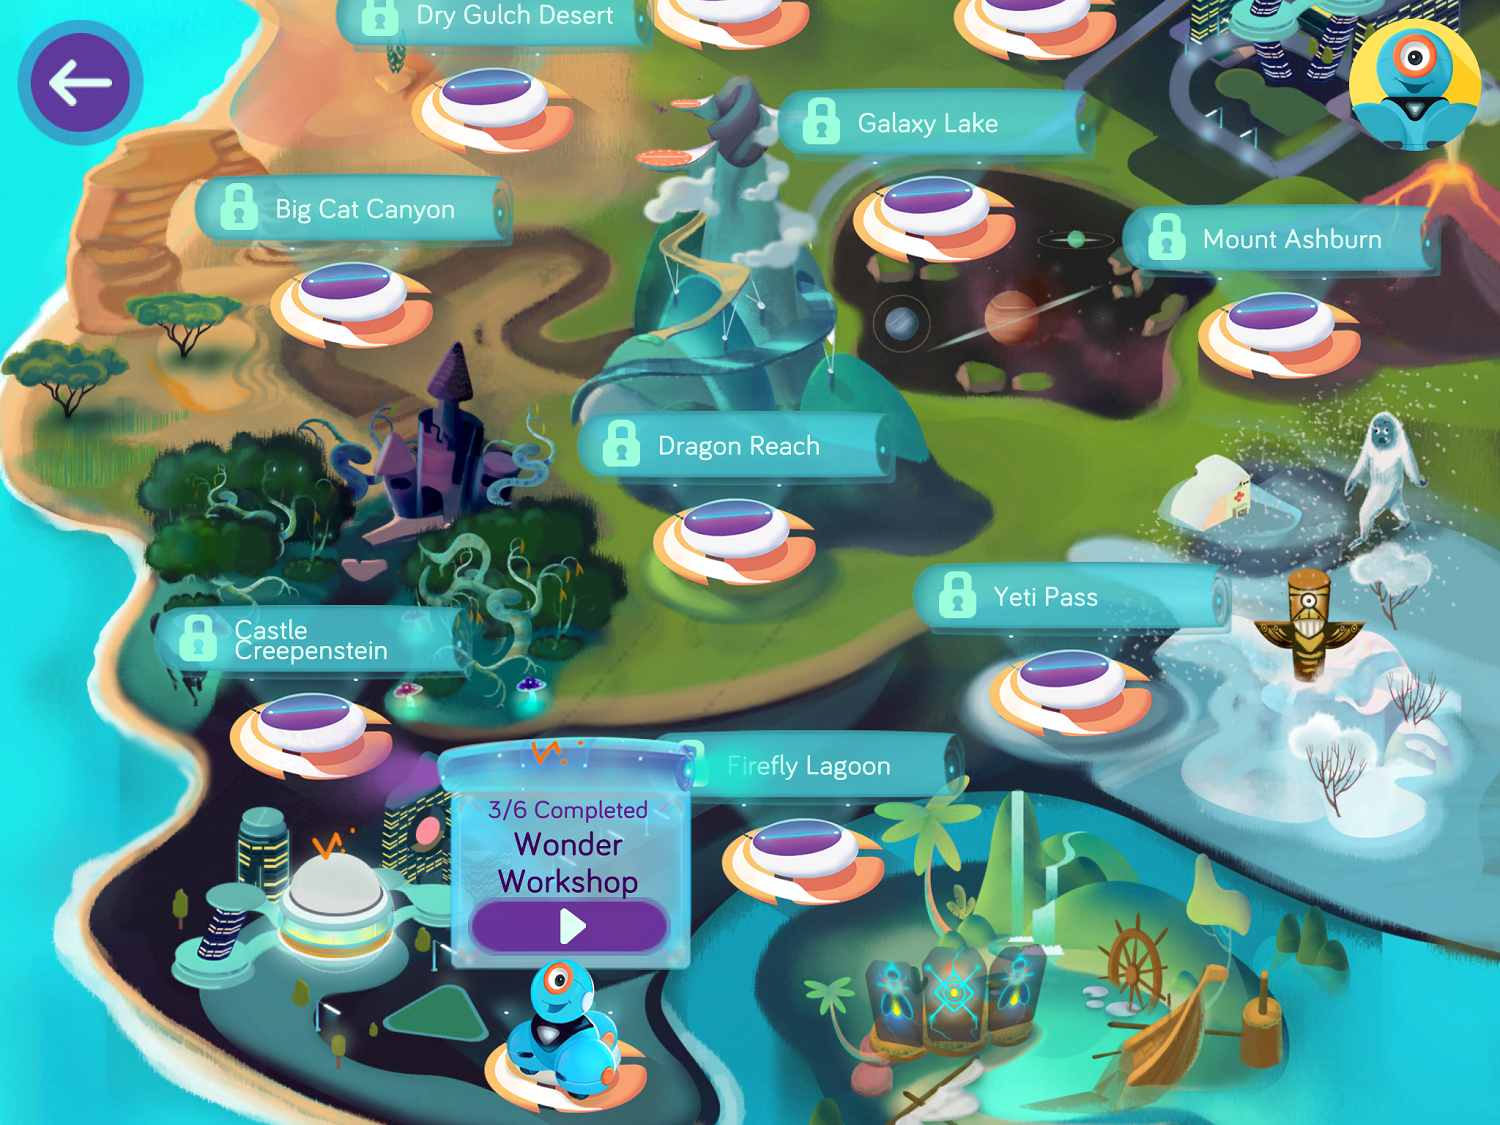
The Wonder app provides students with a range of challenges that develop their ability to program Dash and Dot. Students can travel through a variety of levelled quests, including the African Grasslands, Arctic Wilderness and Outer Space. Once students complete these challenges, they can begin creating their own worlds.
Blockly App
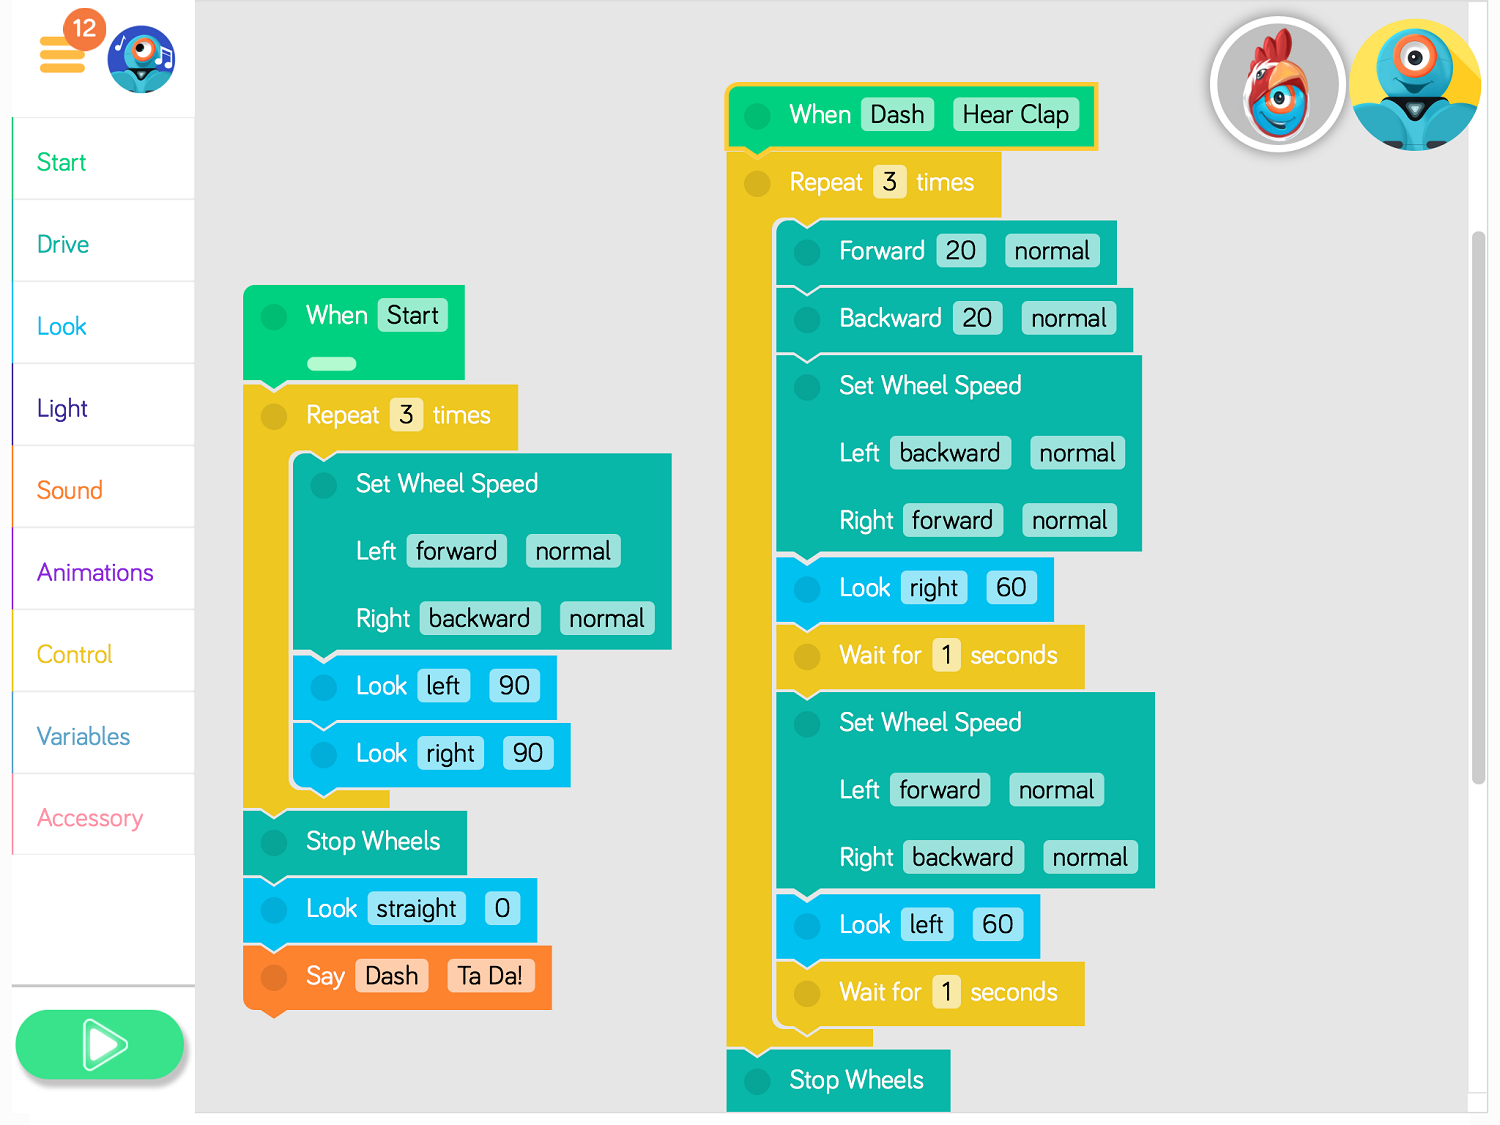
The Blockly app provides students with challenges to develop their understanding of block coding. They are introduced to conditional statements, loops and sensors. Students can program Dash and Dot to manoeuvre by responding to button inputs and voice commands.
Path App
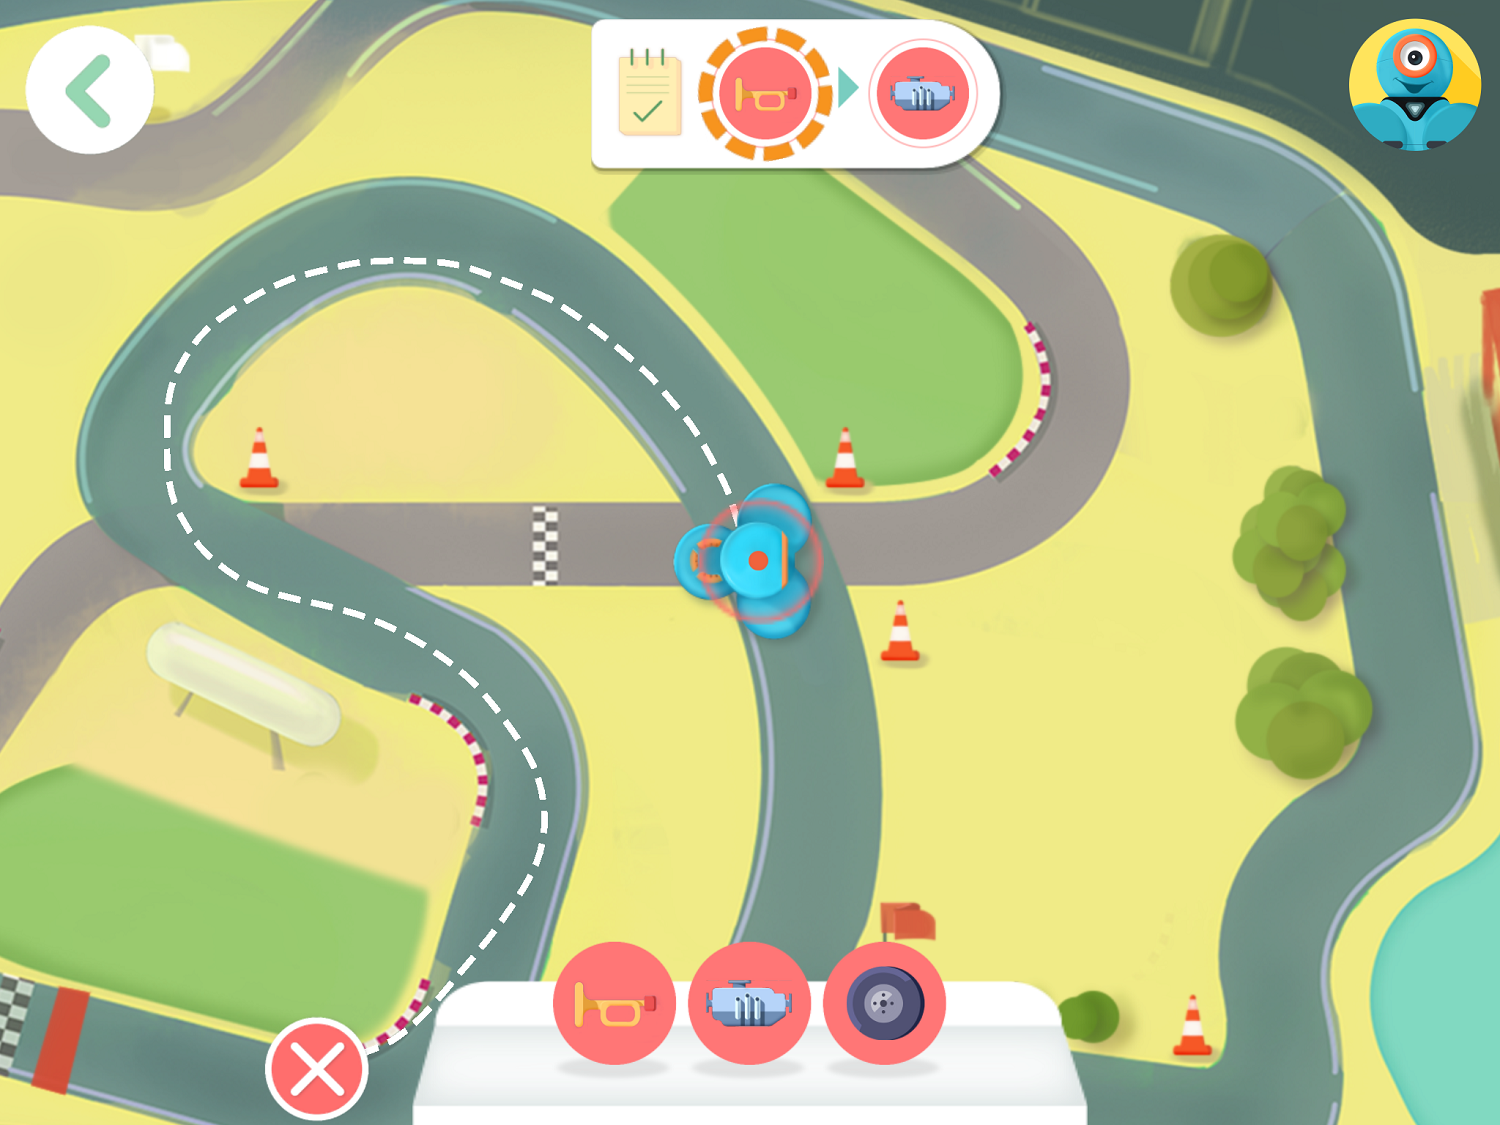
The Path app, as it suggests, allows students to program Dash to follow a set path. Students can complete a range of set challenges and then create their own.
Six Ways to Implement Dash and Dot in the Classroom
-
- Location and coordinates
- Measurement
- Number facts game
- Storytelling
- Sounds/ letter recognition
- Excursion reflection
Location and Coordinates
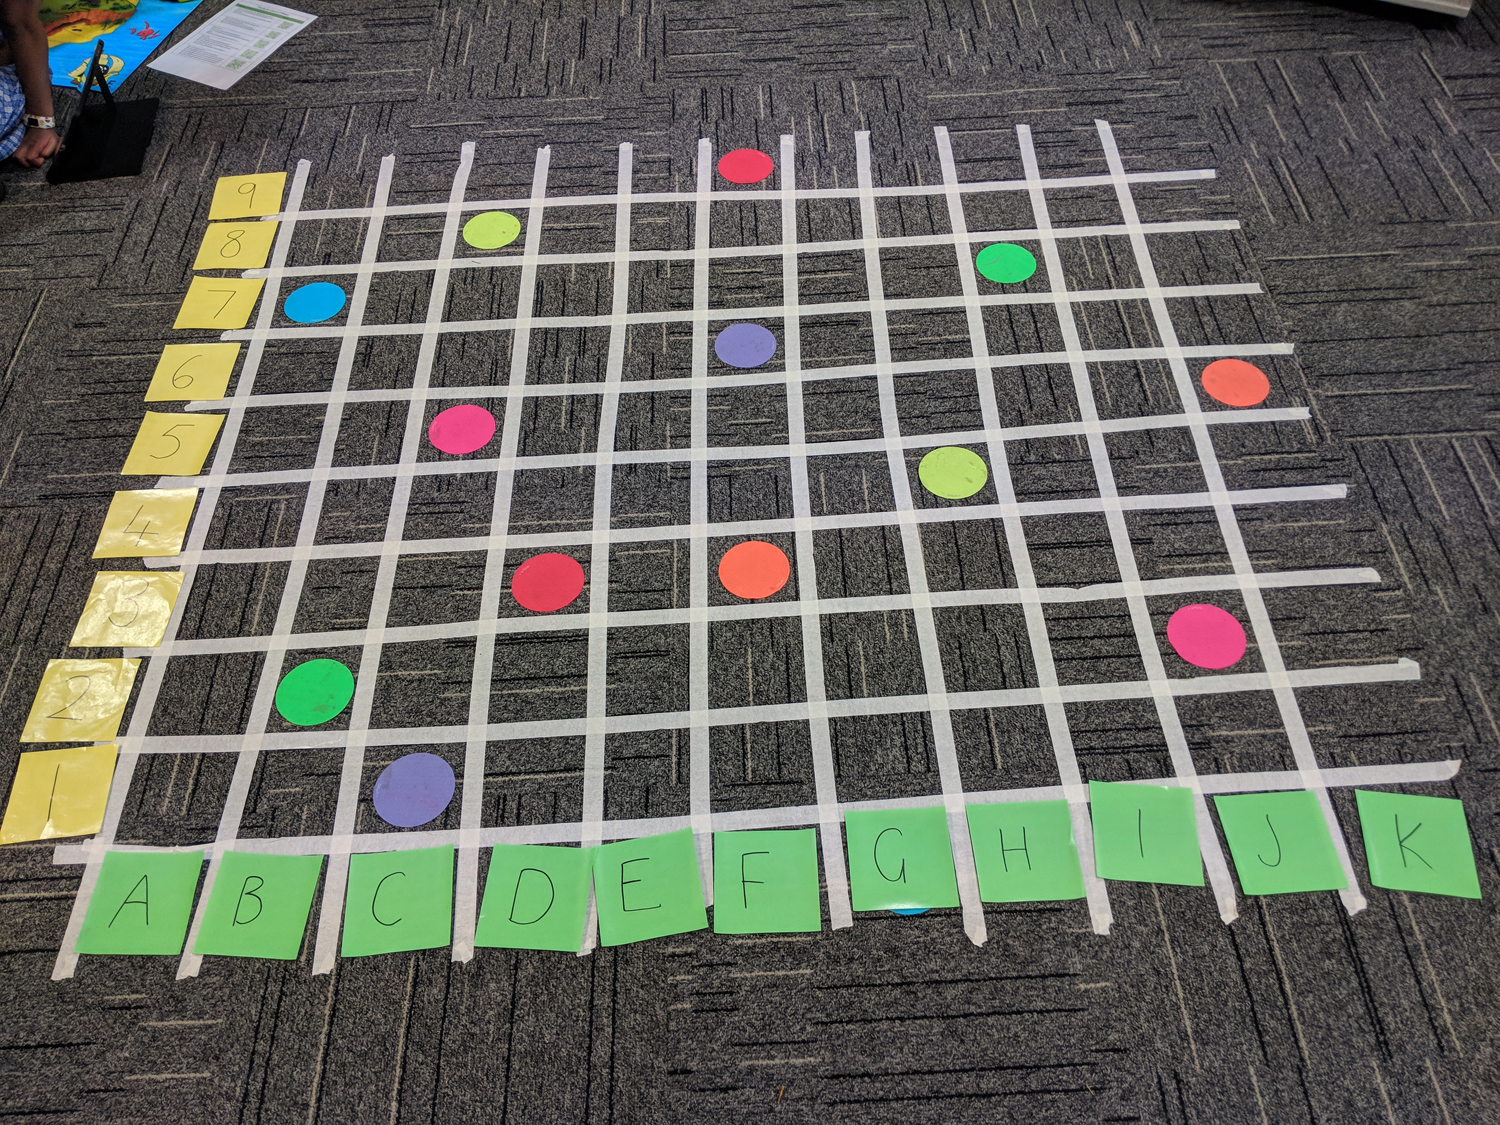
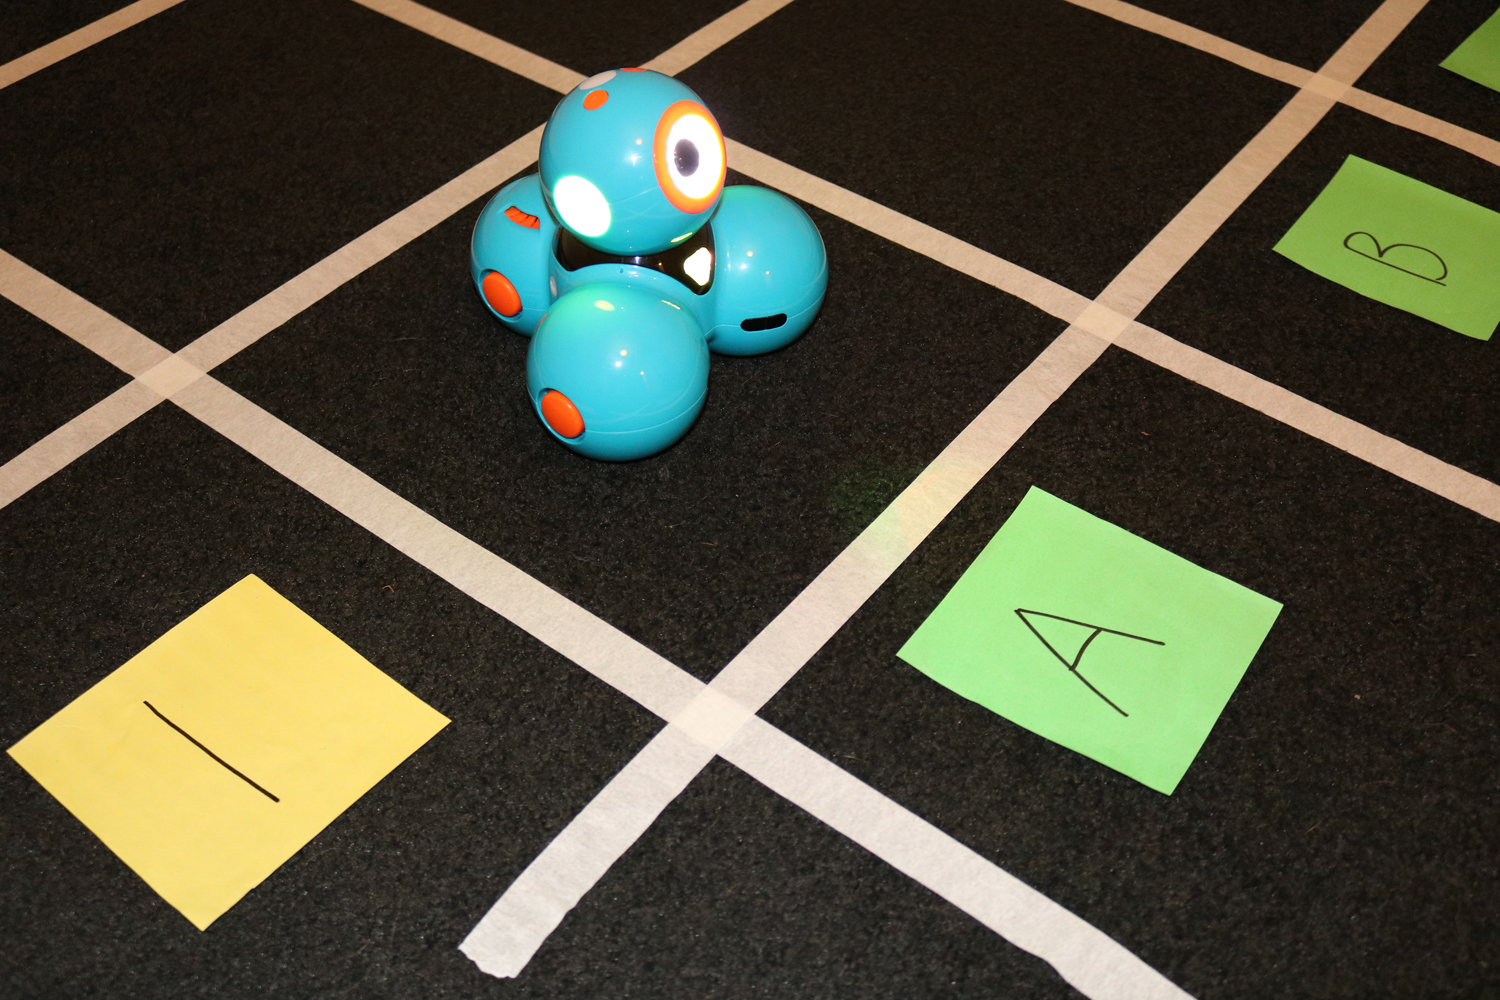
Dash can be used in Mathematics to support students’ learning about location and coordinates.
-
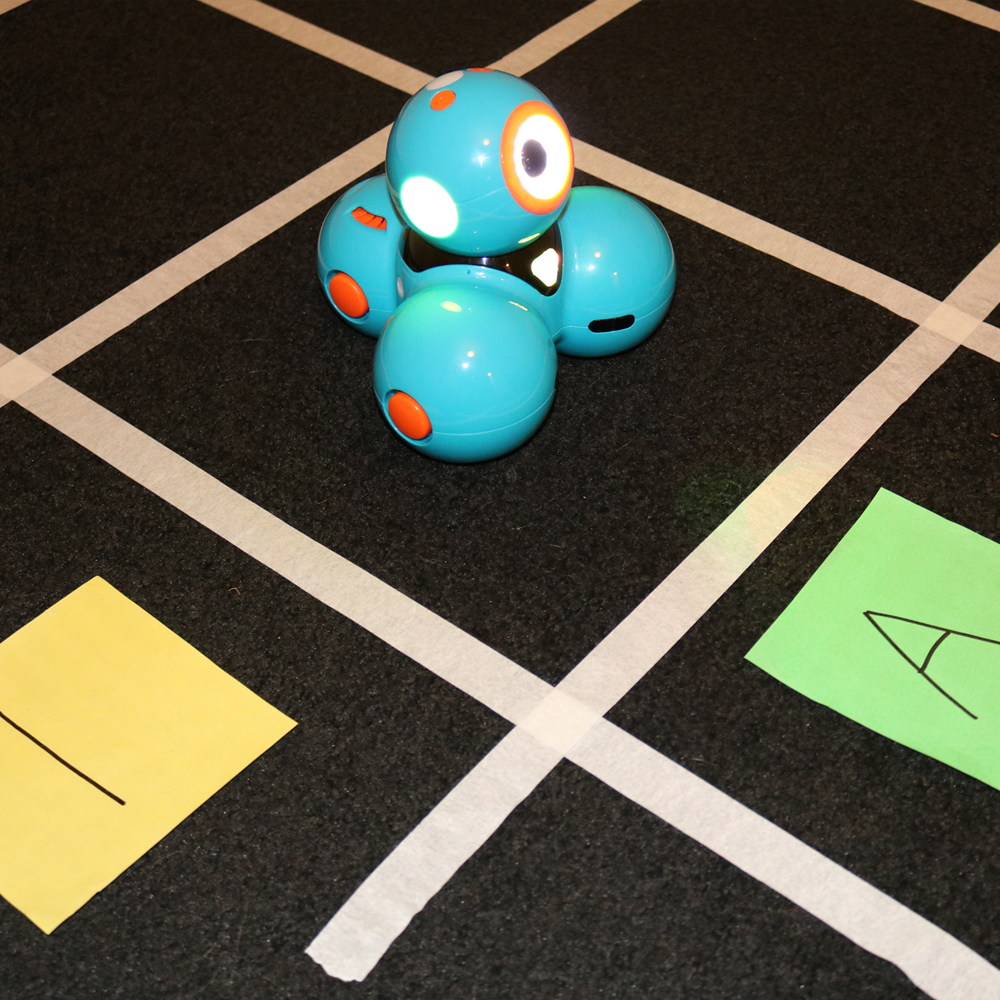
- Teachers create a coordinate grid on the floor using masking tape or chalk.
- Students program Dash to move to specific locations on the grid.
- Students can program Dash to speak the coordinate when it arrives there.
Measurement
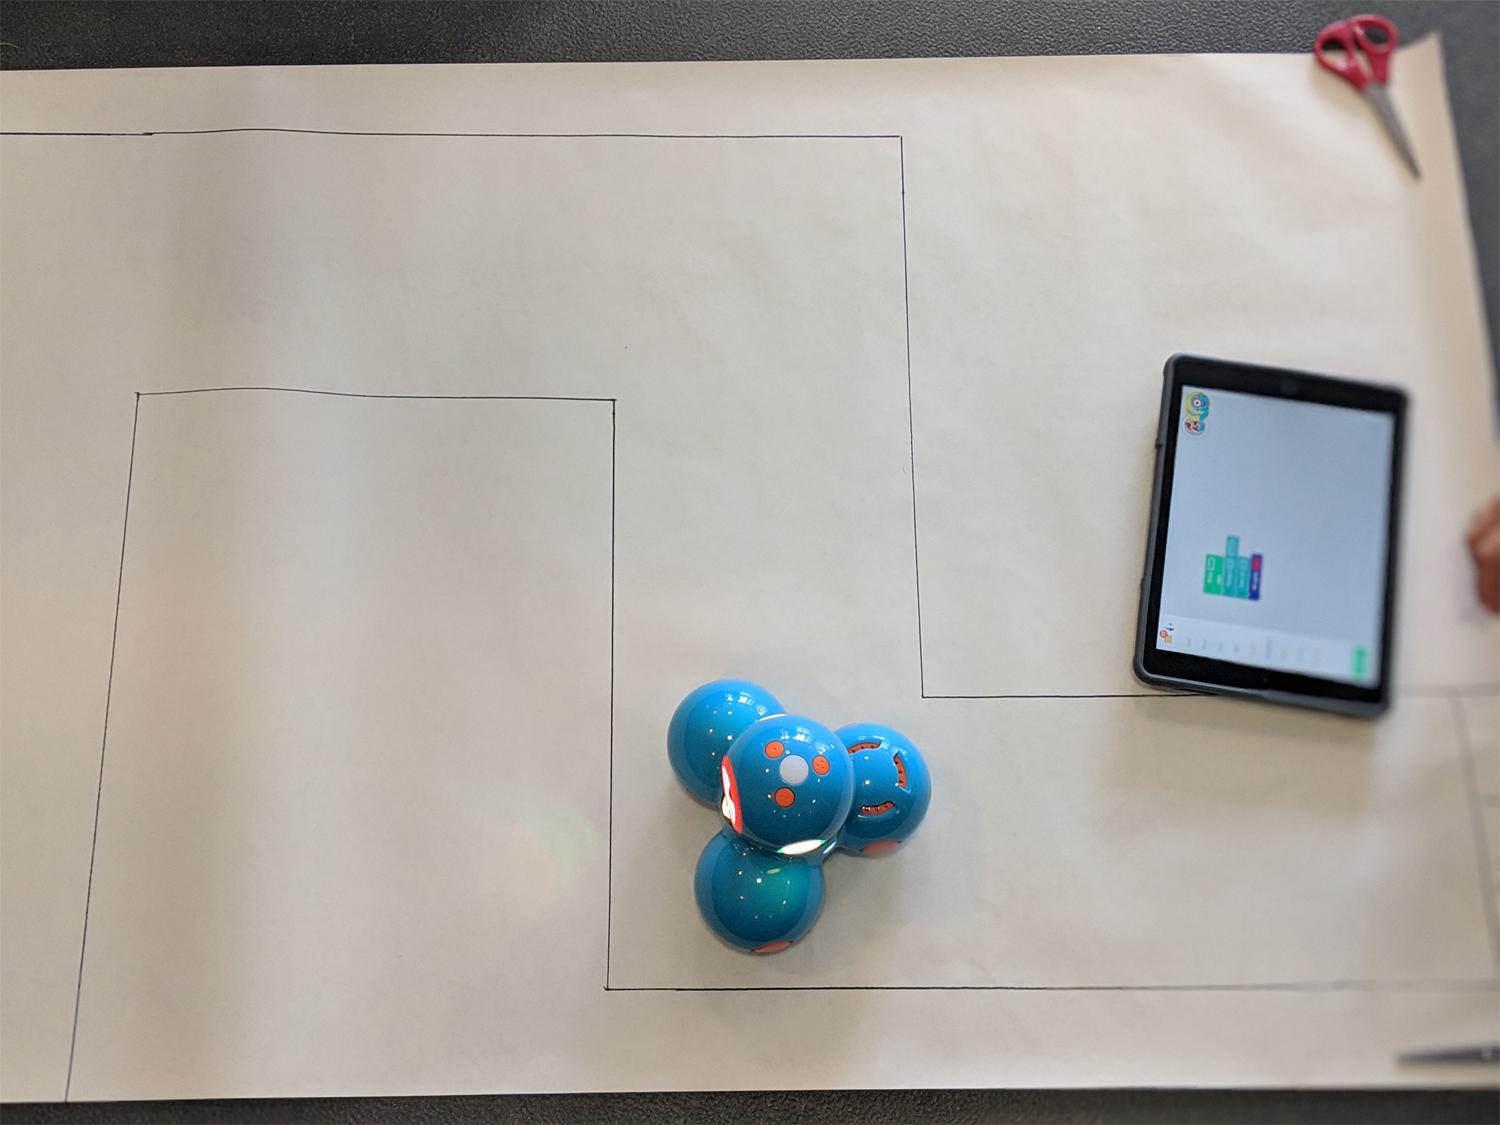
Students need to provide Dash with specific distances to move forwards, backwards, left, or right to manoeuvre him around the floor.
-
- Students draw a maze on butchers paper.
- Alternatively, students can use on-hand materials in the classroom such as blocks, straws, string, books etc to create a maze.
- Students program Dash by calculating the distance and angle of each of Dash’s movements to avoid obstacles and successfully complete the maze.
Number Facts Game
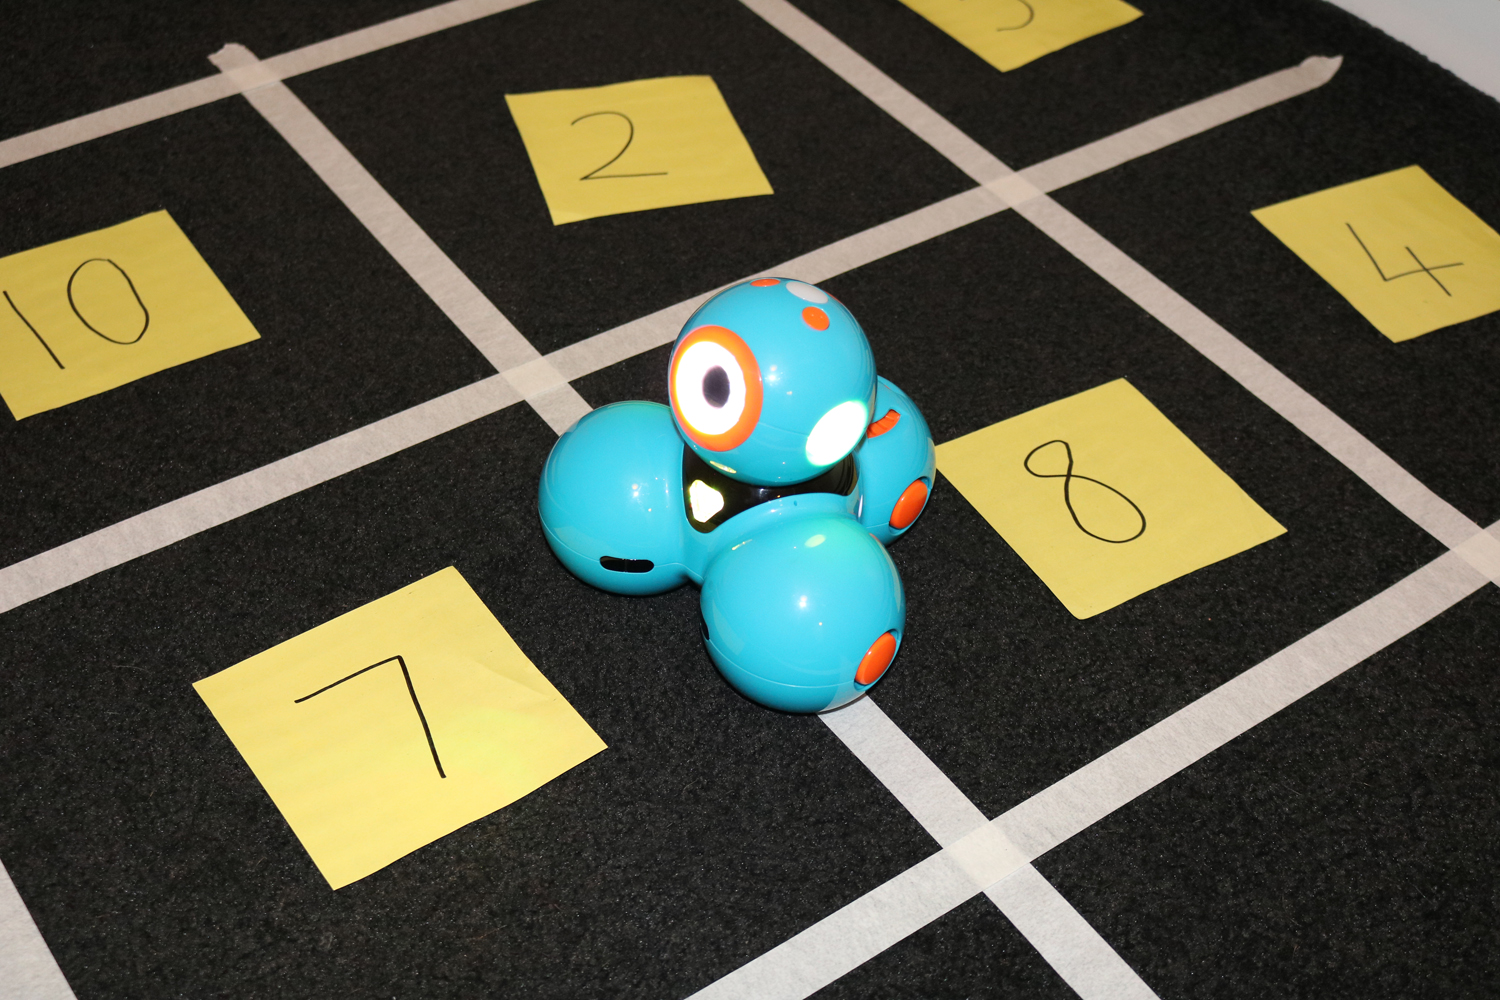
-
- Students create a grid on the floor with numbers in each square that represent the answers to number facts.
- Using Dash and Dot, students program Dot to say different number facts.
- When Dot says a number fact, students program Dash to move to the correct answer on the grid.
Alternative number facts game:
-
- Have two students or groups working on the grid at the same time.
- Groups take it in turns rolling two ten-sided dice. (You can always add or remove dice depending on student abilities.)
- Students add the numbers together then program Dash to move to the correct answer.
- Once they get to the correct number they place a kinder square over it to claim it.
- The group with the most coloured squares wins. If the answer is already covered, the group misses their turn.
Storytelling:
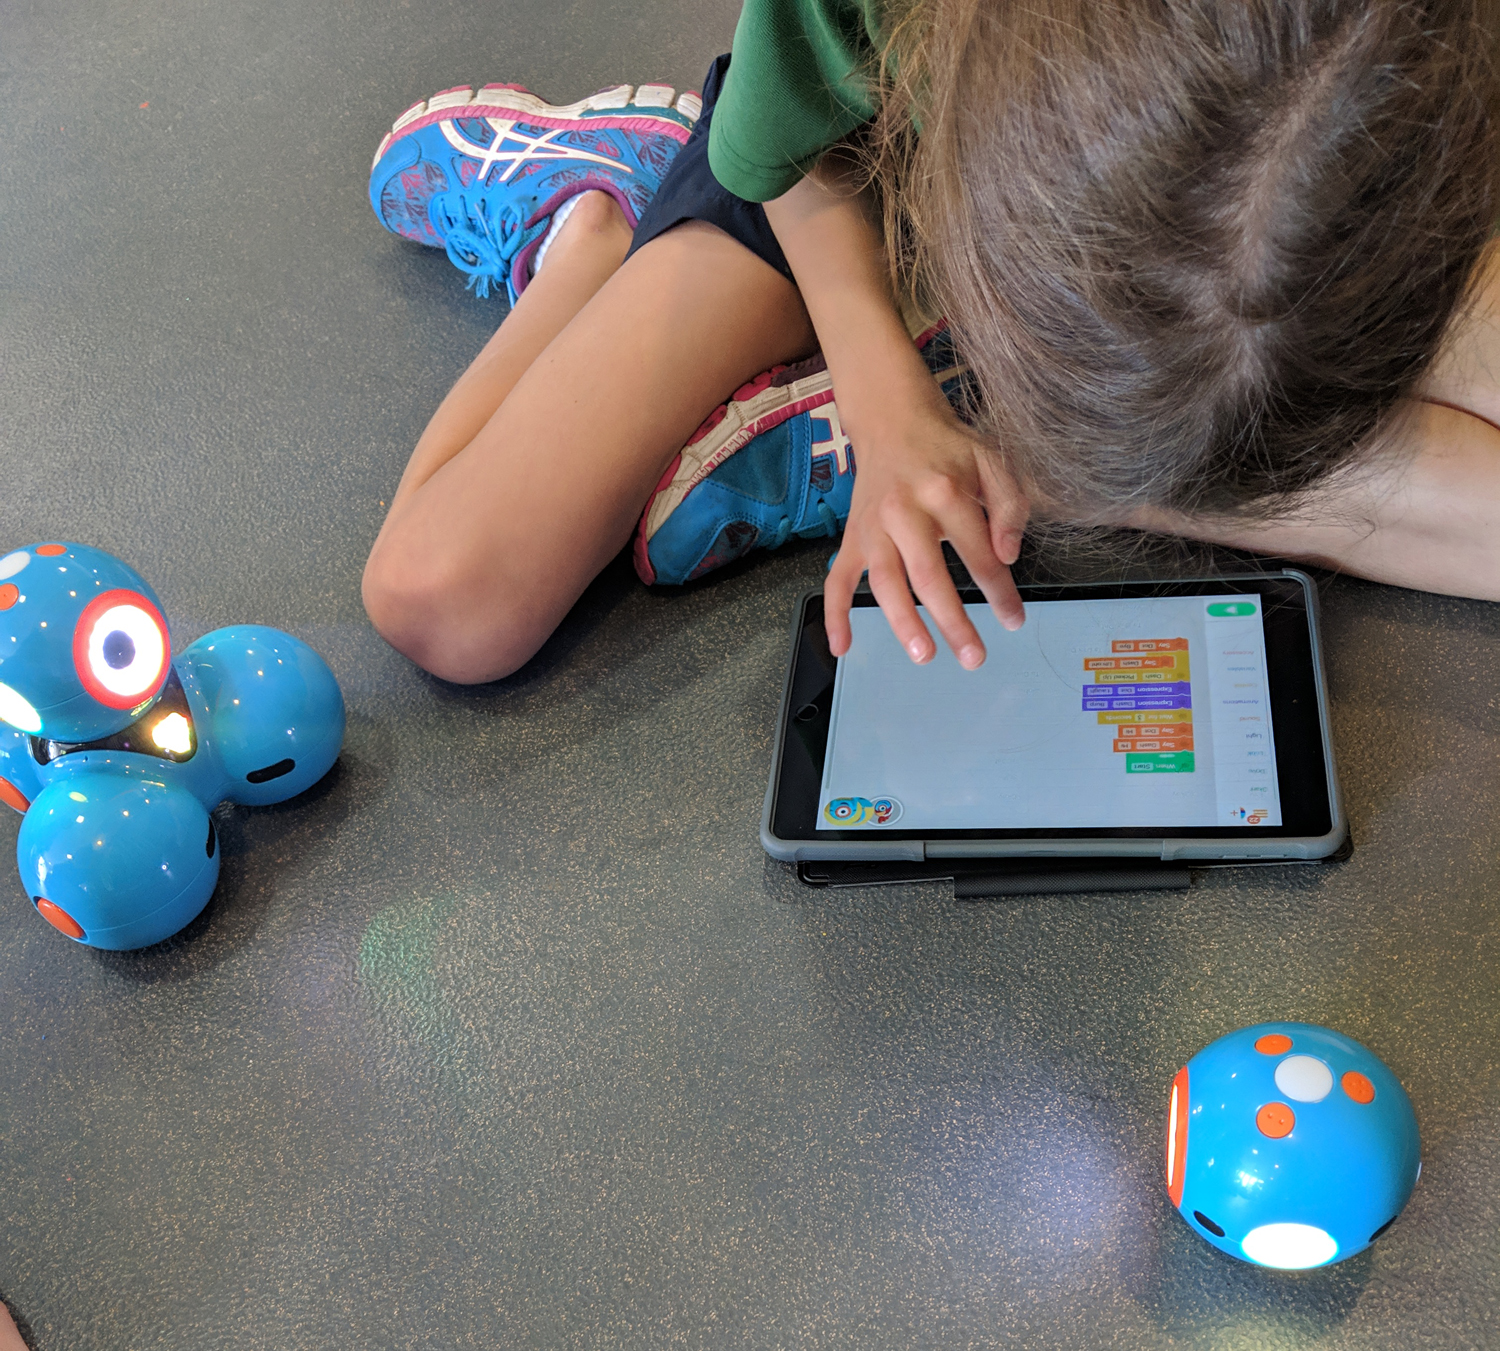
-
- Students recreate stories they have read by programming Dash to move through the story.
- At each major point in the story, students can record their own voice to give important information.
- Example: The Three Little Pigs. Dash plays the character of the Wolf. Students create the scene and program Dash to move around making huffing and puffing noises before he blows the house down. Dot can be used as one of the Three Little Pigs stuck in a house, who can also retell parts of the story.
Sound and Letter Recognition:
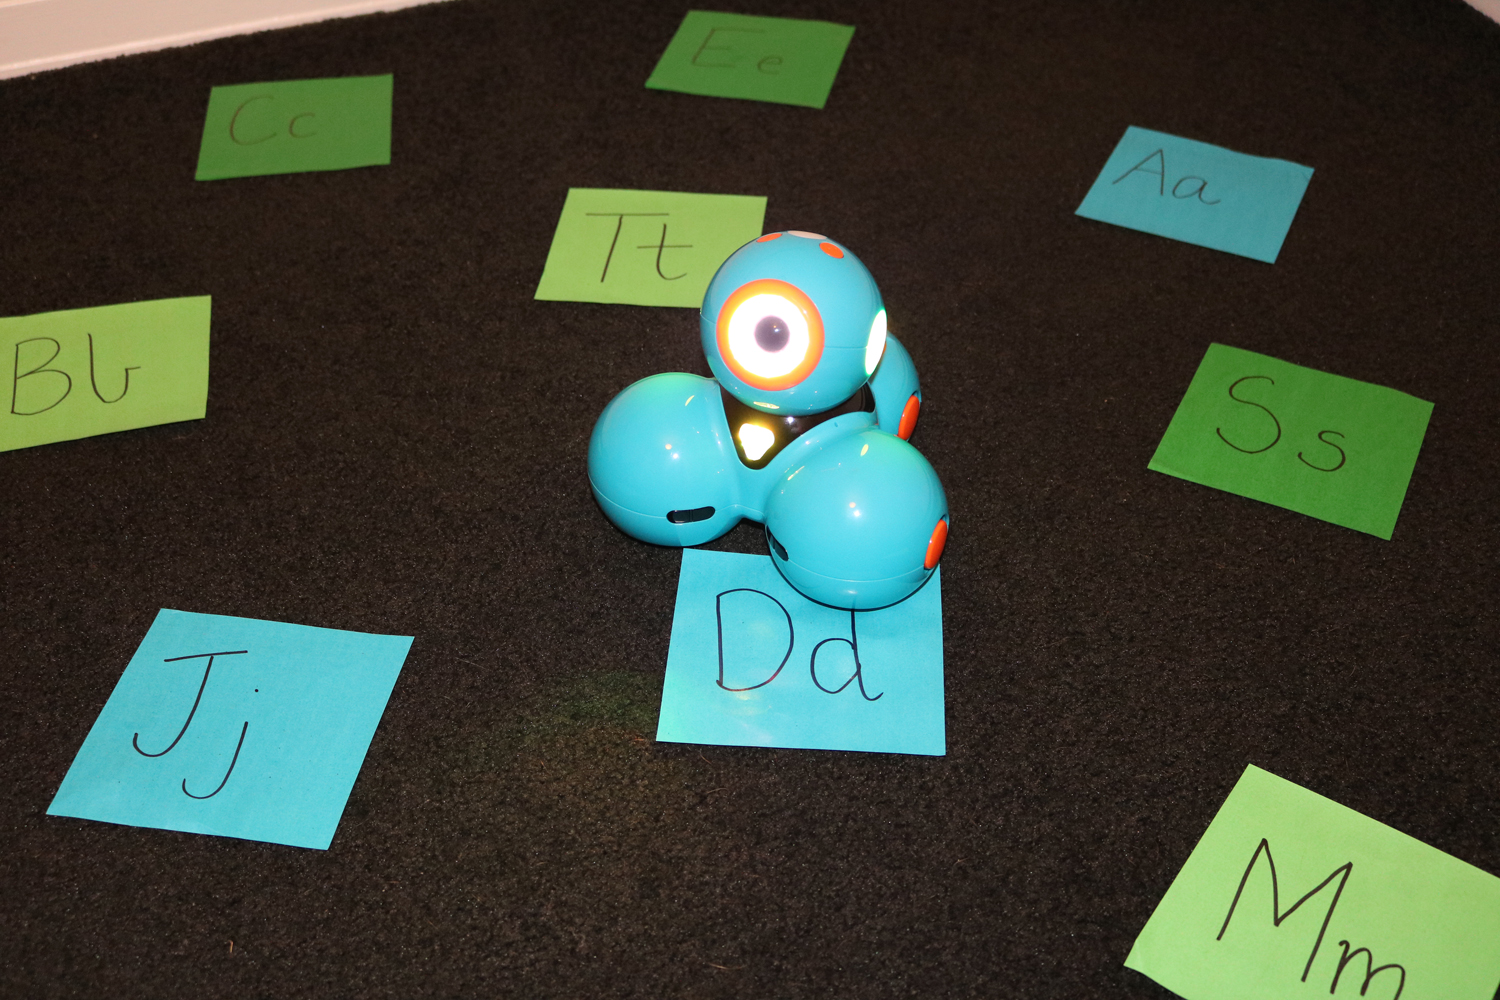
-
- Students or teachers write letters or sounds on kinder squares.
- Students then scatter the kinder squares around the floor.
- The teacher says a letter or sound.
- Students program Dash to move to the letter or sound that they hear.
Extension activity:
-
- The teacher says a word, for example, ‘mat’.
- Students program Dash to manoeuvre to all three letters.
Excursion Reflection
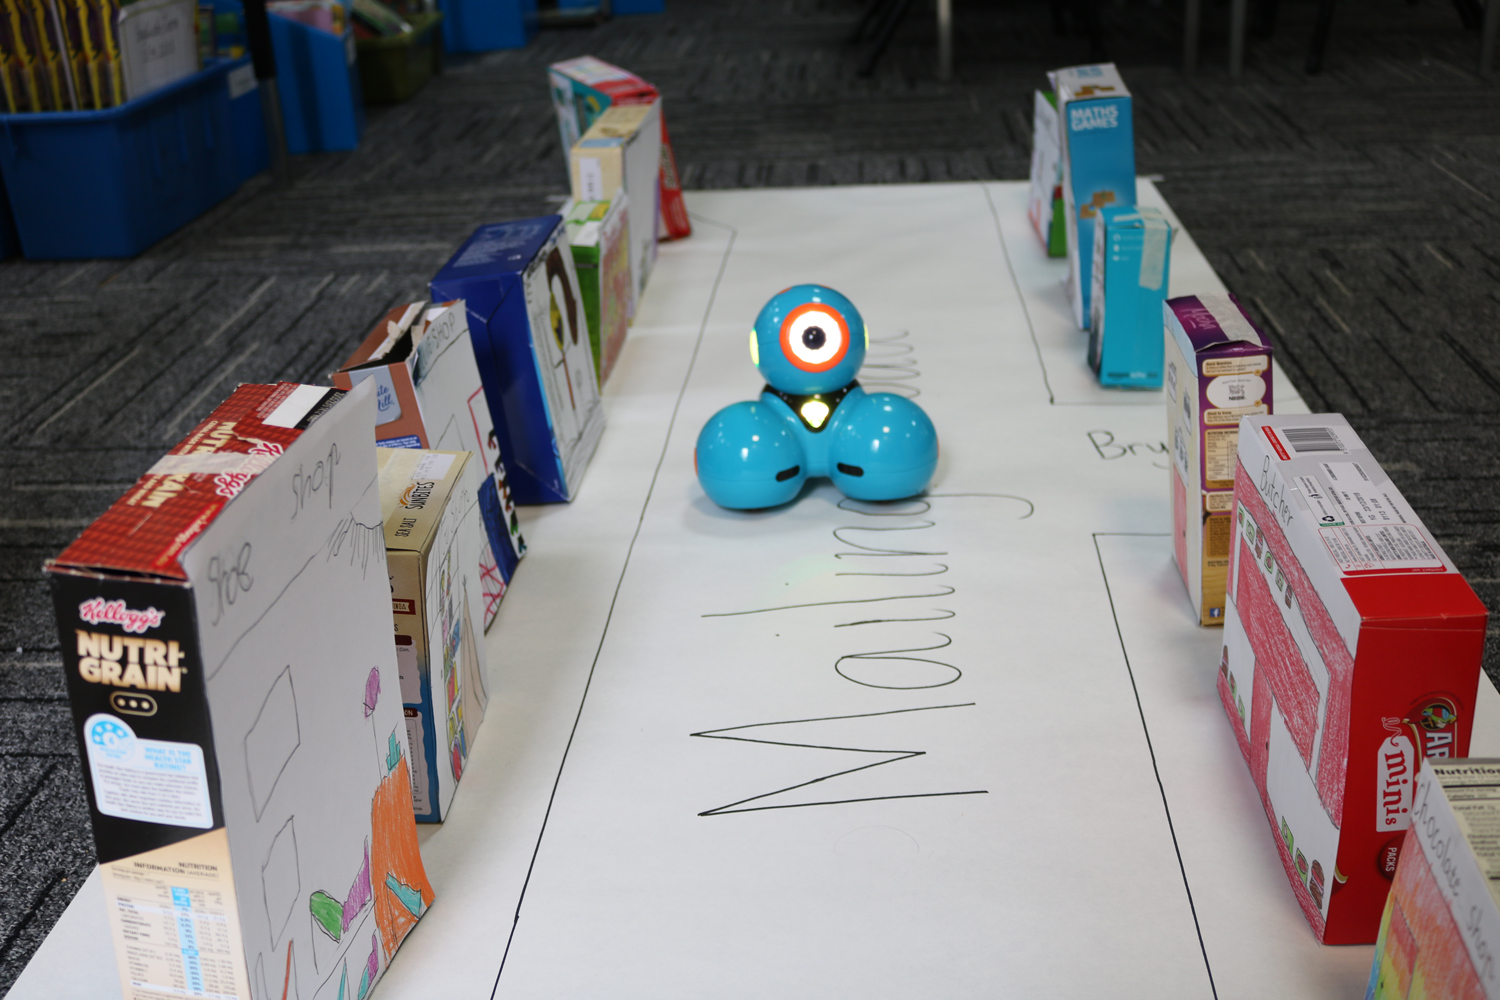
-
- Example: As part of a unit of inquiry, Year 1 students explored their local shopping strip.
- On returning to school, the students recreated the shopping strip out of cardboard boxes.
- The students program Dash using directional movement to measure distances to manoeuvre around the shopping strip.
-
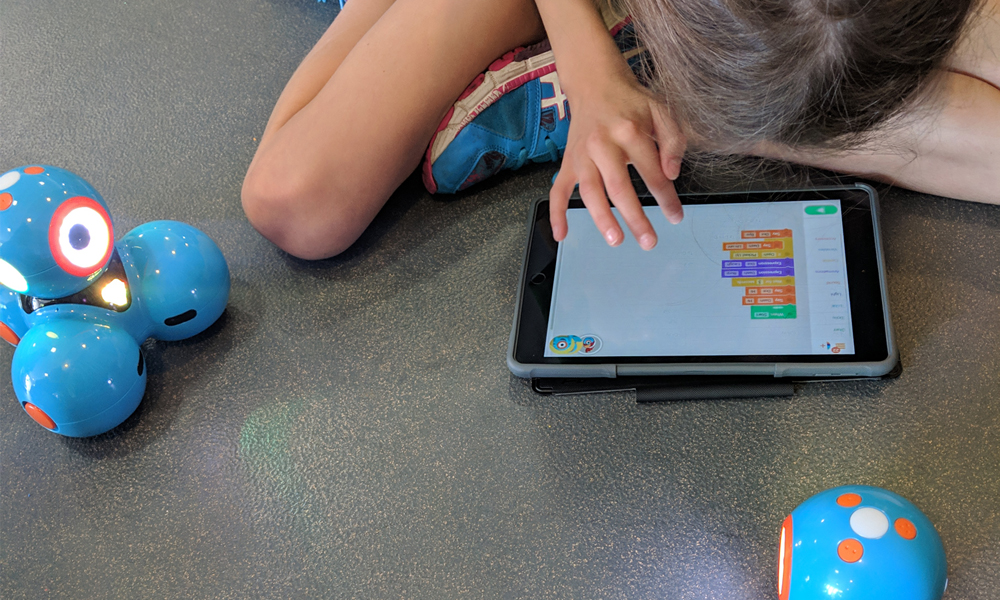
Featured Product: Dash & Dot Educational Robots Pack
How are you using Dash & Dot in Your classroom? We would love to hear from you!
About the Author
Eleni Kyritsis is an award winning teacher from Melbourne. She is the Leader of Curriculum and Innovation at Strathcona Baptist Girls Grammar. Eleni facilitates professional learning workshops around the world that focus on unleashing creativity and curiosity in classrooms. You can contact her at elenikyritis.com and @misskyritsis
Incorporating A Digital Reading Program Into My Primary Classroom
Gary is a year 3 teacher who works in a large public school in Sydney which has over 1000 students. He has been teaching for 20 years and has used Wushka successfully with years 3, 4 and 5 over the past two years. Gary currently uses Wushka in a co-teaching learning space with 60 students. Hear from Gary below as to his experiences with Wushka.
We’ve been using Wushka at our school for two years now and it has reaped very positive results for our students. It has increased student engagement with reading and teachers have noticed a transfer of this engagement into the classroom. Students love the accessibility of it and the freedom to choose from a variety of texts at their own level.
As a teacher, I’m able to control the levels of reader available to each student. The texts are organised into coloured reading ‘boxes’ and I can assign these to particular students or to different reading groups. The texts are organised from levels 1 to 31+ in line with familiar reading levels which is great for both beginner and experienced readers.
Each text comes with comprehension questions, lesson plans and other resources. These are very helpful in organising lessons for guided reading. I particularly like the discussion cards that engage students in a deeper analysis of the texts they have read. These are great for independent activities in the classroom.
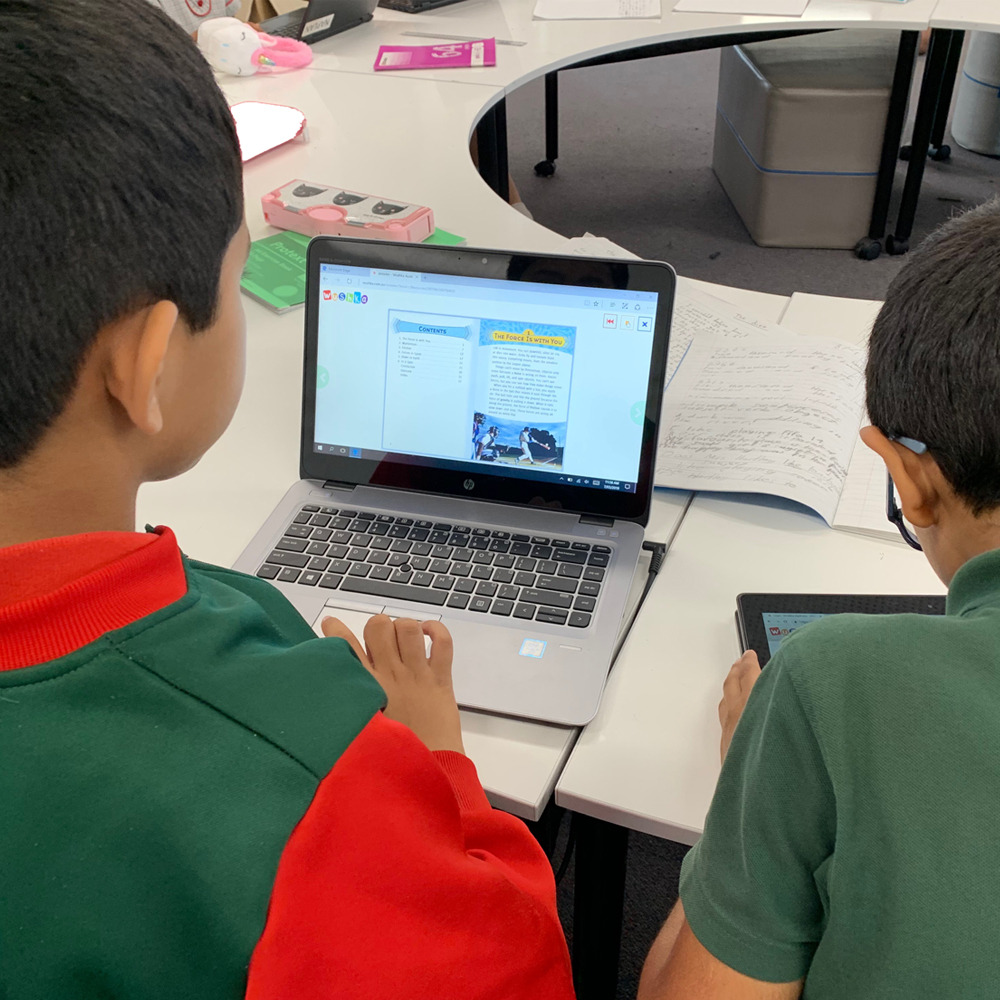
In a school with over 1000 students, levelled readers are in high demand. Wushka has allowed school-wide access to over 600 readers, saving us a lot of expense that would have been spent in replacing or adding new readers to our collection. It gives us access to a range of texts that we would never otherwise have been able to afford.
We use Wushka for our home reading program and guided reading, and we also incorporate the texts into our Project Based Learning and STEM learning. We love the filter function, which allows us to search for texts by topic, comprehension strategy, genre or text type. It’s easy to find texts on a particular subject for students at all reading levels and texts can be displayed on the interactive whiteboard for whole-class, modelled reading sessions.
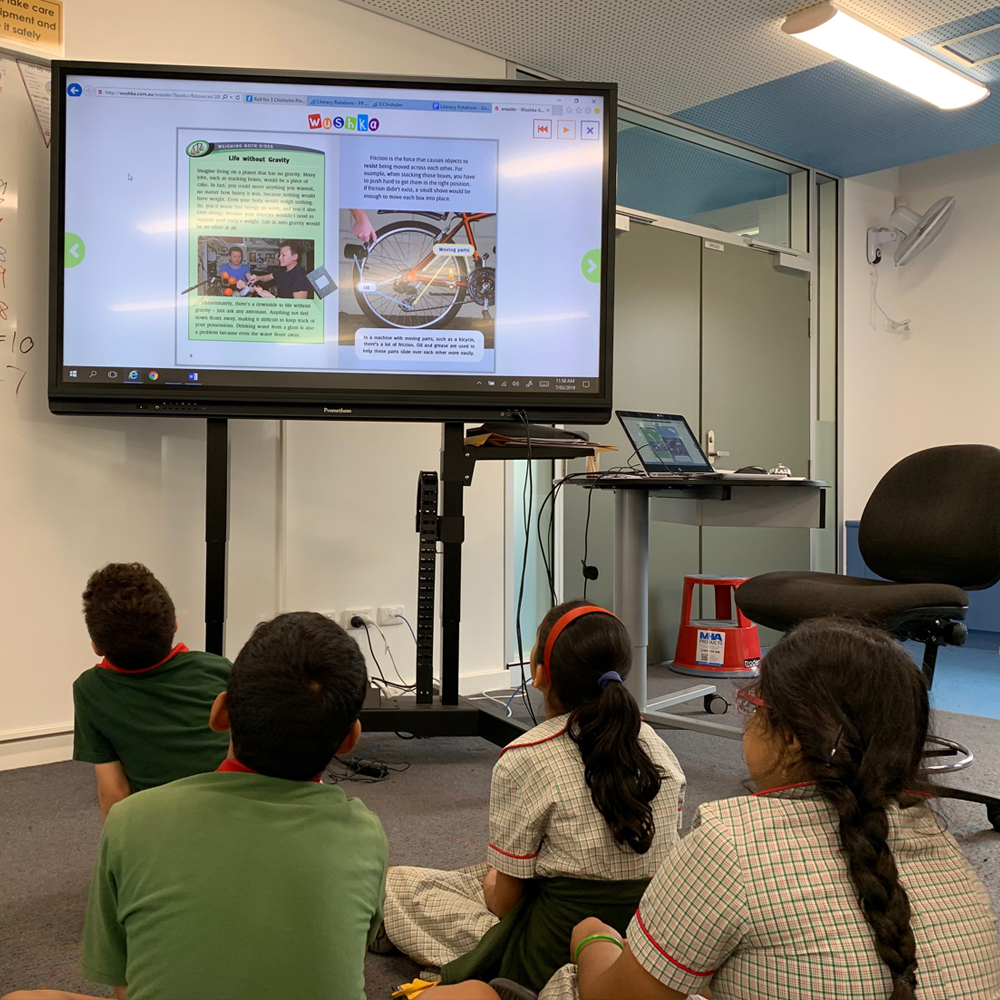
One of the functions that has really helped in our school community, which is almost 100% EALD (English as an Additional Language or Dialect), is the read aloud function. This lets students hear the books being read to them which might otherwise be impossible due to English not being the first language of parents in the home. The value of this function in improving reading fluency is immeasurable.
The other great advantage of Wushka is the opportunity for teachers to access data around their students’ reading. Teachers can see how often students are reading, how long they are reading for and whether they are understanding the texts they are reading by looking at quiz results.
As a school of the future we love the flexibility of the Wushka reading program and with technology becoming a greater part of school learning environments we find that it meets our needs extremely well. We no longer have to carry bundles of readers across a very large school site.
The training and support offered by the Wushka team has been extremely helpful. As part of our Wushka subscription, we have held several workshops in upskilling our teachers in the various aspects of the program. I would highly recommend Wushka because of its cost effectiveness, versatility and ease of use.

