Posted on

Deck the halls: 7 Christmas craft activities that bring the festive!

Christmas

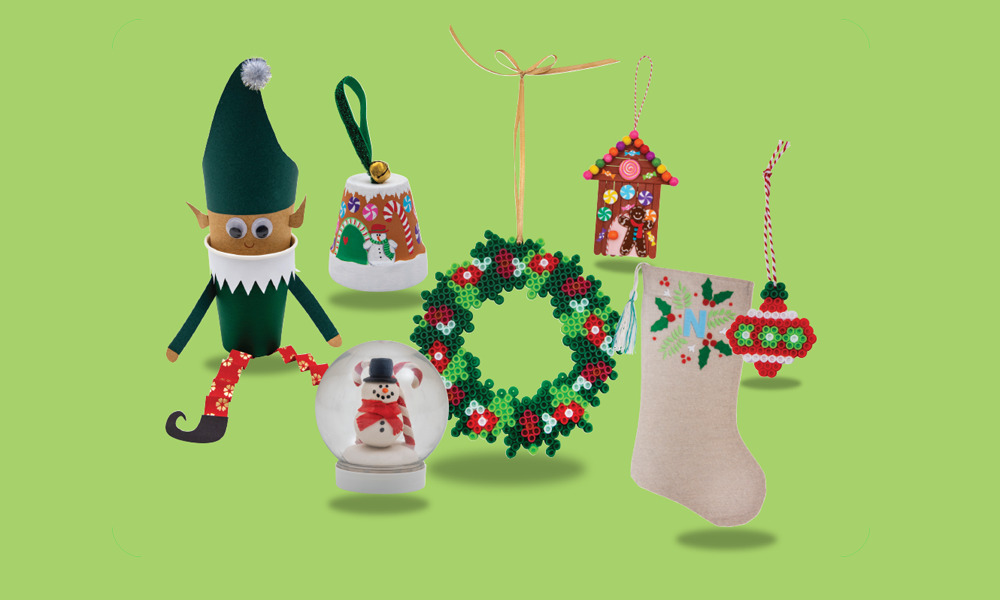
From wreaths to snow globes, it’s time to get Christmas crafty with these 7 elf-approved activities! While Santa is busy in the North Pole preparing for his big appearance, that’s the cue for all of us down here to plan our festive season arts and crafts. We’ve put our Santa thinking caps on and come up with 7 fun craft activities to bring the joy and merry! They’re as easy to make as kicking back on a sleigh ride with jingle bells on! Little creative minds and hands ready? Let’s gooo!


Elf cup
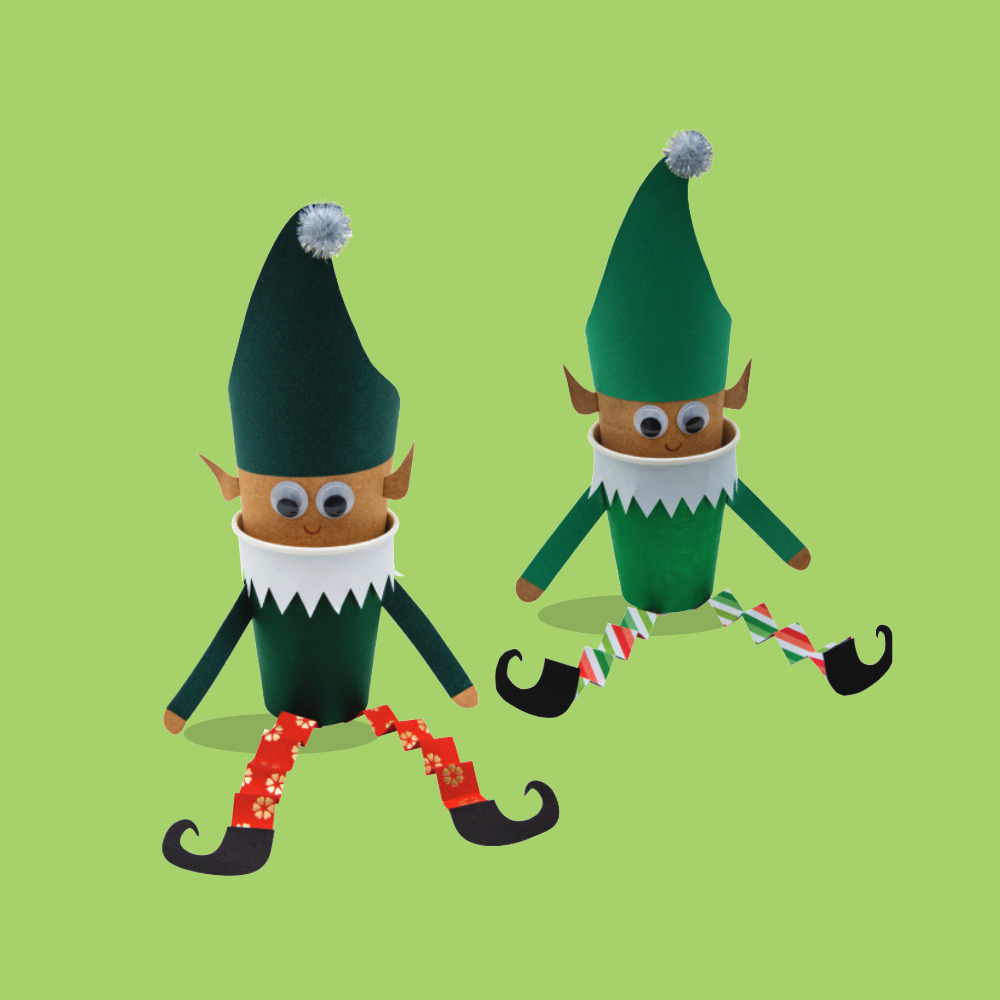
Christmas Craft Elf Cup

We took a poll and 100% of Santa’s elves LOVE it when you create little craft versions of them! These finished elf cups look wonderful sitting on a shelf (naturally), on the Christmas table or near the tree. White eco-paper cups are the basis of these cute decorations, painted in green. Then you build your elf’s legs, feet, and cheeky head and hat.


You will need:

White Eco Paper Cups https://www.teaching.com.au/product/jm850

Christmas Paper Chains https://www.teaching.com.au/product/cs5548

A4 Coloured Cover Paper https://www.teaching.com.au/product/teb0001

18mm Joggle Eyes https://www.teaching.com.au/product/sh1038

Strong Craft Glue https://www.teaching.com.au/product/cs0004

A4 Kraft Paper https://www.teaching.com.au/product/teb0087

Assorted Christmas Pom Poms https://www.teaching.com.au/product/th180


Let’s make it!

Cover your cup in green using a marker or paint and set aside to dry.

To make the elf’s collar, cut a strip of white cover paper 28(L) x 3.5(W)cm, and then trim zig-zags into one edge (triangles measuring approx. 1.5cm, with each point roughly 1.5cm apart).

Wrap your zig-zag collar around the top of the cup, attaching with glue at the back.

To make the elf’s legs, take 2 strips of Christmas paper chain and fold them back and forth to make a zig-zag fold.

Use a dab of glue to attach the legs to the base of the cup.

To make the feet, fold a piece of black cover paper in half and draw one point elf shoe with a pencil, cut the pencil markings out, giving you two shoes.

Use a dab of glue to attach the shoes to the very end of the zig-zag paper legs.

To make the elf’s head, cut a piece of brown Kraft paper approx. 15(L) x 26(W)cm, wrap it into a cylinder with an overlap of approx. 2cm, and either tape or glue in place. Pop it into the cup.

To make the hat, free draw a wonky triangle shape (measuring approx. 26cm at the base, going up to a point. Our elf’s hat measures 14cm from the base line to the point).

Cut out your elf hat and glue it onto the top of the elf hat, overlapping the hat onto the Kraft paper.

To make the arms, use the excess paper from the hat and Kraft paper. Cut two strips of brown craft paper measuring 9(L) x 1.5(W), and 4 x coloured paper lengths 8(L) x 1.5cm.

Layer the Kraft paper and coloured paper together – 1 coloured on the bottom, Kraft in the middle with the ends poking out and another coloured on the top, gluing together. Repeat to make the second arm. Use a pair of scissors to round off the brown Kraft paper to form the hands.

Make a small 45-degree fold on the tops of the arms and glue to the elf cup body.

Free draw two ears on the brown Kraft paper – with 0.5cm excess to fold back and glue to the elf’s head.

Finish off by adding a smile and gluing on 2 joggle eyes, a pom pom on the hat and set aside to dry thoroughly.

Done! The perfect Elf Cup is ready!


TIP: Modify for younger age groups with pre-cut shapes or templates to snip out.


Gingerbread house terracotta pot ornament
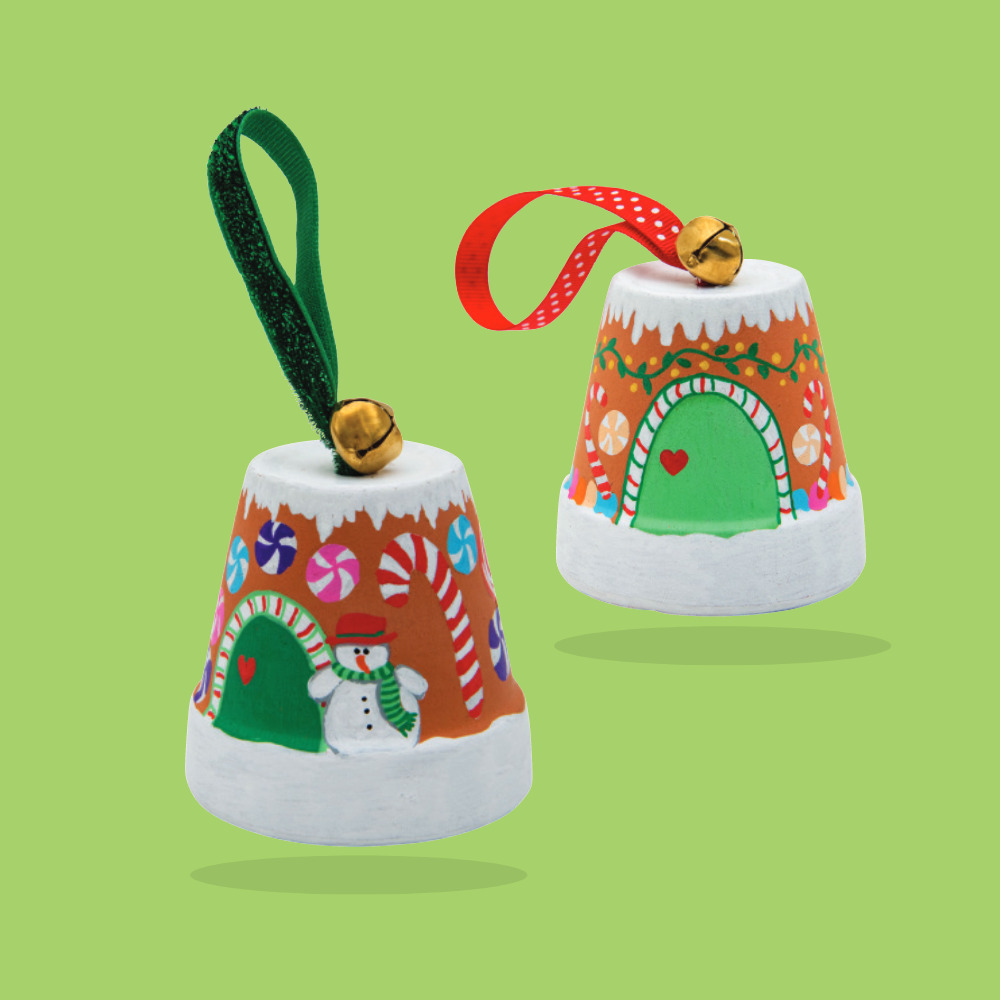
Christmas Craft Terracotta Pot Ornament

This gingerbread house ornament is so cute, it’s bound to be a big favourite for little hands to create and give them a tremendous sense of pride in their work! It would look great sitting on a desk, a shelf, coffee table or a windowsill! These little terracotta pot ornaments also make perfect seasonal gifts for loved ones!

You will need:

Terracotta Plant Pots https://www.teaching.com.au/product/sh9802

Fine POSCA Markers https://www.teaching.com.au/product/um300

Christmas Jingle Bells https://www.teaching.com.au/product/sh9475

Assorted Christmas Ribbons https://www.teaching.com.au/product/sh1588

Crystal Clear https://www.teaching.com.au/product/md025


Let’s make it!

Lightly draw your design onto the terracotta pot with a lead pencil – white snow around the rim and fallen snow coming down around the top edges, a little door, candy canes, gum drops, lollies etc. as desired.

Use the white POSCA paint marker to fill in the large white snow areas.

Use the colourful POSCA paint markers to fill in the brightly coloured details, letting your pencil markings guide your art and set aside to dry.

Apply a layer of Crystal Clear to the entire surface of the pot to provide a permanent barrier to moisture and wear & tear and set aside to dry.

Cut a 20cm length of Christmas Ribbon, form a loop and push the two loose ends through the Jingle Bell.

Feed both loose ends through the hole at the top of the pot, trapping the Jingle Bell on top.

Use strong tape or glue to adhere the loose ribbon ends to the inside of the pot.

Done! The perfect Gingerbread House Terracotta Pot Ornament is ready.


TIP: Further personalise your decoration with embellishments, glitter or writing as desired.


Gingerbread pop stick houses
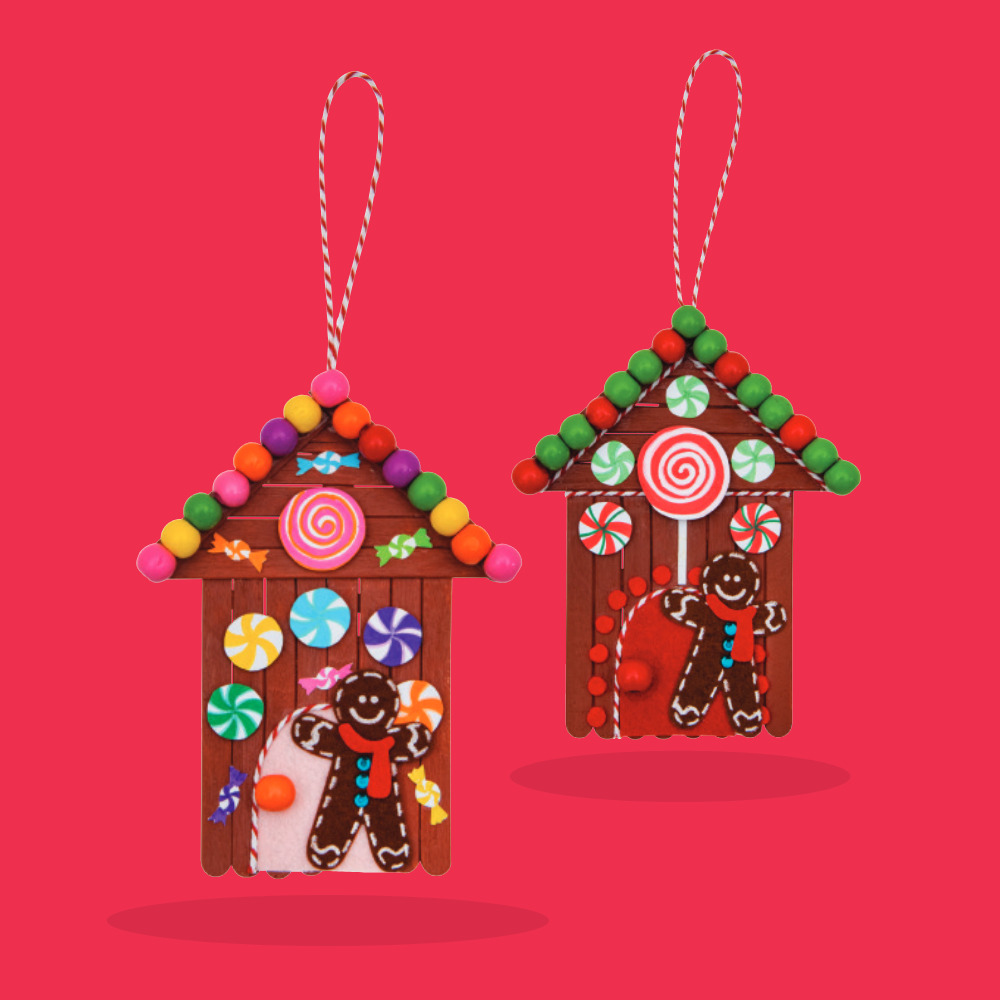
Christmas Craft Gingerbread Pop Stick HouseNo holiday season is complete without a gingerbread house – the sort you can eat and the sort you can treasure, like these! Whimsical and looking oh-so-delicious, these quaint pop stick houses make beautiful seasonal displays. They’re so pretty to hang around the classroom, on the Christmas tree at home or to gift as thoughtful presents!


You will need:

Paddle Pop Sticks Plain https://www.teaching.com.au/product/jm67

Choc Fudge Brown Classroom Splash Acrylic Paint https://www.teaching.com.au/product/ec1114

Strong Craft Glue https://www.teaching.com.au/product/cs0004

Wooden Coloured Beads https://www.teaching.com.au/product/am1770

Assorted Felt Sheets https://www.teaching.com.au/product/flt016

A4 White Cardboard https://www.teaching.com.au/product/AUS208

Christmas Candy Colour Chenille Sticks https://www.teaching.com.au/product/sh1321

Fine POSCA Markers https://www.teaching.com.au/product/UM300

Assorted Felt Christmas Stickers https://www.teaching.com.au/product/SH1613

Red and White Bakers Twine https://www.teaching.com.au/product/sh733


Let’s make it!

To assemble the pop stick house – trim 9 pop sticks to 2/3 of their original size.

Lay 8 of the trimmed pop sticks in a row and use strong glue to adhere the 9th trimmed pop stick across the bottom (to hold your 8 pop sticks together). Allow to dry.

When your glue is dry, flip over and glue 1 whole-length pop stick to the top of the trimmed pop sticks, covering the trimmings.

Trim 2 more pop sticks to 2/3 of their size and glue these to form a triangle-shaped roof (one end each on the sides, and the other end together to form the roof’s point).

When the glue is dry, trim 4 more pop sticks to fit the roof’s triangular frame, and glue in place. Allow to dry.

When the glue is dry, flip your Gingerbread House over – it’s now ready to paint the front in your desired shade of fudge brown. Set aside to dry.

Now it’s time to make all your decorations. We’ve used coloured wooden beads to decorate the roof and doorknob, felt sheets to make the door, bakers’ twine to trim, Christmas felt stickers and candy colour chenille sticks. The sweet treats have been made using POSCA markers on white cardboard which have been cut out and glued into scraps of white felt to raise them up.

Use strong glue to attach all your decorations to the front of your Gingerbread House and set aside to dry thoroughly (the wooden doorknob might need a 2nd blob of strong glue to hold in place).

Lastly, flip your Gingerbread House over, cut a length of baker’s twine and attach to the back of the house to form a hanging loop) and set aside to dry.

Done! The perfect Gingerbread House Decoration is ready.


TIP: Older age groups might enjoy using glue guns to assemble their houses and decorations.


Iron-on beads tree baubles and Christmas wreath

Christmas Craft Christmas Wreath

Have you tried making iron-on bead ornaments? It’s a really simple and fun creative activity, allowing for all sorts of patterns and shapes. You arrange the Christmas-coloured beads on the peg boards to make your desired pattern. You’re then ready to fuse the beads together using a hot iron (adult time!) to make a long-lasting ornament to adorn classrooms, homes or the beloved family Christmas tree.

Baubles – you will need:

Christmas Iron-on Beads Kit https://www.teaching.com.au/product/pb2456k

Red and White Bakers Twine https://www.teaching.com.au/product/sh733 OR

Christmas Ribbon Rolls https://www.teaching.com.au/product/cs9207

Wreath – you will need:

Christmas Iron-on Beads https://www.teaching.com.au/product/pb2456

Square Bead Boards for 5mm Beads https://www.teaching.com.au/product/amb600

Ironing Paper for Iron-on Beads https://www.teaching.com.au/product/amb800

Christmas Ribbon Rolls https://www.teaching.com.au/product/cs9207


Let’s make them!

Arrange the iron-on beads into a design on the bead board.

Warm a household iron to high, making sure the steam is off.

Cover the design with a sheet of ironing paper and iron over until the beads start to melt and fuse together into a colourful and flexible shape.

Allow your design to cool before removing from the bead board.

Peel the protective layer off an acetate sheet and cut two pieces to the size of your frame.

When cool, thread a length of yarn through one of the beads, creating a loop to hand, and tie off (a skewer will help to remake a hole if the beads have completely melted.

Done! The perfect Iron-on Beads Christmas decoration is ready.


TIP: Make sure you have an adult to help or complete the ironing steps.


Snow globe
Christmas Craft Snow Globe

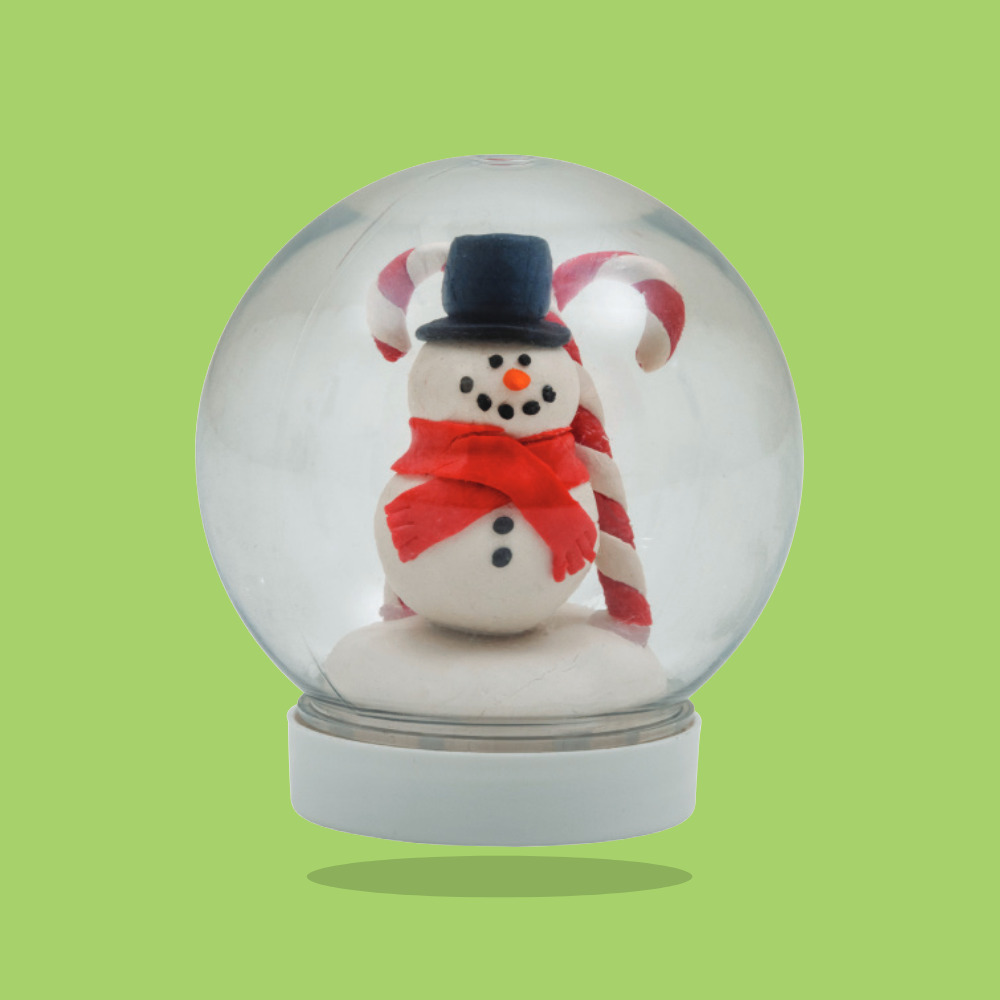
Do you collect snow globes? Do you have one special one? Have you made one before? A snow globe makes a perfect lasting seasonal treasure for little ones – or a perfect gift for friends or family members. You can make whatever scene you like for the inside of your snow globe, although we went with a snowman! However, you can let your creativity run wild with your perfectly preserved snow globe creation!


You will need:

Snow Globe https://www.teaching.com.au/product/CS6575

Glitter; https://www.teaching.com.au/product/bio-glitter-8211-set-of-8

Oven Bake Polymer Clay https://www.teaching.com.au/product/KC1025

High Temp Glue Gun https://www.teaching.com.au/product/CS1660

High Temp Glue Sticks https://www.teaching.com.au/product/CS1661

Christmas Rhinestones https://www.teaching.com.au/product/SH9727

Christmas Ribbon Rolls https://www.teaching.com.au/product/CS9207


Let’s make it!

Wash your hands with soap and water, and dry thoroughly before using the clay.

Soften the Polymer clay using the warmth of your hands, kneading until it is warm and workable.

Shape the clay into a Christmas scene (a snowman, candy canes, reindeer, Santa, presents, a tree etc). Make sure it’s able to fit inside the snow globe (we’ve made a snowman, 2 candy canes and a platform).

Carefully lay your designs onto a flat baking tray with baking paper.

Put your finished design into the oven and bake at around 130 degrees Celsius for 15 to 30 minutes (baking times may vary depending on the size of your chosen designs).

Let your creation completely cool before handling (any rough areas can be sanded or touched up with paint as desired).

Using a hot glue gun (or strong glue that will be waterproof when dry), adhere your Christmas creations to the inside of the snow globe lid, and set aside to dry.

Fill the snow globe with water and glitter as desired and tightly screw the lid to the globe (securing the lid to the globe with a hot glue gun will add complete security).

Decorate the base of the snow globe with sequins or ribbon as desired.

Done! The perfect Christmas Snow Globe is ready.


TIP: Make sure to have an adult help or complete the steps requiring an oven.


Pop stick nutcracker ornament
Christmas Craft Pop Stick Nutcracker

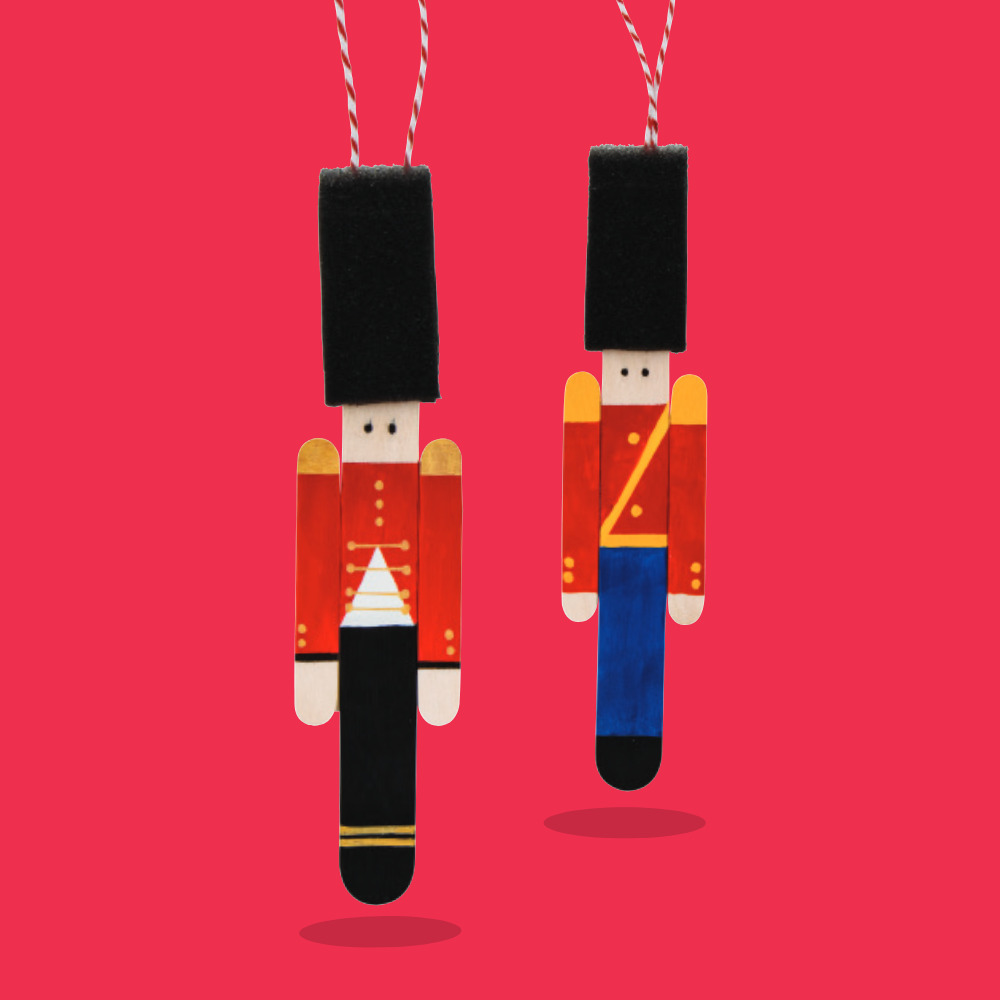
This is such a simple but adorable ornament to hang on the Christmas tree! Do you know the story of the Nutcracker? It tells the story of a little girl called Marie (Clara in some versions) and her toys. In the original story, Marie’s toys come to life on Christmas Eve and a Nutcracker figure helps lead the fight against an army of mice! One of the main themes is about the power of imagination. Marie leads people through a magical dream, who see the wonder of Christmas through her eyes.


You will need:

Foam Paint Brush Set https://www.teaching.com.au/product/nar102

Jumbo Pop Sticks https://www.teaching.com.au/product/jm100

Mini Paddle Pop Sticks https://www.teaching.com.au/product/sh956

Student Acrylic, https://www.teaching.com.au/product/student-acrylic-8211-set-of-5

Fine POSCA Markers https://www.teaching.com.au/product/UM300

Gold Bullet POSCA Marker https://www.teaching.com.au/product/UM509

Strong Craft Glue https://www.teaching.com.au/product/cs0004

Red and White Bakers Twine https://www.teaching.com.au/product/sh733

Washi Tape: https://www.teaching.com.au/product/th1625


Let’s make it!

Use a lead pencil to lightly mark out the Nutcracker’s details on 1 x jumbo pop stick (the face, jacket, pants and shoes) and 2 x mini pop sticks (the arms and hands).

Use acyclic paint to block out the colours (washi tape can help create crisp lines) and set aside to dry.

Use fine POSCA paint pens to decorate the details – yellow for the uniform’s buttons, black to make the eyes etc. and set aside to dry.

Lay the pop sticks face down, arrange them into place and use strong tape or glue to hold them in place, and set aside to dry.

Remove the handle from the foam paint brush, add a small squeeze of strong glue inside, and slide it onto the Nutcracker’s head.

Attach a loop of baker’s twine to the back of the ornament with strong glue (we’ve poked the ends into the back of the sponge hat) and set aside to dry.

Done! The perfect Pop Stick Nutcracker Ornament is ready.


TIP: A small pop stick cut in half and running along the back of the Nutcracker will help the body and arm pop stick pieces stay in place.


Paper Jingle Ornaments
Christmas Craft Paper Jingle Ornament

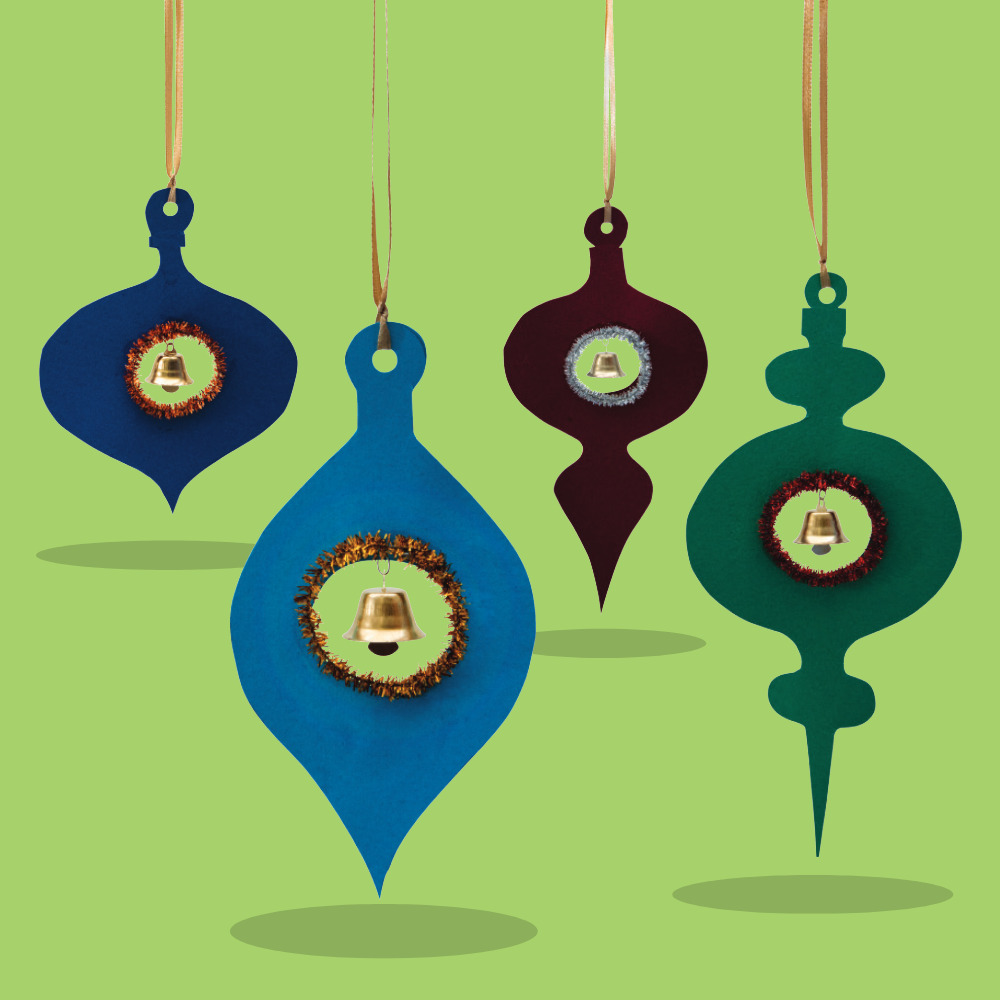
These paper crafting favourites will look beautiful hanging around the classroom or on the Christmas tree at home. They can be made in so many different shapes and colours too! Christmas is all about jingle bells and these are a perfect way to bring your own personalised jingle bells to life!


You will need:

A4 Coastal Cardboard https://www.teaching.com.au/product/aus502#

Tinsel Pipe Cleaners https://www.teaching.com.au/product/cl2205

Christmas Ribbon Rolls https://www.teaching.com.au/product/cs9207

Christmas Bells https://www.teaching.com.au/product/gold-038-silver-bells-8211-pack-of-50

Paper Punch One Hole https://www.teaching.com.au/product/acc003

Silver Craft Wire https://www.teaching.com.au/product/THE218

Supertac Glue https://www.teaching.com.au/product/th005


Let’s make it!

Draw your Christmas decoration shapes onto cardboard and cut out (make sure to leave room for the tinsel and bell in the middle, and a hanging hole at the very top).

Use a compass or small round object to draw a circle in the middle of the decoration (roughly 3.5cm diameter).

Cut out the centre hole (fold the cardboard slightly, make a snip and then use the snip to insert your scissors to cut around the circle line). Discard the trimmings.

Cut a short length of beading wire roughly 4cm long, thread a Christmas bell onto the wire, fold the wire in half and push one end through the cardboard decoration, roughly 1cm above the cut-out circle. Twist the two ends around each other to hold the bell securely (trim if needed).

Cut a sparkly pipe cleaner to approx. 15cm in length and bend around to form a circle to fit around the cardboard decoration centre cut out. Twist the ends around the circle neatly. Use strong glue to attach the sparkly pipe cleaner to the cardboard decoration and set aside to dry thoroughly.

When dry, use a hole punch to make a hole at the top of the decoration and tie a length of Christmas ribbon, forming a loop to hang.

Done! The perfect Paper Jingle Ornament is ready.


TIP: It doesn’t need to stop there! Add as much decoration and sparkle as you like with drawings, embellishments and glitter.


So, there you have 7 beautiful Christmas craft activities to give you decorative goodies that young and old alike will love. Hang them, place them, gift them, share them, enjoy them!

If you’d like to download the step-by-step activity pack pdf, click here.

Happy crafting and seasonal wishes and please share your crafty seasonal awesomeness with us @modernteaching



Shop MTA>

Blog home>


Posted on

13 Mother’s Day handmade gift ideas

Mother's Day Intro Image

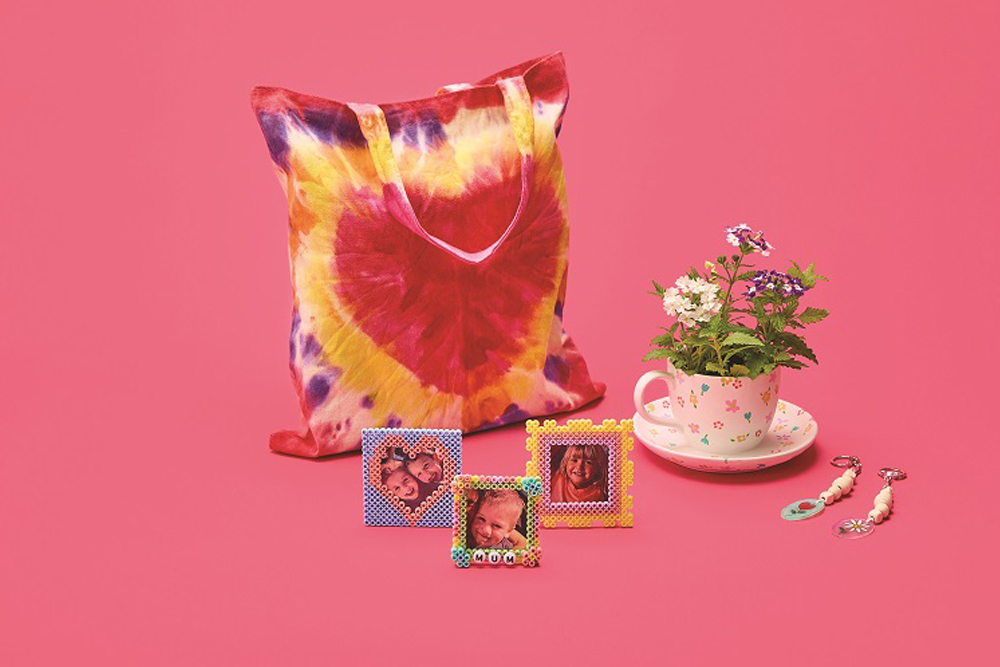
Mother’s Day is right round the corner!  We’ve gathered up our best inspirational list of thoughtful handmade gifts for the maternal figures in our lives – representing the love and gratitude we feel for them and to celebrate all they do for us each day.  

There are so many keepsakes to create! And the beauty of MTA’s open-ended range of Mother’s Day materials is the ability to adapt the activities to children’s ages, needs & suitability – ensuring they can make a personalised treasure that’s just right for their much-loved role models. 

Read on for some creative Mother’s Day themed crafts to make ‘Mum’ feel special.  


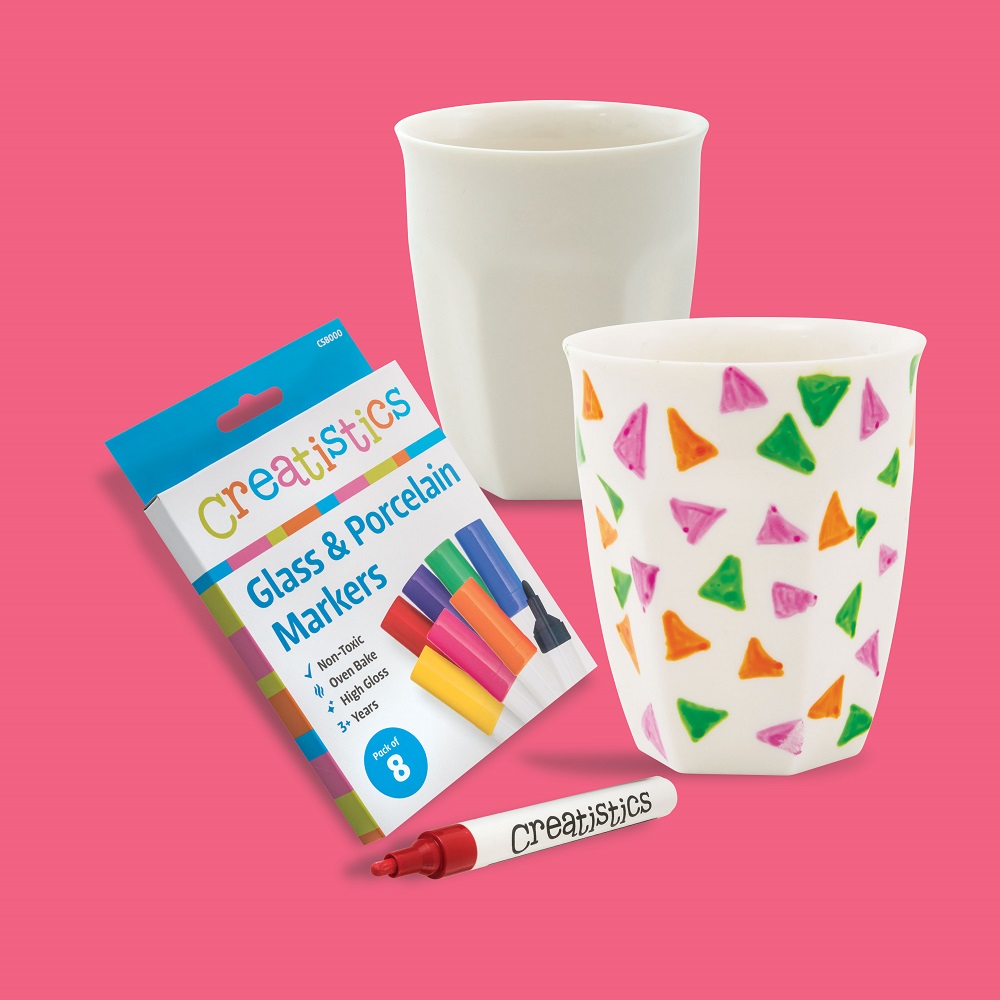
Ceramic Teacup Planter 

Ceramic Teacup Planter


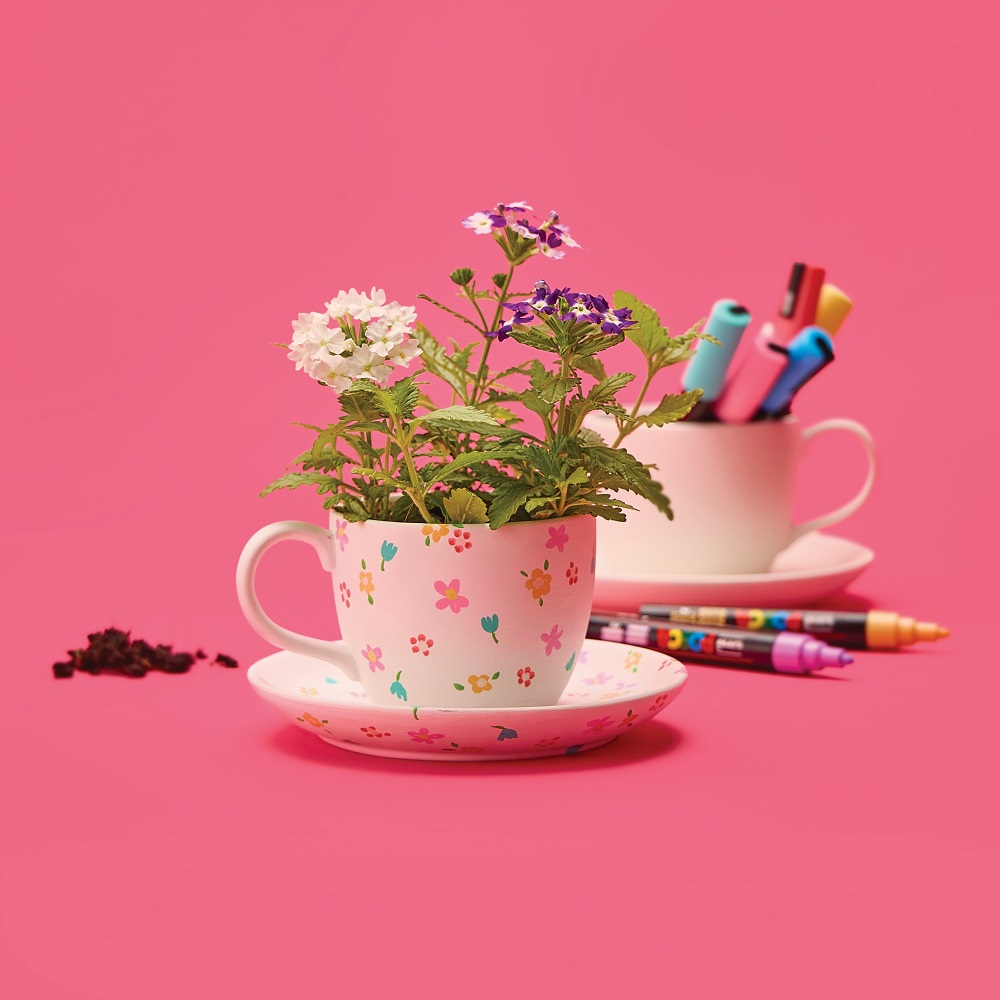
Keep Mother’s Day flourishing all year round with the Ceramic Teacup Planter. The plain smooth surface of the cup & saucer welcome personalisation with any combination of porcelain markers, POSCA pens, pastel paints or rhinestones. Decorate with a pattern, draw pretty pictures, or write down words of love for Mum. In whichever way you choose to customise your planter, it’s sure to have pride of place on the windowsill – and in Mum’s heart.  


STEP-BY-STEP  

  • Give your teacup & saucer a good wash and set aside to dry before applying paint or makers. 
  • Using the Porcelain Markers or paint of choice, carefully draw/paint your design onto the ceramic cup and saucer (paint provides a great overall coverage of colour, while markers provide precise detail). 
  • Set aside to dry thoroughly. 
  • To set the markers and paint for wear & tear, cover with a layer of Crystal Clear.  
  • Set aside to dry thoroughly. 
  • Add soil and a small plant of choice – flowers, herbs or succulents are ideal. 

Done! The perfect Teacup Planter for Mum is ready. 


*TOP TIP – Practising your design on paper before adding to the plate is a great help when deciding how the final product will look. 


Products Used;

Porcelain Teacup Planters 

Glass & Porcelain Markers 

POSCA Marker Pastel Bullet  

Creatistics Pastel Paint 

White Chromacryl Acrylic Paint 

Crystal Clear 


Sand Art Flower Magnets 


Sand Art Flower Magnets


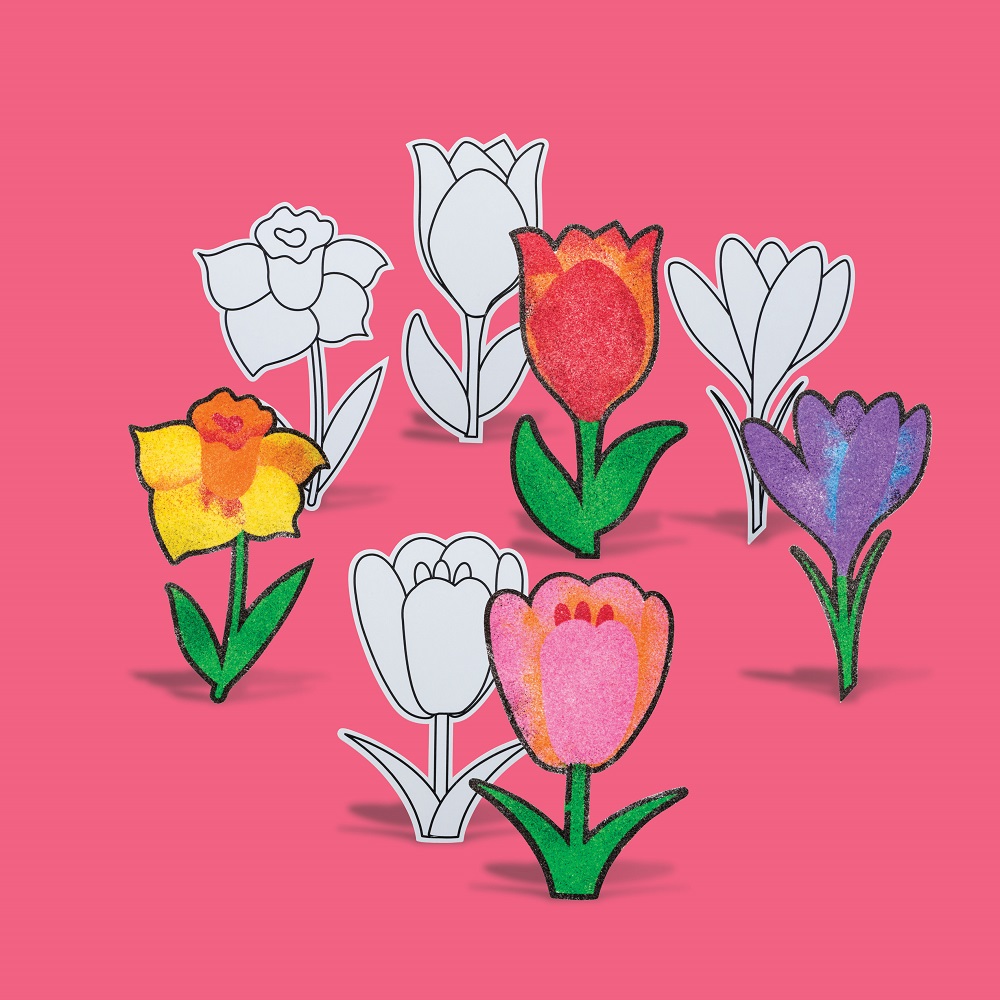
These beautiful pre-cut sand art flowers make for conveniently effective gifts that Mum’s are sure to treasure! Simply peel off the protective paper to reveal the sticky surface below for you to sprinkle sand over. As you work through the sections, you’ll see your flower blooming before your very eyes. The supplied magnets are perfect to stick your flower onto any magnetic surface – the fridge, dishwasher, Mum’s office computer etc. Now mum is reminded of her blooming treasures every time she sees her flower magnets. 

The Coloured sand used for crafting is available in a handy pack of 10, or choose to purchase individually in the pictured blue, purple, pink, red, orange, yellow and green. The rich vibrant shades are ideal for this project!  

Glitter shakers are super handy when it comes to applying the coloured sand too. They come with two types of pouring options from fine sprinkle to steady pour for easy application every time. Feel welcome to add a touch of Bio-glitter to the shakers for your flowers to shine bright!  


STEP-BY-STEP  

  • Choose your flower design and coloured sand. 
  • Carefully peel back a section of covering to reveal the sticky surface below.  
  • Pour or shake the sand onto the sticky surface until it’s covered, gently shaking off excess.  
  • Repeat steps 2 and 3 until the entire flower is covered with coloured sand.  
  • Attach the supplied magnet onto the back of the tulip.  

Done! The perfect sand art fridge magnet is for Mum is ready.  


*TOP TIP – Painting trays come in handy to catch the excess spill of sand so that it can be used – and avoid a sandy classroom!  


Products Used;

Sand Art Flowers 

Creatistics Coloured Sand 

Glitter Shakers 


Iron on Bead Frames 


Iron-On-Bead Frame


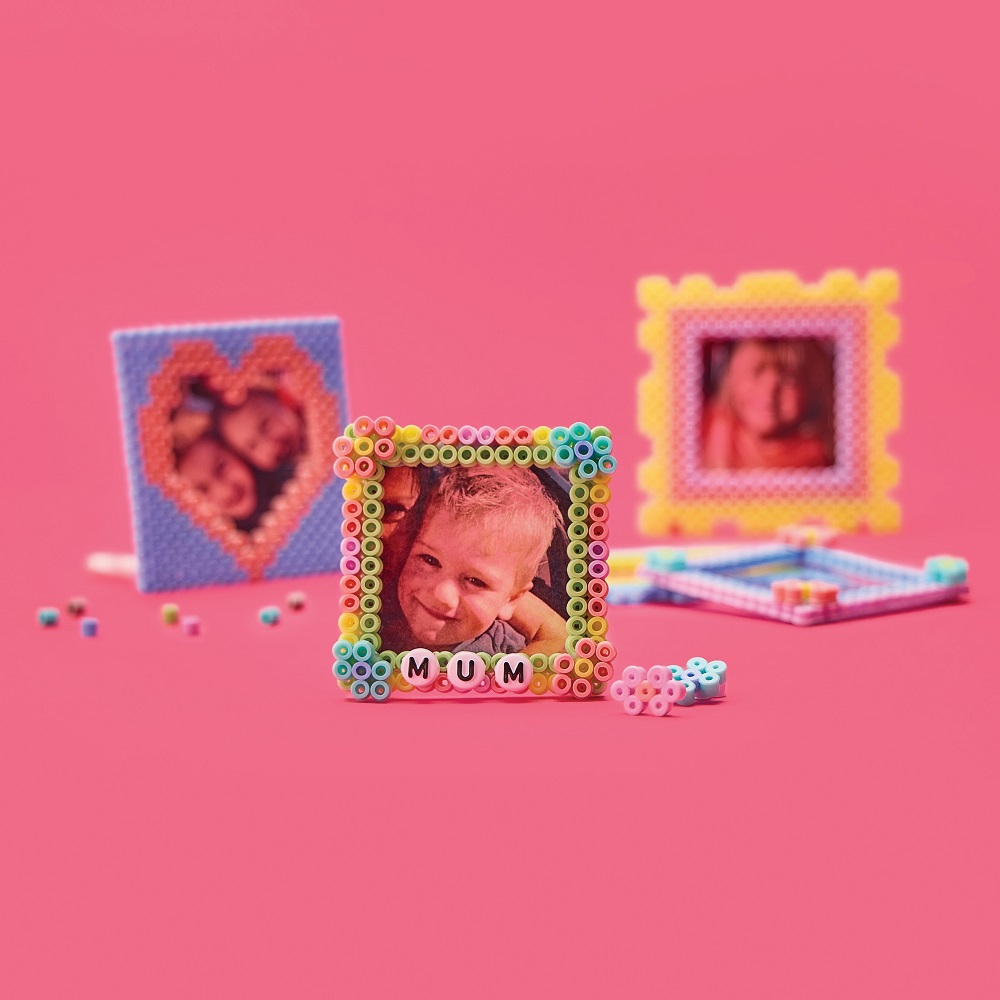
Iron on Beads welcome children to create. They work like open-ended craft materials, inviting children to arrange them into any number of shapes & patterns. Perfect to make jewellery or key tags, trinket bowls, coasters, embellishments and so much more – literally anything your imagination desires.  

Perfect for Mother’s Day these pastel-coloured non-toxic plastic beads easily arrange on a bead board; just lay on a piece of ironing paper and with a quick iron over, the beads melt together to hold their shape. It’s super easy! Children can also use them as traditional beads, stitching through the openings as they thread and weave – ideal for beaded jewellery or finishing off hanging decorations.  

Available in so many shades, choose from vibrant colours and the handy vibrant pack, pastel colours and the handy pastel pack or bright neon if you’re feeling like some flare. And for younger age groups, they might find the jumbo sized beads more workable along with their jumbo-sized square bead boards, or jumbo assorted shapes boards.  


STEP-BY-STEP  

  • Arrange the iron-on beads into a design on the bead board.  
  • Warm a household iron to high making sure the steam is off.  
  • Cover the design with a sheet of ironing paper and iron over until the beads start to melt and fuse together into a colourful and flexible shape. 
  • Allow your design to cool before removing from the bead board.  
  • Peel the protective layer off an acetate sheet and cut two pieces to the size of your frame.  
  • Sandwich a photo or drawing between the acetate sheets and glue layers together, then glue to the back of the frame.  
  • Set aside to dry thoroughly.  
  • When dry, peel an adhesive magnet from the sheet and attach to the back of the frame.  

Done! The perfect keepsake for Mum is ready.  


*TOP TIP – Hot irons are not for young children. Have an adult help or complete the ironing steps. 


Products Used;

Pastel Iron on Beads  

Ironing Paper for Iron on Beads  

Creatistics Square Bead Boards 

Tacky Glue 

A4 Acetate Sheets

Self-Adhesive Magnetic Sheets 


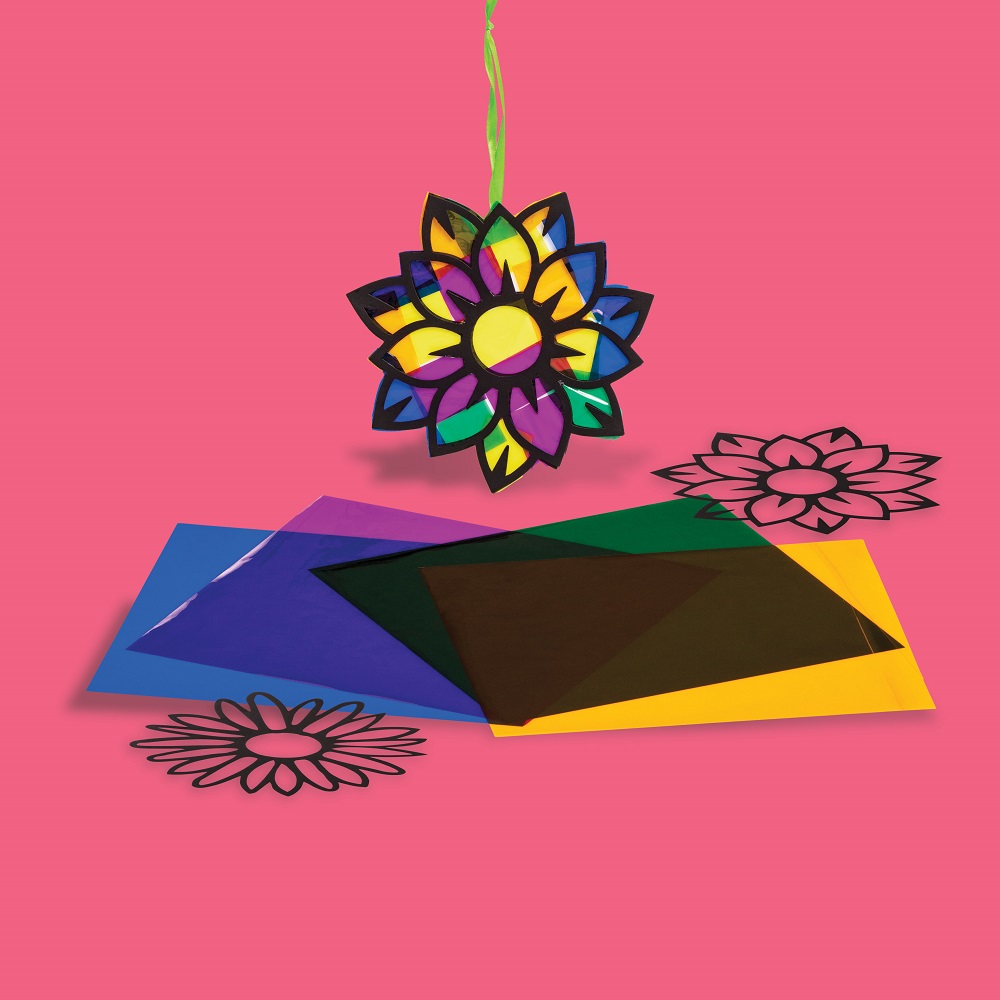
Stained Glass Flowers


Stain Glass Window Flowers


Take the hassle out of planning with pre-cut stained glass shapes ready to decorate. Made from black cardboard, these pretty flowers frame the included coloured cellophane beautifully. They even come with their own hanging ribbons. It’s a brilliantly convenient craft pack!  

Display on windows, use the ribbons to hang or stick onto greeting cards for handmade gifts that’ll surely bring a smile to Mum. These colourful flowers will last the test of time too– long after cut flowers have wilted these elegant creations will proudly blossom. 


STEP-BY-STEP  

  • Choose your flower design and gently press out the petal inserts. 
  • Apply a small amount of glue to one side of the flower (the edge of a glue stick or washable school glue will work with precision). 
  • Press the coloured cellophane onto the glue, snipping the pieces to size as desired. 
  • Use scissors to carefully snip off any excess cellophane from the edges of the flower. 
  • Use a tab of strong craft glue (or sticky tape) to attach the enclosed ribbon for hanging.  

Done! The perfect blooms are ready for Mum.  


*TOP TIP – Use glue sparingly, too much glue with lead to wrinkled cellophane. 


Products Used;

Stained Glass Flowers 

Creatistics Superstik Glue Stick  

Tacky Craft Glue  


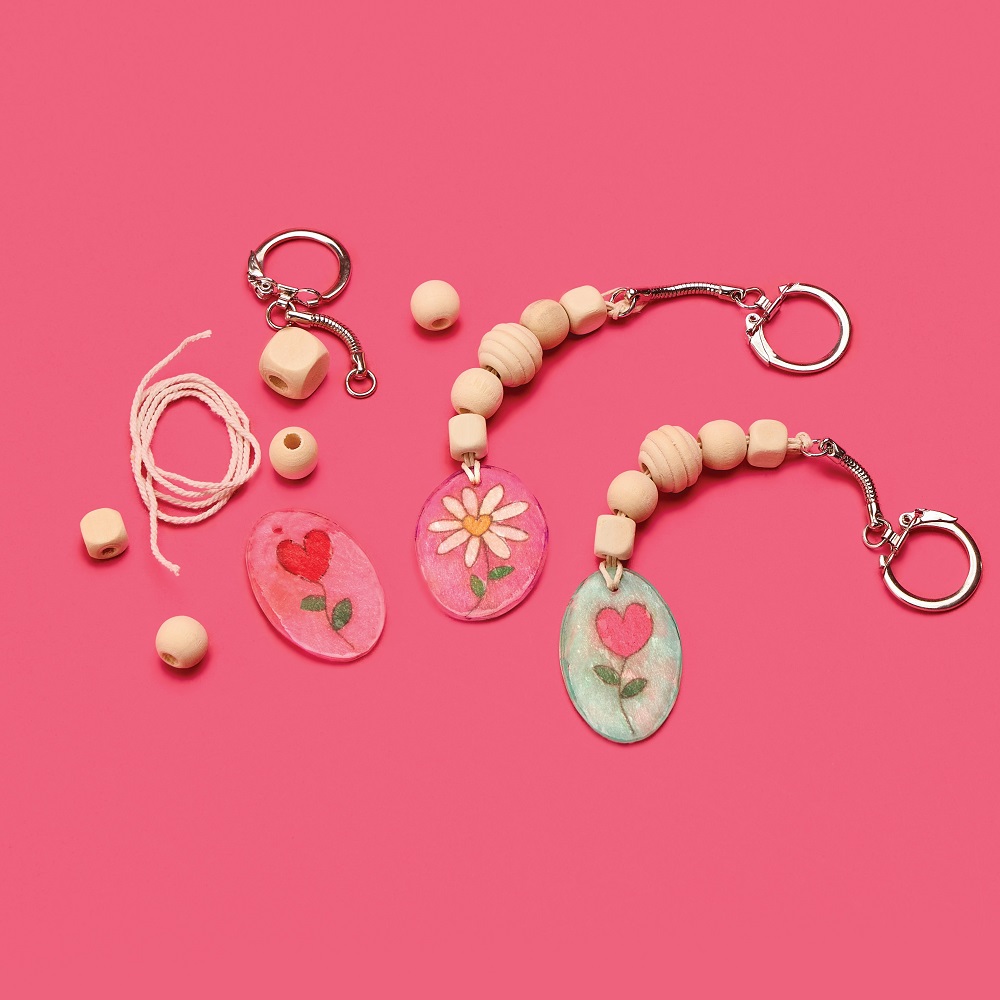
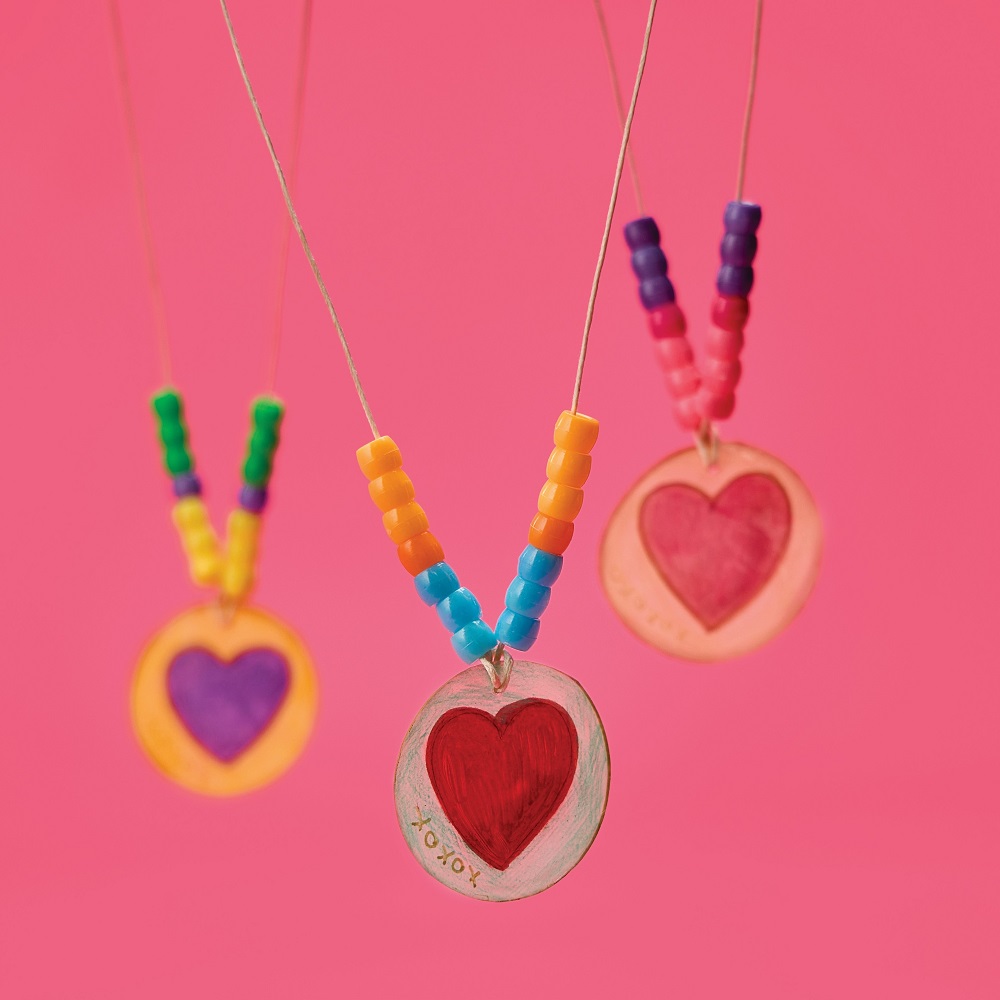
Shrink Film Beaded Key Chain 


Shrink Film Key Chain


With her very own handmade key chain, Mum can take your love along with her all the time.  

Made using shrink film, this versatile medium works like drawing on a piece of paper – only so much more fun! When you’re finished with your design, simply cut it out, punch a hole in the top (to thread into), and bake in the oven. You’ll see your design shrink before your very eyes! When it’s completely cooled, you’ll see it’s now a durable hard trinket ready to transform into a myriad of things.  

Necklaces, bracelets, key chains, bag trinkets, car rear-view mirror accessories & door hanger decorations are all super simple to make. Just thread some beading cord or leather through the hole, add some beads and finish off with a key chain as desired. This is a gift that’s sure to last the distance. 


STEP-BY-STEP  

  • Draw keychain designs onto the shrink using the matte side with coloured pencils or permanent markers.  
  • Carefully cut around design and punch a hole to attach the beading cord. 
  • Pre-heat oven to 150°C. 
  • Place each design on a lined tray (matte side up) and bake.  
  • Plastic will begin to shrink after 10 seconds, watch carefully! They will shrink to approx. 60% of the original size.  
  • Remove from oven once plastic has flattened and set tray aside to cool completely before handling. 
  • Thread beading cord through the shrink film decorations and add desired number of beads. 
  • Firmly tie the cord onto the key chain to hold everything in place. 

Done! The perfect keychain for Mum is ready.  


*TOP TIP – Coloured pencil markings will darken in the oven; a very light shading is all that’s needed for bright vibrant colour! 


Products Used;

Clear Shrink Film 

Natural Beading Cord

Key Chain 

Natural Wooden Beads 

Paper Punch One Hole 


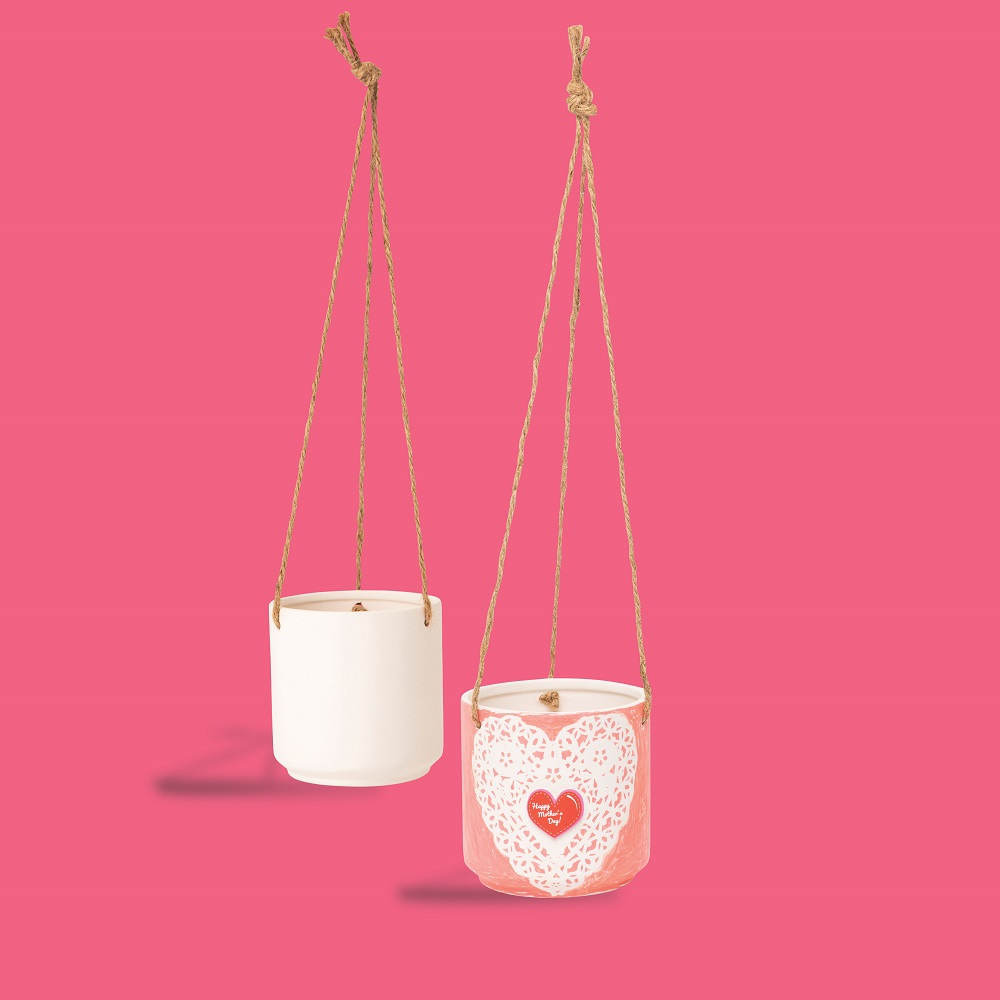
Hanging Porcelain Planter 


Hanging Porcelain Planter 

Perfect for growing creativity! These adorable porcelain planters are ideal to personalise for Mother’s Day. There are so many ways to decorate them! Pastel paint & felt feathers add calming shades to compliment Mum’s soon-to-be favourite plant, or bold & vibrant paint with glitter glue will surely brighten Mum’s day!  


STEP-BY-STEP  

  • Apply your chosen shade of paint to the porcelain planter and set aside to dry thoroughly. 
  • Decorate your planter using POSCA markers with words, drawings, or messages of love, and then set aside to dry. 
  • Spray on a layer of Crystal Clear to protect from the weather and wear & tear. 
  • Use tacky glue to stick on your desired embellishments and set aside to dry once more.  
  • Add soil and a plant of your choice (flowers, herbs or succulents work well).  

Done! The perfect planter is ready for Mum.  


*TOP TIP – Before applying paint, markers, or embellishments, it’s recommended to thoroughly wash the porcelain planter and set aside to dry.   


Products Used;

Hanging Porcelain Planter 

Creatistics Pastel Paint 

POSCA Marker Pastel Bullet 


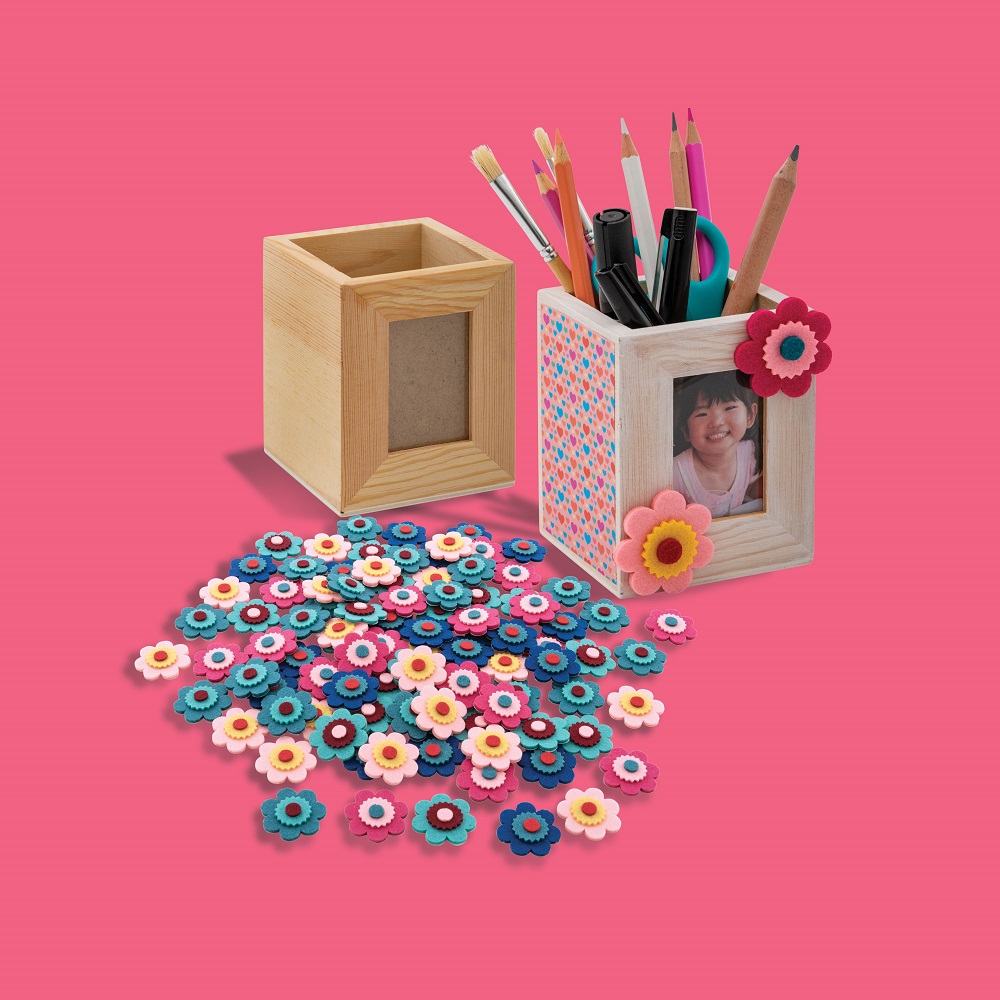
Pencil Holder Frame  


Wooden Pencil Holder


This Mother’s Day keepsake is not only beautiful, its wonderfully functional too. Decorate the pine wood pencil holder and PVC frame for stationery to sit proudly on Mum’s desk as a reminder of a special occasion for years to come.  

Perfect to decorate with pastel paint and special papers (Mother’s Day, Impressionist or Patterned) and then finished off with the cutest accent embellishments (Flowers, Feathers, Wooden MUM Tiles, Glittery Daisies or Flower Rhinestones). Follow the simple step-by-step guide below to assemble yours. The only tough choice here is, how will you decorate yours? 


STEP-BY-STEP  

  • Remove the PVC display frame from the wooden pencil holder and set aside. 
  • Using a brush, apply paint to your pencil holder and set aside to dry.  
  • To cover some of the sides with patterned paper, lay the pencil holder onto the paper and use a pencil to trace around. 
  • Lift the pencil holder off the paper, and using scissors, cut around the pencil markings (snipping inside of the pencil markings will ensure the paper fits neatly in place).  
  • Apply a layer of Superstik Glue Stick to the surface of the pencil holder you’re wanting to place the paper on, and then firmly press the paper onto the surface, using your hands to smooth it down.  
  • Repeat steps 3 to 5 for as many sides of the holder as desired (children’s drawings on cover paper also make a beautiful alternative to patterned paper).  
  • Use dabs of Tacky Glue to apply your choice of embellishments and set aside to dry.  
  • For the display frame, print and cut-to-size a photograph or child’s drawing, and gently slot it into place along with the PVC frame.  

Done! Mum’s perfect pencil holder is ready.  


*TOP TIP – Several layers of paint will provide complete coverage, while paint thinned with water will provide a rustic whitewashed effect.  


Products Used;

Pencil Holder Frame 

Felt Flowers

Creatistics Pastel Paint 

Tacky Glue 


Personalised Latte Mugs 


Personalised Latte Mug


A one-of-a-kind latte mug is just perfect to remind Mum how loved she is. Whether she’s gearing up for a big day ahead, or ready to relax at the end of it, her very own personalised will be Mum’s go-to favourite cup! These beautiful mugs are supplied as plain white, providing the perfect canvas for children to decorate and personalise with drawings and messages.  


STEP-BY-STEP  

  • For best results, we recommend to thoroughly clean your mug with soapy water, giving them a good rinse and dry afterwards (a dishwater is ideal). 
  • Draw or paint your desired designs onto the outside of the mug. 
  • Set aside to dry thoroughly.  
  • To set the mug ready for drinking, wear & tear and dishwasher use it will need to be baked in an oven. Set oven to 150 degrees C, and once oven temp has been reached, bake the mug for 30 minutes, turn oven off and allow to cool before removing.  

Done! The perfect latte mug is ready.  


*TOP TIP – Paint provides a great overall coverage of colour, while porcelain markers provide precise detail. 


Products Used;

Latte Mugs & Marker Value Pack 

Glass & Porcelain Markers 

Akwa Glass & Tile Paint 


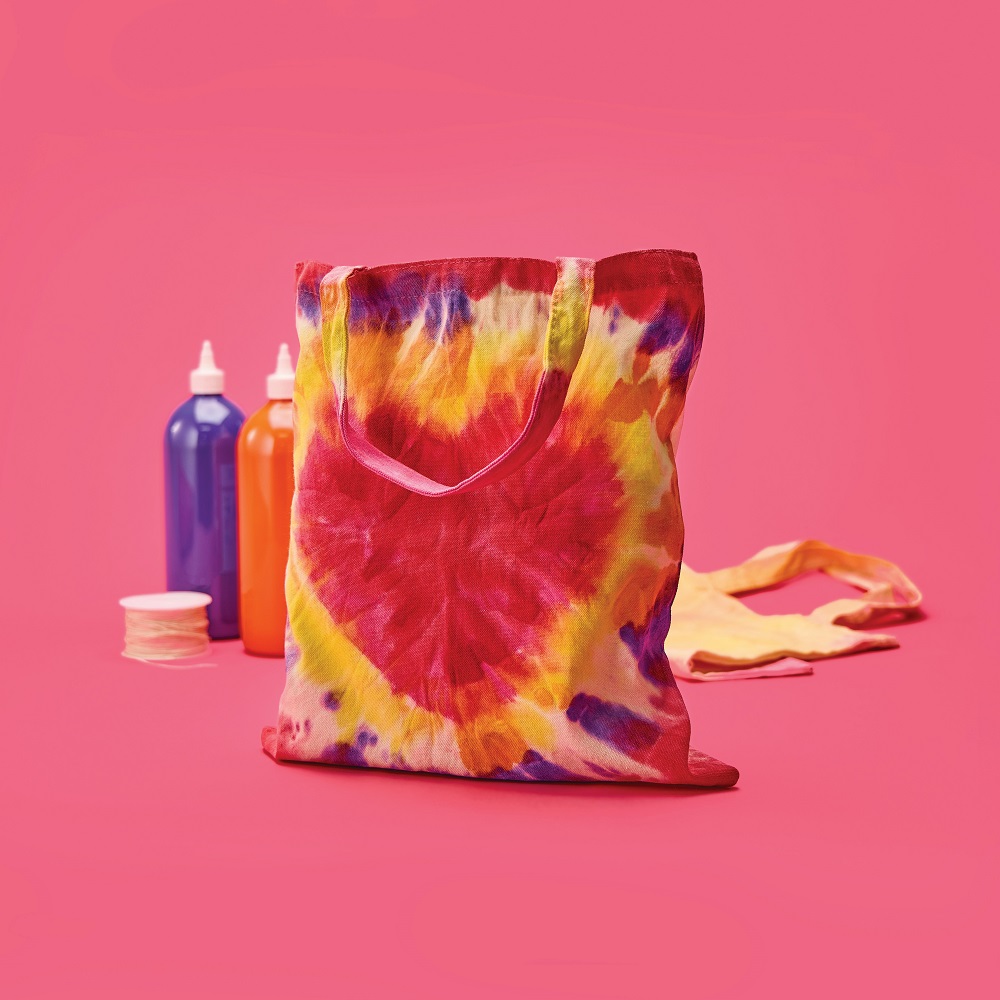
Love Heart Tie Dye Calico Bag 


Love Heart Tie Dye Calico Bag


Tie-Dye (or tied dying) is an ancient art that’s been well-known across continents and cultures for thousands of years. It’s made a modern resurgence with plenty of colourful textile designs to experiment with. All that’s needed is fabric, coloured dyes, and string – although modern tie dye is made a breeze with the use of rubber bands. 

Choose any number of coloured dyes in vibrant rainbow and bright fluorescent shades or keep to the pictured warm colour tones of purple, magenta, red, orange, and yellow and you’re all ready to start! It’s the position of the rubber bands wound tightly around the fabric that creates the unique and mesmerising result. Creatistics Tie Dye takes the hassle out of the process too! No need for messy salt & vinegar and tubs of water, simply apply the coloured dye straight from the bottle onto the fabric.  

Whichever collected of shades and pattern of rubber bands you choose; Mum’s shopping bag will be the envy of every shopper!  


STEP-BY-STEP  

  • Soak your calico bag in cold water and wring out the excess water.  
  • Fold your damp calico bag vertically in half.  
  • Use a Creatistics Colouring Marker to draw a half-heart shape with the centre aligning on the fold (washable markers will come off when you put the bag in the washing machine). 
  • Scrunch the bag with tight pleats following along the marker line, matching up the marking together, and tightly wrap a rubber band around the pleats on the marker line.  
  • Add another rubber band approx. 4cm below the first one.  
  • Keep adding rubber bands until you reach the length of the bag.  
  • Wearing gloves, apply Creatistics Tie Dye straight from the bottle onto the fabric bag, a new colour for each banded section, covering the entire surface.  
  • Place the calico bag into a plastic bag or alternative plastic wrap.  
  • Let sit for a few hours in a cool damp place (a fridge is ideal).  
  • Remove the fabric bag from the plastic bag and remove the rubber bands (carefully cutting away with scissors is ideal).  
  • Hang the calico bag on the clothesline and allow it to air dry.  
  • Once thoroughly dry, place the calico bag in a dryer for 5-10 minutes on a hot spin setting to enable the colours to fully bind (we also recommend to separately wash the bag 3 to 4 times before washing with other laundry to avoid running).  

Done! The perfect carry bag for Mum is ready.  


*TOP TIP – Educators and older students will find applying the dye straight from the bottle the easiest methods, however younger age groups may find it easier to apply the dye from a bowl with a brush.  


Products Used;

Calico Bags

Creatistics Tie Dye

Creatistics Chunky Colouring Markers 

Rubber Bands 


Shrink Film Jewellery 


Shrink Film Jewellery


Just like the key chain earlier, shrink film jewellery makes beautifully memorable keepsakes and yet they’re easy-peasy to assemble. With just a few simple items and a touch of creativity, in no time at all Mums around the country can proudly sport their Mother’s Day jewellery.  

Whether you choose clear shrink film, printable white or pre-cut charms, young creators will have free reign to design the perfect adornments for their mums and much-loved role models. Read on to follow through the steps to make the colourful pictured pendants.  


STEP-BY-STEP  

  • Draw jewellery designs onto the shrink film using the matte side with coloured pencils or permanent markers.  
  • Carefully cut around design and punch a hole to thread through.  
  • Pre-heat oven to 150°C. 
  • Place each design on a lined tray (matte side up) and bake.  
  • Plastic will begin to shrink after 10 seconds, watch carefully! They will shrink to approx. 60% of the original size.  
  • Remove from oven once plastic has flattened and set tray aside to cool completely before handling. 
  • Thread beading cord through the shrink film decorations and add desired number of beads. 
  • Firmly tie the cord to hold everything in place, leaving enough room to fit a bracelet or necklace on as desired. 

Done! The perfect jewellery for Mum is ready. 


*TOP TIP – Coloured pencil markings will darken in the oven; a very light shading is all that’s needed for bright vibrant colour! 


Products Used;

Clear Shrink Film 

Natural Beading Cord 

Coloured Pony Beads 

Natural Wooden Beads

Paper Punch One Hole


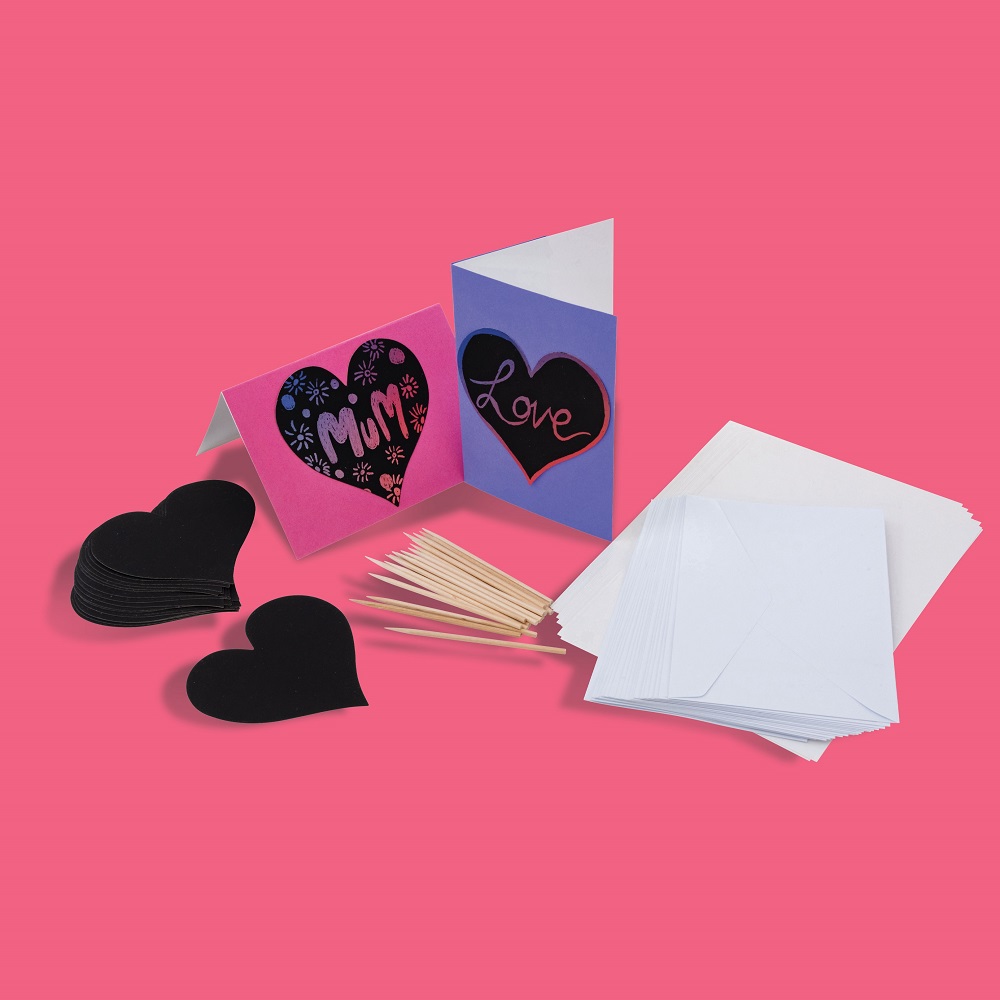
Scratch Art Greeting Cards 


Scratch Heart Cards


DIY Mother’s Day cards are perfect for children to use their creativity in imaginative ways to make something just right for their Mum. A thoughtful and loving message inside the card will be something Mum will hold in her heart forever. 

And because they’re so quick and simple to make, they’ll be time for children to make a card for all their role models & friends – mums, step-mums, grandmas, aunties, the kind neighbour always offering a friendly wave… Why not get the class together to send kind messages to the residents at the local retirement village? These beautiful cards will make anyone’s day!   


STEP-BY-STEP  

  • Using the provided scratch tools scratch away the black surface of a scratch-art heart to reveal the colour gradient below. It could be a special message with words, drawings or pretty patterns.  
  • To make the coloured card front, apply a small layer of glue stick to the front of the card and lay it onto a piece of coloured paper. 
  • Cut away excess paper. 
  • Apply the glue stick to the back of the scratch-art heart and firmly press onto the font of the greeting card.  
  • Set aside to dry thoroughly if needed.  
  • Draw and write loving messages inside.  

Done! Mum’s perfect Mother’s Day card is ready.  


*TOP TIP – Don’t forget the envelope! It’s a terrific space for children to personalise with drawings, stickers or embellishments.  


Products Used;

Scratch Art Hearts & Cards Pack

Hot & Cold Coloured Paper


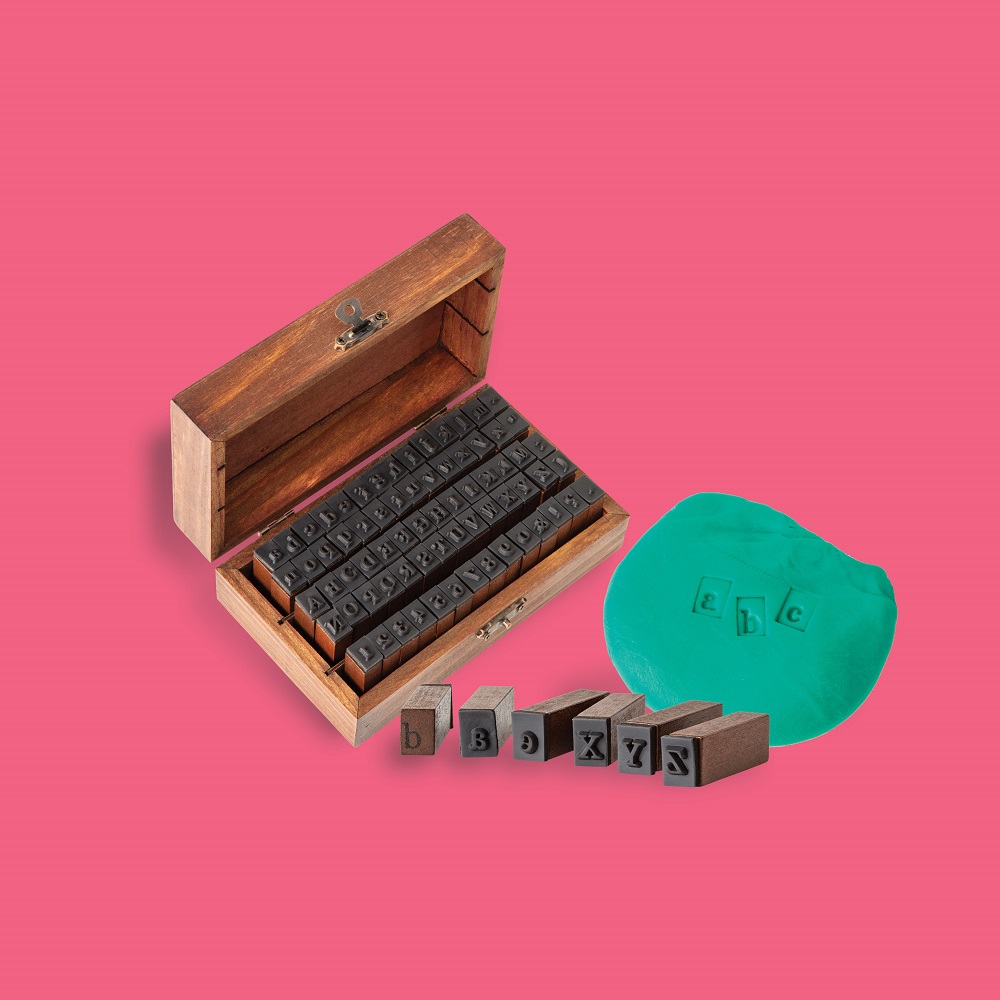
Alphabet & Number Stamps  


Alphabet & Number Stamps


Perfect to incorporate printmaking into arts & crafts, this traditional alphabet & number stamp set will print messages of love into all sorts of mediums. Whether they’re used with ink on cards, or stamped into paper Magiclay, silk clay and air dry clay your creations will have that extra special touch this Mother’s Day.  


STEP-BY-STEP  

  • With a rolling pin, roll out your chosen clay medium to create a smooth surface.  
  • Use a cookie cutter or free form your clay in your desired shape, eg. Necklace pendants, trinket bowls, key chains, tea light holders, desk paper weights etc.  
  • Gently press the letters/numbers into the clay, forming messages of love, eg. ‘MUM’, ‘XOXO’, ‘BEST MUM’ etc.   
  • Set your works aside to thoroughly dry (don’t forget to poke a hole in your works if you’ll be threading leather or cord to hang). 

Done! The perfect message for mum is ready.  


*TOP TIP – A sprinkle of Bio-Glitter always adds a touch of sparkle to Mum’s present. 


Products Used;

Alphabet & Number Stamps


Now that your craft supplies are organised, have you got your wrapping sorted? 

For large presents tissue paper, cellophane or paper rolls that can be personalised with paintings or drawings are ideal. For small items, paper bags are perfect, available in festive polka dots or easy-to- personalise natural or white.  Finish off with ribbons made with satin, raffia or jute and you’ll be all set for Mum’s special day.  


Now it’s time to gather the class and get your craft on!  


Download our Mother’s Day activities PDF Bundle

Blog Home>

Shop MTA>

Posted on

Easter Art And Craft Activities


Hop into Easter with a Crafty Eggs-Travaganza 

Easter is a time for family, friends, and of course adorable Easter craft! From super simple pre-cut ‘everything in the box’ activities to egg-citing multi-step projects for older students to have a crack at, we’ve rounded up 10 of the best!

Read on to adorn your classroom in Easter cheer, assemble the most adorable gifts for some-bunny special and organise an egg-stra special hat parade that’ll be the talk of the town.

So grab your best Easter bonnet and let’s hop to it.


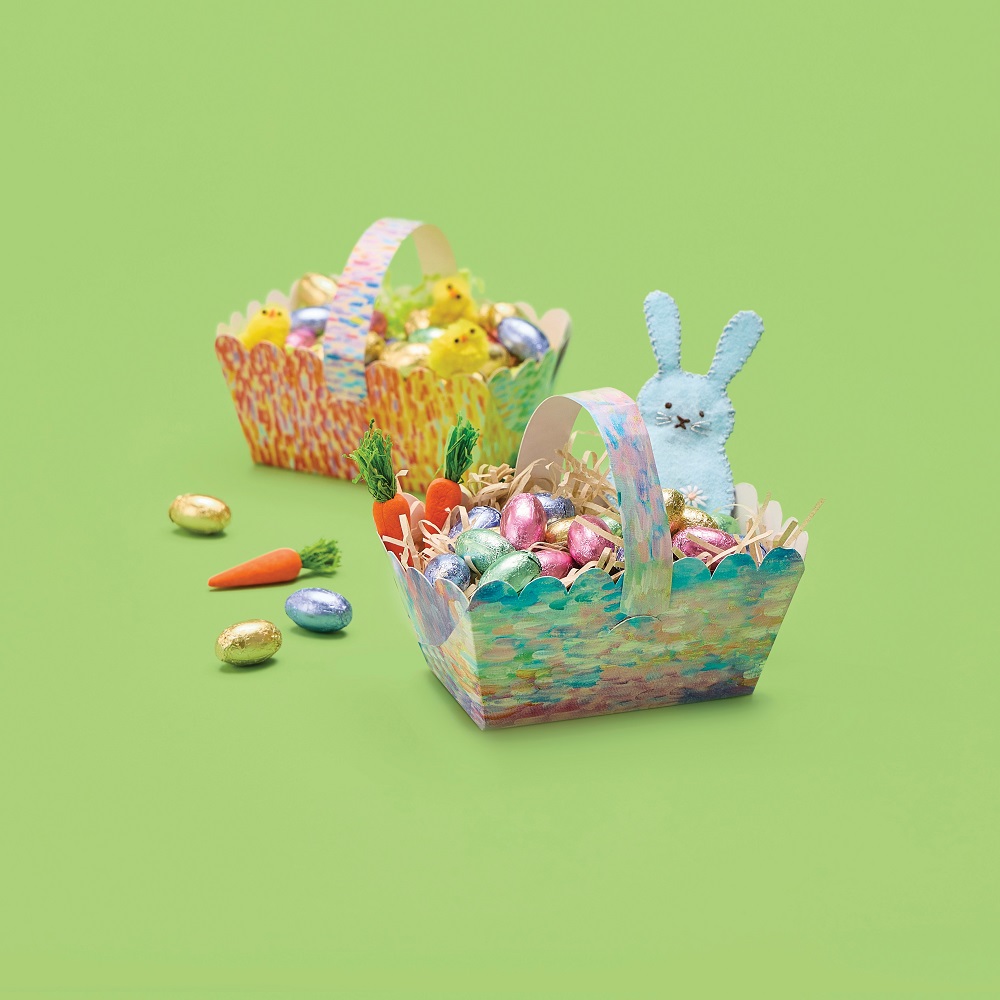
Easter Hunting Baskets

Easter Hunting Basket

The traditional Easter hunting basket has formed part of our Easter memories for generations, with happy little hunters excitedly gathering hidden choccy eggs around the garden or school grounds. The basket making in the days and weeks before hand would build the anticipation of the festivities to come – and finally the day would arrive!

But it doesn’t need to be chocolate! There’s plenty of treasures for children to hunt for, why not try Easter sticker sheets, felt bunny stickers, mini carrots and fuzzy chicks for imaginative Easter hunting that’s bound to delight.

Simple to make and fun to craft, these cardboard baskets are pre-cut with slots and perforated lines to guide your basket folding. All you need to do is decide how you’ll decorate yours!


STEP-BY-STEP

  1. Apply the glue stick to the backing of your Easter basket and handle.
  2. Press the glue side of the basket onto the backing side of the pattern paper and gently smooth down with your fingers to remove any air bubbles, set aside to dry.
  3. Carefully cut away the excess pattered paper and recut along the pre-cut Easter basket lines
  4. Use the pre-fold lines of the basket to fold the basket into its shape and glue into place.
  5. Decorate your basket with Easter stickers, paper shred and chicks.


Done! The perfect hunting basket is ready for chocolate egg hunting!


*TOP TIP – Younger children will enjoy decorating their baskets with scraps of paper or paint, rather than one sheet of patterned paper.


Products Used;

Impressionist Pattern Papers OR Gingham Paper 

Easter Hunting Baskets

 Kraft Paper Shred  OR Green Crinkle Paper Shred

Easter Stickers 

Easter Chicks 

Creatistics Superstik Glue Stick  


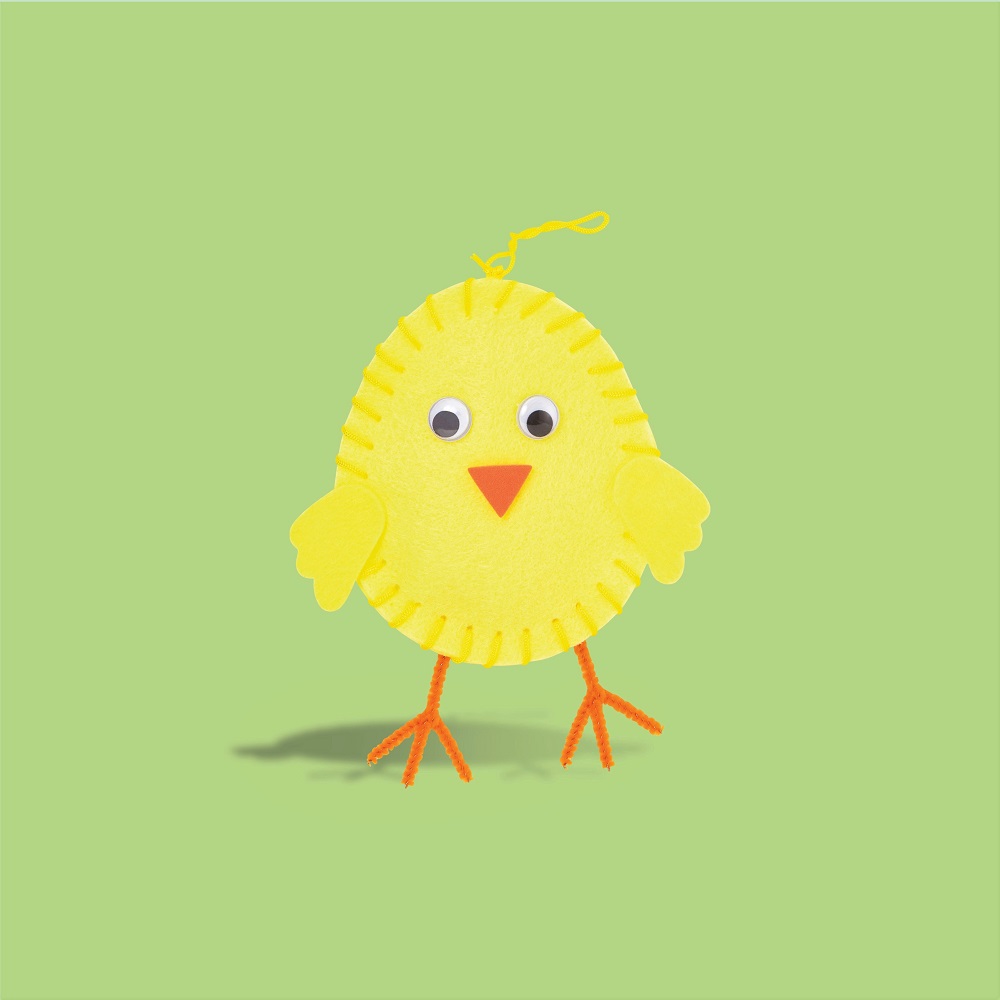
Felt Threading Easter Chicks

Felt Threading Easter Chicks

Mess free crafts like these soft & sweet Easter Chicks are super simple to navigate. With all the pre-cut pieces supplied in the kit, students can experiment with sewing techniques as they assemble the components using the accompanying visual instructions. You’ll just need a tiny dab of glue at the end to adhere the little chicks’ eyes, beak, and wings. And ta-da! Your adorable textile creation is finished.

There are so many incredible developmental benefits for young students engaging in basic sewing, including patience and confidence, fine motor dexterity, the ability to cognitively following instructions, the building of valuable life skills and many more.

These little chickees are just about bouncing out of the packet to be assembled! Read on to follow the steps to make one for your very own.


STEP-BY-STEP

  1. Assemble all your pieces – 2 x yellow felt body pieces, filling, plastic sewing needle & yellow weaving thread, 2 x wings, 2 x eyes, a beak and length of orange pipe cleaner to form the legs.
  2. Bend your orange pipe cleaner over to that it forms a long semi-circle.
  3. Using scissors, carefully snip two short lengths off the ends, and use these lengths to twist around the legs to form the chick’s feet, and then set aside.
  4. Thread your plastic needle with the yellow weaving thread and tie a knot in one end.
  5. Place your yellow body pieces together, and using a whip stitch, begin to sew the two pieces together at one side.
  6. Place leg piece inside the 2 body pieces and continue to whip stitch, locking the legs into the body as you continue around the edge.
  7. When you have stitched most of the way around, carefully place your filling evenly into the body and finish off stitching the two pieces closed, tying off with a firm knot (the remaining thread can form a hanging loop if desired).
  8. Using a small dab of tacky glue, attach the 2 eyes, the beak and wings to chick and set aside to dry thoroughly.


Done! Your felt Easter chick is ready.


*TOP TIP – Holding the pieces together with a few pegs will help keep everything stable while younger students sew it all together.


Products Used;

 Felt Threading Easter Chicks

Tacky Craft Glue 


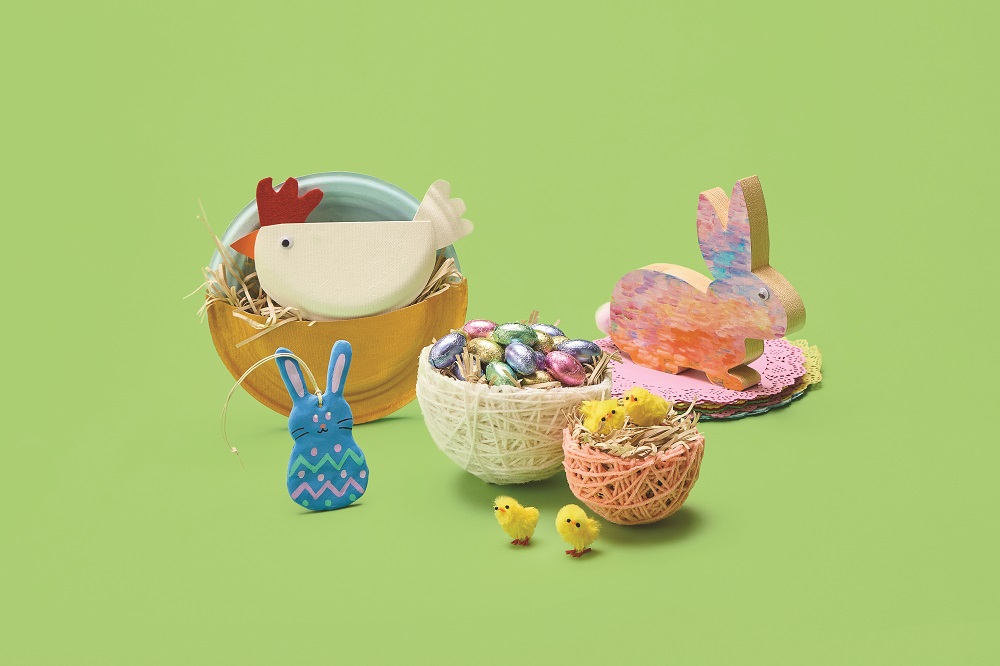
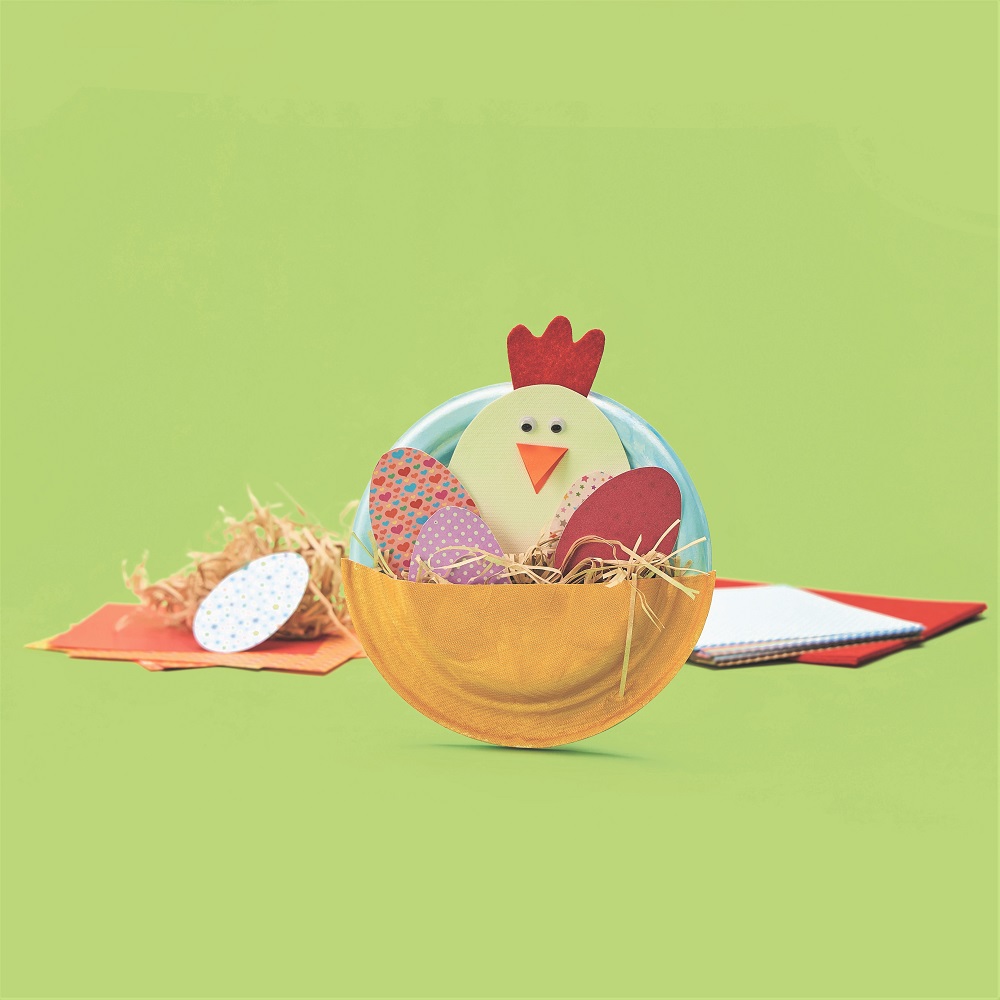
Eco Plate Roosting Nests

Eco Plate Roosting Nests

Paper plates – a classroom favourite! It’s amazing what you can transform them into. With just a snip of some scissors, a splash of colour, a dab of glue and a sprinkle of creativity, you’re able to make any creative creature.

For this activity we’ve transformed the trusty paper plate into an adorable roosting nest. We know little ones will love filling their nests with Mama Hen and her beloved eggs & chicks. We love the texture and stability the eco sugarcane ‘paper’ plates gave to this activity, providing value for children to engage in pretend play and storytelling with their creations.


STEP-BY-STEP

  1. For the background, apply your choice of pastel paint onto the front side of a plate and set aside to dry.
  2. To make the nest, cut one plate in half, apply gold paint to the back side, and set aside to dry.
  3. To make Mama Hen, cut the remaining half plate into a semi-circle or large egg shape.
  4. Using coloured felt or paper, cut out one white tail, one orange beak and one red comb.
  5. Glue the beak, comb and tail onto Mama Hen and glue on some joggle eyes so she can keep watch over her chicks.
  6. When the painted plates have dried, glue the nest onto the background plate and set aside to dry again (a few pegs will help everything stay in place while the glue dries).
  7. When Mama Hen and her nest is thoroughly dry, pack in Kraft Paper Shred and then rest Mama Hen and her chicks inside their cosy home.


Done! Your very own Easter Roosting Rest is ready.


*TOP TIP – Add some extra goodies to Mama Hen’s nest by gluing patterned paper onto sugar cane plates and cut into oval egg shapes.


Products Used;

18cm White Sugar Cane Eco Plates

23cm White Sugar Cane Eco Plates 

Pattern Paper Squares 

 Creatistics Pastel Paint

Assorted Felt Sheets 

Joggle Eyes 

Kraft Paper Shred 

Gold Fabric and Craft Paint 

Creatistics Strong Craft Glue 

Easter Chicks


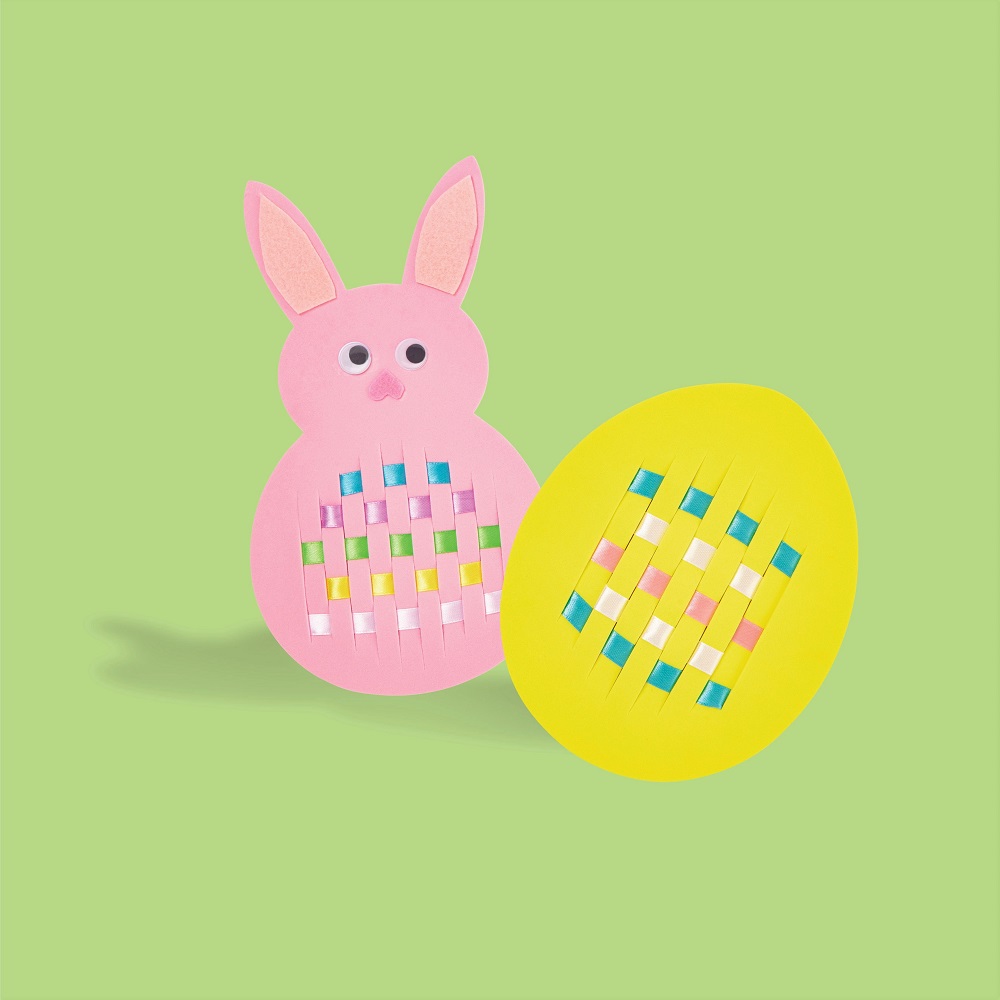
Weaving Eggs & Bunnies

Weaving Eggs & Bunnies

Create fantastic weaving patterns this Easter with the Weaving Eggs & Bunnies set. This is a brilliant introduction for children working with textiles as they gain an understanding of the fundamentals of weaving and pattern designs. They’re perfect to decorate the classroom, home or make the sweetest Easter gifts for loved ones. Extend children’s vocabulary as they discuss secondary colours and pastel shades and positional language to describe the action of ‘over and under’ as they work with the satin weaving ribbons.

Take the activity to the next level by adding eyes, nose and decorative details to the bunnies or create a nest for the eggs. Add them to Easter hats and bonnets, use them for storytelling or combine two together to make Easter themed hinting baskets. When children’s creativity is involved, there’s absolutely no limit!


STEP-BY-STEP

  1. Choose your design and pre-cut lengths of satin ribbon.
  2. Weave each length of ribbon over and under the pre-cut slots to form a pattern.
  3. Use a dab of tacky glue to hold the ribbon in place on the reverse side.
  4. Add your choice of detail such as bunny’s joggle eyes and pastel felt facial features or decorate both shapes with adhesive rhinestones or glitter flowers and daisies.
  5. If using glue, set aside to dry thoroughly.


Done! The perfect Easter weaving eggs & bunnies are ready.


*TOP TIP – Experimenting with pattern making and sequences in the classroom will help younger children get the hang of the over and under action to form weaving patterns.


Products Used;

Weaving Eggs & Bunnies 

Pastel Felt 

Assorted Joggle Eyes 

Tacky Craft Glue 


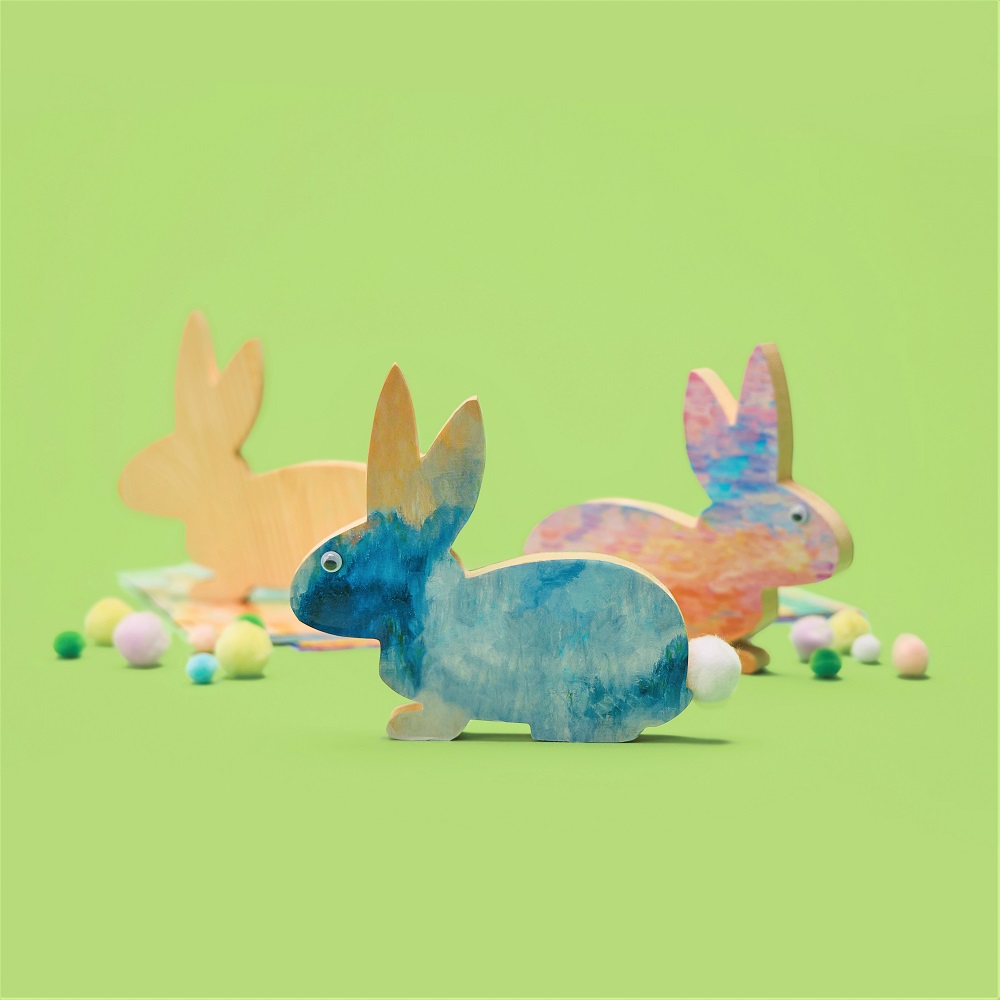
Colourful Wooden Bunnies

Colourful Wooden Bunnies

These solid pre-cut wooden bunnies are a terrific experience to incorporate woodwork to the younger year’s classroom. Made from a solid block of unfinished pinewood, they lend themselves to all sorts of decorations. Whether it’s patterned paper, paint, wood markers, POSCA pens, glitter glue or a combination of them all, there’s bound to be a colony of bunnies full of individual personality in no time!

Read on to follow the steps to make the illustrated impressionist artwork inspired bunnies.


STEP-BY-STEP

  1. Lay the wooden bunny onto the impressionist paper and trace around with a pencil.
  2. Lift the bunny off and carefully cut around the pencil markings.
  3. Cover one side of the wooden bunny with Creatistics Superstik glue stick and place the blank side of the paper onto the wooden bunny, matching the bunny paper shape to the corresponding wooden bunny side.
  4. Repeat for the second side.
  5. Apply Tacky glue to Joggle eyes and a Pom Pom tail and adhere in place and set aside to thoroughly dry.
  6. Draw whiskers and other details on your bunny as desired) or add on some Easter themed embellishments. Don’t forget Bunny’s crunchy carrot to nibble on too.


Done! Your adorable Easter Bunnies are ready.


*TOP TIP – Cutting the paper just on the inside of the pencil markings will ensure it fits the wooden bunny exactly.


Products Used;

Wooden Bunny

 Pastel Pom Poms 

 Impressionist Pattern Papers 

Creatistics Superstik Glue Stick  


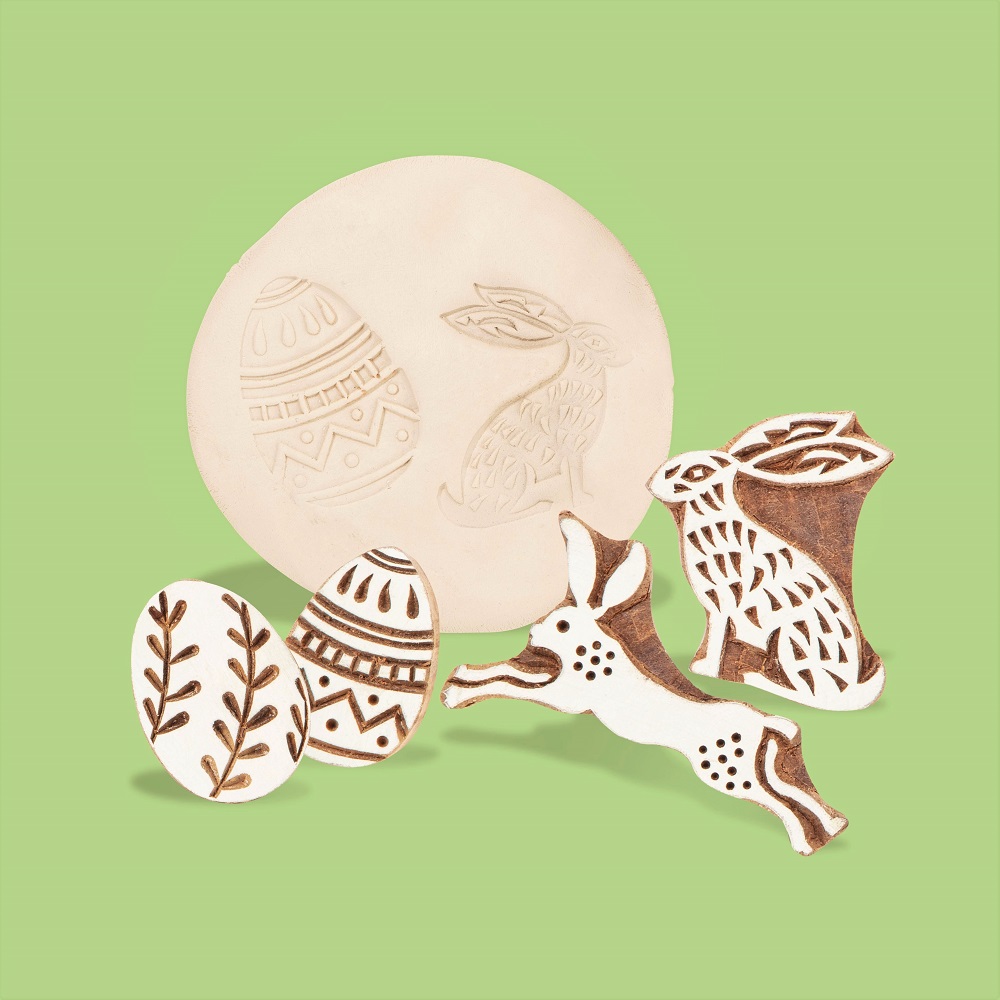
Easter Block Print Stamps

Easter Block Print Stamps

Clay is a medium that lends itself to all age groups and crafting abilities – from beginners right through to experienced potters. And the beauty of air-dry clay is the ability to form incredible works without needing the hassle and expense of firing ovens. Simply use your hands to form coil or pinch pots, shallow dishes, birds in nests, necklaces, wall art, hanging decorations, nature prints, paper weights and so much more!

These adorable Easter themed wooden Block Print Stamps add festive flare to your Easter clay works. Perfectly paired with natural beading cord or leather cord, to make all sorts of jewellery or decorative works. Form your own clay beads or grab yourself convenient packs of beads in natural wood, pearl pony, or painted pink & white wood.

Don’t forget to add a finishing-off sparkle with Creatistics Bio-glitter, and you’re all done!


*TOP TIP – If your clay dries out while you’re using it for extended periods, use a little water on your hands to form a smooth surface. This is particularly handy for smoothing the edges of your works.


Products Used;

Easter Block Print Stamps 

Creatistics Air Dry Ceramic Clay  

 Air Hardening Clay 

Flowers of Australia Block Stamps  

Wooden Block Print Stamps 


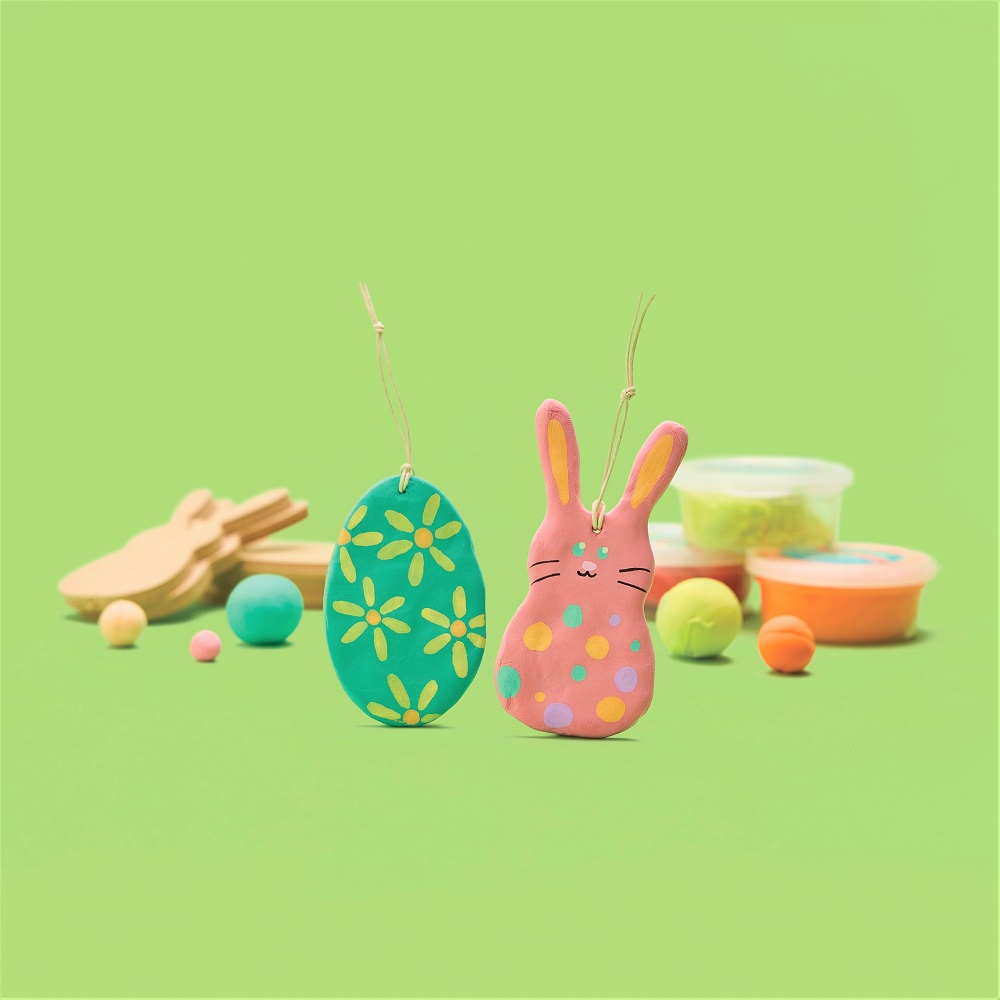
Wooden Easter Ornaments

Wooden Easter Ornaments

These wooden Easter ornaments are the cutest little blank canvases, allowing for plenty of personalisation as children decorate them to their liking. The finished product can make all sorts of goodies – traditional hanging decorations, key chains, school bag accessories, car rear view mirror accessories, gift tags, Easter hat additions, hunting basket treasures and so much more.

For colourful multi-step creations, the following activity combines modelling with drawing. Although, the beauty of a blank wooden shape ensures there’s no end to the types of mediums that can be used – paint, patterned paper, collage, embellishments, glitter and more.

How will you transform your Easter ornaments?


STEP-BY-STEP

  1. Divide each Magiclay colour pot into 3 portions (each 20g container will cover approx. 3 Wooden Easter Ornaments).
  2. Using your fingers, gently press your portion of Magiclay into a flat rough circle.
  3. Place it onto the wooden ornament and wrap it around, covering the ornaments entire front surface.
  4. Gently mould the clay onto the back of the ornament, using your fingers to manipulate the Magiclay into place. Your ornament should now be completely covered.
  5. Carefully poke a skewer through the ornaments hole to ensure it can still hang when dry.
  6. Set aside to dry for 24 to 48 hours.
  7. Use POSCA paint pens to decorate your shapes and set aside to dry again.
  8. Thread a length of twine/ribbon through the ornament’s hole and tie off securely into a loop.


Done! The perfect Easter decorations for the classroom and home are ready.


*TOP TIP – For large classes or combination of classes, the bulk pack Silk Clay Kit, also available separately in individual colours, will ensure there’s plenty to go round in each student’s preference of colour.


Products Used;

Paper Magiclay Candy Colours  

 Wooden Easter Ornaments 

Natural Beading Cord 

POSCA Marker Pastel


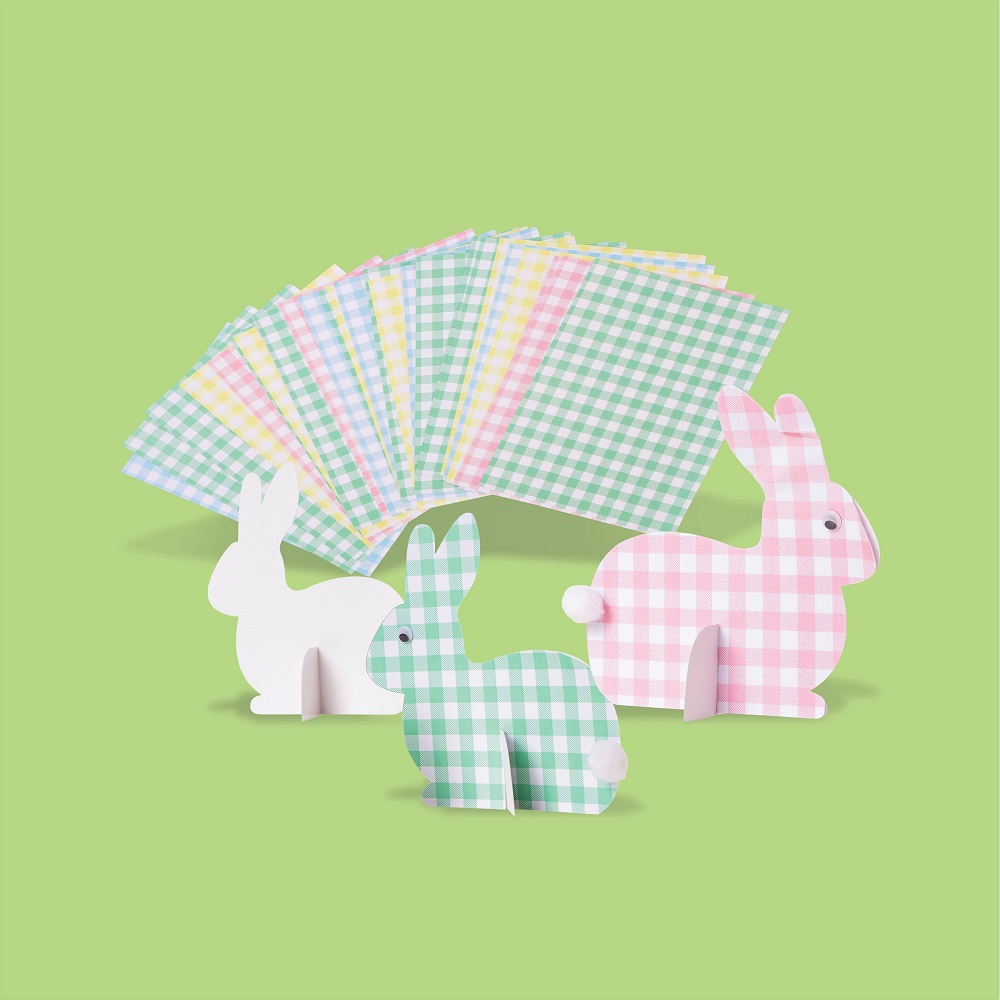
Standing Cardboard Easter Bunny

Standing Cardboard Easter Bunny

These cute Standing Cardboard Bunny shapes are sure to capture children’s attention. They’re supplied in plain white cardboard to provide opportunities for creativity to shine – collage, paint, draw or stick on any number of embellishments. Add joggle eyes, a nose, a pom pom tail or even tie a decorative bow around the collar. You’re Peter Cottontail is ready to hop down the bunny trail!

Read on to work through the steps for creating your very own pastel toned gingham patterned bunny.


STEP-BY-STEP

  1. Apply a layer of glue stick to one side of the bunny and set aside to dry.
  2. Carefully cut the excess paper from around the bunny, and along the pre-cut standing slot.
  3. Repeat steps 1 and 2 on the reverse side of the bunny if desired.
  4. Use tacky glue to adhere joggle eyes, a pom pom tail (and any other embellishments) and set aside to thoroughly dry.
  5. Slot the bunny-shaped cardboard piece neatly into the pre-cut holder.


Done! Your adorable standing bunny is ready to decorate your desk, mantel, or Easter lunch table.


*TOP TIP – When using glue, allow your decorated pieces to thoroughly dry before slotting the bunny into its standing base.


Products Used;

Standing Cardboard Bunny

Gingham Paper

Pastel Pom Poms

Creatistics Superstik Glue Stick

Tacky Craft Glue 

Assorted Joggle Eyes


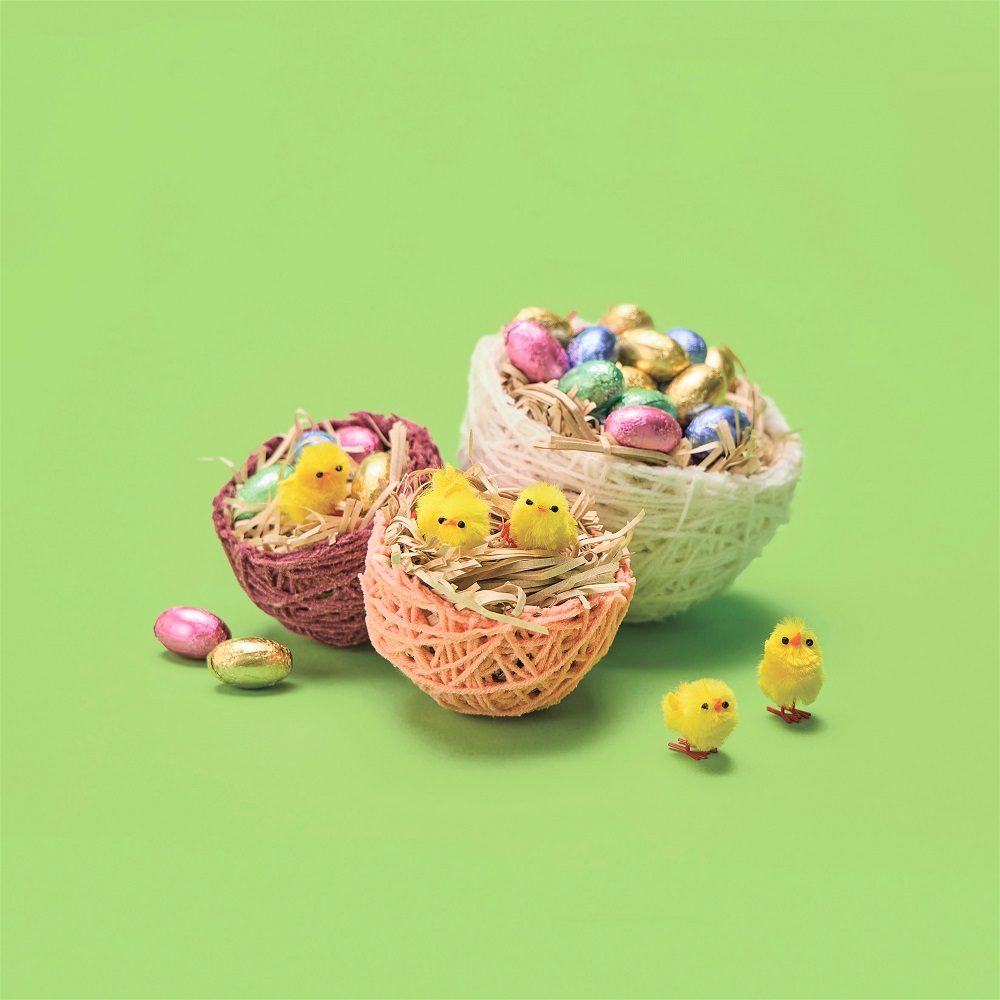
Easter Yarn Nests

Easter Yarn Nests

Are you looking for an oh-so-cute project for older students? This utterly adorable Easter activity uses a process similar to papier mache, in this case using yarn in place of paper, with PVA glue acting as the moist adhesive to bind the yarn onto a balloon and then hardening into a nest as it dries.

Buttery soft pastel toned yarn in light blue, pink, purple and white will make for a super sweet Easter theme while bright & bold coloured yarn will lend itself to artistic flare. When your nest is ready, it can be filled with paper shred in natural, pastel rainbow or green or even snuggly feathers in pastel, bright or natural. Add in some little chickees and hide your choccies away.

In any colour way you choose, your yarn nests will sit proudly on display!


STEP-BY-STEP

  1. Blow up the balloon with a small amount of air so that it resembled an egg shape, firmly tie a knot and set aside.
  2. Pour approx. 1 cup of PVA glue into a shallow bowl.
  3. Cut long lengths of coloured yarn and carefully place them into the glue to avoid tangling, making sure all parts of the yarn are covered in glue.
  4. Slowly wind the PVA covered yarn around the balloon, using fingers to gently move the yarn into place and remove excess glue when wrapping.
  5. Hang to dry (depending on the weather this may take up to a week).
  6. When the glue is thoroughly dry, pop the balloon and remove all pieces while carefully cutting the yarn egg in half to form 2 nests.
  7. Fill each nest with paper shred and decorate with chicks and chocolate eggs.


Done! The perfect cosy Easter nest is ready.


*TOP TIP – Letting the PVA yarn dry between layers will speed up the process (too many layers of yarn and PVA will make it tricky to dry). Be patient, it can take days for some layers to dry thoroughly.


Products Used;

Balloons

Assorted Acrylic Yarn 

Creatistics PVA Washable School Glue

Kraft Paper Shred

 Easter Chicks


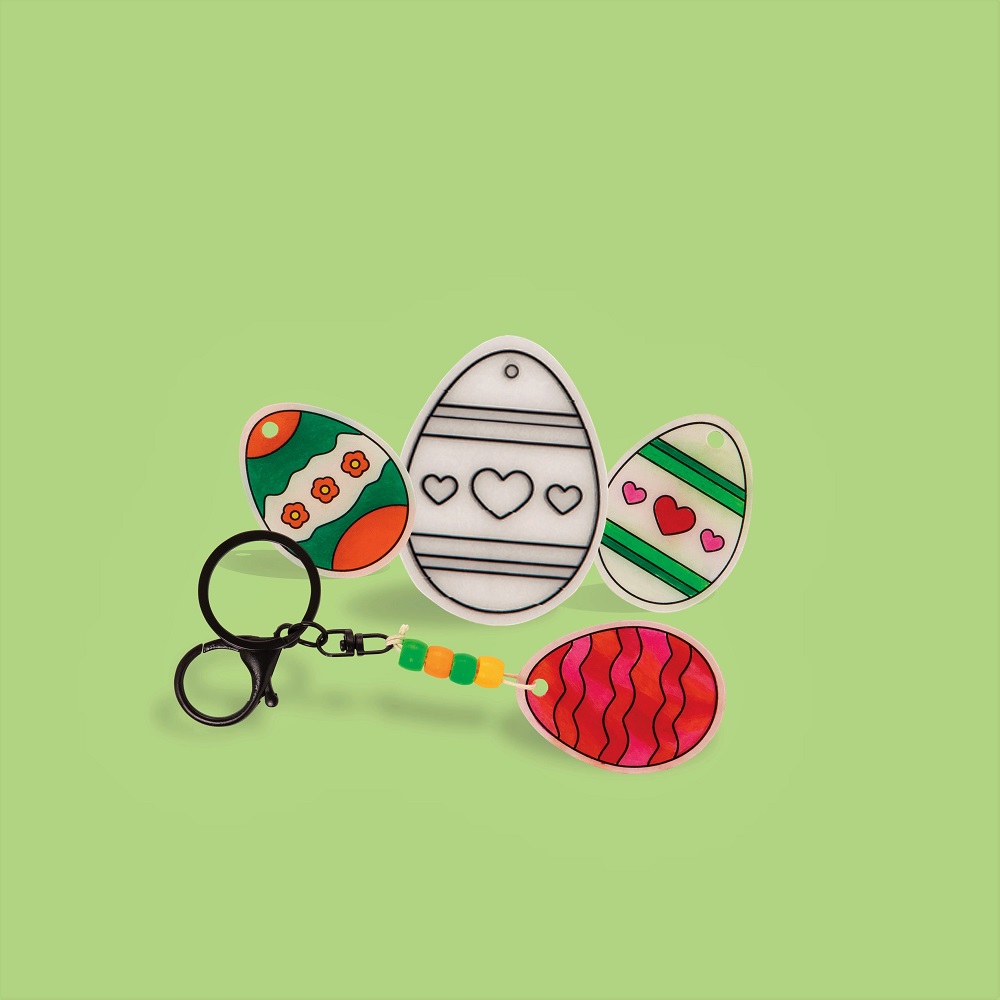
Shrink Film Easter Eggs

Shrink Film Easter Eggs

Have you tried shrink film before? Simply colour, bake, and watch it shrink!

Shrink film is a brilliantly mesmerising activity, and these new handy pre-cut Shrink Film Easter Eggs are sure to create a buzz in the classroom. Use the different patterns to make trinkets, jewellery, and decorations – and the happiest of Easter craft memories.


STEP-BY-STEP

  1. Colour in your design on the matt side of the shrink film using coloured pencils or permanent markers (remember to pop out the pre-cut hanging hole before baking).
  2. Pre-heat oven to 150°C.
  3. Place design on a lined tray (matt side up) and bake.
  4. Plastic will begin to shrink after 10 seconds (to approx. 60% of its original size).
  5. When the plastic has returned to its flat shape remove the tray from the oven.
  6. Wait for the shrink film to cool completely before handling.
  7. When thoroughly cool, thread a length of cord into the hole, and firmly tie off.
  8. Thread desired number of beads onto the cord and firmly attach to your keychain with several firm knots.


Done! The perfect Easter themed key ring is ready!


*TOP TIP – With shrink film, coloured pencils go a long way. A very light shading will result in bold and vibrant colours.


Products Used;

Shrink Film Easter Eggs

 Black Lobster Key Tags

Natural Beading Cord

Pearl Pony Beads

Jumbo Coloured Pencils


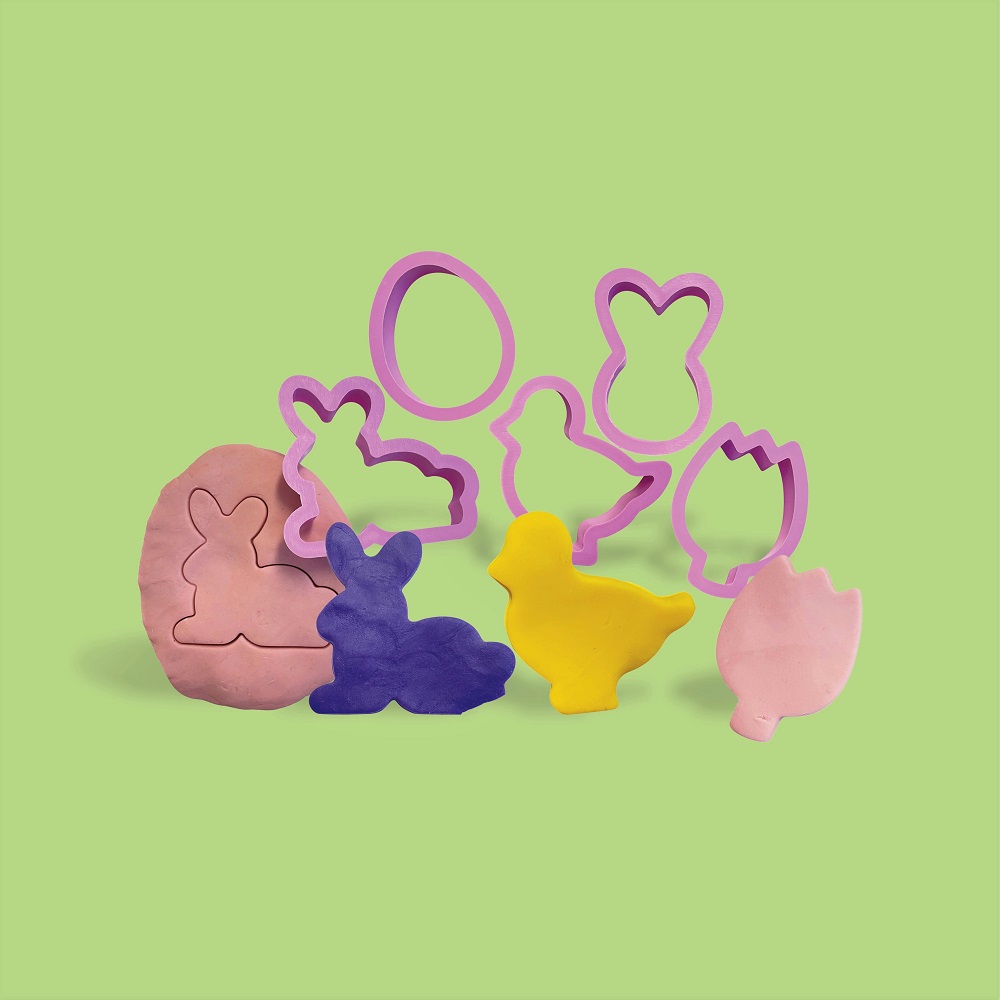
Easter Clay & Dough Cutters

Easter Clay & Dough Cutters

Working with dough is a satisfying way to entertain children’s tactile stimulation and creativity. It’s also an activity rich with physical benefits – from fine motor strength and dexterity to coordinating dough tools to form creations out of the chosen medium.

This set of Easter Clay and Dough Cutters offers incredible possibilities for children to make and create Easter goodies. In each set there’s an egg, baby chick, rabbit, tulip, and bunny face shape for children to stamp in any number of dough options (play dough, cookie dough, modelling clay, or plasticine).

For children to make permanent works, air dry clay is a handy option, simply roll the clay out as you would for dough, press the Easter shaped cutter into the clay, remove the excess and set your clay ornament aside to dry. Before it’s dry, use a pencil or skewer to carefully poke a hole into the top of the shape will ensure there’s somewhere to tie cording and beads for simply stunning Easter decorations.


*TOP TIP – A light sprinkling of Bio-Glitter will add an extra-special sparkly touch to the experience.


Products Used;

Easter Clay and Dough Cutters

Creatistics Pastel Dough

Plastic Rolling Pin 


We hope you’ve enjoyed the latest eggs-travaganza of Easter crafts and are bursting with inspiration for an egg-stra special Easter!


Download: Easter activities PDF Bundle


Blog Home>

Shop MTA>

Posted on

How to thrive not just survive – 14 top tips for a stress-free year

Thrive Leaderboard

When a new school year gets underway, it’s often with a feeling of excitement – but also a slight feeling of fear or apprehension. It can be daunting, as you know how busy it will get at times, and how you will be asked to dig deep and find superhuman powers as you tackle lesson plans, new students, different classes, new colleagues, new processes, a new curriculum or a new school environment. That’s on top of your day-to-day teaching. It’s a lot.

While you may feel switching to survival mode is the only way through, it is possible to thrive not just survive. How do you make the school year as enjoyable as possible? Maximise joy and minimise stress with this refresher. It’s thrive time…


1. Remind yourself of the rewards

Teaching can be a job that asks a lot of you. Rather than focus on the negative as you head into the school year, remember the core reasons you chose this marvellous career!

Remind yourself of the impact you’re making.

Look for those ‘aha’ moments with the students.

Congratulate yourself on your tenacity and skills.

Take pride in what you do well.

Remember that you are making a difference every day.


2. Prioritise self-care

Yes, everyone talks self-care. But are you doing it? Take care of your wellbeing in this busy first term when you’re getting established, so you have a deeper well of positive energy to pull from. A few small daily self-care practices can make a big difference in relieving stress, supporting good mental health and showing up for your students in the best way.

If stress is building in the classroom, breathe in deeply, hold it for a few seconds, then exhale slowly for a few seconds. Repeat that deep breathing for 2 minutes to lower your stress response and gain control.

Take a 5-minute brain break or mini-meditation to decompress throughout the day.

Outside the classroom, self-care can mean carving out quiet time, not over-scheduling your life, doing things you love and saying no to things you don’t. When in doubt, reach for an affirmation card to bring you some calm and focus.


3. Eat healthy & exercise

Staying healthy is the single most important way to keep yourself happy and motivated throughout the school year. A healthy diet and exercise regimen is a natural mood enhancer and energy booster too!

Cool moves: Find exercise you like – yoga, walking, gym – and schedule it when you can so it’s a regular part of your work week.

Restorative sleep: Those zzzzzs are a powerful way to stay healthy. Regular sleep lets your body and mind rejuvenate so you can meet the day with energy instead of fatigue.

Food as medicine: Getting the fuel your body needs to stay sharp will help you no end in the classroom. Prioritise fresh fruit, complex carbohydrates, leafy greens and lean proteins. Try to curb unhealthy snacks. (But also cut yourself some slack – you’re only human!).

Stay hydrated: Drink plenty of water each day. H2O hack: fruit is loaded with water so you can also top up your intake there.


4. Make time for you-time

Your free time matters. It helps you avoid teacher burnout – especially in the school year when it’s go go go. Here’s how to make it happen so you maintain that energy.

Boundaries: Put some firm boundaries in place. If you can leave schoolwork at school, do! This might mean saying no sometimes to both personal and professional opportunities – but boundaries will make you more content as a teacher.

Thrive tip: Turn off notifications on your phone for work emails!


Happy place: Lean into hobbies, pets, friends, family, Netflix, the beach, road trips… find your happy place outside of school hours and carve out time for it. Having some ‘you time’ and taking the dog for a walk, getting that massage or enjoying a leisurely brunch will help support a healthier balance in your life, and make your teaching time more energised, focused and less stressful.
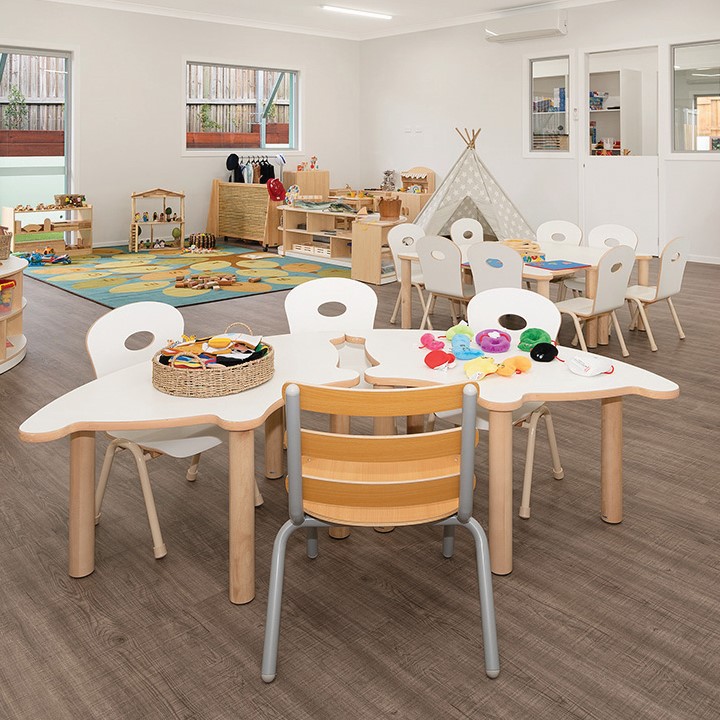
You’ll be a better you: You work long hours but remember that your personal time is important to protect, so you can keep being the teacher you love being – and your students will thank you for it!

Thrive tip: In each term, book in some watertight ‘you time’ dates – a friend catch up, a bushwalk or a family BBQ. Schedule them in advance so when the term hits, those dates are locked and loaded.


5. Talk to your colleagues

No-one understands the demands of a teaching job like other teachers, so work those workplace friendships! Communication and meaningful social connection can be stressbusting in so many ways.
You’ll laugh and support each other, relax with each other and build healthy perspectives and potential solutions for problems that arise.

Never be afraid to ask for help. It’s a sign of strength. So, reach out, offload and share – remember, a problem shared is a problem halved.

You can help others too which feels awesome!

It’s chemically proven! ‘Feel good’ conversations trigger higher levels of dopamine, oxytocin, endorphins and other biochemicals that give us a sense of wellbeing. Gotta love that.


6. Book some professional development

Upskilling and staying motivated is important, so make time to top up on your professional learning and update your skill set throughout the year. Write a list of what you’d like to learn and seek out conferences or seminars that could inspire your teaching. There are lots of training opportunities offered by so many organisations. You can learn so many new things even in one day. Perhaps you could aim for a bit of PD each term to help with your wellbeing and sense of growth.


7. Keep calm and plan

Before the year goes too far, stay ahead with a physical (or digital) planner. It will give you a great sense of calm and a feeling of accomplishment! Using a teacher planner, jot down notes or goals you want to achieve and put dates in place. The more organised you feel during the year, the more the stress will melt away and you won’t feel so overwhelmed.


8. Make the classroom clean a dream

Classrooms have a habit of getting cluttered really easily, even early on in the school year. Aim to stay on top of tidying throughout the year with a system – recycling, take-home work, rubbish, store away. Perhaps put students in charge of tidying up work on the wall. At the end of each term, do a mini-clean and tidy. Send projects or artworks home that you don’t need to keep in the cupboards or in tubs or drawers any more.


9. Tackle reports like a pro

Reporting is a real skill and twice a year, it will come up on you before you know it! Keep notes along the way (in your planner perhaps) that will help you when it gets to report writing time. Otherwise it can be all-consuming writing meaningful comments and assessments. When the time comes, find a quiet place that works best to write your reports efficiently and use a method that focuses you. Be strategic and disciplined with your time, and don’t let it take over your time completely. You’ve got this.


10. Familiarise yourself with curriculum changes

For many teachers, 2023 is a year of change as the new Australian Curriculum Version 9 (https://v9.australiancurriculum.edu.au/) comes into play as well as revisions to the NZ Curriculum (https://nzcurriculum.tki.org.nz/Refreshing-the-New-Zealand-Curriculum). How do these changes impact your lesson plans? Take the time to understand the implications in the classroom and shape your teaching accordingly. Evaluate the relevance of the resources you’re using.

 

11. Outsource the admin

Having time to prepare for your core teaching duties is a hot topic!! Research shows that many teachers juggle an ever-expanding workload. To avoid burnout, learn what tasks you can outsource throughout the school year. Put your hand up for admin support wherever and whenever it’s offered and available.
 

12. Plan holidays

Plan regular mini-breaks or holidays throughout the year. Get online. Book something. Explore travel sites. Plan a home reno. Whether you unwind best with a vacation or staycation, planning a break is motivating and will give you something to aim towards after all the hard work you put in. As a wise person once said, you can’t pour from an empty cup, so make sure a little break, even if it’s just a weekend, fills up your cup.
 

13. Be imperfect

Remember that what you’re doing every day is enough. Many teachers feel stressed and are prone to burnout because they feel they need to do more. Banish the perfectionism. You’re in a wildly human job at the end of the day, dealing with many different people – students, parents, principal, admins, the school community. Keep stress at bay by reminding yourself that you’re doing enough.
 

14. Look for the opportunity in each moment

What strengths and skills are you honing in the classroom, even when the moment may not be one of your finest? Find the opportunity in every moment – the good or the bad. The school year may have challenges, but even on the toughest day, there’s a lesson – not just the ones you’re sharing with your students, but one for you. Look for it and see it as the opportunity it is – to self-reflect, to improve, to pivot or to keep doing what you’re doing! Remember, your goal this year is to thrive and keep that passion alive!


Plan for the best and apply some of these tips to keep your tank full! Making your school year stress-free is possible if you prioritise yourself, prioritise your growth as a teacher, connect with others, plan ahead – and don’t forget to hydrate and breathe deep every day! And of course, when you thrive, your students do too.


Blog Home>

Shop MTA>

Posted on

Top EC resources you need for 2023

ls505 and ach20212 product

As 2022 comes to a close and we start to plan for the year ahead, we look back and evaluate the year’s learning curriculum. What worked well? What experiences did the class enjoy most? What resources were the most popular, and what made them barely spend a minute on the shelf as children delved into play each day? 

It’s not just the high quality that ensures a resource lasts a long time (that’s important of course), but the high value of that item that makes it a winner. But what’s high value in an early childhood setting? 

Undoubtedly it’s the open-ended play value of a resource that allows for endless adaptability. Innovative resources that empower children to inquire and experiment that nourish creative minds to find creative solutions. For children’s autonomy and confidence to blossom, in turn, giving them the desire and strength to explore and continue exploring new and exciting things. 

Let’s read on to take a closer look at MTA’s top EC resources for 2022, and some of the reasons why they make the difference.


Early Years Planner Tidal Creek

teb2023-e1 Product

https://www.teaching.com.au/product/TEB2023-E1


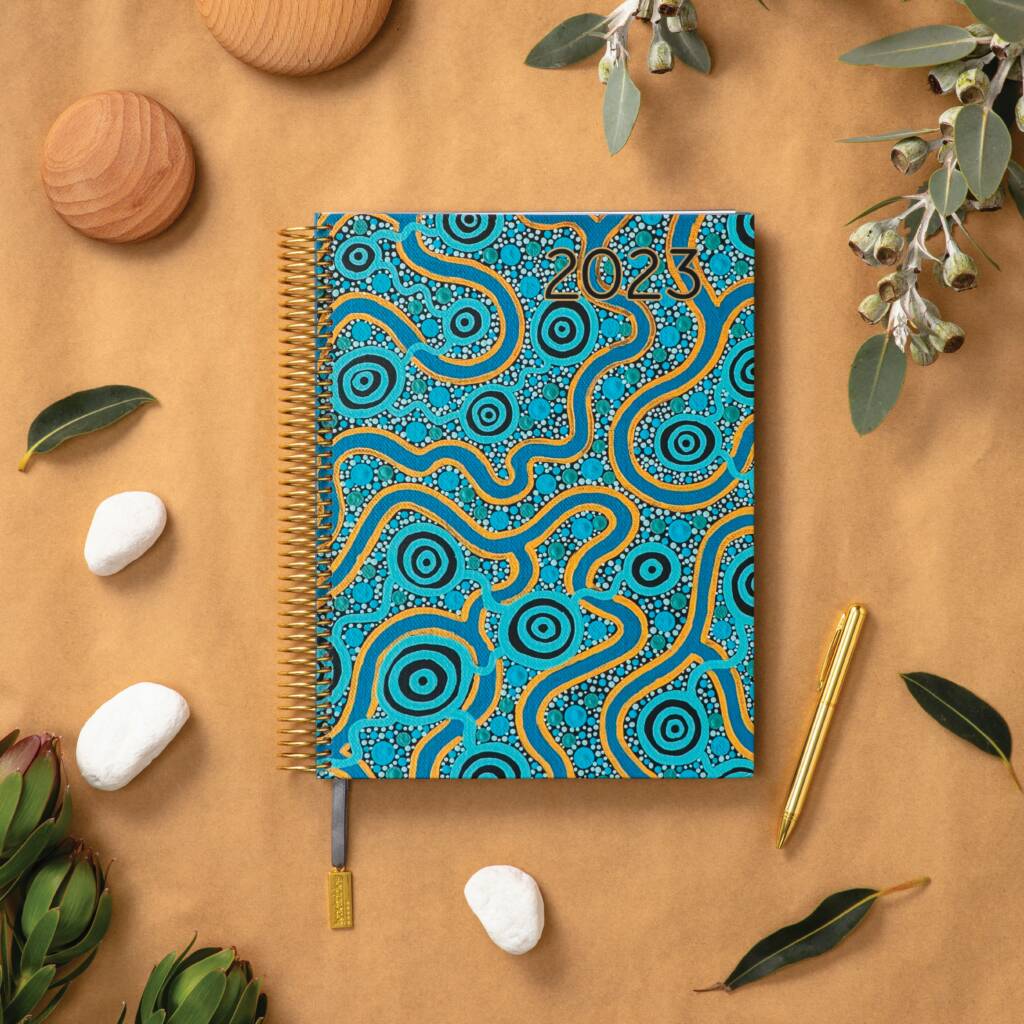
Is there any better way to start each day than with a satisfying feeling of organisation? Everyone’s favourite MTA Early Years & Teacher Planners are the ultimate organisational tools. Exclusively developed with teachers & educators, these premium quality A4 spiral bound planners provide flexibility for your teaching programme and class curriculum.

It’s not just the flexible layouts of these planners that make them a favourite; it’s also the ‘extras’ featured throughout. There’s inspiration to motivate, teaching tips & ideas to support educators in their profession, dedicated spaces to keep on track with goals & plans and possibly the absolute most important – spaces to make sure ‘me time’, or self-care happens for wellbeing. Brilliant! 

The Tidal Creek cover has fast become the most popular, with artwork designed by Lauren Greatorex. Lauren is a proud Malgana, Nyikina and Jabirr Jabirr woman living on Kariyarra County in Port Hedland. Her artwork is inspired by her mission to connect with her ancestral heritage. ‘Tidal Creek’ represents the tidal pools during a king tide on Nyikina. Lauren loves acrylic because of its ability to dry fast, which allows her to layer colours when painting.

We love it when functionality is also beautiful! 


Bamboo Counting Set

qgp922 product

https://www.teaching.com.au/product/QGP922


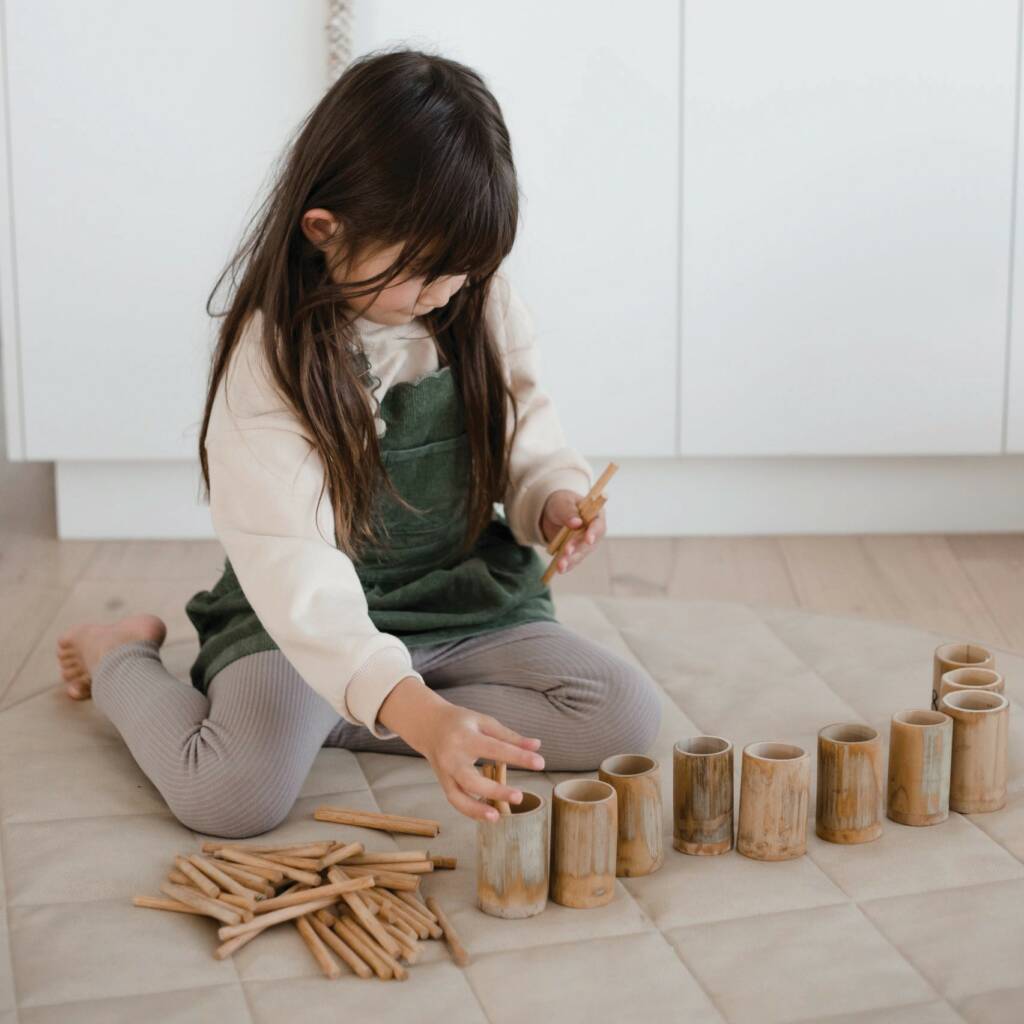
Maths meets loose parts! The Bamboo Counting Set consists of 10 bamboo cups with 55 wooden sticks for endless number exploration. Children are encouraged to place the correct amount of sticks in the corresponding cup or find and collect objects in nature or around the classroom. Objects can be sorted in a variety of ways: by size, colour, material, shape, etc. It’s a brilliantly authentic resource for children to learn through doing as they experiment with written numbers and their quantity relationship.

Number sense, or the basics of learning numbers, can be a source of fun and intrigue. Simple games and rhymes, visual aids, patterns, classification and measurement involving numbers can all lead to numerical confidence. Use the Bamboo Counting Set on its own or combine with markers & paper to promote mark-making as children experiment with symbols and their meaning, recognition of quantities and mathematical language. 

A lifelong love of maths is ready to begin!  


Natural Spaces – Low Heavy-Duty Adult Chair

dm4564 Product

https://www.teaching.com.au/product/DM4564#


There’s so much to say about the Natural Spaces Low Heavy-Duty Adult Chair, you see, it’s not just an ordinary chair…

This chair is specifically designed for adults to sit at low levels. Educators and teachers often have to sit on children’s furniture which is too small or not stable enough. OHS ergonomic assessments have identified the need for a low chair which is designed for adult use. To solve this problem, MTA have designed a chair which accommodates educator comfort while working at lower heights. This chair is the result of tests that use the innovative ViSafe movement sensing technology. These tests have resulted in a chair which is specifically designed to provide adult educators a comfortable and stable seat while working.

Made with beautiful maple ply and a solid silver metal frame tested to 170kg as specified under AUS/NZ 4688.2:2000. Each leg has a plastic foot to avoid classroom noise and minimise floor scratches. It even features low maintenance wipe clean surfaces. Yes please! 

Why is it important for educators to sit at low levels? 

Being part of the group where they can meaningfully socialise and engage with their educators and classmates at eye level brings possibilities rich with learning. Children feel a sense of belonging, ensures children feel safer, more in control and more connected. Being at eye level communicates that you’re meaningfully there for them, paying attention to their needs and interests.

We learn by seeing and doing too. When you’re at eye level, you’re there to support and scaffold children’s learning, to role model safe & appropriate behaviours, to join in and demonstrate tasks or the use of tools, including cutlery at mealtimes, scissors at the craft table, speech and communication and so much more. 

The possibilities of a chair! 


Harmony Outdoor Moveable Play Kitchen

hmy10243 Product

https://www.teaching.com.au/product/HMY10243


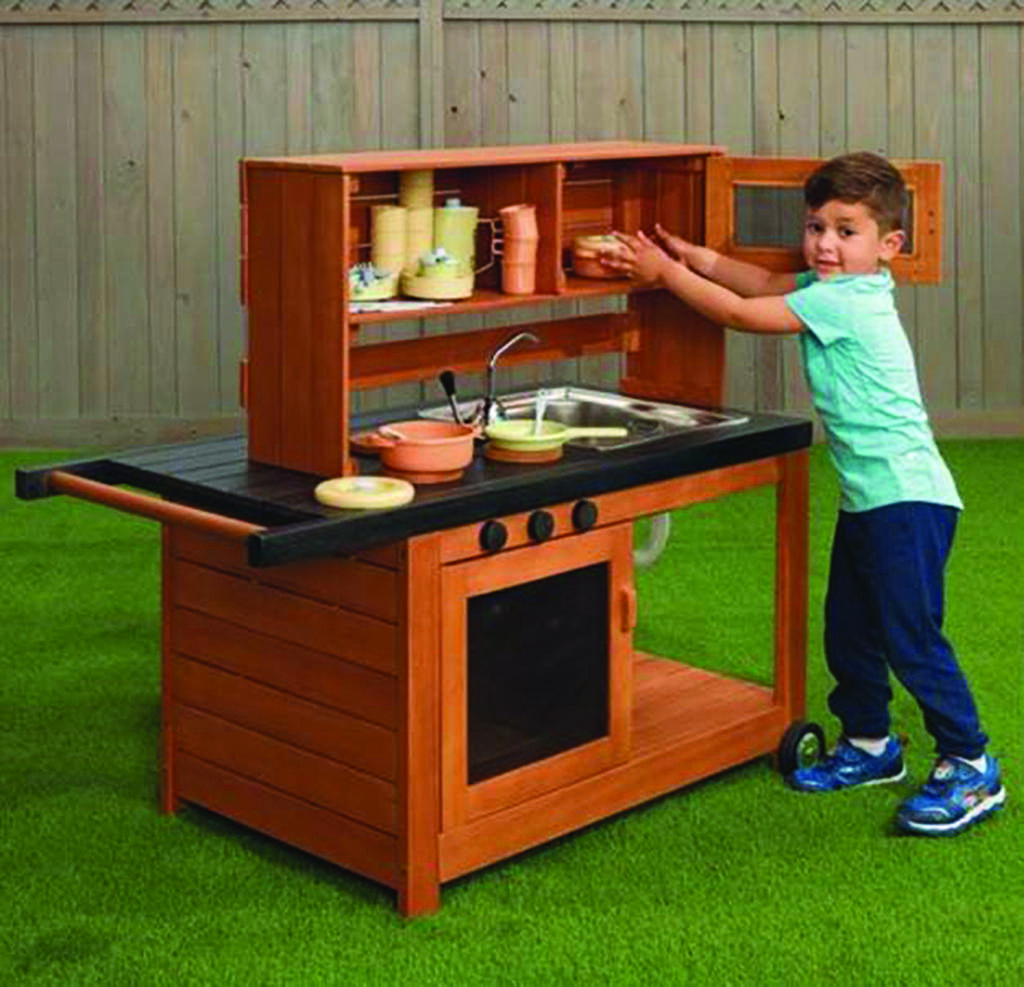
Outdoor cooking adventures await! The Harmony Outdoor Moveable Play Kitchen makes a welcoming invitation for copious hours of imaginative culinary play. Built to last, it’s made from sturdy FSC Eucalyptus and features stainless steel fittings & rust-resistant metal hardware for extra longevity. Its manoeuvrability makes this furniture piece a firm favourite too. Whether you’re chasing the shade, resetting play spaces or sharing resources between classes, simply lift one side of the kitchen with the handle and move it about the learning environment on its sturdy wheels.

A child-sized version of a kitchen provides the perfect space to engage in imaginative and creative play, building independence and autonomy to scaffold valuable life skills. It’s a space for children to imitate the actions they see at home and in the wider community, widening vocabulary and communication styles as children work with new objects, engage in conversation and talk about what they’re doing. It can be social play rich in teamwork and problem-solving as children negotiate, share, take turns and work with each other. Or it can be quiet, solitary play where children immerse themselves in their own culinary world as they take a break from a busy day. In any which way, the Harmony Outdoor Moveable Play Kitchen is responsive to children’s changing needs.

What culinary treasures will be served up today?


Magic Scarves

GJ2306 Product

https://www.teaching.com.au/product/GJ2306


Magic Scarves remain a favourite open-ended resource for their limitless play possibilities, with the play value ensuring value for money! Each set of 12 scarves comes in 4 primary colours – blue, yellow, green and red. They’re ultra-durable and yet super soft and light as a feather! They provide tactile experiences that nourish children’s senses, creativity and imaginations for years to come.

You see, Magic Scarves can transform into any myriad of things, giving free rein to children’s imaginings as they adapt the scarf into anything the day brings. Will the scarf be a set of colourful fairy wings, a protective superhero cape or a majestic wizard’s cloak? Whether they’re used for decorative drapery, curtains for cubby houses or puppet shows, small world scenery, music, dance and movement, to wrap around dolls or to wear as dress-ups, the generous 68cm size makes them large enough for just about anything! 

They’re a must for every class!


Rainbow Families

FR495 Product

https://www.teaching.com.au/product/FR495


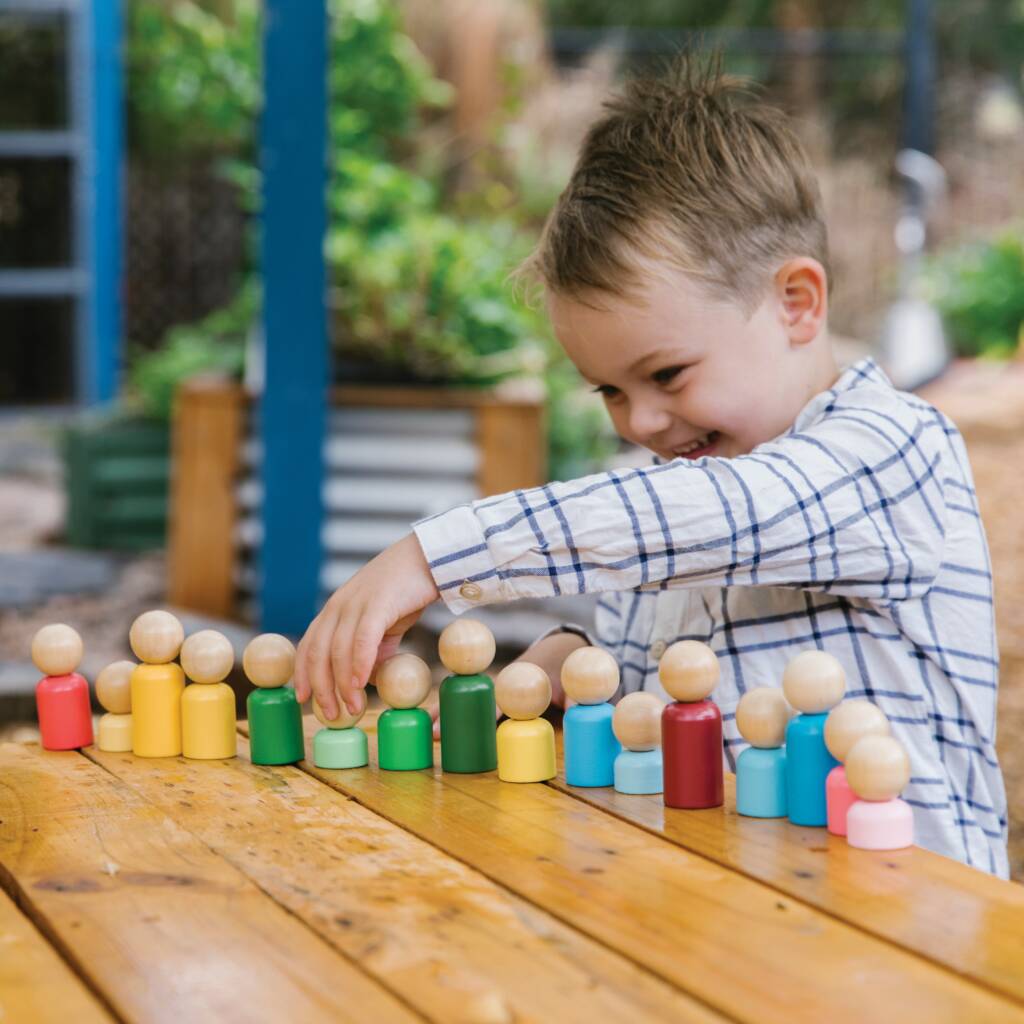
The simple design and absence of facial features adds to the open appeal of Rainbow Families, with children’s imaginations, or inner picturing abilities, adapting the figures to represent literally anyone and to express any range of emotions as they engage in play, rich with possibilities. Made with FSC schima and finished with non-toxic paints and dyes, these adorable colourful people also bring peace of mind to an environment well-looked after. 

From a doctor with their patients to a café owner and their customers, the whole community can be represented as children use these 16 brightly coloured block play people to imitate real life. They’re ready to engage in small-world play, practise naming and sorting colours, compare and classify sizes and so much more. They enrich play with dollhouses, building sets, towns and roadways and make the most beautiful classroom displays. In any which way you choose, they’re built to last the rigours of play. 

Rainbow Families would love to reside in your learning community! 


dëna – Kids Diverity Set

dt01056 Product

https://www.teaching.com.au/product/DTKIT03


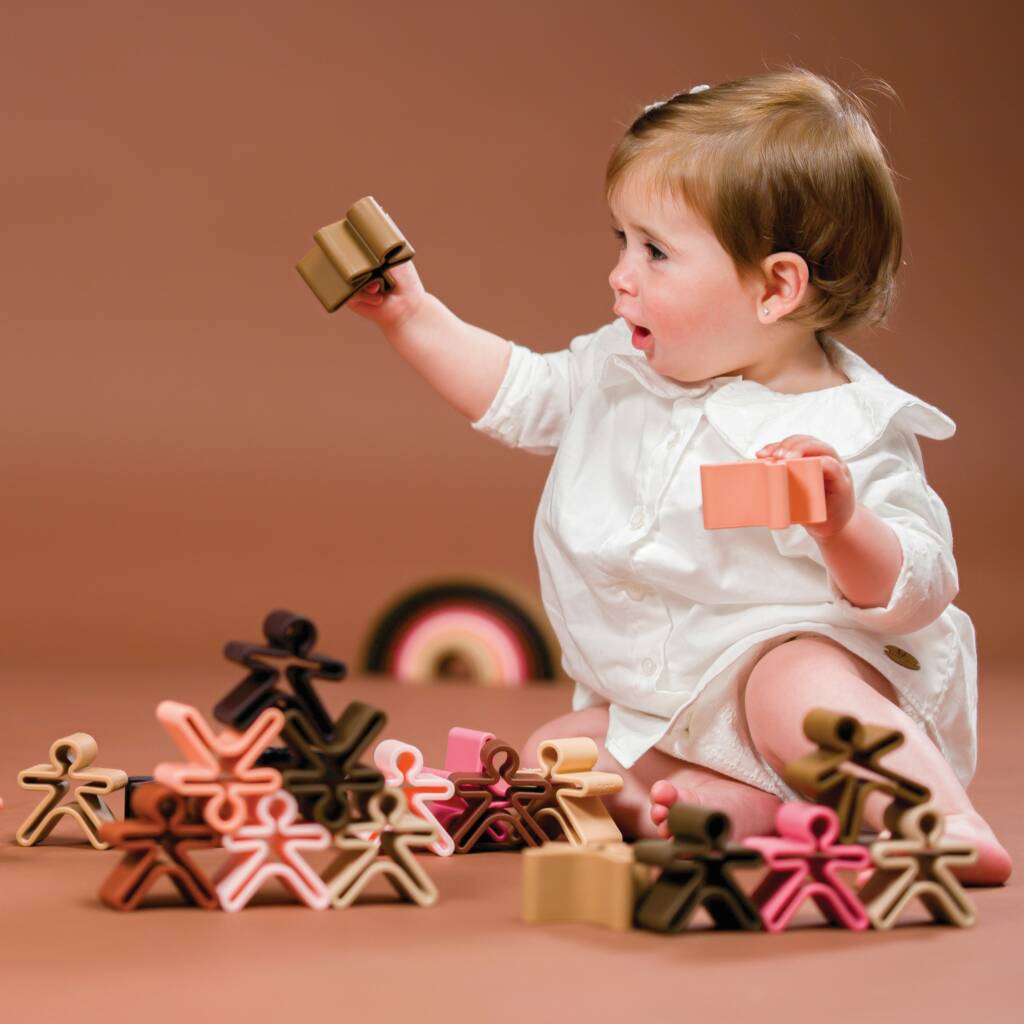
Children begin to develop their sense of self from a young age, making their interactions, their environment and wider community influential to their identity. A simple yet significant way to support children in developing a positive understanding of themselves and others is ensuring they have access to a wide range of inclusive learning resources. Learning resources that nourish children’s self-esteem and confidence to flourish while fostering respect and open-mindedness for others.

This dëna Silicon Diversity Set communicates the values of empathy, equality, diversity and inclusion with a powerful tribute to the beauty of all skin tones. The kit includes a large 12-piece rainbow along with 12 people – representing the skin tones of everyone on our planet.

It’s a wonderfully open-ended resource suitable for children of all ages – right from birth. BPA, PVC, latex and phthalate free, these multifunctional silicon sets evolve with children’s developmental stages too. They’re ideal as a teether, a sensory resource, stacking and building, small world play, cooking moulds, water play, classroom displays and more. 

Little hands won’t want to put them down! 


Multi-Sensory Pre-Writing Tray and Board

akr20616 Product

https://www.teaching.com.au/product/AKR20616


The Pre-Writing Tray & Board is a multi-sensory tablet for developing pre-writing skills and eye-to-hand coordination through the creative representation of figures using touch – inspired by the Montessori methodology by engaging sensory stimulation to further engage children’s processing and memory. By engaging the thousands of touch receptors in our fingertips, neurons fire signals via nerves to the spinal cord, the brain stem, the thalamus and finally to the cerebral cortex for processing. Children can use this sensory input to explore early literacy and numeracy by experimenting with mark-making in the sand – drawing shapes, and connecting lines and curves as they begin to form shapes, symbols, numbers and letters.

And for easy setup, these sets include all you need to get started – a wooden tray with reversible board (one side is a blackboard for chalk and the other side is a whiteboard for erasable marker pens), chalks, eraser, felt tip pen, a bag of sand (0.5kg) and a sand smoother. Brilliant! 

Let literacy and numeracy abound! 


Stockholm  Rectangle Corner Mirror

ach20212 Product

https://www.teaching.com.au/product/ACH20212


Mirrors and the reflections they make can be a source of fun, intrigue and experimentation, creating a whole host of incredible learning opportunities too. Available in Rectangle and Square, these Corner Mirrors make terrific spaces for open-ended play that nurture children’s natural curiosity, leading to endless inquiry and discovery.

Made from environmentally friendly FSC plywood, these mirror pieces feature a wooden base panel plus 2 x mirrored side panels for mesmerising mirror investigation. The mirrors themselves are scratch resistant and made from acrylic so they won’t shatter like glass for super safe learning environments and peace of mind.

Add in some open-ended resources to invite children to play with colour, light and reflection or create an inspiring space for dramatic play. Why not add cushions or drape fabric over to create a magical cubby or sensory nook?

Who knows what they’ll be each day!  


Wooden Outdoor Pan Scale

teb6265 Product

https://www.teaching.com.au/product/TEB6265


Numeracy is part of our daily lives – the knowledge, skills, behaviours and dispositions to use mathematics in a wide range of situations each and every day. Whether we’re managing money, scheduling calendars, measuring cooking ingredients or tallying up sports scores, numeracy plays a big part of what we do. 

 Promoting the development of numeracy competencies in early childhood welcomes children to become confident & familiar with numeracy from a young age, learning by doing as they engage in mathematical ways of thinking, extend mathematical language and vocabulary as they use mathematical concepts to make sense of their world – in turn, sparking a lifelong love of mathematical knowledge. Who knows where their journey will take them? 

A terrific way to enrich numeracy exploration is offering problem-solving situations to experiment with. As children work through solutions to obstacles, they strengthen their analytical skills – resourcefulness, creativity, abstract thinking and logical reasoning. 

Made from sustainable Eucalyptus wood, this Outdoor Pan Balance has become a fast favourite to take numeracy exploration into the great outdoors, where children can explore the weight of objects found in nature. Gumnuts, pebbles, pinecones, shells and all sorts of outdoor treasures provide children with natural provocations to explore. Combine found objects with traditional building blocks, Fraction Blocks and loose parts for any number of possibilities. 

Experimenting with the weight of objects today can lead to the weight management of intergalactic rockets tomorrow! 


Thanks for joining us over here at the Modern Teaching Blog today! 

We’ve loved chatting about our Top 10 resources for the year; which one has been your favourite? 


Blog Home>

Shop MTA>


Posted on

Ten Frightfully Good Activities For The Spooky Season

Various Halloween themed craft supplies

Halloween is such a fun time of year for spooky crafts and activities, with plenty of opportunities to bring out children’s creativity and imagination. From dressing up in costumes and decorating the classroom or home to scavenger hunts, and arts and crafts, there’s something for everyone to have a wickedly good time! Read on for some quick, easy and festive Halloween projects that will have you howling!


Paper Bag Monsters

Spooky bag monster craft project
Paper bag monsters are a versatile craft experience for children to let their imaginations run wild! These plain bags can be decorated in whatever wacky characters come to mind, with children freely exploring the open-ended materials offered and choosing to use them in their own wonderful ways. Add language and storytelling to the experience by creating storylines with their characters or find a cosy spot for children to engage in spooky monster puppet play when their paper bag creations are dry.


Featured products:
Paper Bags 
Dot Markers 
Jumbo Creations Box 
Paper Shapes 


Ghost Pencil Toppers
frightful ghosts pencil toppers craft project
Add some spooky excitement to drawing and writing with these quick and easy paper pencil toppers. Simply draw a ghost character onto thick paper or cardboard and cut the shape out, punch two holes in the ghost and gently thread the pencil or pen through the holes and abracadabra, your adorably spooky pencil toppers are ready for action.


Featured products:
White Cover Paper 
Coloured Pencils 


Spooky Book Placeholder
Made from only a few simple paper folds and embellishments, this is one cute creature that’s batty about storytime! Grab yourself a square piece of black paper and follow the folding sequence pictured below.

Bat Bookmark Folding Instructions

Add some little wings, fangs and joggle eyes, and this adorable spooky book placeholder is ready to join in the reading. Let your imaginations run wild and fold all sorts of fun creatures with a spooky twist – bats, pumpkins, cats, frogs, owls, ghosts and more!


Featured products:
Matt Paper Squares 
Gloss Paper Squares 


Storytelling Pop Sticks
Storytelling Popsticks
Storytelling is an activity rich in language and communication! It’s a time for children to hone their concentration and listening skills, explore feelings and emotions, share their own experiences and learn from others in an interchange of knowledge. Stories can explore aspects of STEM, problem solving, memory recall and provide a place where children can freely express their thoughts and imaginings. We love storytelling!

These adorable props provide visual prompts for children and educators to tell a story. Draw some story characters on thick paper or cardboard, colour them in, cut them out and stick them onto pop sticks (for extra durability, the drawings can be laminated before they’re added to the pop sticks). Follow the characters from a favourite storybook or create your own for all sorts of imaginative tales. Once upon a time….


Featured products;
Pop Sticks 
Coloured Pop Sticks 
Coloured Pencils  
Coloured Jumbo Pencils 


Spider Tic Tac Toe
Spider Tic Tac Toe drawn in chalk on slate
Also called Noughts & Crosses, Tic Tac Toe is a fun and simple game for young children to build maths skills, including counting, predictability, problem solving and special awareness. Taking turns to lay their pieces on the board, whoever gets three in a row, either horizontally, vertically or diagonally, is the winner! This is a traditional game that can be made up with all sorts of odds and ends – to make the game board, use paper and markers or a hard, flat surface and chalk or sticks. To make the playing pieces, simply find four of something that’s different from the other player’s pieces. We’ve made spooky bottle top spiders in two different colours, but you could use stones, shells, wood slices, counters etc.


Featured products:
Bottle Tops 
Pipe Cleaners 


Loose Parts Dough Creatures
Loose Parts Spooky Dough Creatures
With loose parts play, anything can happen! Children can move loose parts freely,  adapting and turning them into anything their imagination desires. A selection of open-ended loose parts makes a wonderfully inspiring invitation for children to explore, experiment, inquire and invent, and with the addition of dough or modelling clay, children are sure to make some fantastical creations!
To make a treasured keepsake that will last, switch the dough or modelling clay for air-dry clay, which will harden beautifully in a day or so, ready to adorn the classroom or live on at home.


Featured products:
Modelling Clay Kit 
Creatistics Dough Kit 
Creatistics Dough Set 
Craft Essentials Kit 


Happy Halloween Bunting
Happy Halloween bunting
Adorable FREE printable Happy Halloween bunting!

These sweet and spooky characters are sure to bring festive cheer to the learning environment – whether it’s the classroom, after school setting, home learning or weekend fun – the finishing touch to any Halloween party is here. Simply print out as many copies of the bunting as you desire, snip out the shapes, follow the hole punch guide and string up your spooky triangle bunting.
No need to worry about waste either. Paper bunting can be saved and reused next year, snipped up for spooky collage art, popped into the recycling or even shredded and added to the compost to make nutritious soil to grow yourself a real pumpkin!


Featured products:
Jute Hemp Twine 
White Cardboard 
Happy Halloween Bunting  FREE PDF Download 


Outdoor Story Stones

Outdoor Story Stones
Combine storytelling with the wonder of nature with these adorable story stones. Made from a mix of natural stone and resin, they’re built to last the rigours of play outside, allowing outdoor nature play to guide imaginative storytelling. The sights, sounds and textures of the great outdoors all make wonderful prompts for scenes where anything can take place. Story stones can also be made by adding simple illustrations to stones or small wooden branch cuts.


Featured products:
Story Stones – Fairy Tales 
Story Stones – Outer Space 
Story Stones – Under the Sea 


Batty Paper Crafts

frightful bat paper craft project with google eyes and gluesticksPaper arts and crafts are fantastic for children learning about colours and shapes. Snipping paper is also a fun way to work on scissor skills. Joggle eyes will help bring children’s creations to life and may even inspire some spooky storytelling! The paper shape pictures can decorate the classroom or be taken home as gifts to share the excitement of the spooky season.
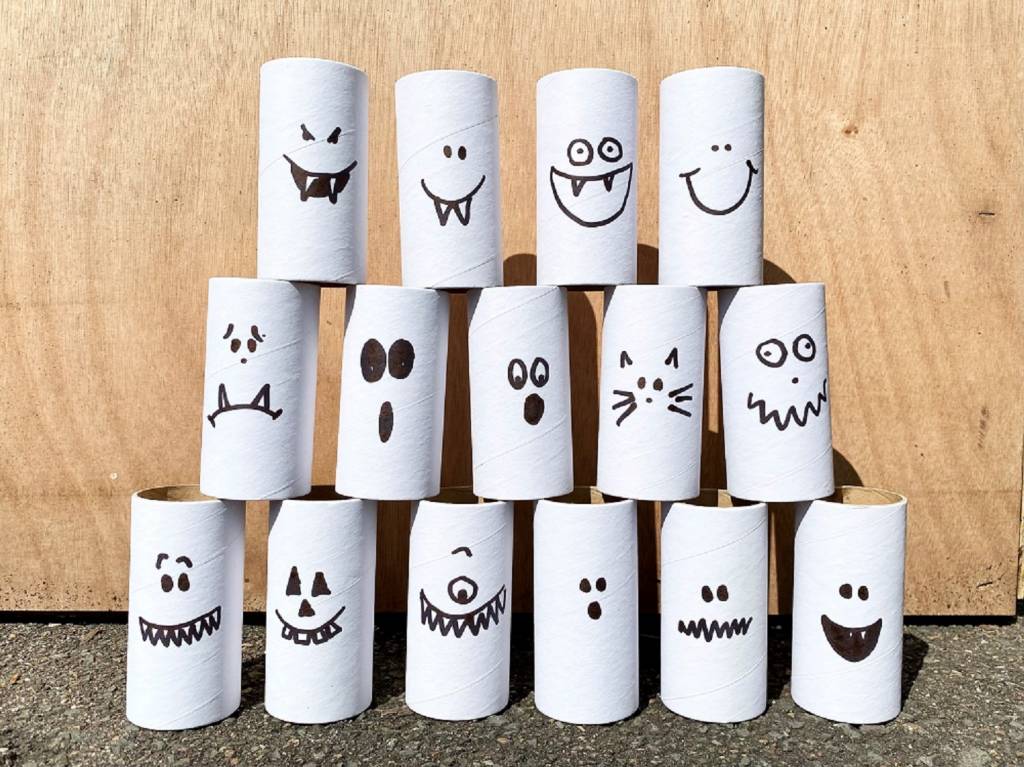
This activity can also be adapted for different age groups to make sure everyone’s safe. Children confident with scissors may like to snip their own shapes out, where younger ones might benefit from a selection of pre-cut shapes to choose from.


Featured products;
Coloured Paper 
Joggle Eyes 


Spooky Fairground Bowling

Spooky Fairground Bowling craft project using cardboard rolls Fairground bowling games are a timeless tradition for all good parties, and this sweet, spooky version is a hoot. Add some wacky faces to sturdy cardboard rolls and take turns knocking them down with any ball you have handy. These ghosty characters look great with plain white rolls or decorated with paint, markers, coloured paper and all sorts of embellishments for endless design options. For older children, numbers can be added for scoring up the total points knocked over for fun maths practice.
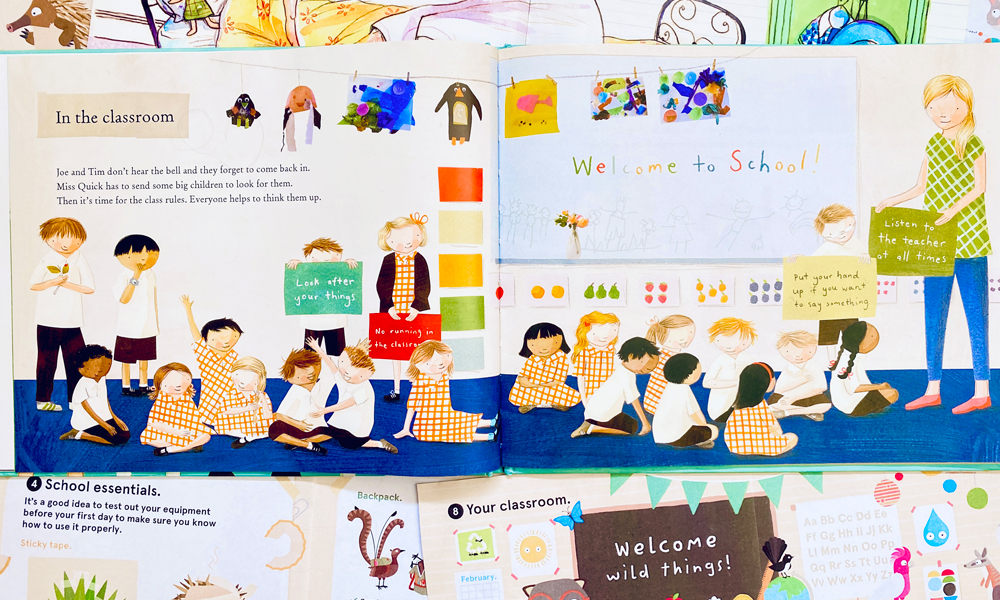
 

Featured products:
Cardboard Tubes 
Craft Rolls 


*All these activities can be modified and adapted to suit different age groups, taking away small parts for children under 3 years of age and replacing them with larger safe parts. Where scissors are used, educators may use adequate supervision to suit the needs of the children or offer pre-cut shapes.


What are your favourite spooky crafts and activities to celebrate Halloween?


About the Author
Penny Groen is an Early Childhood Teacher who has been working in Early Childhood Education and Care settings around Sydney for 17 years. She has a passion for working in meaningful partnerships with families and communities, providing a responsive and engaging curriculum where everyone feels welcome to contribute. You can see Penny’s interest in the natural world with all the weird and wonderful experiments growing both inside and outside the classroom. Penny’s also known for equipping children with the tools to explore their interests and celebrate the discoveries each day brings.


Shop MTA>

Blog Home>

Posted on

Super Stories For Starting School

Book blog starting school preview

A happy new year to you all, and welcome back to the MTA Book Blog!

It doesn’t feel like very long ago at all that we were shining a light on our picture books for brighter times — I do hope you were able to enjoy that fantastic Brighter Times discount! And now here we are at the start of a brand-new year, hopefully full of brighter times ahead but definitely full of fabulous books just waiting to be discovered!

In the spirit of things that are brand new, for this first post of 2022, we’re going to be taking a closer look at some perfect picture books to support children who are starting school for the very first time this year.

Starting school is undoubtedly one of the most enormous and most emotional milestones in a young child’s life, and never more so than right now. With many of the children moving up into primary school this year having spent the last two years with decidedly disrupted routines, the transition to primary school is likely to be one that is approached with understandably increased anxiety and trepidation. As always, books to the rescue.

We have selected some utterly wonderful picture books to help young children prepare for the move mentally, physically and emotionally in our Starting School Book Pack. So grab your lunchbox, say one last goodbye to the cat and check you’ve got your lucky scrunchie, because we’re off to school!


‘First Day’ by Andrew Daddo and Johnathan Bentley

First Day book cover and quote

We start the day with the sweet and touching ‘First Day’ by Aussie author/illustrator duo Andrew Daddo and Johnathan Bentley. In ‘First Day’, we join a little girl and her mum as they prepare for the first day of school. But who is reassuring who?

In this cleverly written story, it’s not until the final page that the narrator becomes clear, and we realise that it’s the little girl who has been speaking the comforting words to her mother throughout, coaching her through the day, anticipating the challenges and conceding that she too has some first-day nerves.

‘I might have to be a bit brave, too.

But it’s not for long.

Let’s meet here when the bell goes.’

The transposition of traditional adult/child roles in books is always a source of delight for children, and ‘First Day’ is a great example of this. In demonstrating that those feelings of anxiety and uncertainty are not only natural but also shared by a big-brave-all-knowing adult, the book brilliantly models emotional vulnerability and allows children to find comfort in knowing they’re not alone in their first-day feelings.


‘Starting School’ by Jane Godwin and Anna WalkerStarting School book cover and quote

For our next lesson, we’ll be looking at the gorgeously illustrated ‘Starting School’ by another Aussie author/illustrator team, Jane Godwin and Anna Walker. In this story, we are introduced to five children on their first day of school. Each child has different expectations coming into the classroom, and each one has a very different first-day experience.

‘Polly is trying to be brave.

Sunita doesn’t know anyone, but she feels ready for school.

Hannah feels excited, but Tim doesn’t want to leave his mum.

Joe has found an interesting book about dinosaurs.’

For me, it’s this diversity in the experiences that are presented that is the most valuable element of ‘Starting School’. As children approach school age, this also coincides with the development of their ‘theory of mind’; the understanding that other people have motivations, emotions and experiences of events that may differ from their own. This is crucial for a child’s social-emotional development, particularly within the context of establishing new friendships and relationships in a school community.

A follow-up discussion with your new starters about which one of the children in the story — if any — had the same feelings they did on their first day will encourage children to share their own experiences, promote empathy and further develop their theory of mind as they acknowledge the diversity of experiences within their new classroom.


‘The Wild Guide to Starting School’ by Laura and Philip BuntingThe Wild Guide to Starting School book cover and quote

For our final lesson of the day, we’re in for a real treat with an adorably hilarious picture book from powerhouse Aussie husband-and-wife team Laura and Philip Bunting. If laughter is the best medicine, then allow me to prescribe a big gulp of ‘The Wild Guide to Starting School’ to soothe those first-day jitters. ‘The Wild Guide to Starting School’ reads as a how-to guide that will have your little ones giggling on every page as they learn what to do and — importantly — what not to do when they get to school. Helpful tips include:

  • Scissors are for chopping paper, not haircuts.
  • When making new friends, try to avoid licking.
  • It is not okay to eat the teacher.
  • Do not poop in the sandpit.
  • Do not poop on your teacher.
  • You don’t win friends with poop.

At this point I should probably point out that the characters in ‘The Wild Guide to Starting School’ are all Australian animals (although would it be that much of a stretch?), which adds fantastic comic value and allows for some truly brilliant illustrations. However, amongst the silliness there is genuinely helpful advice, as well as some big-hearted truths about how devoted and caring teachers are and how everyone is feeling lots of Big Feelings, all of which are valid and all of which are perfectly normal.


There goes the bell! That means it’s time to wrap up this week’s post, tidy our tables, gather our things (how did I lose my sock?) and head on home, ready to do it all again next time!

So, if you’re looking for the perfect picture books to ease your new starters into your classroom — or if you’re an early childhood educator looking to help prepare your intrepid little learners and ensure their transition to primary school is as smooth as possible — then look no further than the titles in the Starting School Book Pack. These sweet, relatable and fiendishly funny books will fill your little ones with knowledge, confidence and empathy as they embark upon this most exciting of new adventures.


See you on the playground!*


*kidding, I’ll be in the library.


About the Author

Emily Bruce is the Managing Editor at Modern Teaching Aids (although she prefers the term Grammar-Wrangler-in-Chief). She has worked in children’s publishing in the UK and Australia for eight years and is passionate about finding the spark that ignites a lifelong love of literacy in the next generation of storytellers.


Blog Home>

Shop MTA>


Posted on

Back-to-school essentials

Back to school classroom overhead view

Every new school year brings with it a level of excitement for both teachers and students. It is my favourite time of the year as everyone begins with a fresh start and an enthused energy for the year ahead. For teachers, we have the privilege of getting to teach a new class of students, designing the learning space from a blank canvas, and for many, the always-elusive goal to be more organised.

In this post I will be sharing some of my must-have resources for the classroom along with my favourite beginning-of-the-year activities to get to know your students and for your students to get to know each other.


Classroom Must-Haves:
When setting up my classroom I always like to have a theme or colour scheme. Over the years some of my favourite themes that I have created have been based on butterflies, ‘Up in the Sky’ (hot air balloons, planes), the ocean and the circus. I love having the colours of the learning space, resources and display boards match to set the tone of a creative organised space that welcomes students to our class.

Some items I love to include in my classroom are;


Classroom Caddies Laptrays and Chairbags

These products can be used in a variety of ways in the classroom and the best thing is that they all match.


Lap Trays
These Lap Trays are a great addition to any junior primary classroom. They allow for flexibility in the learning space during group work and also during independent learning. I love that these trays provide students with a hard surface to complete tasks in their books so they do not need to write on the carpet or flooring. I use these daily with my students during small group work that takes place on the floor space around the class. Many students also choose to use the Lap Trays during independent learning time so they can work in a quiet spot or away from others. In my classroom, I have a beautiful courtyard outside where my students sometimes choose to go outside to work and these Lap Trays allow them to have a suitable surface to work on.


Children with Laptrays sitting on floor


Classroom Book Caddies
These Book Caddies are a great way to store take-home readers and student books. I organise my student books in these Book Caddies and have labels on them for maths, reading, writing and inquiry books. I like having them all together for two reasons; the first being that students do not need to go to their tubs to get their specific book, rather I can either have the class captain hand the books out or I can call out student names to collect, and the second being that at the end of a learning experience students place all their books back into the Book Caddy and then I can easily view and assess their learning rather than searching through each student’s tub for their book.


Book caddies filled with books on desk


Classroom Caddies
These Classroom Caddies are perfect for shared stationery and the vibrant colours stand out when placed on classroom tables. The compartments in the Classroom Caddies allow for pencils, pens, scissors, glue, rulers to be stored neatly, making them easily accessible for student use.

Classroom Caddies are also a great resource for sharing required activity materials. During STEM and Inquiry Learning activities I use the Classroom Caddies to provide each group or table with the resources they need for the specific activity. I can organise the materials prior to the lesson and, upon completion, students can return the materials in an orderly way making clean up a lot more efficient.

Filled Classroom Caddies on classroom floor


Chair Bags
These beautiful Chair Bags provide students with a place to store their essentials without the hassle of a tub. I love the various pocket sizes which allow for students to store their devices, exercise books and the book they are reading, along with their essential classroom resources like a ruler, pencil case etc.

Filled Chairbags and Classroom Caddies on Desk in classroom


Beginning-of-the-Year Activities:
At the beginning of the school year the priority should be on developing relationships with your students and getting to know what they each like and are interested in. Spending time undertaking activities that highlight student personalities will support you as the teacher but also allow students to get to know each other and begin to develop new friendships. These activities also provide teachers with an insight to see how students work together, interact and complete tasks.

These are my favourite activities to get to know your students:

Jigsaw Activity:

Jigdraw DIY jigsaw activity

Materials
Jigdraw – 20 Pack 
– Snap-lock bags

Each student receives a blank Jigdraw template with 20 pieces. Students draw a different image on each puzzle piece that represents something about themselves. Some ideas for images can be family, pets, hobbies, favourite food, favourite places etc.

Students place their completed Jigdraw pieces into a snap lock bag.

The snap lock bags are then randomly handed out to students who need to put the puzzle pieces together and then try to guess which student is represented by the images.

These Jigdraw blocks are also a great resource to use for students to share their learning during inquiry learning. They can then build upon their ideas and knowledge as the learning continues throughout the year.


Chalk Mindmaps

DIY Chalkboard Signs activity

Materials – Sidewalk Chalk 

Chalk is a great resource to have in any classroom. I have found the Sidewalk Chalk to be the perfect size and thickness for student use and it comes in great colours. Students can use the Sidewalk Chalk to draw directly onto concrete, but I have created blackboard-painted timber pieces for student use across many learning areas.

Students receive a number of blackboard-painted timber pieces and draw a giant Mindmap to highlight the topic they are given. The topic gets placed in the centre and then students write or draw their ideas and place them around the topic to create their giant mind map. This is a great visualisation too.

Some ideas I like to focus on at different times are;

    • Looking forward to this school year
    • Holiday reflection
    • Inquiry brainstorm, questions, wonderings
    • Spelling words
    • End-of-term reflections


I hope this blog post has provided you with some inspiration to help you set up your classroom or provide you with some beginning-of-the-year activity ideas to get to know your students.


Featured Products:


About the author

Eleni Kyritsis is an award-winning Year 3 teacher and Leader of Curriculum and innovation from Melbourne, Australia. Eleni facilitates professional learning workshops around the world that focus on unleashing creativity and curiosity in classrooms. You can contact her at elenikyritis.com and @misskyritsis


Shop MTA>


Blog Home>

Posted on

Creating Welcoming & Calming Learning Spaces

Creating Welcoming & Calming Learning Text and Plant pot Vector graphic

A positive, nourished mindset is so important to keep the energy high all year round. Our goal is to support and nurture educators when the physical and emotional demands of day-to-day tasks and experiences exceed the amount of energy available! (Over a long period of time, this can lead to feeling overwhelmed and drained.)

In this piece, we’ll look at valuable ways in which learning spaces can be shaped to support and respond to children’s and families’ needs. This ensures everyone feels safe, connected and comfortable in the setting, including all the great educators out there worth their weight in gold!


Comfy & Cosy Spaces

Young girl sat on beanbag chair in childcare learning environment


Soft furnishings ensure children have access to a comfortable learning environment and can include anything from rugs and carpets to cushions, canopies, netting, fabrics and more!

Soft furnishings can transform a loud and busy learning environment by absorbing noise and helping to create pockets of calm where children can, for example, snuggle into a big cushion to read a book, or lie down and have a rest in a cosy and comfy spot. Soft furnishings can modify a rustic cubby house into an inviting and comfortable cave or create a welcoming area for the class to sit together to yarn, share stories and plan out the day’s events.


Featured Product:

MTA Spaces –  Navy Foam-Filled Lounger 


Calming & Reflective Spaces

Young girl sat in cosy nook reading


Calming and reflective spaces offer a peaceful learning setting in which children can embrace quiet. Here, children can spend time relaxing and reflecting away from the hustle and bustle of a busy classroom.

Cushions, fabrics, tents and dens can all contribute to quiet and reflective spaces, making cosy and comfortable spots for children to explore and make their own.

Combine these spaces with books, puzzles, soft toys, tea parties or anything else that children would like to add to their retreat. A calming and reflective space can be just the thing to refuel children’s energy.


Featured Product:

Stockholm Spaces – Cosy Retreat 


Spaces of Belonging

Peg People of the world on table


The way children and their families are welcomed into the learning environment makes an incredible difference to their sense of belonging. Belonging is all about feeling connected and secure, valued and accepted with the community’s people and place. A deep sense of belonging ensures the emotional wellbeing of children and their families can thrive, including their self-worth, confidence, capability and adaptability, to name a few.

Feeling secure and connected within their social and physical learning environments will also ensure that these settings become places of safety and refuge for children and families to work through the challenges and difficulties they might be experiencing.

Educators are in an excellent position to build a sense of belonging, not only with their words and actions but also with the physical settings too. Seeing welcoming resources such as wall hangings or displays or children’s names on parent communication pockets will invite families into the settings. Classroom journals will also empower children and their families to contribute to the program and the day’s happenings.

A place where everyone belongs.


Featured Product:

Peg People of the World


Mindful Spaces

Birds eye view of young girl surrounded by mindful picture cards


Affirmations, mindfulness and restful breathing activities, including yoga, can all help ‘cultivate calm’ while fostering a peaceful and positive mindset. Creating a daily ritual with affirmations and yoga
or meditation and breathing will empower young children to nurture their self-awareness, set positive intentions and work through emotional regulation in healthy and helpful ways.

Focusing on gratitude – the feeling of appreciation – is also a powerful way to see the silver lining when everything seems gloomy. These Positive Mindset Affirmation Cards and I Am Me Affirmation Cards can enable the building of confidence, resilience and self-esteem by helping children to find the sunny side of any situation.


Featured Product:

Mindful & Co Kids Yoga Flash Cards


Engaging & Inspiring Spaces

MTA Light table with chids hands and coloured shapes on top


It’s hard to feel motivated when you’re burnt out.

Refreshing your learning environment with a new and exciting project can go a long way in helping to reignite energy and enthusiasm. Light boxes and panels along with light box resources are wonderful tools to drive children’s motivation to explore and investigate with energy and enthusiasm. They light up the room in the most magical of ways, in turn bringing delight and wonder to learning curriculums.

Creating an engaging and inspiring learning environment ensures everyone wants to come back for more. What will happen today? The possibilities for discovery are endless!


Featured Product:

Stockholm Spaces – Round Table & Light Panel


Culturally Meaningful Spaces

Young girl playing with culturally meaningful resources on table


Culturally meaningful curriculums in early childhood settings increase opportunities for its community members to feel connected – a place to feel safe and secure, to feel loved, appreciated and valued. A place to belong.

If you’re thinking, ‘This sounds great, but where do I begin?’, a good starting point is to have a wander through your setting. Does everything in your setting reflect the diverse backgrounds of its community members (the children and their families, the educators and service staff, as well as the wider community at large)?

There’s no end to the items that you can meaningfully interweave throughout your environment. Include dolls, figurines, pretend food, dress-ups and props from around the world. Ensure children’s books portray the diversity of the world’s peoples, perspectives, cultures and abilities in a positive light. Make sure there are truly authentic cultural and Indigenous resources for children to connect with on a daily basis. Invite educators and families to share their cultural backgrounds – learn some keywords and phrases from different languages, learn a song or dance, cook foods from around the world or engage in traditional storytelling.


Featured Product:

Fair Trade Aboriginal Ceremony Matching Game


Purposeful Spaces

Childcare centre furniture


Learning spaces that are set up purposefully can bring safety and comfort and a sense of calm to the environment. The physicality of the space (the size, furniture placement etc.) communicates what is to happen, providing clear boundaries and fostering behaviours of motivated and engaged learners. Create breakaway areas, book corners and home corners or simply direct foot traffic in safe and effective ways.

How can a purposeful space be created? It might be through using non-fixed furniture pieces that can be easily moved around the room to create and define predictable play spaces. Open-backed shelving also acts as a barrier while allowing for maximum supervision. Rugs and carpets define a learning space, while the number of chairs, cushions and pillows communicate how many children the area is suitable for at any one time.

The resources chosen to join the space will also encourage positive behaviours. Organised and uncluttered spaces with a considered selection of materials will invite children to develop their skills and interests while interacting in positive ways and achieving learning goals.


Featured Product:

Stockholm Spaces – Circular Low Table


Creative Spaces

Paining easel with paintings hanging in childcare learning environment


With all those big feelings and emotions children are experiencing, spaces in which children can express themselves with art become even more important. The creative and expressive arts (including painting and drawing, dance, drama, music and movement) all allow children to work through their feelings and emotions by creatively expressing themselves, which is especially important when the words can’t be found.

Providing a space that includes a wide variety of creative materials ensures children have endless opportunities to process what’s happening in their world and come to terms with their experiences. A space where children’s voices and perspectives are seen and heard.

Creative spaces aren’t just for children though! A selection of art materials in the staff room can provide a creative strategy for educators to relieve stress. Drawing or colouring-in for adults can help boost positive feelings or simply take your mind off things.


Featured Product:

Premium Wooden 4-Sided Easel


Storytelling Spaces

Young girl and boy reading large storybooks in earlychildhood centre classroom


Grab a comfy cushion – it’s storytime!

Books that gently and sensitively capture the lived experience of lockdown, such as While We Can’t Hug, Share Your Rainbow and Windows are invaluable in helping children make sense of an ever-changing ‘new normal’ during the current pandemic. The Fun & Humour Book Pack is guaranteed to make children laugh with continuous joy and entertainment, while the Emotional Development Book Pack celebrates some important milestones in young children’s emotional development with just the right touch of imagination.

Whether it’s everyday shared reading with the Big Books Mixed Carton or storybooks that delve into specific topics, books are a powerful way for children to explore and process their feelings and emotions, supporting and empowering them to identify and articulate the things they are experiencing.


Multigenerational Spaces

White cots and blue armchair & cushions


Adult-sized furniture pieces ensure educators have places to sit safely and comfortably throughout the day, as well as provide welcoming statements for families to participate. Whether it’s reading a story from the Intergenerational Shared Reading Pack or providing a space for carers to feed their little ones before setting off, adult-sized armchairs, sofas, chairs and cushions will ensure a homelike setting where all the members of the learning community feel comfortable and welcome.

Featured Product:

Aalto – Full-Size High Back Armchair


A well thought out learning environment has the power to support the wellbeing of children & their families – and educators too! It can encourage exploration, enquiry and discovery – and can include open spaces to move about, cosy nooks to hide away and everything in between. It can respond to individuals needs and interests, provide stimulation and excitement, security and comfort, demonstrate cultural diversity and perhaps most importantly- a deep sense of belonging for all.


Thanks for joining us over here at the Modern Teaching Blog today!


About the Author
Penny Groen is an Early Childhood Teacher who has been working in Early Childhood Education and Care settings around Sydney for 17 years. She has a passion for working in meaningful partnerships with families and communities, providing a responsive and engaging curriculum where everyone feels welcome to contribute. You can see Penny’s interest in the natural world with all the weird and wonderful experiments growing both inside and outside the classroom. Penny is also known for equipping children with the tools to explore their interests and celebrate the discoveries each day brings.


Blog Home>

Shop MTA>